Author

Noah

Browsing

Discover the Joy of Cooking: Wholesome Beef Quinoa Bowl

Welcome to a delightful culinary experience where comfort meets nutrition! The Wholesome Beef Quinoa Bowl is more than just a meal; it’s a nourishing blend of flavors and textures that will quickly become a favorite in your kitchen. This recipe is not only easy to prepare but also packed with protein and wholesome ingredients, making it perfect for a busy weeknight dinner or a leisurely weekend meal.

As you embark on this cooking journey, you’ll find that cooking with quinoa and beef is not only satisfying but also versatile. This bowl encapsulates the essence of hearty cooking—bringing together lean ground beef, fluffy quinoa, and vibrant vegetables. Let’s dive into why this meal is so special and how to create it with ease.

Why You’ll Love This Recipe

  • Wholesome Nutrition: Packed with protein, fiber, and essential nutrients, this bowl supports healthy eating habits.
  • Quick Preparation: With a total cooking time of about 30 minutes, you can have a delicious meal ready in no time.
  • Versatile Ingredients: Easily customize with your favorite vegetables or protein sources, such as chicken or beans.
  • One-Pot Wonder: Simplify cleanup by preparing this dish in one pot, making it perfect for busy nights.
  • Flavorful Combinations: The spices and fresh cilantro create a delicious depth of flavor that elevates every bite.

Ingredients Breakdown

Let’s take a closer look at the ingredients you’ll need to create this amazing dish. Each component plays a crucial role in building the flavors and textures that make this bowl so delightful.

  • 1 pound lean ground beef (90/10): Provides a rich source of protein and essential nutrients. You can substitute with ground turkey or plant-based protein for a lighter option.
  • 1 cup uncooked quinoa, rinsed thoroughly: The star of the dish, quinoa is a gluten-free grain rich in protein and fiber. Rinsing removes any bitterness.
  • 2 cups low-sodium beef broth: Enhances the flavor of the quinoa and the overall dish. Vegetable broth can be used for a vegetarian option.
  • 1 medium red bell pepper, diced: Adds sweetness and color to the bowl.
  • 1 medium yellow onion, finely chopped: Offers a savory base flavor that complements the beef.
  • 2 cloves garlic, minced: Brings aromatic depth to the dish.
  • 1 tablespoon olive oil: Used for sautéing, it adds healthy fats and flavor.
  • 2 teaspoons cumin: Imparts earthy warmth; a key spice in this recipe.
  • 1 teaspoon paprika: Adds a subtle smokiness and depth of flavor.
  • ½ teaspoon chili powder: Provides a mild kick and enhances the overall taste.
  • Salt and pepper to taste: Essential for balancing flavors.
  • 1 cup black beans, rinsed and drained: A great source of fiber and protein, they add heartiness to the dish.
  • 1 avocado, sliced: Creamy texture that adds healthy fats.
  • 2 tablespoons fresh cilantro, chopped: Brightens the dish with freshness.
  • 1 lime, cut into wedges: A squeeze of lime elevates the flavors beautifully.

How to Make Your Beef Quinoa Bowl

Close-up view of a colorful beef quinoa bowl with vibrant ingredients including avocado and peppers.

Ready to get cooking? Follow these simple steps for a delicious and satisfying meal.

  • Step 1: Cook the Quinoa: In a medium saucepan, combine rinsed quinoa and broth. Bring to a boil, reduce heat, cover, and let simmer for about 15 minutes or until quinoa is fluffy and liquid is absorbed. Remove from heat and let it sit covered for 5 minutes.
  • Step 2: Prepare the Beef Mixture: In a large skillet, heat olive oil over medium heat. Add onion and garlic, sautéing until translucent. Then, add ground beef, breaking it apart with a spoon. Cook until browned, about 5-7 minutes.
  • Step 3: Season the Beef: Stir in cumin, paprika, chili powder, salt, and pepper. Mix well and add diced bell pepper and black beans. Cook for another 5 minutes, allowing the flavors to meld.
  • Step 4: Assemble Your Bowl: Fluff the quinoa with a fork and divide it among bowls. Top with the beef mixture, avocado slices, and a sprinkle of fresh cilantro. Serve with lime wedges on the side.

Expert Tips for Perfecting Your Bowl

Want to take your Beef Quinoa Bowl to the next level? Here are some expert tips to keep in mind:

  • Rinse Your Quinoa: Always rinse quinoa thoroughly to remove its natural coating, called saponin, which can taste bitter.
  • Monitor Cooking Time: Quinoa cooks quickly, so keep an eye on it to avoid overcooking and getting mushy.
  • Customize Your Protein: Experiment with different proteins like chicken, turkey, or even tofu for a vegetarian option.
  • Mix Up the Vegetables: Feel free to add or substitute vegetables based on what you have on hand; zucchini or spinach work wonderfully.
  • Enhance with Cheese: For extra creaminess, add a sprinkle of feta or shredded cheese on top.
  • Chill for Meal Prep: Make a large batch and refrigerate leftovers for quick lunches throughout the week.
  • Spice It Up: Adjust the spice levels to your preference for a milder or spicier dish.
  • Fresh Herbs Matter: Always use fresh herbs for the best flavor; dried herbs can’t replicate that vibrant taste.

Common Mistakes and Troubleshooting

If you run into any issues while preparing your Beef Quinoa Bowl, here’s how to troubleshoot:

  • Quinoa is Mushy: This typically occurs when too much liquid is used. Measure carefully and stick to the cooking instructions.
  • Beef is Tough: Overcooking can lead to tough beef. Cook just until browned and avoid prolonged cooking.
  • Flavor is Lacking: Ensure you season your meat before and during cooking. Taste as you go to adjust seasoning.
  • Vegetables are Soggy: Add vegetables later in the cooking process so they retain their texture.

Variations to Try

Let’s keep things interesting! Here are some exciting variations to this recipe:

  • Southwestern Style: Add corn, diced tomatoes, and top with avocado and a dollop of sour cream.
  • Mediterranean Twist: Use feta cheese, kalamata olives, and fresh parsley instead of cilantro.
  • Asian-Inspired: Incorporate soy sauce, ginger, and serve with sesame seeds and green onions.
  • Vegetarian Version: Replace beef with lentils or chickpeas, keeping all other ingredients the same for a hearty bowl.

Storage and Make-Ahead Instructions

This dish is perfect for meal prepping! Here’s how to store it:

  • In the Refrigerator: Store leftovers in an airtight container for up to 3 days. Reheat in the microwave or on the stovetop.
  • Freezing: Portion out the beef and quinoa mixture into freezer-safe containers. It will keep well for up to 2 months.
  • Reheating: Thaw overnight in the fridge before reheating. Add a splash of broth or water to keep the quinoa moist.

Comprehensive FAQ

Let’s address some common questions about this recipe:

  • Can I use other grains instead of quinoa? Yes! Brown rice or farro can be great substitutes.
  • How do I know when the quinoa is cooked? It’s done when it’s fluffy and the germ ring has separated from the seed.
  • Can I prepare this dish ahead of time? Absolutely! You can cook all components and store them separately until ready to serve.
  • What can I serve with my Beef Quinoa Bowl? Consider a side salad, roasted vegetables, or crusty bread.
  • Is this dish gluten-free? Yes, quinoa is naturally gluten-free, making this dish a safe option for those with gluten sensitivities.
  • Can I make it spicy? Definitely! Add jalapeños or increase the chili powder for extra heat.
  • What’s a good substitute for beef broth? Vegetable broth or even water can be used, though broth adds more flavor.
  • How do I store leftovers? Keep them in an airtight container in the fridge for up to 3 days.

Nutrition Tips and Dietary Adaptations

This wholesome bowl is not only delicious but can easily adapt to various dietary needs. Here are some tips:

  • For a Low-Carb Option: Replace quinoa with cauliflower rice for a lighter version.
  • For High-Protein Needs: Add more beans or serve with a side of Greek yogurt.
  • Vegan Option: Use plant-based beef and skip the cheese for a fully vegan meal.
  • Low-Sodium Version: Use low-sodium broth and limit added salt for a healthier choice.

Equipment Recommendations

To make your cooking experience smooth and enjoyable, consider having these kitchen tools on hand:

  • Medium Saucepan: Essential for cooking quinoa and other grains.
  • Large Skillet: Perfect for sautéing the beef and vegetables.
  • Spatula: Handy for stirring and breaking up the meat as it cooks.
  • Measuring Cups and Spoons: Ensure precision in your ingredient measurements.

Serving Suggestions

Finally, let’s talk about how to beautifully present your Beef Quinoa Bowl:

  • Layered Presentation: Arrange quinoa at the bottom, followed by the beef mixture, and top with avocado and cilantro for a visually appealing dish.
  • Garnishes: Add a sprinkle of lime zest or feta cheese for extra flavor and color.
  • Accompaniments: Serve with a side of lime wedges, hot sauce, or your favorite dipping sauce for an interactive dining experience.

Conclusion

In summary, the Wholesome Beef Quinoa Bowl is more than just a recipe; it’s a celebration of flavors, nutrition, and the joy of home cooking. With its simple steps, rich flavors, and endless customization options, this dish is perfect for anyone looking to nourish their body and delight their taste buds. So gather your ingredients, take a deep breath, and enjoy the process of creating something wonderful. Happy cooking!

Beef Quinoa Bowl

Prep Time 10 minutes
Cook Time 20 minutes
Total Time 30 minutes
Servings 4 servings
Calories 550
A hearty and nutritious bowl combining lean ground beef, quinoa, and fresh vegetables for a satisfying meal.

Ingredients

Meat

  • 1 pound lean ground beef (90/10)

Grains

  • 1 cup uncooked quinoa, rinsed thoroughly

Broth & Beans

  • 2 cups low-sodium beef broth
  • 1 cup black beans, rinsed and drained

Vegetables & Aromatics

  • 1 medium red bell pepper, diced
  • 1 medium yellow onion, finely chopped
  • 2 cloves garlic, minced

Oils & Spices

  • 1 tablespoon olive oil
  • 2 teaspoons cumin
  • 1 teaspoon paprika
  • ½ teaspoon chili powder

Garnishes & Extras

  • 1 avocado, sliced
  • 2 tablespoons fresh cilantro, chopped
  • 1 lime cut into wedges

Instructions 

  • Cook quinoa in beef broth until tender, about 15 minutes.
  • In a skillet, heat olive oil and cook ground beef until browned, then add diced onion, garlic, cumin, paprika, chili powder, salt, and pepper. Cook until fragrant.
  • Stir in cooked quinoa and black beans, heating through.
  • Serve in bowls topped with sliced avocado, chopped cilantro, and lime wedges.

Notes

For extra flavor, add a squeeze of lime or hot sauce.
Calories: 550kcal
Cost: $15
Course: Main Course
Cuisine: American
Keyword: Beef, Quinoa

Introducing Zesty Lemon Pepper Chicken Wraps: A Perfect Weekday Meal

Are you looking for a quick yet satisfying meal that brings joy to your table? These Zesty Lemon Pepper Chicken Wraps are just what you need. Featuring tender chicken, fresh ingredients, and a zesty sauce, these wraps are perfect for busy days when you want to enjoy something delicious without spending hours in the kitchen. In this comprehensive guide, I’ll walk you through everything you need to know to create these delightful wraps, ensuring that you feel confident and inspired to cook.

Why You’ll Love This Recipe

Here are a few reasons why these lemon pepper chicken wraps will become a favorite:

  • Quick Preparation: Ready in under 30 minutes, this recipe is perfect for busy weeknights.
  • Flavorful Ingredients: The combination of lemon, pepper, and fresh veggies creates a refreshing taste sensation.
  • Customizable: You can easily adapt the recipe to suit your dietary needs or preferences.
  • Meal Prep Friendly: These wraps are great for make-ahead lunches or dinners, making them a versatile option.
  • Kid-Friendly: Even picky eaters will love the flavors, making it a great meal for the whole family.

Ingredient Breakdown

Here’s what you’ll need to make your Lemon Pepper Chicken Wraps, along with some substitution options:

  • 2 tablespoons salted butter: Can be replaced with olive oil for a healthier option.
  • 2 teaspoons lemon zest: Fresh is best, but you can use bottled lemon zest in a pinch.
  • 1 teaspoon lemon juice: Freshly squeezed lemon juice enhances the flavor.
  • 1/4 teaspoon black pepper: Adjust to taste; consider using white pepper for a subtler flavor.
  • 1/2 pound chicken (sliced, cubed, or shredded): Feel free to substitute with tofu or tempeh for a vegetarian option.
  • Shredded provolone or provel cheese: Use your favorite cheese or a dairy-free alternative.
  • Sliced avocado: Adds creaminess; you can leave it out if preferred.
  • Sprouts and green leaf lettuce: Add freshness; substitute with microgreens or spinach.
  • 4 10″ flour tortillas: Whole wheat or gluten-free tortillas can be used.
  • 4 tablespoons mayonnaise: Opt for Greek yogurt for a lighter sauce.
  • A pinch of garlic powder: Optional, but it adds depth to the sauce.

Step-by-Step Instructions

Close-up view of juicy Lemon Pepper Chicken Wraps with vibrant toppings.

Let’s get cooking! Follow these simple steps to create your wraps:

  1. In a skillet over medium-low heat, melt the butter and stir in the lemon zest, lemon juice, and black pepper.
  2. Add the sliced or cubed chicken and sauté for about 15 minutes or until the chicken is cooked through and golden brown.
  3. Allow the chicken to cool on a plate for about 5 minutes before assembling your wraps.
  4. In a small pan, melt additional butter and stir in more lemon zest and black pepper.
  5. Remove from heat and mix in the mayonnaise and butter mixture. Optionally, add garlic powder.
  6. Spread the Lemon Pepper Sauce across the four flour tortillas.
  7. Add the lettuce, sprouts, and avocado, along with any other veggies you like.
  8. Roll the tortillas up, cut them in half, and serve.

Pro Tips for Perfect Wraps

To elevate your lemon pepper chicken wraps, consider these expert insights:

  • Don’t Rush the Sauté: Allow the chicken to brown nicely for enhanced flavor.
  • Let it Rest: Cooling the chicken slightly helps with assembly and prevents soggy wraps.
  • Experiment with Flavors: Add herbs like dill or parsley for a fresh twist.
  • Check for Seasoning: Always taste and adjust the seasoning before serving.
  • Try Different Proteins: Swap chicken for shrimp or fish for a different flavor profile.
  • Make it Spicy: Add a pinch of cayenne pepper or sriracha to the sauce for a kick.
  • Wrap Smart: Ensure your tortillas are pliable by warming them slightly before filling.
  • Presentation Matters: Serve with a side of dipping sauce for a restaurant-style touch.

Common Mistakes and Troubleshooting

Here are some pitfalls to avoid while making your wraps:

  • Overcooking the Chicken: Keep an eye on your chicken to prevent it from drying out.
  • Skipping the Sauce: The sauce adds essential moisture and flavor, so don’t skip it!
  • Messy Assembly: Use a clean workspace and organize your ingredients for a smoother process.
  • Too Much Filling: Overstuffing can make rolling difficult, so keep fillings balanced.

Variations to Try

If you’re feeling adventurous, here are some fun variations to consider:

  • Dairy-Free Delight: Swap out cheese and mayonnaise for avocado or a dairy-free yogurt alternative.
  • Veggie-Packed: Add roasted vegetables such as bell peppers and zucchini for extra nutrients.
  • Spicy Sriracha: Mix sriracha into the sauce for a fiery twist.
  • Asian-Inspired: Use sesame oil instead of butter, and add shredded carrots and cucumber.

Storage and Make-Ahead Instructions

Want to prepare in advance? Here’s how to store your wraps:

  • Refrigeration: Store assembled wraps in an airtight container for up to 2 days.
  • Freezing: Wrap tightly in plastic wrap and foil, freeze for up to a month. Thaw in the fridge before reheating.
  • Make-Ahead Sauce: Prepare the lemon pepper sauce in advance and store it in the fridge for up to a week.

Nutrition Tips and Dietary Adaptations

To make these wraps even healthier, consider these tips:

  • Add Fiber: Include more veggies like spinach or kale to boost fiber content.
  • Lean Proteins: Opt for skinless chicken breast or turkey for a leaner option.
  • Whole Grains: Use whole wheat tortillas for added nutrients.
  • Keep it Light: Use low-fat mayonnaise or Greek yogurt to reduce calories.

Equipment Recommendations

Here’s what you’ll need to make your cooking experience smoother:

  • Skillet: A non-stick skillet is ideal for sautéing chicken.
  • Sharp Knife: For easy slicing of chicken and vegetables.
  • Mixing Bowl: To combine your lemon pepper sauce ingredients.
  • Spatula: Perfect for flipping chicken and spreading sauce.

Serving Suggestions

Consider these sides to complement your wraps:

  • Simple Green Salad: A light salad pairs beautifully with the wraps.
  • Chips and Salsa: For a crunchy side, serve with tortilla chips and fresh salsa.
  • Fruit Salad: A refreshing fruit salad balances the savory flavors of the wraps.

Frequently Asked Questions (FAQs)

Here are some common questions about this recipe:

  • Can I make these wraps ahead of time? Yes! Assemble the wraps and store them in the fridge for up to two days.
  • What can I use instead of chicken? Tofu, chickpeas, or grilled vegetables work well as substitutes.
  • How do I prevent the wraps from getting soggy? Keep the sauce on the side until ready to eat.
  • Can I freeze the wraps? Yes, just wrap them tightly and store them in the freezer for up to a month.
  • What other sauces can I use? Try ranch dressing, tzatziki, or a spicy aioli for different flavors.
  • Is there a vegetarian version? Absolutely! Substitute chicken with grilled veggies or a bean mixture.
  • How spicy are these wraps? They are mild, but you can add hot sauce to increase the heat.
  • What’s the best way to reheat frozen wraps? Thaw in the fridge overnight, then reheat in a skillet or microwave.

With this detailed guide, you’re all set to create mouthwatering Zesty Lemon Pepper Chicken Wraps. Enjoy the process of cooking and the satisfaction of sharing delicious meals with your loved ones. Remember, cooking is not just about the end result—it’s about finding joy in the journey. Happy cooking!

Lemon Pepper Chicken Wraps w/ Lemon Pepper Sauce

Prep Time 10 minutes
Cook Time 20 minutes
Total Time 30 minutes
Servings 4 servings
Calories 650
Enjoy flavorful chicken wraps with a zesty lemon pepper sauce, fresh veggies, and melted cheese for a delicious meal.

Ingredients

Dairy

  • 2 tablespoons salted butter
  • 2 teaspoons lemon zest
  • 1 teaspoon lemon juice
  • 1/4 teaspoon black pepper
  • 0.5 pounds chicken (sliced, cubed or shredded)
  • shredded provolone or provel cheese
  • sliced avocado
  • sprouts
  • green leaf lettuce
  • 4 10" flour tortillas flour tortillas
  • 1 tablespoon salted butter
  • 4 tablespoons Mayonnaise
  • 2 teaspoons lemon zest
  • 1/4 teaspoon black pepper
  • a pinch garlic powder (if desired)

Instructions 

  • In a skillet, melt butter and stir in lemon zest, lemon juice, and black pepper.
  • Add chicken and sauté until cooked and golden, about 15 minutes.
  • Cool chicken for 5 minutes. Meanwhile, melt butter in a small pan, add lemon zest and black pepper, then stir in mayonnaise and garlic powder.
  • Spread sauce on tortillas, add lettuce, sprouts, avocado, and chicken. Roll up, cut in half, and serve.

Notes

Feel free to add other veggies or cheese for extra flavor.
Calories: 650kcal
Cost: $15
Course: Main Course
Cuisine: American
Keyword: chicken, lemon, Wraps

Embrace the Comfort of a Teriyaki Turkey Rice Bowl

In the heart of every kitchen lies the potential for joy, creativity, and nourishment. Today, we’re diving into the delightful world of the Teriyaki Turkey Rice Bowl—a dish that seamlessly combines flavors, textures, and nutrients. Whether you’re a seasoned home chef or just starting your culinary journey, this recipe is designed to make cooking approachable and enjoyable.

This Teriyaki Turkey Rice Bowl is not only simple to prepare but also offers a wholesome balance of protein, vegetables, and carbohydrates. With tender ground turkey enveloped in a sweet and savory teriyaki sauce, paired with fluffy rice and vibrant steamed broccoli, this dish is sure to become a staple in your home. Let’s explore why you’ll love this recipe!

Why You’ll Love This Recipe

  • Quick to Prepare: This meal can be ready in just 30 minutes, making it perfect for busy weeknights.
  • Nutritious Balance: Packed with lean protein from ground turkey and vitamins from fresh vegetables, it’s a complete meal.
  • Customizable Ingredients: Use what you have on hand—swap in your favorite veggies or grains.
  • Kid-Friendly: The mild flavors and colorful presentation make it appealing to picky eaters.
  • Meal Prep Friendly: Make extra servings for easy lunches throughout the week.

Ingredients You’ll Need

To create this comforting Teriyaki Turkey Rice Bowl, gather the following ingredients:

  • 2 cups steamed broccoli florets: Adds a fresh crunch and vibrant color.
  • 1 pound ground turkey (93% lean): A healthy protein source that absorbs the teriyaki sauce beautifully.
  • 4 cups cooked white or brown rice: The perfect base for the dish, offering heartiness and texture.

Ingredient Substitutions

Close-up view of a delicious Teriyaki Turkey Rice Bowl featuring ground turkey and broccoli over rice.

If you’re missing an ingredient or looking to adjust based on dietary preferences, consider these substitutions:

  • Ground Turkey: You can swap it for ground chicken or lean beef if you prefer.
  • Broccoli: Feel free to use other vegetables like bell peppers, snap peas, or carrots.
  • Rice: Quinoa or cauliflower rice can be great alternatives for a low-carb option.
  • Teriyaki Sauce: Use a homemade version with soy sauce, honey, and garlic for a fresher taste.

How to Make Your Teriyaki Turkey Rice Bowl

Now that you have your ingredients, let’s walk through the steps to create this delightful dish:

  • Step 1: In a large skillet, brown the ground turkey over medium heat until fully cooked, breaking it apart with a spatula.
  • Step 2: Add your teriyaki sauce to the skillet, stirring to coat the turkey evenly. Let it simmer for a few minutes to enhance the flavors.
  • Step 3: While the turkey is cooking, steam the broccoli until just tender, about 4-5 minutes.
  • Step 4: Serve the cooked turkey over a bed of rice, topped with the steamed broccoli and a drizzle of extra teriyaki sauce if desired.

Pro Tips for Perfect Teriyaki Turkey Rice Bowls

Here are some expert tips to elevate your Teriyaki Turkey Rice Bowl experience:

  • Don’t Overcook the Turkey: Aim for a juicy texture; overcooking can lead to dryness.
  • Use Fresh Ingredients: Fresh garlic and ginger can enhance the flavor profile of your teriyaki sauce.
  • Adjust Sweetness: Taste your sauce and adjust the sweetness according to your preference—add more honey or brown sugar if needed.
  • Let It Marinate: For deeper flavor, consider marinating the turkey in the teriyaki sauce for 30 minutes before cooking.
  • Variety of Textures: Add nuts or seeds on top for an added crunch.
  • Keep it Colorful: Incorporate a mix of colorful vegetables for visual appeal and added nutrients.
  • Make it a Stir-Fry: You can turn this bowl into a stir-fry by adding additional vegetables and cooking them with the turkey.
  • Storing Leftovers: Store any leftover turkey and vegetables separately from the rice to maintain texture.

Common Mistakes and Troubleshooting

Even simple recipes can have hiccups. Here are common mistakes and how to avoid them:

  • Dry Turkey: Ensure you don’t overcook the turkey; it should be cooked just until no longer pink.
  • Too Salty: If your dish tastes too salty, balance it out with a bit of sugar or honey.
  • Sticking Rice: Rinse your rice before cooking to remove excess starch and prevent it from becoming sticky.
  • Uneven Cooking: Stir the turkey regularly to ensure even cooking and flavor distribution.

Variations to Explore

Feel free to experiment with these variations to keep your Teriyaki Turkey Rice Bowl fresh and exciting:

  • Spicy Teriyaki Bowl: Add sriracha or chili paste to the sauce for a spicy kick.
  • Veggie-Packed Bowl: Incorporate a variety of vegetables like zucchini, bell peppers, or mushrooms.
  • Fried Rice Style: Use leftover rice and stir-fry it with the turkey and vegetables for a fried rice version.
  • Asian-Inspired Bowl: Top with sesame seeds, green onions, and a drizzle of sesame oil for added flavor.

Storage and Make-Ahead Instructions

This Teriyaki Turkey Rice Bowl is perfect for meal prep:

  • Refrigeration: Store in airtight containers in the fridge for up to 4 days.
  • Freezing: You can freeze the turkey and sauce mixture for up to 2 months. Reheat and serve over freshly cooked rice.
  • Reheating: Warm in the microwave or on the stove, adding a splash of water if needed to prevent drying out.

Frequently Asked Questions

Here are some common queries regarding the Teriyaki Turkey Rice Bowl:

  • Can I use ground chicken or beef instead of turkey? Yes, both ground chicken and beef work well in this recipe.
  • What if I don’t have teriyaki sauce? You can make a simple version using soy sauce, honey, garlic, and ginger.
  • How can I make this dish vegetarian? Substitute the ground turkey with firm tofu or tempeh and use vegetable broth instead of meat-based sauces.
  • What vegetables can I add? Carrots, bell peppers, snap peas, and bok choy are excellent additions.
  • Can I prepare this dish in advance? Absolutely! You can prep the turkey and veggies ahead of time for quick assembly.
  • What is the best rice to use? Jasmine or basmati rice is recommended for its fragrance and texture, but brown rice is also a nutritious option.
  • Is this dish gluten-free? Use tamari instead of soy sauce to make it gluten-free.
  • How do I ensure my rice is fluffy? Rinse the rice before cooking and use the right water-to-rice ratio (typically 1:2).

Nutritional Tips and Dietary Adaptations

This Teriyaki Turkey Rice Bowl can easily fit into various dietary plans:

  • Low-Carb Option: Replace rice with cauliflower rice for a low-carb alternative.
  • High-Protein Option: Add edamame or chickpeas for an extra protein boost.
  • Allergy-Friendly: Ensure your teriyaki sauce is free from allergens if needed, or make your own.

Equipment Recommendations

To make this recipe, you’ll need:

  • Large Skillet: For cooking the turkey and sauce.
  • Steamer Basket: To steam the broccoli perfectly.
  • Rice Cooker: Optional, but it makes cooking rice easier and more consistent.

Serving Suggestions

This Teriyaki Turkey Rice Bowl is delicious on its own, but you can enhance your meal with:

  • Sesame Seeds: Sprinkle on top for added crunch and flavor.
  • Pickled Ginger: A tangy side that complements the sweet teriyaki sauce.
  • Chili Oil: Drizzle for a spicy finish.
  • Fresh Herbs: Garnish with chopped cilantro or scallions for freshness.

In conclusion, the Teriyaki Turkey Rice Bowl is a versatile and rewarding dish that invites you to explore flavors and textures in your cooking. It’s not just a meal; it’s a chance to connect with the joy of cooking and the satisfaction that comes from nourishing yourself and your loved ones. Enjoy the process, and happy cooking!

Teriyaki Turkey Rice Bowl

Prep Time 10 minutes
Cook Time 15 minutes
Total Time 25 minutes
Servings 4 servings
Calories 450
A quick and flavorful bowl combining lean ground turkey, steamed broccoli, and rice, all coated in a savory teriyaki sauce.

Ingredients

Vegetables

  • 2 cups steamed broccoli florets

Protein

  • 1 pound ground turkey, 93 percent lean

Grains

  • 4 cups cooked white or brown rice

Instructions 

  • Cook rice according to package instructions.
  • Steam broccoli until tender.
  • Cook ground turkey in a skillet until browned.
  • Mix cooked turkey with teriyaki sauce and simmer briefly.
  • Assemble bowls with rice, turkey, and broccoli.

Notes

You can substitute brown rice for added fiber or adjust the sauce for sweetness.
Calories: 450kcal
Cost: $12
Course: Main Course
Cuisine: Asian
Keyword: Turkey

Discover the Vibrancy of Greek Cuisine with This Refreshing Shrimp Salad

If you’re looking for a dish that embodies the essence of summer while being quick and easy to prepare, you’ve found it. This Greek Shrimp Salad is not only a feast for the eyes but also a celebration of flavor and freshness. Combining succulent shrimp with bright vegetables and a zesty dressing, this recipe captures the heart of Mediterranean cuisine. Perfect for light lunches, dinner gatherings, or even meal prep, this salad is a must-try. Let’s dive into the details of how to make this delightful dish!

Why You’ll Love This Recipe

  • Quick and Easy: With minimal cooking and assembly time, you can have this salad ready in about 30 minutes.
  • Fresh Ingredients: Utilizing fresh vegetables and herbs ensures a burst of flavor in every bite.
  • Customizable: This recipe can be easily adapted to suit your taste preferences or dietary needs.
  • Meal Prep Friendly: Make it ahead of time and store it in an airtight container for easy lunches throughout the week.
  • Healthy and Nourishing: Packed with protein and fiber, this salad is a wholesome option that keeps you satisfied.

Ingredient Breakdown and Substitutions

To create this Mediterranean masterpiece, here’s what you’ll need:

  • 1/4 cup extra virgin olive oil: A high-quality olive oil enhances the flavor of the dressing.
  • 3 tablespoons freshly squeezed lemon juice: Fresh lemon juice adds brightness and acidity.
  • 2 tablespoons fresh basil (chopped): Basil brings a sweet, aromatic touch.
  • 1 tablespoon fresh thyme (snipped): Thyme adds depth and earthiness.
  • Salt and freshly ground black pepper: Essential for seasoning.
  • 1.5 lb raw shrimp (peeled and deveined): Choose large shrimp for the best texture.
  • 5 oz yellow cherry tomatoes (sliced in half): These add sweetness and color.
  • 5 oz red cherry tomatoes (sliced in half): For visual appeal and flavor.
  • 1 large cucumber (quartered): Crunchy and refreshing.
  • 1/3 cup red onion (sliced): For a bit of bite.
  • 1 avocado (peeled, cored, and diced): Creaminess that balances the flavors.
  • 3 tablespoons capers: A briny kick to elevate the dish.
  • 4 oz Feta cheese: Creamy and tangy, Feta is a classic addition.

If you have any dietary restrictions or preferences, here are some substitutions you can consider:

  • Shrimp: Substitute with grilled chicken or tofu for a different protein.
  • Feta cheese: Use dairy-free cheese or omit it for a lighter version.
  • Olive oil: Avocado oil can be used for a different flavor profile.
  • Cherry tomatoes: Substitute with diced bell peppers for a crunchy texture.

Pro Tips for the Perfect Greek Shrimp Salad

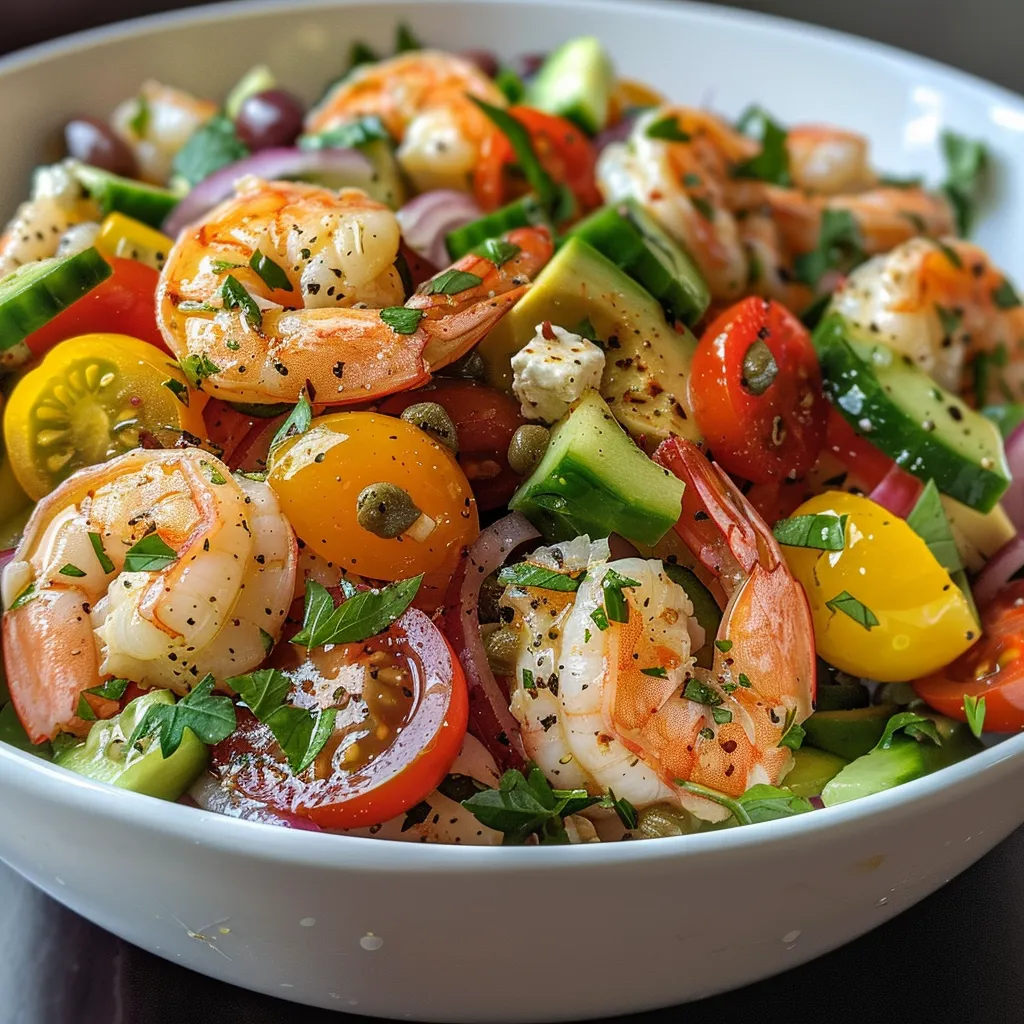
A vibrant bowl of Greek Shrimp Salad featuring colorful cherry tomatoes, cucumber, avocado, and shrimp.
  • Perfectly Cooked Shrimp: Cook shrimp for about 2-3 minutes on each side over medium-high heat until they turn opaque. Avoid overcooking to maintain tenderness.
  • Chill Before Serving: Let the salad chill in the fridge for at least 30 minutes before serving to allow the flavors to meld.
  • Use Fresh Herbs: Fresh herbs will always provide a more vibrant flavor compared to dried.
  • Quality Ingredients Matter: Invest in good quality extra virgin olive oil and fresh, ripe vegetables for the best flavor.
  • Don’t Skip the Dressing: The dressing ties all the flavors together, so don’t skimp on it!
  • Adjust Seasoning to Taste: Taste the salad after mixing and adjust salt, pepper, or lemon juice as needed.
  • Layer Ingredients: To prevent sogginess, layer the salad ingredients and add dressing right before serving.
  • Garnish for Presentation: A sprinkle of fresh herbs on top before serving can make a beautiful presentation.

Common Mistakes and Troubleshooting

Here are some potential pitfalls to avoid when making your Greek Shrimp Salad:

  • Overcooking the Shrimp: Monitor closely as shrimp can turn rubbery if cooked too long.
  • Rinsing Shrimp: Avoid rinsing shrimp under water as it can wash away flavor; pat dry instead.
  • Poor Quality Ingredients: Choosing lower-quality produce can affect the overall taste of the salad.
  • Not Allowing Flavors to Marry: Skipping chill time can result in a less flavorful salad.

Delicious Variations to Try

If you want to mix things up with your Greek Shrimp Salad, consider these variations:

  • Spicy Shrimp Salad: Add diced jalapeños or a dash of hot sauce for some heat.
  • Quinoa Greek Shrimp Salad: Incorporate cooked quinoa for added protein and fiber.
  • Greek Shrimp Pasta Salad: Toss in cooked pasta for a heartier meal.
  • Grilled Vegetable Salad: Add grilled zucchini or bell peppers for a smoky flavor.

Storage and Make-Ahead Instructions

To keep your Greek Shrimp Salad fresh and delicious:

  • Store in an airtight container: Refrigerate for up to 2 days. The flavors deepen as they sit.
  • Keep dressing separate: If you plan to store it, keep the dressing separate until ready to serve to avoid sogginess.
  • Prep Ingredients Ahead: You can chop vegetables and prepare dressing a day in advance for quick assembly.

Frequently Asked Questions

  • Can I use frozen shrimp? Yes, just ensure they are completely thawed and pat dry before cooking.
  • How do I prevent the salad from wilting? Store dressing separately and add it right before serving.
  • What can I substitute for Feta cheese? Try goat cheese or leave it out for a dairy-free option.
  • Is this salad gluten-free? Yes, all ingredients are gluten-free, making it a great option for gluten-sensitive individuals.
  • Can I make it vegan? Substitute shrimp with chickpeas or grilled tofu, and omit the Feta.
  • How long will leftovers last? The salad is best enjoyed fresh but can last in the fridge for up to 2 days.
  • What should I serve with this salad? Pair it with crusty bread or a side of hummus for a complete meal.
  • Can I add nuts? Yes, toasted pine nuts or walnuts can add a lovely crunch.

Nutrition Tips and Dietary Adaptations

This Greek Shrimp Salad is not only delicious but also packed with nutrients:

  • High in Protein: Shrimp provides an excellent source of lean protein.
  • Rich in Fiber: Vegetables and avocado contribute dietary fiber, beneficial for digestion.
  • Healthy Fats: Olive oil and avocado deliver heart-healthy monounsaturated fats.
  • Low in Carbs: This salad is low in carbohydrates, making it suitable for low-carb diets.

Equipment Recommendations

For this recipe, you’ll need:

  • Skillet or Grill Pan: For cooking the shrimp to perfection.
  • Cutting Board and Knife: Essential for chopping vegetables.
  • Mixing Bowl: To combine the ingredients and dressing.
  • Airtight Container: For storing leftovers or meal prep.

Serving Suggestions

To elevate your dining experience:

  • Garnish with Fresh Herbs: A sprinkle of chopped basil or parsley adds freshness.
  • Serve with Crusty Bread: Perfect for soaking up the dressing.
  • Pair with a Light White Wine: A chilled Sauvignon Blanc complements the flavors beautifully.

This Greek Shrimp Salad not only serves as a delightful meal but also as a reminder of the joy of cooking with fresh ingredients. Whether you’re hosting a gathering or simply enjoying a quiet meal at home, this salad is sure to impress. So gather your ingredients, take a moment to appreciate the process, and enjoy this vibrant dish filled with flavor and love!

Greek Shrimp Salad

Prep Time 15 minutes
Cook Time 10 minutes
Total Time 25 minutes
Servings 4 servings
Calories 350
A fresh and flavorful Greek-inspired shrimp salad perfect for a light lunch or dinner.

Ingredients

Dressing

  • 0.25 cup extra virgin olive oil
  • 3 tablespoons freshly squeezed lemon juice
  • 2 tablespoons fresh basil (chopped)
  • 1 tablespoon fresh thyme (snipped)
  • to taste salt and freshly ground black pepper salt and pepper

Shrimp

  • 1.5 lb raw shrimp (peeled and deveined) (large - about 15-20 per pound)

Additional ingredients

  • 2 tablespoons olive oil
  • 0.25 teaspoon salt
  • 2 tablespoons freshly squeezed lemon juice
  • 0.25 cup fresh basil (chopped)
  • red pepper flakes (optional) red pepper flakes (optional)
  • 5 oz yellow cherry tomatoes (sliced in half)
  • 5 oz red cherry tomatoes (sliced in half)
  • 1 large cucumber (quartered)
  • 1/3 cup red onion (sliced)
  • 1 large avocado (peeled, cored, and diced)
  • 3 tablespoons capers
  • 4 oz Feta cheese

Instructions 

  • Prepare the dressing by whisking together olive oil, lemon juice, basil, thyme, salt, and pepper.
  • Cook the shrimp in boiling water until pink and opaque, about 3-4 minutes, then drain and cool.
  • Combine cooked shrimp with cherry tomatoes, cucumber, red onion, avocado, capers, and feta in a large bowl.
  • Pour the dressing over the salad and toss gently to combine.
  • Serve immediately or chill for 30 minutes for enhanced flavor.

Notes

Use fresh herbs for the best flavor and adjust seasoning to taste.
Calories: 350kcal
Cost: $15
Course: Salad
Cuisine: Greek
Keyword: shrimp

Discover the Joy of Lemon Pesto Turkey Pasta

Welcome to a delightful culinary experience with my Lemon Pesto Turkey Pasta. This recipe is not only a fantastic way to utilize leftover turkey but also brings together the bright flavors of lemon zest and aromatic basil pesto with hearty farfalle pasta. Cooking should be a pleasure, and this comforting meal embodies that philosophy, making it perfect for a cozy weeknight dinner or a special occasion.

In this article, you’ll find everything you need to know about creating this dish, from a detailed ingredient breakdown to pro tips, variations, and common mistakes to avoid. Whether you’re a seasoned chef or a beginner, my warm and inviting approach will help you cook with confidence and joy.

Why You’ll Love This Recipe

  • Quick and Easy: With just a few simple steps, you can whip up a delicious meal in under 30 minutes.
  • Perfect for Leftovers: Transform leftover turkey into a vibrant dish that feels fresh and exciting.
  • Flavorful and Nourishing: The combination of lemon zest, basil pesto, and turkey creates a dish that is both comforting and satisfying.
  • Versatile: This recipe can be adapted with various pasta shapes or ingredients, making it a staple in your kitchen.
  • Healthy and Balanced: Packed with protein from the turkey and nutrients from the vegetables, it’s a nourishing option for any meal.

Ingredient Breakdown

Let’s dive into the ingredients that make this dish a true standout. Here’s what you’ll need:

  • Salt: Essential for enhancing flavors. Use sea salt for a natural taste.
  • 2 large eggs: These will help create a creamy sauce without the need for heavy cream.
  • Zest from one lemon: Adds brightness and acidity to balance the richness of the pesto.
  • 1/2 cup prepared basil pesto: Store-bought or homemade, it brings a burst of flavor.
  • 1/2 pound farfalle (bow tie) pasta: The texture holds the sauce beautifully, but feel free to substitute with any pasta you love.
  • 1 tablespoon extra virgin olive oil: For sautéing the onions and adding richness.
  • 1 heaping cup chopped onion (about one medium onion): Sweetens the dish as it cooks.
  • 1 clove garlic, minced: Infuses the dish with a warm aroma and flavor.
  • 2 cups chopped cooked turkey meat: Leftover turkey thigh meat works great, but any cooked turkey will do.
  • Freshly ground black pepper: To taste, adding a bit of spice to the dish.

Consider these substitutions for flexibility:

  • Gluten-free pasta: Use a gluten-free alternative for a gluten-sensitive option.
  • Vegetarian option: Replace turkey with sautéed mushrooms or chickpeas for a hearty vegetarian meal.
  • Herb alternatives: Swap basil pesto with sun-dried tomato pesto for a different flavor profile.

Pro Tips for Perfect Pasta

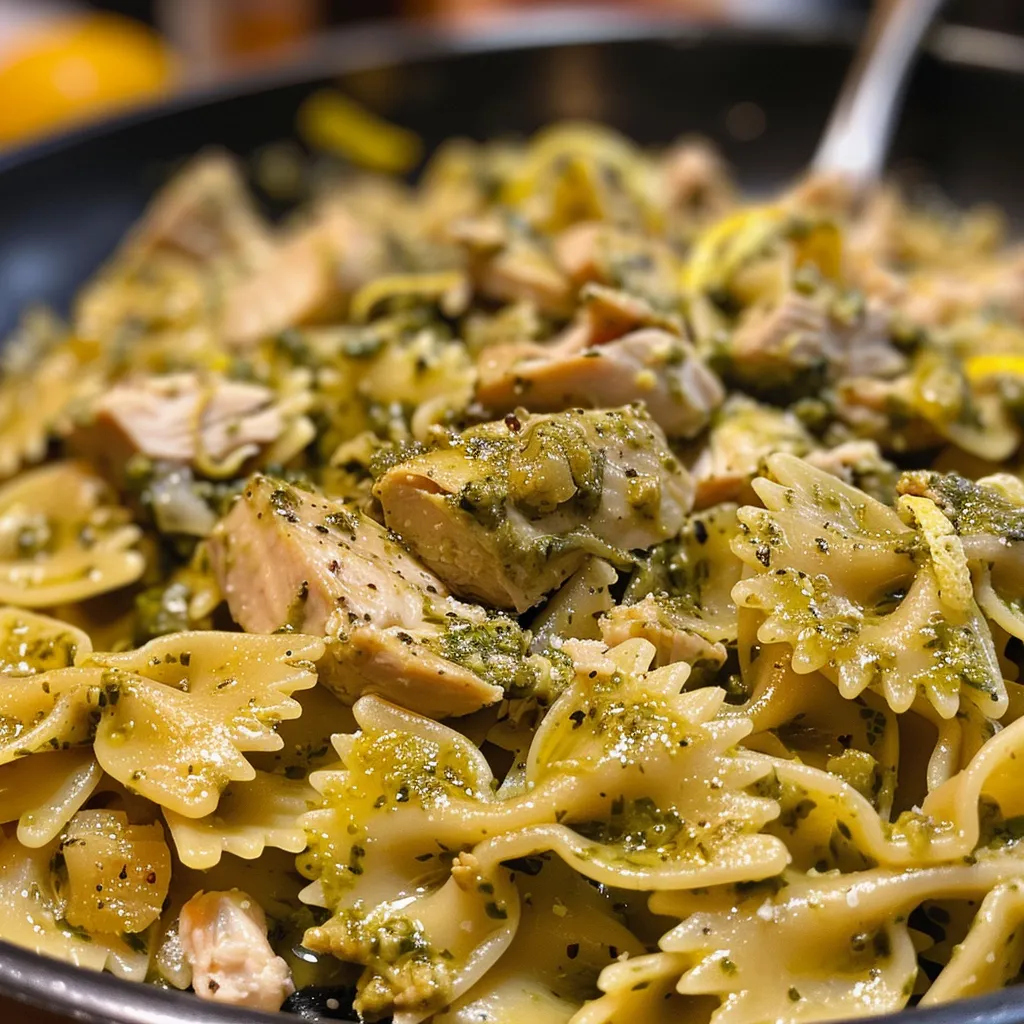
Close-up of a vibrant Lemon Pesto Turkey Pasta dish with bow tie pasta and herbs.

Here are some expert insights to elevate your cooking experience:

  • Boil Water Properly: Always add salt to boiling water before adding the pasta for better flavor absorption.
  • Reserve Pasta Water: Keep some pasta cooking water to adjust the sauce consistency if needed.
  • Don’t Overcook the Pasta: Aim for al dente to ensure the pasta holds its shape and texture.
  • Mix Off Heat: When combining the pasta with the sauce, keep the pan off the heat to prevent the eggs from curdling.
  • Balance Flavors: Taste and adjust seasoning with salt, pepper, or a splash of lemon juice as necessary.
  • Fresh Ingredients: Use fresh lemon zest and quality pesto for the best flavor.
  • Cook in Batches: If making for a crowd, double the recipe for easy serving.
  • Garnish Wisely: Fresh herbs or a sprinkle of cheese can elevate the presentation.

Common Mistakes and Troubleshooting

Cooking can come with its challenges. Here’s how to avoid some common pitfalls:

  • Overcooked Pasta: Always check the pasta a minute or two before the package time to ensure it’s just right.
  • Curdled Sauce: If the eggs curdle, it’s likely due to too much heat. Mix off the heat as mentioned earlier.
  • Too Salty: If your dish ends up salty, balance it out with a squeeze of lemon juice or a bit of cream.
  • Dry Pasta: If the pasta is too dry after mixing, add back some reserved pasta water to loosen it up.

Variations to Try

Feel free to experiment with these delicious variations:

  • Spinach and Feta: Add fresh spinach and crumbled feta cheese for a Mediterranean twist.
  • Spicy Kick: Incorporate red pepper flakes for a bit of heat.
  • Seafood Delight: Use cooked shrimp or crab meat instead of turkey for a seafood version.
  • Veggie Medley: Toss in seasonal vegetables like zucchini or bell peppers for added nutrition and color.

Storage and Make-Ahead Instructions

This dish is great for meal prep and leftovers. Here’s how to store it:

  • Refrigerating: Store in an airtight container in the refrigerator for up to 3 days.
  • Freezing: While it’s best fresh, you can freeze it for up to a month. Just reheat gently to avoid overcooking the pasta.
  • Make-Ahead: Prepare the ingredients in advance, but cook the pasta and combine just before serving to maintain the best texture.

Comprehensive FAQ

Here are some common questions about this recipe:

  • Can I use other types of pasta? Yes, any pasta shape will work!
  • What can I substitute for turkey? You can use chicken, tofu, or skip the protein for a vegetarian dish.
  • How do I make this dish vegan? Use vegan pesto, replace eggs with silken tofu, and skip the turkey.
  • Can I prepare this recipe in advance? Yes, you can prep the ingredients and cook them when ready to serve.
  • How can I make it creamier? Add a splash of cream or additional pesto for a richer sauce.
  • What is the best way to reheat leftovers? Gently reheat on the stovetop with a bit of reserved pasta water.
  • Can I add cheese to this dish? Absolutely! Parmesan or Pecorino cheese adds a wonderful flavor.
  • Is this recipe gluten-free? Use gluten-free pasta to make it suitable for gluten intolerance.

Nutrition Tips and Dietary Adaptations

This dish is not only delicious but can also be made healthier:

  • Whole Grain Pasta: Use whole wheat or legume-based pasta for added fiber and nutrients.
  • Low-Calorie Pesto: Opt for a low-calorie pesto or make your own with less oil.
  • Add More Veggies: Incorporate a variety of vegetables to enhance nutritional value.

Equipment Recommendations

Having the right tools makes cooking easier:

  • Large Pot: For boiling pasta, choose a pot that allows plenty of room for the pasta to move.
  • Sauté Pan: A wide pan helps evenly cook the onions and turkey.
  • Whisk: Essential for mixing the eggs and pesto smoothly.
  • Measuring Cups and Spoons: Accurate measurements ensure consistent results.

Serving Suggestions

To elevate your dining experience, consider these serving ideas:

  • Garnish with Fresh Herbs: A sprinkle of fresh basil or parsley brightens the dish.
  • Pair with a Side Salad: A light green salad complements the richness of the pasta.
  • Offer Crusty Bread: A slice of crusty bread is perfect for soaking up the sauce.

In conclusion, my Lemon Pesto Turkey Pasta is a celebration of simple ingredients and the joy of cooking. With a few straightforward steps, you can create a dish that is both nourishing and comforting. Remember, the kitchen is a place for exploration and creativity, so feel free to make this recipe your own. Happy cooking!

Lemon Pesto Turkey Pasta

Prep Time 10 minutes
Cook Time 15 minutes
Total Time 25 minutes
Servings 4 servings
Calories 600
A quick and flavorful pasta dish combining lemon, pesto, and turkey for a satisfying meal.

Ingredients

Salt

  • 2 large eggs
  • 1 each lemon zest (from one lemon)
  • 0.5 cup prepared basil pesto
  • 0.5 pound farfalle (bow tie) pasta
  • 1 tablespoon extra virgin olive oil
  • 1 cup chopped onion (about one medium onion)
  • 1 clove garlic (minced)
  • 2 cups chopped cooked turkey meat (leftover turkey thigh works great)
  • to taste freshly ground black pepper

Instructions 

  • Boil water with salt, cook pasta for 10 minutes until al dente.
  • Whisk eggs, lemon zest, and pesto in a bowl; set aside.
  • Drain pasta, reserving 1/2 cup cooking water.
  • Sauté onions in olive oil until translucent, add garlic and turkey, heat through.
  • Add pasta to pan, pour egg mixture, toss quickly, add reserved water if needed.

Notes

Adjust salt and pepper to taste, and add lemon juice for extra brightness if desired.
Calories: 600kcal
Cost: $15
Course: Main Course
Cuisine: American
Keyword: lemon, Pasta, Turkey

If you’re in search of a comforting dish that brings warmth to the table, look no further than this **Chicken Pesto Pasta**. Combining tender chicken, vibrant cherry tomatoes, and a rich, creamy pesto sauce, this easy weeknight meal is perfect for any occasion. It’s not just about filling your stomach; it’s about enjoying the process of cooking and the joy of sharing a meal with loved ones. In this guide, we’ll dive deep into every aspect of creating this delightful dish, ensuring you feel confident and inspired in your kitchen.

Why You’ll Love This Recipe

  • Quick and Easy: This chicken pesto pasta recipe can be made in about 30 minutes, making it a perfect choice for busy weeknights.
  • Comforting Flavors: The combination of creamy pesto and juicy chicken creates a dish that’s both comforting and satisfying.
  • Customizable: You can easily adapt this recipe by substituting ingredients or adding your favorite vegetables.
  • Nutritious Ingredients: Packed with lean protein, healthy fats, and vibrant veggies, this dish is as nourishing as it is delicious.
  • Perfect for Meal Prep: This pasta reheats beautifully, making it a great option for meal prepping for the week ahead.

Ingredient Breakdown

Let’s explore the essential ingredients you’ll need to create this delicious chicken pesto pasta, along with some handy substitutions:

  • Boneless Skinless Chicken Breast: Provides lean protein. You can substitute with chicken thighs or even shrimp for a different flavor.
  • Kosher Salt: Enhances the overall flavor. If you’re watching your sodium intake, consider using a salt substitute.
  • Black Pepper: Freshly ground black pepper adds depth. Adjust the amount based on your spice preference.
  • Olive Oil: Used for sautéing the chicken. Feel free to use avocado oil for a different flavor.
  • Dried Penne Pasta: This shape holds the sauce well. You can use any pasta you prefer, such as fusilli or spaghetti.
  • Unsalted Chicken Stock: Adds moisture and flavor. You can use vegetable broth or water if you prefer.
  • Basil Pesto: The star of the dish! Homemade pesto is recommended, but store-bought works in a pinch.
  • Heavy Whipping Cream: Provides creaminess. For a lighter option, you can use half-and-half or coconut cream.
  • Grated Parmesan Cheese: Adds a savory note. Nutritional yeast can be used for a dairy-free alternative.
  • Sundried Tomatoes: Contributes a tangy sweetness. Fresh cherry tomatoes can be used for a lighter touch.
  • Sliced Basil Leaves: Optional garnish that adds a fresh flavor.

Step-by-Step Instructions

Now that you have your ingredients ready, let’s walk through the simple steps to make this delicious chicken pesto pasta:

  1. Prepare the Chicken: Cut the chicken breast into about ¾-inch cubes. In a medium bowl, season the chicken with ½ teaspoon of salt, black pepper, and 1 tablespoon of olive oil.
  2. Cook the Chicken: Heat a large, high-sided skillet or Dutch oven over medium heat. Add 2 tablespoons of olive oil. Once hot, add the chicken in a single layer. Cook without moving until golden brown, about 2-3 minutes. Sauté until fully cooked, about 3 more minutes. Transfer to a clean bowl and cover to keep warm.
  3. Cook the Pasta: In the same pan, add the pasta, chicken stock, and ½ teaspoon salt. Bring to a boil over high heat. Cook, stirring frequently, until tender and the stock has mostly evaporated, about 14-16 minutes. Add more water if needed, ½ cup at a time, for a softer pasta.
  4. Make the Sauce: Reduce heat to low. Stir in the pesto sauce, heavy cream, and parmesan cheese. Add the sundried tomatoes and chicken, cooking until everything is warm, about 2 minutes.
  5. To Serve: Serve garnished with halved cherry tomatoes and sliced basil for a pop of color and flavor.

Pro Tips for Perfect Chicken Pesto Pasta

Close-up view of Chicken Pesto Pasta in a bowl, showcasing juicy chicken and vibrant ingredients.
  • Cook Pasta Al Dente: This ensures the pasta holds its shape and texture when mixed with the sauce.
  • Use Fresh Ingredients: Whenever possible, opt for fresh basil and homemade pesto to elevate the dish’s flavor.
  • Don’t Overcrowd the Pan: When cooking the chicken, give it space in the pan to achieve a nice golden crust.
  • Adjust Creaminess: If you prefer a lighter sauce, reduce the amount of heavy cream or substitute it with Greek yogurt.
  • Experiment with Veggies: Add in some spinach or peas for extra nutrients and color.
  • Save Some Pasta Water: Reserve a cup of pasta water before draining; it can help loosen the sauce if it becomes too thick.
  • Let It Rest: Allowing the pasta to sit for a few minutes after cooking enhances the flavors.
  • Don’t Skip the Garnish: Fresh basil and cherry tomatoes not only enhance the visual appeal but also add freshness to each bite.

Common Mistakes and Troubleshooting

Even the best cooks can make mistakes. Here are common pitfalls and how to avoid them:

  • Overcooking the Chicken: This can lead to dry meat. Use a meat thermometer to ensure it’s cooked to 165°F (75°C).
  • Sticking Pasta: Make sure to stir the pasta occasionally while it cooks to prevent it from clumping together.
  • Too Thick Sauce: If your sauce is too thick, stir in a bit of reserved pasta water to achieve the desired consistency.
  • Not Enough Seasoning: Always taste as you go! Adjust the seasoning as needed to enhance the dish’s flavor.

Variations to Try

Feeling adventurous? Here are some delicious variations you can try:

  • Chicken Pesto Pasta with Spinach: Stir in fresh spinach during the last few minutes of cooking for added nutrients.
  • Vegetarian Pesto Pasta: Replace chicken with chickpeas or grilled vegetables for a hearty vegetarian option.
  • Spicy Pesto Pasta: Add a pinch of red pepper flakes to the sauce for a spicy kick.
  • Pasta Salad Version: Chill the cooked pasta and mix with pesto and fresh veggies for a refreshing summer salad.

Storage and Make-Ahead Instructions

This chicken pesto pasta can be made ahead of time and stored for later:

  • Refrigerator: Store leftovers in an airtight container for up to 3 days. Reheat gently on the stove or in the microwave.
  • Freezer: This dish can be frozen for up to 2 months. Thaw in the refrigerator overnight before reheating.

Frequently Asked Questions

Here are some common queries about this recipe:

  • Can I use store-bought pesto? Yes, while homemade is recommended, good-quality store-bought pesto works well too.
  • How can I make this recipe dairy-free? Substitute heavy cream with coconut cream and omit the parmesan cheese or use a dairy-free version.
  • What other proteins can I use? Grilled shrimp, turkey, or even tofu can be delicious alternatives to chicken.
  • Can I add more vegetables? Absolutely! Zucchini, bell peppers, or asparagus would make excellent additions.
  • How do I prevent my pasta from getting mushy? Cook it al dente, and reserve some pasta water to adjust the sauce as needed.
  • Can I make this dish gluten-free? Yes, just use gluten-free pasta and ensure your pesto is also gluten-free.
  • How spicy is the dish? The recipe is not inherently spicy; however, you can add red pepper flakes for heat.
  • Is this recipe suitable for meal prep? Yes! It stores well and can easily be reheated, making it great for meal prepping.

Nutrition Tips and Dietary Adaptations

This Chicken Pesto Pasta can fit into various dietary needs:

  • Low-Carb Option: Substitute pasta with zucchini noodles or spaghetti squash.
  • Increased Protein: Add additional chicken or even some white beans for extra protein.
  • Heart-Healthy: Use whole grain pasta and reduce the amount of olive oil to make it heart-healthier.

Equipment Recommendations

Here are some kitchen tools that will make your cooking experience easier:

  • High-Sided Skillet or Dutch Oven: Perfect for sautéing and simmering.
  • Sharp Knife: For easy and safe cutting of chicken and vegetables.
  • Meat Thermometer: Ensures your chicken is perfectly cooked.
  • Large Pot: Essential for boiling pasta.

Serving Suggestions

Pair your chicken pesto pasta with these tasty sides:

  • Garlic Bread: A classic choice that complements the flavors perfectly.
  • Simple Green Salad: A light salad with a tangy vinaigrette balances the richness of the pasta.
  • Roasted Vegetables: Add a side of seasonal roasted vegetables for extra nutrition.

Cooking is not just about the end result; it’s about the journey and the joy of creating something delicious. This Chicken Pesto Pasta is a perfect way to experience that joy, offering comfort, flavor, and the warmth of home-cooked meals. So gather your ingredients, put on your apron, and enjoy the process. Happy cooking!

Chicken Pesto Pasta

Prep Time 10 minutes
Cook Time 20 minutes
Total Time 30 minutes
Servings 4 servings
Calories 650
A flavorful and creamy pasta dish featuring tender chicken, basil pesto, and sun-dried tomatoes, perfect for a quick weeknight dinner.

Ingredients

Protein

  • 1 pound boneless skinless chicken breast
  • 1 teaspoon kosher salt (divided)
  • ½ teaspoon black pepper
  • 3 tablespoons olive oil

Pasta

  • 8 ounces dried penne
  • 4 cups unsalted chicken stock
  • ½ cup basil pesto
  • ½ cup heavy whipping cream
  • ¼ cup grated parmesan cheese
  • ¼ cup sliced sundried tomatoes
  • ½ cup halved cherry tomatoes (optional)
  • 1 tablespoon sliced basil leaves (optional)

Instructions 

  • Cut chicken into ¾-inch cubes, season with ½ teaspoon salt, black pepper, and 1 tablespoon olive oil.
  • Cook chicken in a skillet over medium heat until golden and cooked through, about 5 minutes. Transfer to a bowl.
  • Add pasta, chicken stock, and ½ teaspoon salt to the pan. Boil and cook until tender, about 14-16 minutes, adding water if needed.
  • Reduce heat, stir in pesto, cream, parmesan, sun-dried tomatoes, and cooked chicken. Warm for 2 minutes.
  • Serve garnished with cherry tomatoes and sliced basil.

Notes

For extra flavor, sprinkle with additional basil or parmesan before serving.
Calories: 650kcal
Cost: $15
Course: Main Course
Cuisine: Italian
Keyword: chicken, Pasta, Pesto

Discover the Joy of Cooking with Our Tender Chicken Herb Salad

Welcome to a culinary experience that not only nourishes your body but also revives your spirit. Our Tender Chicken Herb Salad is the perfect blend of fresh ingredients and wholesome flavors, making it an ideal choice for those focused on muscle gain and wellness. This recipe is designed to be simple yet satisfying, encouraging you to embrace cooking with confidence and care. Let’s dive into the details!

Why You’ll Love This Recipe

This salad is more than just a meal; it’s a celebration of flavors and textures. Here are some compelling reasons to make it today:

  • Protein-Packed: Featuring tender chicken breasts, this salad offers a significant protein boost, essential for muscle gain and recovery.
  • Fresh and Flavorful: The combination of fresh herbs like parsley, mint, and basil elevates the taste, providing a refreshing contrast to the grilled chicken.
  • Versatile Ingredients: You can easily swap ingredients based on what you have, making it a flexible recipe for any occasion.
  • Quick Prep Time: With simple steps and minimal cooking time, you can have this delightful dish ready in under 30 minutes.
  • Health Benefits: This dish is not only great for muscle gain but also supports fat burn and overall wellness, thanks to the nutrient-dense ingredients.

Ingredient Breakdown

Let’s explore the ingredients that make this salad a standout:

  • Chicken Breasts: 1.5 pounds of boneless, skinless chicken breasts serve as the protein base. For a twist, try using turkey breasts or tofu for a vegetarian option.
  • Olive Oil: 2 tablespoons not only adds flavor but also healthy fats. Feel free to substitute with avocado oil for a different profile.
  • Spices: Smoked paprika, garlic powder, salt, and black pepper enhance the chicken’s flavor. Experiment with cumin or cayenne for added depth.
  • Mixed Greens: 4 cups of arugula, spinach, and kale provide a vibrant base. You can also use romaine lettuce or spring mix.
  • Vegetables: Cherry tomatoes, cucumber, and red onion add crunch and color. Substitute with bell peppers or carrots if desired.
  • Fresh Herbs: A mix of parsley, mint, and basil provides brightness. Feel free to add cilantro or chives for a different flavor.
  • Dressing: The dressing includes extra virgin olive oil, lemon juice, Dijon mustard, honey, salt, and pepper. For a vegan version, use maple syrup instead of honey.

Step-by-Step Instructions

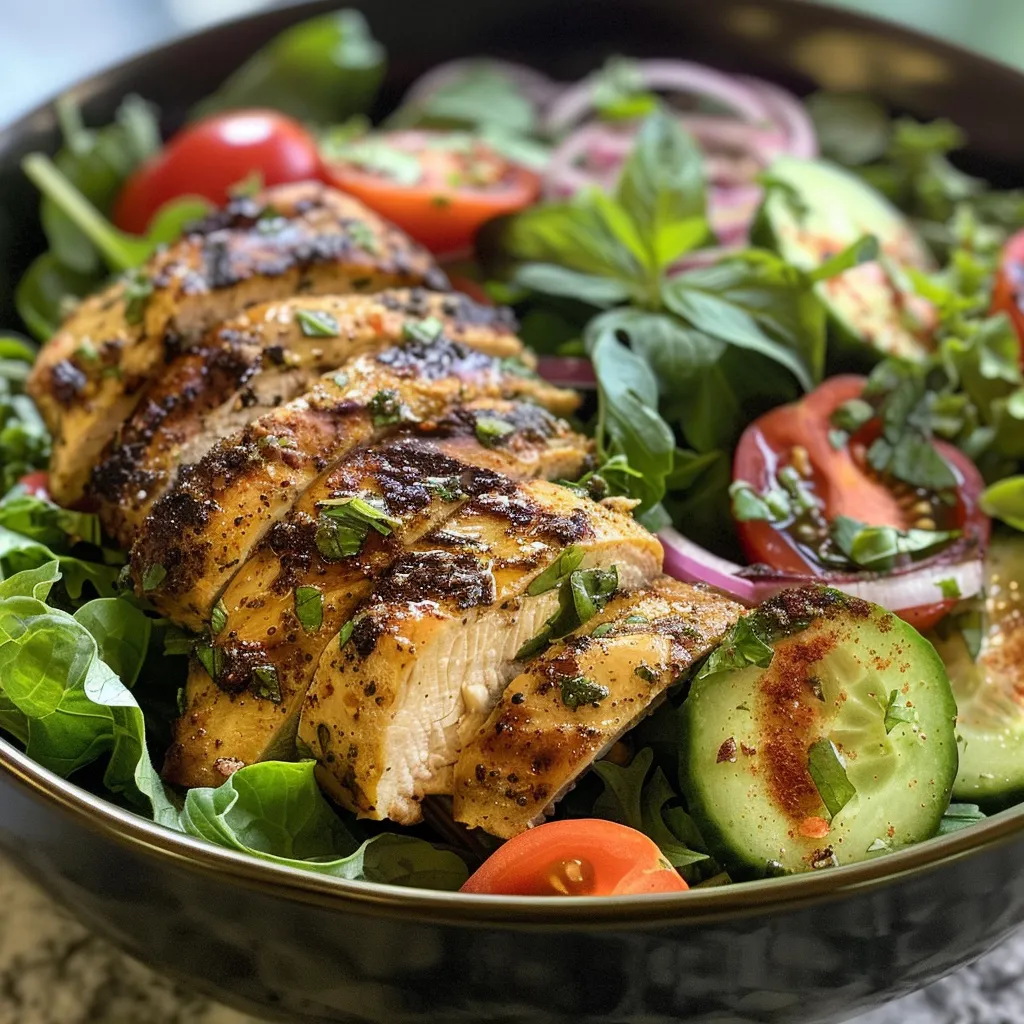
Close-up view of a vibrant tender chicken herb salad featuring fresh ingredients.

Follow these simple steps to create your Tender Chicken Herb Salad:

  1. Marinate the Chicken: In a medium bowl, combine olive oil, smoked paprika, garlic powder, salt, and black pepper. Add chicken breasts, ensuring they are evenly coated. Cover and refrigerate for at least 30 minutes.
  2. Prepare the Grill: Preheat your grill or grill pan to medium-high heat, around 400°F. Lightly oil the grill grates to prevent sticking.
  3. Grill the Chicken: Place the marinated chicken breasts on the grill. Cook for about 6-7 minutes per side until the internal temperature reaches 165°F. Remove from heat and let rest for 5 minutes.
  4. Assemble the Salad: In a large bowl, combine mixed greens, cherry tomatoes, cucumber, parsley, mint, basil, and red onion.
  5. Make the Dressing: Whisk together olive oil, lemon juice, Dijon mustard, honey, salt, and pepper until emulsified. Adjust taste as needed.
  6. Serve: Slice the grilled chicken thinly against the grain. Add it to the salad and drizzle the dressing over. Toss gently and serve immediately for the best freshness.

Pro Tips for Perfecting Your Salad

Here are some expert insights to elevate your cooking experience:

  • Let It Rest: Always allow your grilled chicken to rest before slicing; this retains its juices for a more tender result.
  • Flavor Infusion: Marinating for longer than 2 hours can enhance flavor. Consider marinating overnight for maximum taste.
  • Grill Marks: Ensure your grill is hot enough for beautiful grill marks, which add flavor and aesthetic appeal.
  • Mixing Greens: Use a variety of greens and textures for a salad that’s visually appealing and satisfying.
  • Season Well: Don’t skip seasoning; it’s key to bringing out the flavors in both the chicken and the vegetables.
  • Customize the Dressing: Adjust the acidity or sweetness of the dressing to suit your taste preferences.
  • Balance the Flavors: Aim for a balance of salty, sweet, sour, and bitter in your salad for a well-rounded flavor profile.
  • Make Ahead: You can prepare the chicken a day in advance to save time. Just grill it the next day before serving.

Common Mistakes and Troubleshooting

Even seasoned cooks can make mistakes. Here are some common pitfalls and how to avoid them:

  • Overcooking Chicken: Use a meat thermometer to ensure chicken reaches 165°F without drying out.
  • Underseasoned Salad: Always taste and adjust seasoning in both the chicken and dressing during preparation.
  • Soggy Salad: Add dressing just before serving to prevent greens from wilting.
  • Grilling at Low Heat: If the grill isn’t hot enough, the chicken can become rubbery. Preheat thoroughly.

Delicious Variations

Looking to switch things up? Here are a few variations to consider:

  • Greek Twist: Add feta cheese, Kalamata olives, and a splash of red wine vinegar to give your salad a Mediterranean flair.
  • Asian-Inspired: Incorporate sesame oil, soy sauce, and ginger in the dressing, and add shredded carrots and edamame to the salad.
  • Fruit Fusion: Toss in seasonal fruits like diced apples or berries for a sweet contrast to the savory chicken.
  • Nutty Crunch: Top with toasted nuts such as almonds or walnuts for added texture and healthy fats.

Storage and Make-Ahead Instructions

Want to prepare this salad in advance? Here’s how:

  • Refrigeration: Store the grilled chicken and salad components separately in airtight containers for up to 3 days.
  • Freezing: While the salad is best fresh, you can freeze cooked chicken for up to 2 months. Thaw before adding to the salad.
  • Make-ahead Dressing: The dressing can be made in advance and stored in the refrigerator for up to a week. Shake before using.

Nutrition Tips and Dietary Adaptations

This salad is packed with nutrients, making it a great choice for various diets:

  • Low-Carb Option: Omit the honey or maple syrup from the dressing to keep the carbs low.
  • Gluten-Free: This recipe is inherently gluten-free; just check any additional ingredients for gluten content.
  • Vegetarian/Vegan: Substitute chicken with chickpeas or grilled tofu, and use maple syrup in the dressing for a vegan-friendly option.

Equipment Recommendations

To create this delicious salad, having the right tools can make a difference:

  • Grill or Grill Pan: A high-quality grill ensures even cooking and beautiful grill marks.
  • Meat Thermometer: Essential for checking chicken doneness without cutting into it.
  • Mixing Bowls: A set of nesting bowls is perfect for marinating and mixing your salad components.
  • Whisk: Handy for emulsifying dressings smoothly.

Serving Suggestions

Wondering how to serve this salad? Here are some ideas:

  • As a Main Course: Serve the salad as a light lunch or dinner alongside crusty bread or a quinoa side dish.
  • In Wraps: Use the salad filling in whole-grain wraps or pita pockets for a delicious on-the-go meal.
  • As Meal Prep: Pack individual portions in containers for quick lunches throughout the week.

Frequently Asked Questions

Here are some common questions about the Tender Chicken Herb Salad:

  • Can I use leftovers for this salad? Absolutely! Leftover grilled chicken works perfectly, and you can mix in any leftover vegetables.
  • How can I make this salad spicier? Add red pepper flakes or a dash of hot sauce to the dressing for an extra kick.
  • What can I substitute for the Dijon mustard? You can use yellow mustard or omit it entirely if you prefer a milder taste.
  • How do I make this salad gluten-free? All the ingredients are naturally gluten-free; just ensure any additional ingredients are gluten-free.
  • Can I add cheese to this salad? Yes! Feta or goat cheese would be delicious additions.
  • How long will this salad last in the fridge? It can be stored for up to 3 days, but add dressing just before serving to maintain freshness.
  • Is this salad good for meal prep? Yes! Prepare the components in advance and store them separately for easy assembly throughout the week.
  • What’s the best way to serve leftovers? Enjoy them cold or reheat the chicken slightly before adding to the salad.

In conclusion, our Tender Chicken Herb Salad is not just a meal—it’s an experience that brings together health, flavor, and simplicity. Whether you’re cooking for yourself or sharing with loved ones, this recipe can be a delightful addition to your culinary repertoire. So, gather your ingredients, embrace the process, and enjoy every bite. Happy cooking!

Tender Chicken Herb Salad Recipe for Muscle Gain and Fat Burn

Prep Time 15 minutes
Cook Time 15 minutes
Total Time 30 minutes
Servings 4 servings
Calories 350
This vibrant salad combines grilled chicken with fresh herbs and greens, perfect for supporting muscle gain and fat burning.

Ingredients

Protein

  • 1.5 pounds boneless, skinless chicken breasts
  • 2 tablespoons olive oil
  • 1 teaspoon smoked paprika
  • 1 teaspoon garlic powder
  • 0.5 teaspoon salt
  • 0.5 teaspoon black pepper

Salad

  • 4 cups mixed greens (arugula, spinach, kale)
  • 1 cup cherry tomatoes (halved)
  • 0.5 cup cucumber (thinly sliced)
  • 0.5 cup fresh parsley (chopped)
  • 0.5 cup fresh mint leaves (chopped)
  • 0.25 cup fresh basil leaves (torn)
  • 0.25 cup red onion (thinly sliced)
  • 3 tablespoons extra virgin olive oil
  • 2 tablespoons lemon juice (freshly squeezed)
  • 1 teaspoon Dijon mustard
  • 1 teaspoon honey or maple syrup
  • 0.5 teaspoon salt
  • 0.25 teaspoon black pepper

Instructions 

  • Mix olive oil, spices, and marinate chicken for 30 minutes.
  • Grill chicken until cooked through, then rest and slice.
  • Combine greens, tomatoes, cucumber, herbs, and onion in a bowl.
  • Whisk dressing ingredients and toss with salad and sliced chicken.

Notes

For extra flavor, marinate chicken longer and serve immediately.
Calories: 350kcal
Cost: $15
Course: Salad
Keyword: chicken, Healthy, herbs

A Culinary Journey into Chicken Teriyaki Noodles

Welcome to a delightful exploration of Chicken Teriyaki Noodles—a dish that combines the essence of comfort food with the vibrant flavors of Asian cuisine. This simple yet satisfying recipe brings together tender chicken, fresh vegetables, and chewy noodles, creating a meal that is not only delicious but also quick to prepare. Whether you’re cooking for yourself or sharing with loved ones, these noodles are sure to become a favorite in your home kitchen.

In this guide, we’ll explore the numerous benefits of making Chicken Teriyaki Noodles, a detailed breakdown of ingredients, expert tips for success, and variations to keep your meals exciting. Let’s dive in and discover why this dish is a perfect choice for any night of the week!

Why You’ll Love This Recipe

  • Quick and Convenient: This recipe can be made in under 30 minutes, making it an ideal option for busy weeknights when time is tight.
  • Homemade Goodness: Prepare your own homemade teriyaki sauce for a healthier alternative to store-bought versions, avoiding preservatives and artificial ingredients.
  • Flavorful and Balanced: The combination of savory soy sauce, sweet brown sugar, and fresh garlic creates a perfect harmony of flavors that tantalize the taste buds.
  • Versatile Ingredients: Easily customize this dish with your choice of vegetables or proteins, ensuring it meets your dietary preferences and what you have on hand.
  • Nourishing and Satisfying: Packed with protein and fiber, this dish not only fills you up but also fuels your body with essential nutrients.

Ingredients Breakdown

To make these delicious Chicken Teriyaki Noodles, gather the following ingredients:

  • 1 lb chicken thighs: Cut into bite-sized pieces (substitute with chicken breast for a leaner option).
  • 12 oz udon noodles: Can be substituted with soba noodles, ramen noodles, or even spaghetti if that’s what you have on hand.
  • 2 cups broccoli florets: Fresh or frozen works well.
  • 1 medium onion: Thinly sliced to enhance flavor and cooking time.
  • 2 medium carrots: Julienned into thin matchsticks for even cooking.
  • 3 garlic cloves: Minced for a burst of aroma and flavor.
  • 1 tablespoon fresh ginger: Finely sliced or grated for warmth and subtle spice.
  • ½ cup soy sauce: Use low-sodium soy sauce to control the salt content.
  • ¼ cup brown sugar: Adds a hint of sweetness to balance the salty and savory flavors.
  • 1 tablespoon honey: Optional, for an additional layer of natural sweetness.
  • 2 tablespoons vegetable oil: For stir-frying; can substitute with canola or peanut oil for a higher smoke point.

How to Make Chicken Teriyaki Noodles

Close-up view of Chicken Teriyaki Noodles with vibrant vegetables and tender chicken pieces.

Follow these step-by-step instructions to create your Chicken Teriyaki Noodles:

  1. Marinate the Chicken: In a medium bowl, combine the soy sauce, brown sugar, and honey. Stir until the sugar dissolves, creating a thick marinade. Add the chicken pieces, ensuring they are well-coated. Let marinate for at least 10 minutes; longer if possible for more flavor.
  2. Cook the Chicken: Heat a large skillet or wok over medium-high heat and add 1 tablespoon of vegetable oil. Add the marinated chicken, cooking for 5-7 minutes until golden brown and cooked through. Remove from the skillet and set aside.
  3. Prepare the Noodles: Bring a large pot of water to a boil. Cook the udon noodles according to package instructions (typically 3-5 minutes for fresh noodles). Drain and rinse under cold water to stop cooking.
  4. Stir-Fry the Vegetables: In the same skillet, add the remaining oil over medium-high heat. Add minced garlic and ginger, cooking for 30 seconds. Add onions, carrots, and broccoli, stir-frying for 5-7 minutes until tender yet crisp.
  5. Combine Everything: Return the chicken to the skillet along with any reserved marinade. Toss in the cooked noodles, ensuring everything is well-mixed and heated through for about 2-3 minutes.
  6. Serve Immediately: Dish out your Chicken Teriyaki Noodles while hot. Garnish with sesame seeds or green onions if desired.

Pro Tips for Success

  • Optimal Marination: Allow the chicken to marinate for at least 30 minutes or even overnight for deeper flavor.
  • Use a Heavy Pan: A heavy-bottomed skillet ensures even cooking and prevents sticking.
  • Don’t Overcrowd the Pan: Cook in batches if necessary to ensure the chicken gets a nice sear.
  • Fresh Ingredients: Use fresh vegetables and aromatics for the best flavor; frozen vegetables can be used but may alter texture.
  • Adjust Sweetness: Feel free to adjust the sugar and honey levels based on your personal taste preferences.
  • Cook Noodles Al Dente: To prevent mushiness, cook noodles just until tender.
  • Experiment with Vegetables: Mix in bell peppers, snap peas, or zucchini for a colorful variation.
  • Storage Tips: Store leftovers in an airtight container in the fridge for up to 3 days.

Common Mistakes and Troubleshooting

Even the best of us can make mistakes in the kitchen! Here are some common pitfalls and how to avoid them:

  • Overcooking the Chicken: Keep an eye on the chicken to avoid dryness. Aim for an internal temperature of 165°F.
  • Underseasoning: Don’t skip the marinade; it’s crucial for flavor. Taste and adjust seasoning as you go.
  • Sticky Noodles: Rinse cooked noodles under cold water to prevent sticking, especially if they sit for too long.
  • Flavorless Sauce: If your teriyaki sauce is too bland, add more soy sauce or a dash of sesame oil for richness.

Variations on Chicken Teriyaki Noodles

Here are some fun ways to mix it up:

  • Vegetarian Option: Swap the chicken for tofu or tempeh for a plant-based alternative.
  • Seafood Twist: Use shrimp or salmon instead of chicken for a different flavor profile.
  • Spicy Kick: Add red pepper flakes or sriracha to the marinade for a spicy version.
  • Curry Infusion: Mix in a tablespoon of curry paste for a fusion of flavors.

Storage and Make-Ahead Instructions

This dish can be prepared ahead of time for even more convenience:

  • Make-Ahead Meal: Prepare the chicken and vegetables in advance, then stir-fry just before serving.
  • Storing Leftovers: Keep leftovers in a sealed container in the fridge for up to 3 days. Reheat gently on the stove.
  • Freezing Option: For longer storage, freeze the cooked noodles and chicken separately. They can be reheated in the microwave or on the stove.

Frequently Asked Questions

Here are some common questions about Chicken Teriyaki Noodles:

  • Can I use different noodles?: Absolutely! Soba, ramen, or even whole wheat pasta can work well.
  • Is this recipe gluten-free?: Yes, simply use gluten-free soy sauce and noodles.
  • How can I make it spicier?: Add fresh chili or a splash of hot sauce to the stir-fry.
  • How do I reheat leftovers?: The best way is to gently reheat in a skillet with a splash of water to prevent drying out.
  • Can I add more vegetables?: Yes! Feel free to include any seasonal vegetables you enjoy.
  • What is the best way to serve it?: Serve hot with a sprinkle of sesame seeds and green onions for added flavor.
  • How long does it take to make?: The entire process takes about 30 minutes from start to finish.
  • Can I use chicken without skin?: Yes, skinless chicken thighs or breasts can be used for a leaner option.

Nutritional Tips and Dietary Adaptations

This dish not only satisfies your taste buds but also provides essential nutrients. Here are some tips:

  • Balanced Meal: Pair with a side of steamed vegetables for added fiber and nutrition.
  • Protein Source: Chicken provides lean protein, while the vegetables contribute vitamins and minerals.
  • Healthy Fats: Use healthy oils like olive or avocado oil when stir-frying.

Essential Equipment Recommendations

Having the right tools can make your cooking experience smoother:

  • Wok or Non-Stick Skillet: Ideal for stir-frying to achieve that perfect sear.
  • Sharp Knife: For easy and precise cutting of vegetables and chicken.
  • Cutting Board: A sturdy board is essential for food prep.
  • Measuring Cups and Spoons: Ensure accuracy in your ingredients for the best flavor.

Serving Suggestions

Elevate your Chicken Teriyaki Noodles with these serving ideas:

  • Garnish: Top with sesame seeds, chopped green onions, or cilantro for freshness.
  • Accompaniments: Serve with a side of pickled ginger or a simple salad to balance flavors.
  • Presentation: Use a large bowl to serve family-style, allowing everyone to help themselves.

In conclusion, making Chicken Teriyaki Noodles is not just about creating a meal; it’s about enjoying the process and sharing the love of home-cooked food. By following this comprehensive guide, you’ll not only master the art of this dish but also inspire confidence in your cooking journey. Remember, every meal is an opportunity to explore flavors and create memories in the kitchen. Happy cooking!

Chicken Teriyaki Noodles

Prep Time 15 minutes
Cook Time 20 minutes
Total Time 35 minutes
Servings 4 servings
Calories 550
A flavorful and quick Asian-inspired dish combining tender chicken, fresh vegetables, and savory teriyaki noodles.

Ingredients

Protein

  • 1 lb chicken thighs, cut into bite-sized pieces (can substitute with chicken breast)
  • 12 oz udon noodles (or soba, ramen, or spaghetti)

Vegetables

  • 2 cups broccoli florets (fresh or frozen)
  • 1 medium onion, thinly sliced
  • 2 medium carrots, julienned (cut into thin matchsticks)
  • 3 cloves garlic, minced (fresh preferred)
  • 1 tablespoon fresh ginger, grated (adds warmth and spice)
  • 0.5 cup soy sauce (low-sodium optional)
  • 0.25 cup brown sugar (for sweetness)
  • 1 tablespoon honey (optional)
  • 2 tablespoons vegetable oil (for stir-frying)

Instructions 

  • Mix soy sauce, brown sugar, and honey; marinate chicken for at least 10 minutes.
  • Cook chicken in a hot skillet with 1 tbsp oil until golden and cooked through, then set aside.
  • Cook noodles according to package, drain, and rinse with cold water.
  • Stir-fry garlic, ginger, onions, carrots, and broccoli in the same skillet until tender.
  • Return chicken to skillet, add noodles, and toss with sauce; cook 2-3 minutes to combine flavors.

Notes

For extra flavor, garnish with sesame seeds or sliced green onions.
Calories: 550kcal
Cost: $15
Course: Main Course
Cuisine: Asian
Keyword: chicken, noodles, Teriyaki

Transform Your Dinner Routine with Chicken Spaghetti and Creamy Burrata

Welcome to a culinary adventure that will elevate your weeknight dinners! This Chicken Spaghetti with Burrata is a delightful mix of flavors and textures, featuring juicy chicken, sweet roasted cherry tomatoes, and the creamy richness of burrata cheese, all tossed in a luscious lemon butter garlic sauce. Not only is this dish simple to prepare, but it also brings a touch of elegance to your table, making it perfect for family gatherings or cozy evenings at home.

As you embark on this cooking journey, you’ll find that the combination of tender chicken, aromatic garlic, and the freshness of basil creates a comforting atmosphere in your kitchen. Whether you’re a novice or a seasoned cook, this recipe is designed to inspire you to embrace the joy of cooking with confidence and ease.

Why You’ll Love This Recipe

  • Quick & Easy: Ready in just 40 minutes, perfect for busy weeknights.
  • Flavorful Balance: The creamy burrata combined with the tangy lemon butter sauce creates a perfect harmony of flavors.
  • Versatile Ingredients: Utilizes simple ingredients that you likely already have at home.
  • Impressive Presentation: Serve this dish to impress guests with its beautiful colors and textures.
  • Comfort Food: A heartwarming dish that brings the family together around the dinner table.

Ingredient Breakdown and Substitutions

Here’s what you need to create this mouthwatering dish:

  • 10 oz cherry tomatoes: You can substitute with grape tomatoes or any other sweet variety.
  • 2 tablespoons olive oil: For sautéing; can be replaced with avocado oil for a different flavor.
  • 3 cloves garlic (minced): Fresh garlic is best, but garlic powder can be used in a pinch.
  • Salt and pepper: Essential for seasoning; adjust to taste.
  • 1.5 lb chicken breast: Boneless, skinless thighs can also provide more flavor and moisture.
  • 1/4 teaspoon salt: Enhances flavor; you can add more based on preference.
  • 2 teaspoons smoked paprika: Adds depth; feel free to use regular paprika or omit if you prefer.
  • 1 teaspoon Italian seasoning: A mixture of herbs that can be substituted with individual herbs like oregano or thyme.
  • 4 tablespoons butter: For a richer flavor, use unsalted butter or olive oil.
  • 8 oz spaghetti: Any pasta shape will work—try penne, fusilli, or gluten-free options.
  • 8 oz burrata cheese: Fresh mozzarella is a good substitute if burrata isn’t available.
  • 1/2 cup fresh basil (chopped): Dried basil can be used, but fresh provides a more vibrant flavor.
  • 1/3 cup pine nuts (lightly toasted): Almonds or walnuts can be used for a different nutty flavor.

Pro Tips for Success

A close-up view of Chicken Spaghetti topped with Burrata and lemon slices.
  • Prep Ahead: Chop your ingredients and prep your sauce ahead of time to make cooking even quicker.
  • Don’t Overcook Chicken: Cook until just done to keep it juicy—use a meat thermometer for precision (165°F).
  • Reserve Pasta Water: Save a cup of pasta water before draining; it can help emulsify your sauce.
  • Resting the Chicken: Allow the chicken to rest for a few minutes before slicing to retain juices.
  • Layer Flavors: Sauté garlic until fragrant before adding tomatoes; this enhances the overall flavor.
  • Toast Pine Nuts: Watch them closely! They can go from toasted to burnt in seconds.
  • Finish with Freshness: Add fresh basil at the end to maintain its vibrant flavor and color.
  • Serve Immediately: Enjoy the dish right away for the best creamy texture from the burrata.

Common Mistakes and Troubleshooting

Even the most seasoned cooks can make mistakes. Here are some common pitfalls and how to avoid them:

  • Overcooked Pasta: Cook until al dente as it will continue to cook in the sauce.
  • Dry Chicken: Avoid cooking on high heat for too long; medium heat is your friend.
  • Too Much Garlic: If the garlic flavor is overpowering, balance it with more lemon juice or butter.
  • Watery Sauce: If your sauce is too runny, simmer it longer to thicken up.
  • Cheese Not Melting: Let burrata sit at room temperature for 30 minutes before serving.

Flavor Variations

Feel free to experiment with the following variations to make this dish your own:

  • Spicy Kick: Add red pepper flakes or diced jalapeños for some heat.
  • Veggie Delight: Include spinach, arugula, or zucchini for added nutrition and color.
  • Herb Infusion: Experiment with different fresh herbs like parsley or cilantro.
  • Cheesy Goodness: Mix in some grated Parmesan for an extra cheesy flavor.

Storage and Make-Ahead Instructions

This dish can be made ahead of time and stored for later enjoyment:

  • Refrigerate: Store leftovers in an airtight container for up to 3 days.
  • Freezing: While not ideal due to the texture of burrata, you can freeze the chicken and sauce separately.
  • Reheating: Gently reheat on the stove with a splash of water or broth to revive the sauce.

Comprehensive FAQ

  • Can I use frozen chicken? Yes, just ensure it’s fully thawed before cooking.
  • What can I substitute for burrata? Fresh mozzarella or ricotta are great alternatives.
  • Is it necessary to use cherry tomatoes? No, any sweet tomato variety will work.
  • How can I make it gluten-free? Use gluten-free pasta options available on the market.
  • Can I add shrimp instead of chicken? Absolutely! Adjust cooking time accordingly.
  • How spicy is this dish? It is mild; adding spice is optional based on your taste.
  • What wine pairs well with this dish? A crisp Sauvignon Blanc complements the flavors nicely.
  • Can I prepare this in advance? Yes, prep the ingredients ahead and cook right before serving.

Nutritional Tips and Dietary Adaptations

This dish can be made to suit various dietary preferences:

  • Low-carb Option: Substitute pasta with spiralized zucchini or spaghetti squash.
  • Dairy-Free: Use a vegan cream cheese or omit cheese altogether.
  • Protein Boost: Add chickpeas or lentils for a vegetarian protein source.

Essential Equipment Recommendations

To make this recipe, you will need:

  • Large Pot: For boiling pasta.
  • Skillet: For sautéing ingredients and preparing the sauce.
  • Meat Thermometer: To check chicken doneness accurately.
  • Colander: For draining pasta.

Serving Suggestions

Making this dish visually appealing is just as important as the flavors. Consider the following tips:

  • Garnish with Fresh Basil: Add a sprinkle of fresh basil on top before serving for color.
  • Serve with a Side Salad: A light arugula salad pairs beautifully with the richness of the pasta.
  • Crusty Bread: Offer some warm, crusty bread for dipping into the sauce.

As you cook, remember to enjoy the process. Cooking is not just about the end result but the love and care you put into every step. So, take your time, savor the flavors, and create a meal that brings comfort and joy to your table.

Thank you for joining me on this culinary journey—happy cooking!

Chicken Spaghetti with Burrata and Lemon Butter Garlic Sauce

Prep Time 15 minutes
Cook Time 20 minutes
Total Time 35 minutes
Servings 4 servings
Calories 650
A flavorful pasta dish featuring tender chicken, fresh cherry tomatoes, creamy Burrata, and a zesty lemon butter garlic sauce for a delightful meal.

Ingredients

Vegetables and Aromatics

  • 10 oz cherry tomatoes (sliced in half)
  • 2 tablespoons olive oil
  • 3 cloves garlic (minced)
  • 1/4 teaspoon salt

Main Protein

  • 1.5 lb chicken breast (skinless, boneless)
  • 1/4 teaspoon salt
  • 2 teaspoons smoked paprika
  • 1 teaspoon Italian seasoning

Additional Oil

  • 2 tablespoons olive oil
  • 1/2 lemon lemon (preferably Meyer, thinly sliced)

Garlic and Butter

  • 4 cloves garlic
  • 4 tablespoons butter

Pasta

  • 8 oz spaghetti

Cheese

  • 8 oz Burrata cheese

Herbs and Nuts

  • 1/2 cup fresh basil (chopped)
  • 1/3 cup pine nuts (lightly toasted)

Instructions 

  • Cook spaghetti according to package instructions; drain and set aside.
  • Sauté garlic in olive oil, add cherry tomatoes, and cook until softened.
  • Cook chicken breasts with spices, then slice thinly.
  • Prepare lemon butter sauce by melting butter with garlic and lemon slices, then toss with cooked pasta, chicken, and sauce.
  • Top with Burrata, basil, and toasted pine nuts before serving.

Notes

Use fresh ingredients for best flavor and adjust seasoning to taste.
Calories: 650kcal
Cost: $15
Course: Main Course
Cuisine: Italian
Keyword: Burrata, chicken, Pasta

Experience the Joy of Cooking with Lemon Garlic Ground Beef Pasta

Welcome to a culinary adventure where simple ingredients combine to create a dish that is both vibrant and comforting. This Lemon Garlic Ground Beef Pasta recipe is designed for those busy weeknights or lazy Sundays when you crave something delightful yet straightforward. Featuring zesty lemon, savory garlic, and lean ground beef, this dish proves that cooking can be a joyous experience without the fuss. Let’s dive into the details and discover why this meal should be your next go-to.

Why You’ll Love This Recipe

Here are just a few reasons this recipe will quickly become a staple in your kitchen:

  • Quick and Easy Preparation: Ready in just 30 minutes, making it perfect for busy weeknights.
  • Bright and Flavorful: The combination of lemon and garlic creates a dish that is both refreshing and comforting.
  • Simple Ingredients: Most ingredients are pantry staples, so you won’t need to make a special trip to the store.
  • Versatile Meal: This pasta dish can be served on its own or paired with a side salad or bread for a complete meal.
  • Healthy Comfort Food: Using lean ground beef and fresh ingredients makes this a nourishing option that doesn’t compromise on flavor.

Ingredients Breakdown

Before we start cooking, let’s take a closer look at the ingredients you’ll need and some potential substitutions:

  • 1 pound 90/10 lean ground beef: Opt for ground turkey or chicken for a lighter option.
  • 12 ounces pasta of your choice: Spaghetti, penne, or linguine work best, but feel free to use gluten-free pasta for dietary needs.
  • 3 tablespoons extra virgin olive oil: Substitute with avocado oil if preferred.
  • 8 cloves garlic, minced: Adjust according to your taste; roasted garlic can be used for a milder flavor.
  • Zest of 2 medium lemons (about 2 tablespoons): Lemon zest adds brightness; if unavailable, use lime zest.
  • Juice of 2 medium lemons (about 4-5 tablespoons): Fresh juice is best, but bottled can be a quick substitute.
  • 1 teaspoon red pepper flakes: Adjust the amount based on your spice preference.
  • Salt and black pepper to taste: Essential for flavor enhancement.
  • 1/2 cup freshly grated Parmesan cheese: Nutritional yeast can be used for a dairy-free version.
  • Fresh parsley for garnish (optional): Adds a touch of color and freshness.

Step-by-Step Instructions

Close-up view of Lemon Garlic Ground Beef Pasta with garnished parsley.

Now that we have our ingredients ready, let’s dive into the cooking process.

  1. Bring a large pot of salted water to a boil and cook the pasta according to package directions, stopping 1 minute before it’s fully tender — it will finish cooking in the skillet with the beef.
  2. While the pasta cooks, heat the olive oil in a 12-inch skillet over medium-high heat for about 1 minute until it shimmers slightly.
  3. Add the minced garlic and red pepper flakes, stirring constantly for about 30 seconds until fragrant — don’t let it brown, or it turns bitter and acrid.
  4. Add the ground beef to the skillet, breaking it up with a wooden spoon as it cooks. Let it sit undisturbed for 2-3 minutes to allow it to brown properly instead of steaming.
  5. Once the beef is no longer pink (about 5-7 minutes total), add the lemon zest and stir to combine.
  6. Pour in the lemon juice and let it bubble for about 1 minute, scraping up any browned bits stuck to the bottom of the skillet.
  7. Drain the pasta, reserving about 1 cup of the pasta cooking water, and add it to the skillet with the beef.
  8. Toss everything together, adding pasta water a few tablespoons at a time until the sauce coats the noodles — aim for a glossy finish, not dry or soupy.
  9. Remove from heat, sprinkle with Parmesan, toss again, and taste for salt and pepper before serving.

Pro Tips for the Best Pasta

Enhance your cooking experience with these expert insights:

  • Choose the right pasta: Use pasta shapes that hold sauce well, like penne or fusilli, for better flavor integration.
  • Don’t overcook the pasta: Stop cooking when it’s al dente; it will continue to cook in the skillet.
  • Let the beef brown: Allowing the beef to brown properly adds depth and flavor to the dish.
  • Adjust acidity: If the dish is too tangy for your taste, balance it with a bit more olive oil or cheese.
  • Fresh herbs make a difference: Adding fresh herbs at the end brightens the flavors significantly.
  • Use reserved pasta water wisely: It’s starchy and helps to create a smooth sauce.
  • Cheese melting tip: For a creamier texture, add cheese off the heat to prevent it from clumping.
  • Garnish generously: Don’t skimp on the parsley; it adds both color and freshness.

Common Mistakes and Troubleshooting

Even simple recipes can present challenges. Here’s how to avoid common pitfalls:

  • Overcooking the garlic: If garlic becomes brown, it will taste bitter. Keep a close eye on it.
  • Too dry pasta: If your pasta ends up dry, add more reserved pasta water to achieve the desired consistency.
  • Insufficient seasoning: Always taste and adjust seasoning before serving; a pinch of salt can elevate the flavors.
  • Cheese clumping: If cheese clumps, ensure it’s added off the heat and stirred quickly.

Delicious Variations

Feel free to customize this recipe to suit your taste or dietary needs:

  • Vegetarian Option: Substitute ground beef with lentils or mushrooms for a hearty vegetarian alternative.
  • Spicy Version: Add more red pepper flakes or diced jalapeños for an extra kick.
  • Creamy Lemon Pasta: Mix in a splash of cream or a dollop of sour cream for a creamy texture.
  • Herbed Pasta: Incorporate fresh basil or oregano for additional herbal notes.

Storage and Make-Ahead Instructions

This dish can easily adapt to your meal-prepping needs:

  • Meal Prep: Prepare the beef and sauce in advance, then toss with freshly cooked pasta when ready to serve.
  • Storage: Store leftovers in an airtight container in the refrigerator for up to 3 days.
  • Reheating Tips: Reheat on the stovetop with a splash of reserved pasta water to restore the sauce’s consistency.

Comprehensive FAQs

Here are some common questions about making Lemon Garlic Ground Beef Pasta:

  • Can I use frozen ground beef? Yes, just thaw it completely before cooking.
  • What type of pasta works best? Spaghetti, penne, or linguine are great choices.
  • How can I make it dairy-free? Omit the cheese or use a dairy-free alternative.
  • Can I add vegetables? Absolutely! Spinach, zucchini, or bell peppers can be great additions.
  • Is it suitable for meal prep? Yes, it stores well and can be reheated easily.
  • How spicy is this dish? It’s mildly spicy; adjust the red pepper flakes to your preference.
  • Can I use other meats? Yes, ground turkey or chicken work well as alternatives.
  • What side dishes pair well? A simple green salad or garlic bread complements this pasta beautifully.

Nutrition Tips and Dietary Adaptations

To maintain a healthy balance while enjoying this dish:

  • Lean protein: Opt for lean ground beef to keep fat content lower.
  • Whole grain pasta: Consider whole grain or legume-based pasta for added fiber.
  • Portion control: Be mindful of portion sizes to enjoy without overindulging.
  • Fresh vegetables: Add more vegetables to increase nutrient density.

Essential Equipment Recommendations

Here’s what you’ll need to create this delicious meal:

  • Large pot: For boiling pasta.
  • 12-inch skillet: Ideal for cooking the beef and combining ingredients.
  • Wooden spoon: Perfect for stirring and breaking up the beef.
  • Measuring cups and spoons: Essential for accurate ingredient measurements.

Serving Suggestions

To elevate your dining experience:

  • Garnish with fresh parsley: Adds a pop of color and freshness.
  • Serve with lemon wedges: For an extra burst of citrus flavor.
  • Pair with a crisp white wine: A chilled Sauvignon Blanc complements the dish beautifully.
  • Enjoy with crusty bread: Perfect for soaking up any remaining sauce.

In conclusion, this Lemon Garlic Ground Beef Pasta is more than just a meal; it’s an experience that brings warmth and comfort to your table. With its simplicity and delightful flavors, it’s a recipe you can confidently share with family and friends. So gather your ingredients, embrace the joy of cooking, and savor every bite. Happy cooking!

Lemon Garlic Ground Beef Pasta

Prep Time 10 minutes
Cook Time 15 minutes
Total Time 25 minutes
Servings 4 servings
Calories 650
A quick and flavorful pasta dish featuring tender ground beef, fresh lemon, and garlic, perfect for a satisfying weeknight dinner.

Ingredients

Meat

  • 1 pound 90/10 lean ground beef

Pasta

  • 12 ounces pasta of your choice (spaghetti, penne, or linguine)

Oil

  • 3 tablespoons extra virgin olive oil

Garlic

  • 8 cloves garlic, minced

Lemon Zest

  • 2 medium lemons zest of lemons (about 2 tablespoons)

Lemon Juice

  • 2 medium lemons juice of lemons (about 4-5 tablespoons)

Red Pepper Flakes

  • 1 teaspoon red pepper flakes

Salt and Pepper

  • to taste Salt and black pepper

Parmesan Cheese

  • 1/2 cup freshly grated Parmesan cheese

Parsley

  • for garnish Fresh parsley (optional)

Instructions 

  • Cook pasta in salted water until 1 minute before tender, then drain and set aside.
  • Heat olive oil in a skillet over medium-high heat, add garlic and red pepper flakes, cook 30 seconds.
  • Add ground beef, brown for 5-7 minutes, then stir in lemon zest.
  • Pour in lemon juice, cook 1 minute, then add pasta and some reserved water, toss to coat.
  • Remove from heat, sprinkle with Parmesan, toss again, and season with salt and pepper before serving.

Notes

For extra flavor, garnish with chopped parsley before serving.
Calories: 650kcal
Cost: $15
Course: Main Course
Cuisine: American
Keyword: Beef, lemon, Pasta