Author

Noah

Browsing

Discover the Comfort of Nourishing Vegan Pumpkin Pie Bars

Welcome to a delightful journey of flavors and comfort with our Nourishing Vegan Pumpkin Pie Bars. These bars encapsulate the warm essence of autumn and the joy of sharing sweet treats with loved ones. Using wholesome ingredients, they are not only easy to prepare but also cater to a variety of dietary preferences. Let’s dive into the details of this recipe that’s perfect for any season!

Why You’ll Love This Recipe

These Vegan Pumpkin Pie Bars are more than just a dessert; they come with a range of benefits that make them a staple in your kitchen:

  • Wholesome Ingredients: Made with almond flour and pumpkin puree, these bars offer a nutritious twist to traditional pumpkin pie.
  • Dairy-Free Delight: Perfectly crafted for those who are lactose intolerant or following a vegan lifestyle.
  • Easy to Make: With simple steps, you can whip up this recipe in under an hour, making it great for busy days.
  • Perfect for Any Occasion: Whether it’s a cozy family gathering or a festive celebration, these bars fit right in.
  • Customizable Flavor: With various spice options, you can tailor the flavor to your preference, enhancing your culinary creativity.

Ingredients Breakdown

Understanding your ingredients is key to mastering this recipe. Here’s a detailed breakdown:

  • Almond Flour: A gluten-free option that adds a nutty flavor while keeping the bars tender.
  • All-Purpose Flour: Provides structure. If you prefer a gluten-free version, substitute with more almond flour or a gluten-free blend.
  • Salt: Enhances the overall flavor, balancing the sweetness of the filling.
  • Cinnamon: Adds warmth and depth to the pumpkin flavor.
  • Brown Sugar or Coconut Sugar: Sweetens the crust; coconut sugar is a lower glycemic option.
  • Oil or Vegan Butter: Keeps the crust moist. Opt for coconut oil for a subtle coconut flavor.
  • Pumpkin Puree: The star ingredient; ensure you use pure pumpkin puree, not pumpkin pie filling.
  • Cashews: Soaked for creaminess in the filling; can be swapped with silken tofu for a nut-free version.
  • Maple Syrup: Natural sweetener that pairs beautifully with pumpkin.
  • Cornstarch or Tapioca Starch: Acts as a thickener, ensuring a smooth filling.
  • Vanilla Extract: Adds a lovely aromatic flavor.
  • Pumpkin Pie Spice: A blend of spices that enhance the pumpkin flavor.

Making the Bars: Step-by-Step Instructions

Close-up of vegan pumpkin pie bars with a golden crust and creamy filling.

Follow these easy steps to create your Vegan Pumpkin Pie Bars:

  1. Make the Crust: In a bowl, mix almond flour, all-purpose flour, salt, cinnamon, and brown sugar until combined.
  2. Add the Fat: Incorporate oil or melted vegan butter until the mixture resembles crumbs and is slightly sticky. If too crumbly, add a few drops of non-dairy milk.
  3. Prepare the Pan: Transfer the mixture into a parchment-lined 9×5 inch loaf pan, pressing it evenly with a spatula.
  4. Pre-Bake: Bake at 350°F (175°C) for 10 minutes while you prepare the pumpkin layer.
  5. Blend the Filling: In a blender, combine pumpkin puree, soaked cashews, maple syrup, cornstarch, salt, vanilla extract, and pumpkin pie spice. Blend until smooth, adding non-dairy milk as needed.
  6. Layer the Filling: Pour the blended mixture into the pre-baked crust, smoothing it out. Optionally, top with cinnamon sugar by mixing 2 tsp sugar and 1/2 tsp cinnamon.
  7. Final Bake: Return the pan to the oven and bake for 35-45 minutes, or until the center is set and not jiggly.
  8. Cool and Chill: Remove from the oven, let it cool, then refrigerate for at least an hour before slicing to serve.

Pro Tips for Perfect Pumpkin Pie Bars

To ensure your Vegan Pumpkin Pie Bars are a hit, consider these expert insights:

  • Check Your Pumpkin: Use fresh pumpkin puree for the best flavor, or canned puree without additives.
  • Soak Cashews Adequately: Soaking for at least 20 minutes allows them to blend smoothly, ensuring a creamy filling.
  • Monitor Baking Time: Ovens vary; start checking for doneness at the lower baking time.
  • Cool Completely: Allow the bars to cool completely before slicing to prevent them from crumbling.
  • Experiment with Spices: Feel free to add nutmeg or ginger for an extra flavor kick.
  • Use Parchment Paper: Lining the pan with parchment makes removal easier.
  • Slice with Care: A sharp knife yields cleaner slices; warm bars can stick.
  • Store Properly: Keep bars in an airtight container to maintain freshness.

Common Mistakes and Troubleshooting

Even the best recipes can have hiccups. Here’s how to troubleshoot common issues:

  • Crust Too Crumbly: If your crust is too crumbly, adding a small amount of non-dairy milk can help bind it.
  • Filling Too Runny: If the filling doesn’t set, it may need more cornstarch or tapioca starch. Ensure the cashews are well blended.
  • Bars Falling Apart: Ensure the bars are completely cooled before slicing to prevent crumbling.
  • Flavor Lacking Depth: Adding a touch more spice or sweetener can enhance the overall flavor profile.

Variations to Try

Make this recipe your own with these delicious variations:

  • Chocolate Chip Version: Fold in dairy-free chocolate chips into the filling for a sweet surprise.
  • Nutty Crust: Add ground walnuts or pecans to the crust for an extra crunch and flavor.
  • Maple Glaze: Drizzle with a maple glaze for added sweetness and visual appeal.
  • Fruity Twist: Add a layer of your favorite jam or fruit puree under the pumpkin layer for a burst of flavor.

Storage and Make-Ahead Instructions

Your Vegan Pumpkin Pie Bars can be easily stored and made ahead:

  • Refrigeration: Store in an airtight container in the refrigerator for up to 5 days.
  • Freezing: You can freeze the bars for up to 3 months. Just ensure they are well-wrapped.
  • Make-Ahead: Make the bars a day in advance; they taste even better the next day as the flavors meld.

Frequently Asked Questions

Here are some common questions and answers regarding this recipe:

  • Can I use pumpkin pie filling instead of puree? No, pumpkin pie filling contains added sugars and spices that may alter the recipe.
  • Is there a nut-free option? Yes, replace cashews with silken tofu for a creamy texture without nuts.
  • Can I use a different sweetener? Absolutely, feel free to use agave syrup or honey if you’re not vegan.
  • What if I don’t have a loaf pan? You can use an 8×8 inch square baking dish as an alternative.
  • How do I know when they’re done? The center should not jiggle when gently shaken, and a toothpick should come out clean.
  • Can I add more spices? Yes, customize with nutmeg, ginger, or cloves for a unique flavor.
  • How do I serve them? These bars are delicious on their own, but you can serve with a dollop of coconut whipped cream or a scoop of vegan ice cream.
  • Are these bars gluten-free? Yes, if you use gluten-free all-purpose flour or increase the almond flour.

Nourishing Your Culinary Journey

In conclusion, these Nourishing Vegan Pumpkin Pie Bars are a wonderful addition to your recipe repertoire. With their comforting flavors and easy preparation, they invite you to slow down and savor the joy of home cooking. Remember, cooking is not just about the food; it’s about the experience, the love, and the memories you create along the way. So gather your ingredients, embrace the process, and enjoy every moment in the kitchen!

Vegan Pumpkin Pie Bars

Prep Time 15 minutes
Cook Time 45 minutes
Total Time 1 hour
Servings 8 bars
Calories 250
Delight in these creamy, spiced vegan pumpkin pie bars with a crunchy crust, perfect for fall gatherings or a cozy treat.

Ingredients

Crust

  • 1/2 cup almond flour
  • 1/2 cup all-purpose flour
  • 1/4 tsp salt
  • 1/4 tsp cinnamon
  • 2.5 tbsp brown sugar or coconut sugar
  • 2.5-3 tbsp oil (or melted vegan butter)

Pumpkin Pie Layer

  • 1 cup pumpkin puree (not pumpkin pie mix)
  • 1/3 cup cashews (soaked in hot water for at least 20 minutes)
  • 1/4 cup maple syrup
  • 2 tsp cornstarch (or tapioca starch)
  • 1/8 tsp salt
  • 1/2 tsp vanilla extract
  • 1 tsp pumpkin pie spice

Instructions 

  • Mix almond flour, all-purpose flour, salt, cinnamon, and sugar in a bowl.
  • Add oil and mix until crumbly; press into a parchment-lined 9x5 inch pan.
  • Bake crust at 350°F (175°C) for 10 minutes, then prepare filling.
  • Blend pumpkin, soaked cashews, maple syrup, cornstarch, salt, vanilla, and spices until smooth.
  • Pour filling over crust, bake at 350°F (175°C) for 35-45 minutes until set, then cool and chill before slicing.

Notes

Chill the bars for at least an hour before serving for best texture.
Calories: 250kcal
Cost: $15
Course: Dessert
Cuisine: vegan
Keyword: pumpkin

Discover the Comfort of Butternut Squash Mac and Cheese

Welcome to your new favorite dish! This butternut squash mac and cheese recipe is a delightful blend of creamy comfort and nutritious goodness. With its rich flavors and velvety texture, this dish not only satisfies your cravings but also adds a touch of warmth to any meal. Let’s dive into why this recipe is a must-try!

Why You’ll Love This Recipe

  • Healthier Comfort Food: Incorporating butternut squash into traditional mac and cheese adds a creamy texture while boosting vitamins A and C.
  • Easy to Prepare: With simple ingredients and straightforward steps, you’ll have a delicious meal on the table without fuss.
  • Rich and Flavorful: The combination of sharp cheddar and mozzarella creates a depth of flavor that elevates this dish beyond basic mac and cheese.
  • Versatile Dish: Perfect as a side or a main dish, this recipe can be customized with various add-ins to suit your taste.
  • Perfect for Meal Prep: Make a big batch and enjoy it throughout the week, whether reheated for lunch or served fresh for dinner.

Ingredient Breakdown

Let’s take a closer look at the ingredients for this creamy butternut squash mac and cheese:

  • 2 tablespoons butter: For sautéing and adding richness.
  • 10 sage leaves: Fresh sage enhances the earthy flavor of the squash.
  • 1 medium shallot (or onion, diced): Adds sweetness and depth.
  • 4 cloves garlic (minced): For aromatic goodness.
  • 5 thyme sprigs: Fresh thyme complements the dish beautifully.
  • Salt and ground pepper to taste: Essential for seasoning.
  • 1 medium (15 oz) butternut squash, diced: The star ingredient that gives the dish its creamy base.
  • 1 lb shells pasta: Shells hold the cheese sauce well; feel free to substitute with your favorite pasta.
  • 1 ½ cup vegetable stock: For a flavorful cooking liquid.
  • 1 cup whole milk: Adds creaminess to the sauce.
  • 1 ½ cup good quality sharp cheddar: A mix of 1 cup cheddar and ½ cup mozzarella cheese for a perfect melt.

Making Your Butternut Squash Mac and Cheese

Close-up view of creamy butternut squash mac and cheese with shell pasta and herbs.

Follow these simple steps to create your creamy dish:

  • Prep the Squash: Begin by peeling, seeding, and dicing the butternut squash into small cubes.
  • Sauté Aromatics: In a large pot, melt the butter over medium heat. Add the sage leaves, shallots, and garlic, cooking until fragrant.
  • Add Squash: Stir in the diced butternut squash and thyme. Season with salt and pepper, then cook until the squash starts to soften.
  • Cook the Pasta: In a separate pot, bring salted water to a boil and cook the pasta until al dente. Reserve some pasta water before draining.
  • Create the Sauce: Add vegetable stock and milk to the squash mixture, then simmer until the squash is tender. Blend until smooth for a creamy sauce.
  • Combine: Stir in the cooked pasta and cheeses, mixing until well incorporated. Adjust seasoning as needed.
  • Serve Warm: Enjoy your butternut squash mac and cheese straight from the pot, or transfer to a baking dish and broil for a crispy top.

Pro Tips for the Best Mac and Cheese

  • Grate Your Cheese: Always grate your own cheese for the best meltability. Pre-shredded cheese often contains anti-caking agents that can affect texture.
  • Don’t Overcook the Pasta: Since the pasta will continue to cook in the sauce, make sure to undercook it slightly.
  • Experiment with Cheeses: Feel free to mix in other cheeses like gouda or fontina for a unique flavor profile.
  • Use Fresh Herbs: Fresh herbs like parsley or basil can brighten the dish and add freshness.
  • Season as You Go: Taste and adjust your seasoning throughout the cooking process for the best flavor.
  • Make It Vegan: Substitute the cheese with vegan cheese and use plant-based milk for a dairy-free version.
  • Thicken with Flour: If your sauce is too thin, create a roux with flour and butter before adding the liquids.
  • Top with Breadcrumbs: For added texture, sprinkle breadcrumbs on top before baking or broiling.

Common Mistakes and Troubleshooting

Even the best chefs encounter hiccups in the kitchen. Here are some common mistakes to avoid:

  • Too Watery Sauce: If your sauce is too runny, simmer it longer to reduce the liquid or add a cornstarch slurry to thicken.
  • Grainy Texture: This can happen if the cheese is added too quickly or at too high a temperature. Always add cheese off the heat for a smooth sauce.
  • Overly Salty: Be cautious when adding salt, especially if your stock or cheese is already salty. Taste before adding extra seasoning.
  • Undercooked Pasta: Ensure your pasta is cooked just right; it should be al dente before mixing with the sauce.

Variations to Try

Get creative with your butternut squash mac and cheese! Here are some delicious variations:

  • Spicy Kick: Add crushed red pepper flakes or diced jalapeños for some heat.
  • Meaty Addition: Stir in cooked bacon or pancetta for a smoky flavor.
  • Veggie Boost: Throw in some sautéed spinach or kale for added nutrients.
  • Gluten-Free Option: Swap out traditional pasta for gluten-free pasta or spiralized veggies like zucchini.

Storage and Make-Ahead Instructions

This dish is perfect for meal prep! Here’s how to store and reheat:

  • Refrigeration: Store leftovers in an airtight container in the fridge for up to 4 days.
  • Freezing: You can freeze the mac and cheese for up to 3 months. Thaw overnight in the fridge before reheating.
  • Reheating: Gently reheat in the microwave or on the stovetop, adding a splash of milk to restore creaminess.
  • Make-Ahead: Prepare the dish up to the baking stage and keep it covered in the fridge for up to 2 days. Bake when ready to serve.

Frequently Asked Questions

Here are some common queries about butternut squash mac and cheese:

  • Can I use frozen butternut squash? Yes, frozen squash works well! Just ensure it’s thawed and drained before using.
  • What pasta works best? Shells, elbow macaroni, or cavatappi are great choices as they hold the sauce well.
  • How can I make this recipe gluten-free? Use gluten-free pasta and ensure your stock is also gluten-free.
  • Can I add protein to this dish? Absolutely! Cooked chicken, turkey, or even chickpeas can be added for a heartier meal.
  • How do I make it spicier? Include spices like cayenne pepper or add some hot sauce to the cheese sauce.
  • Is there a dairy-free version? Yes! Use nut milk and dairy-free cheese alternatives to create a vegan-friendly dish.
  • Can I make it in advance? Yes, you can prepare this dish ahead of time and store it in the fridge before baking.
  • How do I store leftovers? Store in an airtight container in the fridge for up to 4 days or freeze for longer storage.

Nutrition Tips and Dietary Adaptations

Cooking with health in mind? Here are some adaptations:

  • Lower Calorie: Use low-fat milk and reduced-fat cheese to cut down on calories.
  • Boost Fiber: Mix in cooked lentils or beans for an added fiber boost.
  • Vegan-Friendly: Use plant-based milk and cheese to cater to a vegan diet.

Essential Equipment

Make sure you have these kitchen essentials:

  • Large Pot: For cooking pasta and sautéing vegetables.
  • Blender or Food Processor: To blend the squash into a creamy sauce.
  • Baking Dish: If you’re planning to bake the mac and cheese for a crispy top.
  • Measuring Cups and Spoons: For accurate ingredient measurements.

Serving Suggestions

This butternut squash mac and cheese pairs wonderfully with:

  • Simple Green Salad: A fresh salad balances the richness of the dish.
  • Garlic Bread: Crunchy garlic bread makes for a comforting side.
  • Roasted Veggies: Add some seasonal roasted vegetables for extra nutrition.
  • Wine Pairing: A light white wine, such as Sauvignon Blanc, complements the flavors nicely.

In conclusion, this creamy butternut squash mac and cheese is not just a meal; it’s a warm embrace on a plate. I hope you find joy in preparing and sharing it with your loved ones. Don’t forget to experiment and make it your own—happy cooking!

📋Creamy Butternut Squash Mac and Cheese

Prep Time 10 minutes
Cook Time 30 minutes
Total Time 40 minutes
Servings 4 servings
Calories 520
A comforting and flavorful pasta dish featuring roasted butternut squash and sharp cheddar, perfect for cozy dinners.

Ingredients

Dairy and Herbs

  • 2 tablespoons butter
  • 10 sage leaves sage leaves
  • 1 medium shallots (or onion, diced)
  • 4 cloves garlic (minced)
  • 5 thyme sprigs thyme sprigs

Vegetables

  • 1 medium medium butternut squash, diced
  • 1 lb shells pasta
  • 1 ½ cups vegetable stock
  • 1 cup whole milk
  • 1 ½ cups sharp cheddar (mix of cheddar and mozzarella)

Instructions 

  • Roast the diced butternut squash at 400°F (200°C) for 20 minutes until tender.
  • Cook the pasta according to package instructions; drain and set aside.
  • In a large pan, melt butter and sauté shallots, garlic, sage, and thyme until fragrant.
  • Add roasted squash, vegetable stock, and milk; simmer for 5 minutes. Blend until smooth.
  • Stir in cheese until melted, then combine with cooked pasta. Serve warm.

Notes

For extra creaminess, add a splash of heavy cream before serving.
Calories: 520kcal
Cost: $15
Course: Main Course
Cuisine: American
Keyword: butternut squash

Discover the Joy of Heartwarming Stovetop Chicken Chili

Welcome to a cozy culinary journey! This Stovetop Chicken Chili recipe is perfect for those busy evenings when you crave something warm, nourishing, and effortlessly delicious. With tender chicken, hearty beans, and a medley of spices, this chili is not just a meal; it’s a comforting embrace in a bowl. In just about 30 minutes, you can whip up this delightful dish that’s sure to become a family favorite.

Why You’ll Love This Recipe

Whether you’re an experienced cook or just starting out, this recipe offers something for everyone. Here are five reasons why you’ll adore making this chicken chili:

  • Quick and Easy: In just 30 minutes, you can create a delicious meal that requires minimal effort.
  • Hearty Ingredients: Packed with protein from chicken and fiber from beans, this chili is both filling and nutritious.
  • Customizable: You can easily adjust the spice levels and ingredients to cater to your taste preferences.
  • Perfect for Meal Prep: This chili stores well, making it an excellent option for make-ahead meals or leftovers.
  • Family-Friendly: With its balanced flavors, this dish is sure to please even the pickiest eaters.

Ingredient Breakdown and Substitutions

Let’s explore the ingredients you’ll need for this comforting dish and some easy substitutions you can make.

  • Chicken Breast: 1 lb. cut into 1/2″ cubes. You can use thighs for a richer flavor or even rotisserie chicken for quicker prep.
  • Onion: 1 small onion, chopped. Shallots or leeks can also work well here.
  • Jalapeño: 1 chopped for heat. If you prefer less spice, omit this or use a milder pepper.
  • Garlic: 2 cloves, minced. Fresh garlic provides the best flavor, but garlic powder can be a quick alternative.
  • Beans: 1 can each of black beans and kidney beans, drained. Feel free to use any beans you have on hand.
  • Diced Tomatoes: 1 can (15 oz.) adds moisture. You can use fresh tomatoes if preferred.
  • Tomato Sauce: 1 can (8 oz.) enriches the chili’s texture. Substitute with tomato puree for a smoother consistency.
  • Frozen Corn: 1/3 cup for sweetness and texture. You can use fresh corn or omit it entirely.
  • Spices: Salt, black pepper, cumin, chili powder, and cayenne pepper for depth of flavor. Adjust the spices to your liking.
  • Toppings: Sour cream and shredded cheese are optional but recommended for extra creaminess.

How to Make Stovetop Chicken Chili

A close-up side view of a bowl of Stovetop Chicken Chili with visible chicken chunks and toppings.

Follow these simple steps to create your heartwarming chicken chili:

  1. Heat 1 tbsp of oil in a large saucepan over medium-high heat. Add the chopped chicken, salt, and pepper. Cook for about 3-5 minutes, stirring halfway through, until the chicken is cooked through.
  2. Add the chopped onion and jalapeño. Sauté for another 3-5 minutes until the veggies are tender.
  3. Stir in the remaining ingredients: black beans, kidney beans, diced tomatoes, tomato sauce, corn, cumin, chili powder, and cayenne pepper. Mix well and bring the chili to a low simmer.
  4. Reduce the heat and let it cook on low for 30 minutes, stirring occasionally. This allows the flavors to meld beautifully.
  5. Remove from heat and let cool slightly before serving. Top with sour cream, shredded cheese, and fresh green onions if desired. Enjoy your delicious creation!

Pro Tips for the Best Chili

To elevate your stovetop chicken chili, consider these expert insights:

  • Use Fresh Ingredients: Fresh herbs and spices enhance the overall flavor profile of your chili.
  • Adjust the Spice: If you like it hot, add more cayenne or even a dash of hot sauce to kick things up a notch.
  • Let It Rest: Allowing the chili to sit for a few minutes before serving helps the flavors deepen.
  • Garnish Wisely: Fresh cilantro, avocado, or lime wedges can brighten up the dish.
  • Batch Cooking: Make a double batch to freeze for future meals—chili tastes even better the next day!
  • Slow Cooker Option: For an easy hands-off approach, transfer all ingredients to a slow cooker and let it cook on low for 6-8 hours.
  • Experiment with Proteins: Try using turkey, beef, or even a plant-based protein for a different twist.
  • Texture Matters: If you prefer a thicker chili, mash some of the beans against the pot to create a creamy consistency.

Common Mistakes and Troubleshooting

Even the best cooks can face challenges. Here are some common mistakes and how to fix them:

  • Chili Too Watery: If your chili ends up too thin, let it simmer uncovered for a bit longer to evaporate excess liquid.
  • Not Enough Flavor: Always taste and adjust seasoning towards the end. A pinch of salt or a dash of vinegar can bring the flavors to life.
  • Overcooked Chicken: Ensure your chicken is just cooked through; overcooking can lead to dry, tough pieces.
  • Too Spicy: If your chili is too hot, add a dollop of sour cream or a bit of sugar to balance the heat.
  • Boring Texture: Incorporate different beans or vegetables to add layers and variety to your chili.

Variations and Creative Twists

Don’t hesitate to make this recipe your own! Here are some fun variations to try:

  • White Chicken Chili: Substitute the traditional beans with white beans and use green chiles for a milder flavor.
  • Vegetarian Chili: Replace chicken with extra beans, lentils, or quinoa for a hearty meatless option.
  • Smoky Chili: Add a touch of smoked paprika or chipotle peppers for a deeper, smoky flavor.
  • Tex-Mex Style: Throw in some corn tortillas or tortilla chips for added crunch and flavor.

Storage and Make-Ahead Instructions

Planning to enjoy this chili later? Here’s how to store and reheat:

  • Refrigeration: Store leftovers in an airtight container in the fridge for up to 3 days.
  • Freezing: Freeze chili in individual portions for up to 3 months. Thaw overnight in the fridge before reheating.
  • Reheating: Warm chili on the stovetop over medium heat until heated through, adding a splash of water if necessary.
  • Make-Ahead: Prepare the chili up to a day in advance, letting the flavors develop even further.

Comprehensive FAQ

Here are some frequently asked questions about this delicious stovetop chicken chili:

  • Can I use frozen chicken? Yes, you can add frozen chicken directly to the pot. Just ensure it cooks thoroughly.
  • What can I serve with chicken chili? Serve with garlic bread, cornbread, or over rice for a filling meal.
  • Can I make this chili in a slow cooker? Absolutely! Assemble the ingredients in a slow cooker and let it cook on low.
  • How spicy is this chili? The spice level can be adjusted. Feel free to add or reduce the jalapeño and cayenne pepper.
  • Can I use canned beans? Yes, canned beans are perfect for this recipe! Just be sure to rinse and drain them well.
  • How do I make it vegan? Replace chicken with chickpeas or lentils and use vegetable broth instead of chicken broth.
  • What toppings do you recommend? Sour cream, shredded cheese, fresh cilantro, and diced avocado are all great options!
  • Is this recipe gluten-free? Yes, all ingredients are naturally gluten-free, making it a great option for those with dietary restrictions.

Nutritional Tips and Dietary Adaptations

This stovetop chicken chili can easily fit various dietary needs:

  • Low-Carb: Opt for more chicken and fewer beans, or skip the beans entirely.
  • High-Protein: Increase the amount of chicken or add additional legumes like lentils.
  • Low-Fat: Use skinless chicken breast and omit the cheese and sour cream toppings.
  • Vegetarian/Vegan: Replace chicken with plant-based proteins and enjoy the same comforting flavors.

Equipment Recommendations

To make your cooking experience smoother, here are some essential tools you’ll need:

  • Large Saucepan: A sturdy pot is essential for cooking the chili evenly.
  • Cutting Board and Knives: Keep your prep work efficient with a good cutting board and sharp knives.
  • Measuring Cups and Spoons: Accurate measurements ensure that your chili comes out perfectly every time.
  • Wooden Spoon: Handy for stirring and preventing sticking as you simmer your chili.

Serving Suggestions

To make your meal even more delightful, consider these serving ideas:

  • Accompany with Bread: Serve with crusty garlic bread or cornbread to soak up every delicious bite.
  • Add Freshness: Top with a sprinkle of fresh herbs like cilantro or parsley for a vibrant touch.
  • Offer Toppings: Create a toppings bar with sour cream, shredded cheese, diced avocado, and jalapeños for guests to customize their bowls.

As you embark on this culinary adventure, remember that cooking should be a joyful experience. Embrace the process, savor the flavors, and most importantly, enjoy every bite of your heartwarming stovetop chicken chili. Happy cooking!

Stovetop Chicken Chili

Prep Time 10 minutes
Cook Time 30 minutes
Total Time 40 minutes
Servings 4 servings
Calories 350
A hearty and flavorful chicken chili perfect for a quick weeknight dinner. Loaded with beans, vegetables, and spices, it's both satisfying and easy to make.

Ingredients

Protein

  • 1 lb chicken breast (cut into 1/2" cubes)

Vegetables

  • 1 small onion (chopped)
  • 1 jalapeno jalapeño (chopped)

Garlic

  • 2 cloves garlic cloves (minced)

Canned Goods

  • 15 oz black beans (drained)
  • 15 oz kidney beans (drained)
  • 15 oz diced tomatoes
  • 8 oz tomato sauce

Frozen

  • 1/3 cup frozen corn

Spices & Seasonings

  • 1/4 tsp salt
  • 1/4 tsp black pepper
  • 1/2 tsp cumin
  • 1 tbsp chili powder
  • 1/4 tsp cayenne pepper

Optional toppings

  • sour cream (optional)
  • shredded cheese (optional)

Instructions 

  • Heat 1 tbsp oil in a large saucepan over medium-high heat. Add chicken, salt, and pepper; cook 3-5 minutes, stirring.
  • Add onion and jalapeño; cook 3-5 minutes until tender and chicken is cooked through.
  • Add remaining ingredients; simmer on low for 30 minutes, stirring halfway.
  • Remove from heat, let cool slightly, and serve with optional toppings.

Notes

For extra flavor, garnish with fresh cilantro or green onions.
Calories: 350kcal
Cost: $15
Course: Main Course
Cuisine: American
Keyword: chicken, Chili, easy

Welcome to a world of vibrant flavors and delightful textures with this Easy Candy Corn Fudge recipe! Perfect for fall celebrations and Halloween gatherings, this treat combines the creamy richness of white chocolate with the playful colors of candy corn. In this guide, you’ll not only learn how to make this delicious fudge but also discover tips, variations, and everything you need to enjoy the cooking process at your own pace.

Let’s dive in and uncover the joy of creating this festive dessert that is sure to bring smiles to friends and family alike!

Why You’ll Love This Recipe

  • Quick and Easy: This fudge can be prepared in under 30 minutes, making it a perfect last-minute treat for any occasion.
  • No-Bake Delight: Since this fudge doesn’t require baking, you can create it without worrying about your oven’s temperature or timing.
  • Customizable Flavors: The simple base allows you to experiment with different extracts and colors, giving you the freedom to tailor it to your taste.
  • Perfect for Sharing: Cut into small squares, this fudge is ideal for parties or as homemade gifts for friends and family.
  • Visually Appealing: The bright layers create a stunning presentation that makes it a standout treat on any dessert table.

Ingredients Breakdown

To create your Candy Corn Fudge, you’ll need a few simple ingredients. Here’s a detailed look at what you’ll need, along with some helpful substitutions:

  • White Chocolate Chips (36 oz total): The base of your fudge. You can use high-quality chips or even chopped white chocolate for a richer flavor.
  • Heavy Whipping Cream (¾ cup total): This adds creaminess. If you want a lighter version, consider using coconut cream or a non-dairy substitute.
  • Honey or Extract (3 tbsp total): Honey gives a lovely sweetness, while extracts (like vanilla, lemon, or orange) can enhance the flavor.
  • Food Coloring: Yellow and orange for that signature candy corn look. Gel coloring gives a more vibrant hue than liquid.

Step-by-Step Instructions

Follow these simple steps to create your Easy Candy Corn Fudge:

  1. Line a loaf pan (9×5 inches) with foil, leaving an overhang for easy removal. Lightly spray with cooking spray if not using non-stick foil.
  2. In a medium microwave-safe bowl, combine 12 oz of white chocolate chips, ¼ cup heavy whipping cream, and 1 tbsp of honey (or 1 tsp extract).
  3. Microwave the mixture on high for 30 seconds. Stir and repeat until the chips are completely melted and smooth.
  4. Add yellow food coloring and stir until evenly mixed. Spread the mixture evenly into the prepared pan and chill for at least 30 minutes.

Repeat the process for the orange layer using the remaining ingredients, ensuring to chill each layer before adding the next. Finally, for the white layer, mix the last batch of white chocolate and cream, and pour it over the orange layer. Chill until set.

Pro Tips for the Perfect Fudge

Close-up side view of colorful Easy Candy Corn Fudge with yellow and orange layers.
  • Use Quality Ingredients: High-quality chocolate chips will yield a smoother and more flavorful fudge.
  • Don’t Overheat: When melting the chocolate, be cautious not to overheat, which can cause it to seize.
  • Adjust the Sweetness: Feel free to reduce the honey if you prefer a less sweet fudge.
  • Layering Colors: Ensure each layer is fully set before adding the next to achieve those beautiful, distinct layers.
  • Experiment with Flavors: Try adding different extracts to each layer for a unique twist on the classic recipe.
  • Storage: Store your fudge in an airtight container at room temperature for up to a week, or refrigerate for longer freshness.
  • Perfect Texture: For a creamier fudge, increase the amount of heavy cream slightly.
  • Slice with Ease: Use a warm knife to cut the fudge into squares for clean edges.

Common Mistakes and Troubleshooting

Even the best cooks can run into issues. Here are some common pitfalls and how to avoid them:

  • Fudge Too Soft: If your fudge isn’t setting, it may need more time in the fridge or you might have used too much cream. Consider chilling longer to firm it up.
  • Fudge Sticking to the Pan: Ensure you properly line and grease your pan to prevent sticking.
  • Color Not Vibrant: If your colors are dull, consider using gel food coloring, which provides stronger pigmentation.

Variations to Try

Feel free to switch things up with these fun variations:

  • Chocolate Corn Fudge: Replace some white chocolate with milk or dark chocolate for a richer flavor profile.
  • Nutty Fudge: Add chopped nuts between layers for added crunch and flavor.
  • Marshmallow Swirl: Incorporate mini marshmallows into the final layer for a gooey texture.
  • Seasonal Spices: Add a pinch of cinnamon or nutmeg to the fudge for a warm, autumnal taste.

Storage and Make-Ahead Instructions

Your Candy Corn Fudge can be made a few days in advance! Here’s how to store it:

  • Wrap the fudge tightly in plastic wrap and place it in an airtight container. Keep it in a cool, dry place or refrigerate.
  • For longer shelf life, consider freezing the fudge. Cut it into squares, wrap individually, and freeze for up to three months.
  • To enjoy, simply thaw at room temperature for about an hour before serving.

Comprehensive FAQ

Here are some frequently asked questions to help you along the way:

  • Can I use a different type of chocolate? Yes! Feel free to experiment with milk or dark chocolate, but remember this will change the overall flavor.
  • How long does it take for the fudge to set? It typically takes about 30 minutes to an hour in the fridge.
  • Can I add candy corn to the fudge? Absolutely! You can sprinkle candy corn on top for added texture and decoration.
  • Is this recipe safe for kids? Yes! This fudge is a great recipe for kids to help with, especially the layering process.
  • What can I do if my fudge is too hard? If your fudge is too hard, it may have been overcooked. You can try adding a little cream while reheating it gently to soften.
  • How do I cut the fudge neatly? Use a warm knife to cut through the fudge for cleaner edges.
  • Can I use dairy-free ingredients? Definitely! Substitute with dairy-free chocolate and coconut cream for a vegan version.
  • How should I serve it? This fudge is best served at room temperature. You can cut it into fun shapes for a festive touch!

Nutritional Information

This Candy Corn Fudge is a sweet treat, so it’s best enjoyed in moderation. Here are some quick tips for a healthier version:

  • Reduce Sugar: Use less honey or choose a sugar alternative to cut down on sweetness.
  • Use Dark Chocolate: Dark chocolate is often lower in sugar and has added health benefits.
  • Add Nutrients: Incorporate nuts or seeds for added protein and healthy fats.

Equipment Recommendations

Here are some tools that will make your fudge-making experience smooth and enjoyable:

  • Microwave-Safe Bowls: Essential for melting the chocolate and cream.
  • Loaf Pan: A standard 9×5 inch loaf pan works perfectly for this recipe.
  • Silicone Spatula: Great for spreading the fudge evenly in the pan.
  • Measuring Cups and Spoons: Accurate measurements are key to achieving the perfect texture.

Serving Suggestions

Present your candy corn fudge with style:

  • On a Dessert Platter: Arrange squares on a decorative platter surrounded by seasonal fruits or nuts.
  • As Party Favors: Wrap pieces in festive cellophane bags for easy grab-and-go treats.
  • With Hot Beverages: Pair with a warm cup of cider or hot chocolate for a cozy treat.

Final Thoughts

Your journey to creating the perfect Candy Corn Fudge is more than just about the end result; it’s about enjoying the process and sharing joy with loved ones. With this comprehensive guide, I hope you feel empowered to create a delightful treat that brings smiles and warmth to your gatherings. Happy cooking, and may your fudge be as sweet as the memories you create!

Easy Candy Corn Fudge

Prep Time 10 minutes
Cook Time 10 minutes
Total Time 20 minutes
Servings 12 pieces
Calories 150
A simple and colorful treat perfect for fall, combining white chocolate and food coloring to mimic candy corn.

Ingredients

White Chocolate

  • 36 oz white chocolate chips
  • 0.25 cup heavy whipping cream
  • 1 tbsp honey (or extract of your choice)
  • yellow food color
  • 1 tsp vanilla extract (clear is best)

Food Color

  • orange food color

Instructions 

  • Line a loaf pan with foil, leaving overhang for easy removal.
  • Combine white chocolate, heavy cream, and honey in a microwave-safe bowl. Microwave in 30-second intervals, stirring until smooth.
  • Add yellow food color and stir until uniform. Repeat with orange food color for the second layer if desired.
  • Spread the mixture into the prepared pan and chill for at least 30 minutes.

Notes

Use high-quality white chocolate for best flavor and texture.
Calories: 150kcal
Cost: $10
Course: Dessert
Keyword: Candy Corn, Chocolate, Fudge

As the leaves turn and a crisp chill fills the air, there’s nothing quite like the warmth of freshly baked bread to make your home feel cozy. This Cinnamon Swirl Pumpkin Bread combines the comforting flavors of autumn with a delightful cinnamon sugar swirl that is sure to please. Whether you’re looking for a delightful breakfast treat or a comforting dessert, this recipe is designed to be simple, approachable, and incredibly rewarding. Let’s dive into the details of this delicious bread that not only tastes amazing but also fills your kitchen with a heavenly aroma.

Why You’ll Love This Recipe

  • Irresistibly Moist: The inclusion of pumpkin puree ensures that the bread remains tender and moist, making every slice a delight.
  • Perfectly Spiced: With warm spices like cinnamon, nutmeg, and ginger, each bite brings the comforting flavors of fall to your palate.
  • Beautiful Presentation: The defined cinnamon swirl creates a stunning visual appeal, making it perfect for gatherings or as a thoughtful gift.
  • Easy to Make: This recipe requires minimal equipment and ingredients, making it accessible for cooks of all skill levels.
  • Versatile Treat: Enjoy it for breakfast, as an afternoon snack, or as a delightful dessert paired with your favorite hot beverage.

Ingredient Breakdown

This Cinnamon Swirl Pumpkin Bread consists of simple yet flavorful ingredients. Here’s a detailed look at what you’ll need:

  • Granulated Sugar: Provides sweetness and helps create a tender crumb.
  • Light Brown Sugar: Adds moisture and a subtle caramel flavor.
  • All-Purpose Flour: The backbone of the recipe, giving structure to the bread.
  • Baking Soda: Acts as a leavening agent, helping the bread rise beautifully.
  • Salt: Enhances the flavors of the other ingredients.
  • Ground Cinnamon: The star spice that brings warmth and depth to the bread.
  • Ground Ginger, Nutmeg, Cloves: These spices contribute to the cozy, autumnal flavor profile.
  • Pumpkin Puree: The key ingredient that keeps the bread moist and adds a lovely pumpkin flavor.
  • Eggs: Provide richness and help with the structure of the bread.
  • Canola Oil or Coconut Oil: Keeps the bread moist; choose based on your preference.
  • Orange Juice: Adds a hint of acidity that balances the sweetness.
  • Vanilla Extract: A touch of vanilla enhances the overall flavor.

Possible Substitutions

If you have dietary restrictions or simply want to experiment, here are some substitutions:

  • Gluten-Free Flour: Use a 1:1 gluten-free baking mix to make this bread gluten-free.
  • Applesauce: Substitute half the oil with unsweetened applesauce for a lower-fat option.
  • Maple Syrup: Replace granulated sugar with maple syrup for a unique flavor twist.
  • Nutmeg and Allspice: If you don’t have ground ginger or cloves, these can be used instead for a different spice profile.

Step-by-Step Instructions

Side view of a slice of Cinnamon Swirl Pumpkin Bread with visible cinnamon swirls.

Now, let’s walk through the easy steps to create your own Cinnamon Swirl Pumpkin Bread:

  1. Preheat the Oven: Set your oven to 350°F (175°C) and grease a 9×5-inch loaf pan.
  2. Mix the Dry Ingredients: In a large bowl, whisk together the flour, baking soda, salt, and spices.
  3. Combine the Wet Ingredients: In another bowl, mix the sugars, oil, pumpkin puree, eggs, orange juice, and vanilla until smooth.
  4. Combine Wet and Dry: Gradually add the wet mixture to the dry ingredients, stirring until just combined.
  5. Create the Cinnamon Swirl: In a small bowl, mix together cinnamon, brown sugar, and flour for the swirl. Set aside.
  6. Layer the Batter: Pour half of the bread batter into the prepared pan. Sprinkle half of the cinnamon mixture over it. Add the remaining batter and top with the rest of the cinnamon mixture.
  7. Swirl: Use a knife to gently swirl the cinnamon mixture through the batter, creating a marbled effect.
  8. Bake: Bake for 55-65 minutes, or until a toothpick inserted into the center comes out clean.
  9. Cool: Allow the bread to cool in the pan for 10 minutes before transferring it to a wire rack to cool completely.

Expert Tips for Baking the Perfect Cinnamon Swirl Pumpkin Bread

  • Use Room Temperature Ingredients: This helps create a more uniform batter and better texture.
  • Don’t Overmix: Stir until just combined to keep the bread tender.
  • Check for Doneness: Every oven is different; start checking at the 50-minute mark.
  • Let it Rest: Allow the bread to cool completely before slicing to maintain its structure.
  • Store Properly: Keep the bread in an airtight container to maintain moisture.

Common Mistakes and Troubleshooting

To ensure your baking experience goes smoothly, here are some common pitfalls to avoid:

  • Overbaking: Keep an eye on your bread; it can dry out quickly.
  • Incorrect Oven Temperature: Use an oven thermometer to ensure accuracy.
  • Skipping the Swirl: The cinnamon swirl is what makes this bread special, so don’t skip this step!

Delicious Variations

Feel free to get creative with your cinnamon swirl pumpkin bread! Here are some tasty variations:

  • Chocolate Chip: Add 1 cup of chocolate chips to the batter for a decadent twist.
  • Nutty Delight: Incorporate 1/2 cup of walnuts or pecans for added crunch.
  • Fruit-Infused: Mix in 1 cup of chopped apples or pears for a fruity flavor profile.
  • Maple Glaze: Drizzle a simple glaze made of powdered sugar and maple syrup over the cooled bread.

Storage and Make-Ahead Instructions

This bread can be made ahead of time and stored for later enjoyment:

  • Room Temperature: Store in an airtight container for up to 4 days.
  • Refrigerator: For longer storage, wrap tightly and refrigerate for up to a week.
  • Freezer: Freeze slices wrapped in plastic wrap for up to 3 months. Thaw at room temperature before serving.

Frequently Asked Questions (FAQs)

Here are some common questions to help you along your baking journey:

  • Can I use fresh pumpkin? Yes, just ensure it’s well-pureed and not too watery.
  • What can I substitute for eggs? Use flax eggs or unsweetened applesauce for a vegan alternative.
  • How can I make this bread healthier? Substitute half of the oil with unsweetened applesauce and reduce sugar to taste.
  • Is it okay to double the recipe? Absolutely! Just ensure you have enough space in your oven.
  • Can I use whole wheat flour? Yes, but your bread may be denser; consider a mix of all-purpose and whole wheat.
  • How long will it last? Properly stored, it can last up to a week or longer if frozen.
  • Can I add other spices? Feel free to get creative with spices like cardamom or allspice.
  • What should I serve it with? Enjoy it plain, with butter, or cream cheese for added richness.

Nutritional Tips and Dietary Adaptations

This recipe can be adapted to fit various dietary needs:

  • Gluten-Free: Opt for a gluten-free flour blend.
  • Low-Sugar: Reduce sugar or use sugar substitutes like stevia.
  • Vegan: Follow egg substitutes and use plant-based oils.

Equipment Recommendations

Here’s what you’ll need to create your pumpkin bread:

  • Mixing Bowls: Use both large and medium bowls for mixing ingredients.
  • Whisk: A good whisk is essential for thorough mixing.
  • Loaf Pan: A sturdy 9×5-inch loaf pan is ideal for even baking.
  • Spatula: Perfect for folding and transferring batter.

Serving Suggestions

For the perfect serving experience, consider these ideas:

  • Warm with Butter: Serve warm with a pat of butter for extra richness.
  • Pair with Coffee: Enjoy with a hot cup of coffee or tea for a cozy afternoon treat.
  • Top with Cream Cheese Frosting: Add a drizzle of cream cheese frosting for a sweet ending.
  • Garnish with Nuts: Sprinkle chopped nuts on top for added crunch and flavor.

In conclusion, this Cinnamon Swirl Pumpkin Bread is a delightful way to embrace the flavors of fall. Whether you’re baking for yourself or sharing with loved ones, this recipe offers warmth, comfort, and a touch of sweetness that is sure to become a cherished favorite. Happy baking!

Cinnamon Swirl Pumpkin Bread

Prep Time 15 minutes
Cook Time 1 hour
Total Time 1 hour 15 minutes
Servings 8 slices
Calories 320
A moist and flavorful pumpkin bread with a cinnamon swirl, perfect for fall mornings or cozy afternoons.

Ingredients

Main ingredients

  • 1/2 cup granulated sugar
  • 1 cup light brown sugar, packed
  • 1 3/4 cups all-purpose flour
  • 1 teaspoon baking soda
  • 1/2 teaspoon salt
  • 1 teaspoon ground cinnamon
  • 1/2 teaspoon ground ginger
  • 1/4 teaspoon ground nutmeg
  • 1/4 teaspoon ground cloves
  • 3/4 cup pumpkin puree
  • 2 large eggs + 1 egg yolk (at room temperature)
  • 1/2 cup canola oil OR melted coconut oil
  • 1/3 cup orange juice
  • 2 teaspoons vanilla extract
  • 1/3 cup granulated sugar
  • 1 1/2 teaspoons ground cinnamon
  • 1/4 cup light brown sugar, packed
  • 1/2 cup all-purpose flour
  • 1/2 teaspoon ground cinnamon
  • 1/2 teaspoon finely ground sea salt or table salt
  • 3 1/2 tablespoons unsalted butter, very cold

Instructions 

  • Preheat oven to 350°F (175°C). Grease a loaf pan.
  • Mix dry ingredients and set aside. Combine pumpkin, eggs, oil, orange juice, vanilla, and sugars.
  • Gradually add dry ingredients to wet, mixing until just combined. Prepare cinnamon swirl mixture.
  • Pour batter into pan, swirl in cinnamon mixture, and top with cold butter pieces.
  • Bake for 60 minutes or until a toothpick inserted comes out clean. Cool before slicing.

Notes

For best results, use cold butter for the swirl to create a marbled effect.
Calories: 320kcal
Cost: $15
Course: Breakfast, Snack
Cuisine: American
Keyword: Cinnamon, pumpkin

Welcome, dear readers! Today, I invite you to indulge in the delightful experience of cooking with this Creamy Tuscan Chicken recipe. Cooking is not just about the end result; it’s about the joy of creating something nourishing and comforting. This creamy dish, infused with Mediterranean flavors, is perfect for any evening meal, transforming everyday ingredients into a plate of warmth and satisfaction. Join me as we discover how to make this dish both simple and enjoyable, allowing you to embrace your inner chef.

Why You’ll Love This Recipe

  • Quick and Easy: With just a few straightforward steps, you can have a delicious dinner on the table in under 30 minutes.
  • Versatile Ingredients: The recipe uses staples like chicken breasts, spinach, and cherry tomatoes, making it easy to find everything at your local market.
  • Comforting Flavors: The creamy sauce combined with the savory chicken and fresh vegetables creates a dish that feels both indulgent and homey.
  • Perfect for Meal Prep: This dish stores beautifully, so you can make it ahead of time for busy weeknights or lunch the next day.
  • Customizable: Feel free to experiment with different herbs, vegetables, or even proteins to suit your taste or dietary needs.

Ingredient Breakdown

Let’s take a closer look at the ingredients that make this dish a standout. Here’s what you’ll need:

  • Chicken Breasts: Use boneless, skinless chicken breasts, sliced in half to create four thin fillets. This ensures even cooking and tenderness.
  • Seasonings: Salt, pepper, garlic powder, and Italian seasoning enhance the flavor of the chicken.
  • Olive Oil and Butter: These fats not only cook the chicken but also create a rich base for the sauce.
  • Garlic: Fresh minced garlic adds a wonderful aroma and depth of flavor to the dish.
  • Spinach: Fresh baby spinach wilts down, contributing both nutrition and vibrant color.
  • Cherry Tomatoes: These sweet tomatoes add a burst of flavor and a juicy texture to the dish.
  • Heavy Cream: For that luxurious creaminess, heavy cream is a must.
  • Parmesan Cheese: Freshly grated Parmesan adds a salty, umami kick that ties the whole dish together.

If you’re looking for alternatives or substitutions, consider these options:

  • Chicken Thighs: For a richer flavor, chicken thighs can be used instead of breasts.
  • Non-Dairy Cream: For a dairy-free version, try coconut cream or a cashew-based cream.
  • Other Greens: Kale or Swiss chard can be substituted for spinach if preferred.
  • Sun-Dried Tomatoes: For a more concentrated flavor, use sun-dried tomatoes instead of fresh cherry tomatoes.

How to Make Creamy Tuscan Chicken

Let’s dive into the straightforward steps of preparing this delightful dish:

  1. Season the chicken breasts with salt, pepper, and garlic powder.
  2. Heat olive oil in a large skillet over medium heat. Once hot, add the chicken breasts. Cook for about 3-4 minutes on each side until they are golden brown and cooked through.
  3. Remove the chicken from the pan and place it on a plate, covering it loosely with foil to keep warm.
  4. Let the pan cool slightly, then add butter and minced garlic. Cook over low heat until fragrant, about 1 minute.
  5. Add the cherry tomatoes and spinach. Cook over medium-low heat until the spinach wilts, about 2-3 minutes.
  6. Stir in the heavy cream and bring to a simmer. Reduce the heat to low and let it simmer for an additional 2-3 minutes until the sauce thickens slightly.
  7. Mix in Parmesan cheese and return the chicken to the pan. Cook for another 3-4 minutes until the chicken is heated through. Adjust seasoning with additional salt and pepper if necessary.
  8. Serve hot, topped with more Parmesan if desired.

Pro Tips for Perfecting Your Creamy Tuscan Chicken

Close-up side view of creamy Tuscan chicken garnished with spinach and cherry tomatoes.
  • Don’t overcrowd the pan: If your skillet isn’t large enough, cook the chicken in batches to ensure even cooking.
  • Adjust the thickness: If the sauce is too thick, add a splash of chicken broth or water to reach your desired consistency.
  • Fresh herbs: For a burst of freshness, consider adding chopped basil or parsley before serving.
  • Let it rest: Allow the chicken to rest for a few minutes after cooking; this helps retain moisture.
  • Experiment with cheeses: Try using different types of cheese, like mozzarella or goat cheese, for a unique flavor twist.
  • Perfect timing: Ensure your skillet is hot enough before adding the chicken to get a nice sear and prevent sticking.
  • Use a meat thermometer: For perfectly cooked chicken, aim for an internal temperature of 165°F (75°C).
  • Meal suggestions: Pair with pasta, rice, or crusty bread to soak up that delicious sauce.

Common Mistakes and Troubleshooting

Even the best chefs encounter hiccups now and then. Here are some common mistakes and how to avoid them:

  • Overcooking the chicken: Keep an eye on the time and temperature to prevent dry chicken. Use a meat thermometer for accuracy.
  • Not letting the sauce simmer: Allow the sauce to bubble gently; this helps develop flavors and thicken it properly.
  • Using pre-grated cheese: Freshly grated cheese melts better and offers a superior flavor, so skip the pre-packaged stuff.
  • Not seasoning enough: Taste as you go and adjust seasonings to enhance the overall flavor of the dish.

Variations on Creamy Tuscan Chicken

Switch things up with these delightful variations:

  • Spicy Tuscan Chicken: Add a pinch of red pepper flakes to the sauce for a little heat.
  • Sun-Dried Tomato Tuscan Chicken: Incorporate sun-dried tomatoes for an extra depth of flavor.
  • Mushroom Tuscan Chicken: Add sautéed mushrooms to the sauce for additional texture and earthiness.
  • Lemon Herb Tuscan Chicken: Squeeze fresh lemon juice and add lemon zest for a refreshing twist.

Storage and Make-Ahead Instructions

This creamy Tuscan chicken dish can be made ahead of time and stored for later enjoyment:

  • Refrigeration: Store leftovers in an airtight container in the refrigerator for up to 3 days.
  • Freezing: While the dish can be frozen, the cream may separate upon reheating. If freezing, consider making the sauce separately.
  • Reheating: Reheat gently on low heat on the stove, adding a splash of cream or broth to bring it back to life.

Frequently Asked Questions

Here are some common questions and their answers to help you master this recipe:

  • Can I use frozen chicken? Yes, but make sure to fully thaw it and pat it dry before cooking for the best results.
  • What can I serve with creamy Tuscan chicken? It pairs beautifully with pasta, rice, or a fresh salad.
  • How can I make this dairy-free? Substitute heavy cream with coconut cream and skip the cheese or use a dairy-free alternative.
  • Can I use pre-cooked chicken? Yes, just add it to the sauce to heat through, but adjust the cooking time accordingly.
  • Is this recipe gluten-free? Yes, as long as you check the labels on the ingredients, particularly the broth or any added sauces.
  • How can I add more vegetables? Feel free to toss in bell peppers, zucchini, or asparagus for added nutrition.
  • What is the best way to store leftovers? Store in an airtight container in the fridge for up to 3 days or freeze for longer storage.
  • Can I make this recipe ahead of time? Yes, you can prepare the sauce ahead of time and cook the chicken fresh when ready to serve.

Nutritional Information and Dietary Adaptations

This creamy Tuscan chicken is not only delicious but can also be adapted to suit various dietary needs:

  • Low-Carb: Serve it over zucchini noodles or cauliflower rice to keep the carbs low.
  • High-Protein: Add beans or lentils to the dish for an extra protein boost.
  • Vegetarian Option: Substitute chicken with chickpeas or firm tofu for a hearty vegetarian meal.

Essential Equipment Recommendations

To make the cooking process seamless, here are some recommended tools:

  • Non-Stick Skillet: A good quality non-stick skillet ensures even cooking and easy cleanup.
  • Meat Thermometer: Essential for checking the doneness of chicken without cutting into it.
  • Wooden Spoon: Perfect for stirring and scraping the fond from the bottom of the pan.

Serving Suggestions

To complement your creamy Tuscan chicken, consider these serving ideas:

  • Over Pasta: Serve it atop fettuccine or penne for a filling meal.
  • With Crusty Bread: A slice of warm, crusty bread is perfect for soaking up the creamy sauce.
  • On a Bed of Greens: For a lighter option, serve it over a bed of mixed greens or arugula.

In conclusion, this Creamy Tuscan Chicken recipe is not just a meal; it’s an experience that combines comfort, nourishment, and joy. I hope you enjoy making and sharing it as much as I do. Happy cooking, and remember to savor every bite!

Creamy Tuscan Chicken Recipe

Prep Time 10 minutes
Cook Time 20 minutes
Total Time 30 minutes
Servings 4 servings
Calories 550
A rich and flavorful chicken dish with spinach, cherry tomatoes, and a creamy Parmesan sauce, perfect for a quick dinner.

Ingredients

Protein

  • 2 pieces chicken breasts, boneless, skinless (sliced in half to create 4 thin fillets)
  • ½ teaspoon salt
  • ¼ teaspoon pepper
  • ¼ teaspoon garlic powder
  • ¼ teaspoon Italian seasoning
  • 2 tablespoons olive oil
  • 3 tablespoons butter
  • 3 teaspoons garlic (minced)
  • 5 ounces baby spinach (about 3 cups)
  • 1 cup cherry tomatoes (halved)
  • ¾ cup heavy cream
  • ¼ cup Parmesan cheese (freshly grated)

Instructions 

  • Season chicken with salt, pepper, and garlic powder.
  • Cook chicken in olive oil 3-4 minutes per side until cooked through. Remove and set aside.
  • In the same pan, add butter and garlic; cook until fragrant. Add tomatoes and spinach; cook until wilted.
  • Stir in heavy cream and Parmesan; simmer until slightly thickened. Return chicken to pan and heat through.

Notes

For a lighter version, use half-and-half instead of heavy cream.
Calories: 550kcal
Cost: $15
Course: Main Course
Cuisine: Italian
Keyword: chicken, cream, Spinach

Discover the Joy of Farro Salad

If you’re looking to elevate your meal prep with a dish that’s both nourishing and delightful, look no further than this farro salad. Packed with vibrant ingredients and bursting with flavor, it’s not just a salad; it’s an experience. In this article, we’ll dive into everything you need to know about making the perfect farro salad, including tips, variations, and nutritional insights.

Why You’ll Love This Recipe

This farro salad isn’t just another side dish; it’s a celebration of flavors and textures. Here are five reasons to love this recipe:

  • Nourishing Ingredients: With wholesome farro, fresh arugula, and crunchy apples, every bite is packed with nutrients.
  • Versatile Meal Prep: This salad can be enjoyed as a main dish, a side, or even a light lunch throughout the week.
  • Quick to Assemble: With simple steps, you can have this delicious salad ready in no time, making it perfect for busy weeknights.
  • Flavorful Combinations: The interplay of sweet apples and tangy dressing creates a delightful balance that will please your palate.
  • Customizable: Easy to adapt with different ingredients or dressings, allowing you to personalize it to your taste.

Understanding Farro

Before we dive into the recipe, let’s talk about farro. This ancient grain is a nutty, chewy delight that’s similar to barley or quinoa. It’s rich in fiber, protein, and essential nutrients, making it an excellent choice for anyone looking to enhance their diet.

Ingredients You’ll Need

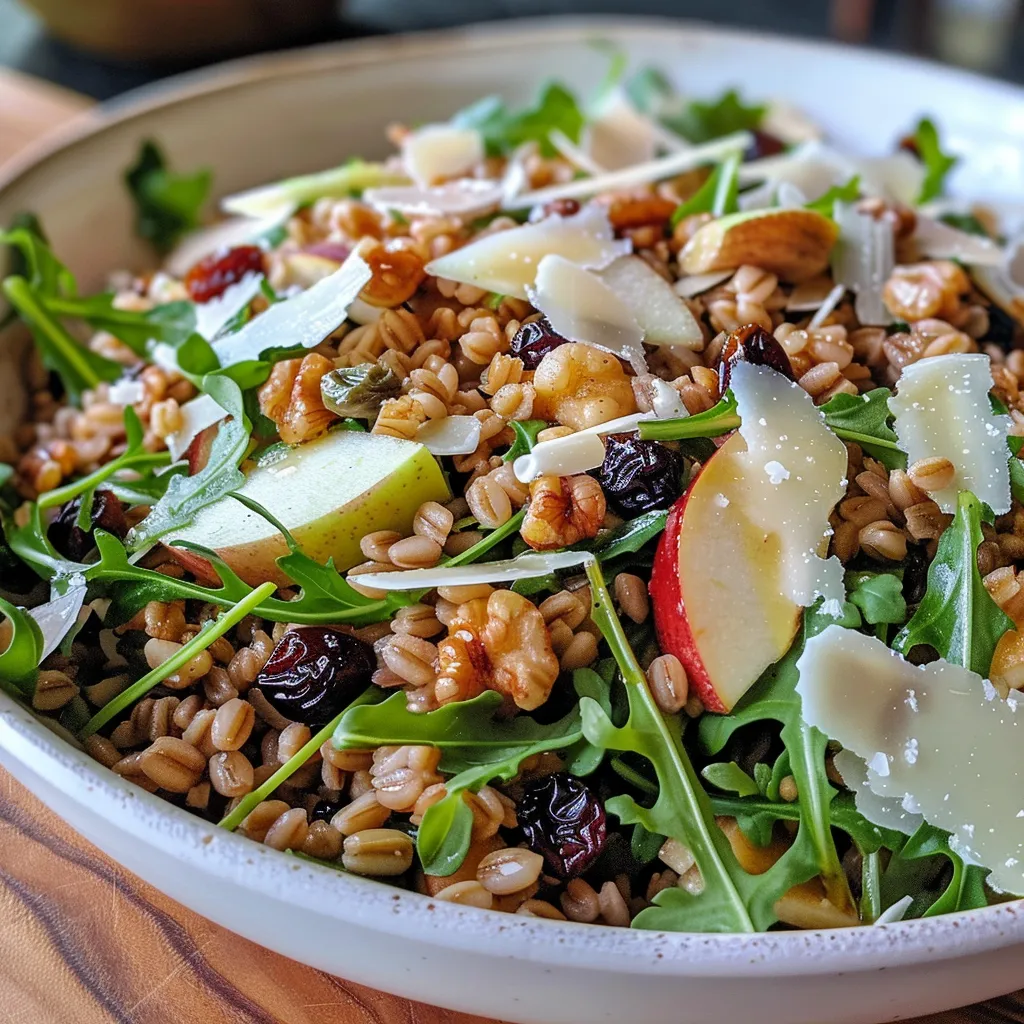
Close-up of a bowl filled with vibrant Farro Salad featuring arugula, apple slices, walnuts, and grated cheese.

Here’s what you need to prepare this farro salad:

  • 1 cup dry farro: Choose whole farro for a nutty flavor and chewy texture.
  • 2 cups baby arugula: Adds a peppery bite and vibrant color.
  • 1 apple: Thinly sliced or finely chopped; Honeycrisp or Fuji are excellent choices.
  • ¼ cup raisins: For a touch of sweetness; dried cranberries are a great alternative.
  • 1 cup freshly shaved or grated Parmesan cheese: Or opt for Pecorino for a stronger flavor.
  • ½ cup chopped walnuts: For crunch; pecans can also be used.
  • Salt and freshly ground black pepper: To taste.
  • 3 tablespoons extra virgin olive oil: A must for a delicious dressing.
  • 2 tablespoons apple cider vinegar: Or lemon juice for brightness.
  • ½ teaspoon maple syrup: Adds a hint of sweetness to the dressing.
  • ¼ teaspoon Dijon mustard: For a subtle kick.

Cooking Farro for Salad

Cooking farro is straightforward but varies depending on the type:

  • Pearled Farro: Cooks in 10-20 minutes. Quick and easy!
  • Semi-Pearled Farro: Takes about 20-30 minutes to cook, retaining more nutrients.
  • Whole Farro: Needs 40 minutes for a tender, chewy texture, but is well worth the wait!

To cook the farro:

  1. Rinse the farro under cold water to remove any debris.
  2. Fill a medium pot with water, season with salt, and bring it to a boil.
  3. Stir in the farro and reduce the heat to a simmer.
  4. Cook until tender, then drain and spread it on a baking sheet to cool.

Crafting the Perfect Dressing

The dressing is crucial for flavor. Here’s how to whip it up:

  • Mix the Ingredients: In a small bowl, whisk together the olive oil, apple cider vinegar, maple syrup, Dijon mustard, salt, and pepper.
  • Taste and Adjust: Don’t hesitate to tweak the sweetness or acidity to suit your preferences.

Assembling the Salad

Now, let’s bring everything together:

  1. In a large bowl, combine the cooled farro, arugula, apple slices, raisins, walnuts, and cheese.
  2. Drizzle the dressing over the top and toss gently to coat.
  3. Season with additional salt and pepper to taste.

Pro Tips for the Best Farro Salad

To ensure your salad is a success, consider these expert tips:

  • Cook Ahead: Prepare the farro in advance and store it in the fridge for up to a week.
  • Fresh Ingredients: Always use the freshest produce you can find for the best flavor.
  • Chill the Salad: Allow the salad to sit for about 30 minutes before serving; this helps the flavors meld.
  • Experiment with Dressings: Try different dressings like balsamic or yogurt-based for variety.
  • Add Protein: For a heartier meal, consider adding grilled chicken, chickpeas, or tofu.
  • Garnish Creatively: Sprinkle fresh herbs like basil or mint for an added layer of flavor.
  • Storage Tips: Store leftovers in an airtight container for up to three days.
  • Presentation Matters: Serve in a large bowl or individual dishes for a beautiful presentation.

Common Mistakes and Troubleshooting

Here are some common pitfalls to avoid when making your farro salad:

  • Overcooking the Farro: Keep an eye on the cooking time to avoid mushy grains.
  • Too Much Dressing: Start with a small amount; you can always add more if needed.
  • Choosing the Wrong Apple: Opt for crisp, sweet varieties; avoid mealy apples that won’t hold up in salads.

Variations to Try

Feel free to get creative with these variations on the basic recipe:

  • Mediterranean Twist: Add olives, sun-dried tomatoes, and feta cheese for a Mediterranean flair.
  • Autumn Harvest: Swap apples for roasted butternut squash and add cranberries.
  • Protein-Packed: Incorporate grilled chicken or quinoa for an extra protein boost.
  • Herbed Delight: Toss in fresh herbs like parsley or dill for a refreshing taste.

Storage and Make-Ahead Instructions

This salad is perfect for meal prep:

  • Refrigeration: Store in an airtight container for up to three days.
  • Freezing: Not recommended, as the texture of the ingredients may suffer.
  • Make-Ahead: Prepare the farro and dressing a day in advance; combine just before serving.

Frequently Asked Questions

Here are some common questions about farro salad:

  • Can I use another grain instead of farro? Yes, quinoa or barley can be great substitutes.
  • Is this salad gluten-free? No, farro contains gluten, but you can use gluten-free grains.
  • How can I make this salad vegan? Omit the cheese or use a dairy-free alternative.
  • Can I add more vegetables? Absolutely! Try bell peppers, cucumbers, or carrots for added crunch.
  • What if I don’t have arugula? Spinach or mixed greens can be used instead.
  • How do I adjust the dressing for a different flavor? Experiment with different vinegars or add fresh herbs.
  • Can I serve this salad warm? Yes, it can be served warm, though it’s best chilled.
  • What’s the nutritional value of this salad? It’s high in fiber and protein, making it a healthy choice!

Nutritional Tips and Dietary Adaptations

This farro salad can fit into various dietary needs:

  • High Fiber: Farro is an excellent source of dietary fiber, promoting digestive health.
  • Calcium Boost: Adding cheese provides a good source of calcium.
  • Protein-Rich: Incorporate nuts or protein sources like chicken for a balanced meal.

Equipment Recommendations

Here’s a list of essential tools to make the process smoother:

  • Medium Pot: For cooking the farro.
  • Whisk: For blending the dressing ingredients.
  • Large Bowl: To combine all salad ingredients.
  • Cutting Board and Knife: For chopping fruits and vegetables.

Serving Suggestions

This salad is incredibly versatile:

  • As a Main Dish: Serve alongside grilled chicken or fish for a complete meal.
  • As a Side: Perfect alongside roasted meats or barbecued dishes.
  • For Lunch: Pack in a lunchbox for a refreshing midday meal.

Conclusion

Incorporating this vibrant farro salad into your meals can transform your dining experience. With its rich flavors, nutritious ingredients, and endless customization possibilities, you’ll find joy in every bite. Whether you’re cooking for yourself or sharing with loved ones, this dish is sure to become a favorite in your kitchen. Enjoy the process of making it, and remember, cooking is all about the journey, not just the destination.

Farro Salad

Prep Time 10 minutes
Cook Time 30 minutes
Total Time 40 minutes
Servings 4 servings
Calories 350
A hearty and nutritious salad combining tender farro with fresh vegetables, cheese, and a tangy dressing.

Ingredients

Grains

  • 1 cup dry farro

Vegetables and Fruits

  • 2 cups baby arugula
  • 1 apple (thinly sliced or finely chopped, use your favorite variety)

Dried Fruits

  • 0.25 cup raisins (or dried cranberries)

Cheese and Nuts

  • 1 cup freshly shaved or grated Parmesan cheese (or Pecorino)
  • 0.5 cup chopped walnuts (or pecans)

Dressing

  • 3 tablespoons extra virgin olive oil
  • 2 tablespoons apple cider vinegar (or lemon juice)
  • 0.5 teaspoon maple syrup
  • 0.25 teaspoon Dijon mustard

Seasonings

  • to taste salt and freshly ground black pepper

Instructions 

  • Cook the farro in boiling salted water until tender, then drain and cool.
  • Whisk together olive oil, vinegar, maple syrup, and mustard to make the dressing.
  • Combine cooled farro with apple slices, raisins, cheese, nuts, and arugula. Drizzle with dressing and toss to combine.

Notes

Feel free to customize with your favorite nuts or cheese varieties.
Calories: 350kcal
Cost: $15
Course: Salad
Cuisine: Mediterranean
Keyword: Farro

Discover the Joy of Apple Pie Egg Rolls

If you’re looking for a delightful dessert that combines the classic flavors of apple pie with a fun twist, then these Apple Pie Egg Rolls are just what you need! Imagine crispy, golden egg rolls filled with sweet, spiced apple filling—a treat that’s perfect for family gatherings or a cozy night in. Serve them warm with a drizzle of caramel sauce or a scoop of vanilla ice cream, and you have a dessert that will impress everyone!

Why You’ll Love This Recipe

  • Quick and easy preparation: Making these egg rolls is straightforward, with simple steps that make cooking enjoyable.
  • Perfect for sharing: These delicious bites are great for parties, offering a fun and shareable dessert option.
  • Versatile flavors: You can customize the filling with different spices and fruits to suit your taste.
  • Make-ahead option: Prepare your filling in advance, allowing for easy assembly and frying when you’re ready.
  • Decadent indulgence: The combination of crispy exterior and warm, gooey apple filling creates a delightful contrast that everyone will love.

Ingredients Breakdown

To create your Apple Pie Egg Rolls, you’ll need the following ingredients:

  • 2 tablespoons unsalted butter: For sautéing the apples and adding richness.
  • 1/4 cup brown sugar: To sweeten the filling with a touch of caramel flavor.
  • 1 teaspoon ground cinnamon: Provides classic apple pie warmth.
  • 1/4 teaspoon ground nutmeg: Adds depth to the flavor profile.
  • 4-5 medium apples, peeled, cored, and diced: Use a mix of tart and sweet apples for balance; Granny Smith and Honeycrisp work well.
  • 1 tablespoon lemon juice: Helps brighten the flavors and prevent browning.
  • 2 tablespoons cornstarch: Thickens the filling to a perfect pie-like consistency.
  • 1/4 cup water: Used in combination with cornstarch to create the filling.
  • 1 teaspoon vanilla extract: Enhances the overall flavor.
  • 15-20 egg roll wrappers: The vessel for your delicious filling.
  • 1 large egg, beaten: For sealing the egg rolls.
  • Oil for frying: Choose a neutral oil like canola or vegetable oil.
  • 1/2 cup granulated sugar: For tossing the fried egg rolls for added sweetness.
  • 2 tablespoons ground cinnamon: For the cinnamon sugar coating.
  • Optional toppings: caramel sauce, whipped cream, vanilla ice cream: Enhance your dessert experience!

Pro Tips for Perfect Apple Pie Egg Rolls

Close-up view of golden-brown apple pie egg rolls, showing crispy texture.
  • Choose your apples wisely: A mix of tart and sweet apples creates a flavorful filling.
  • Don’t skip the lemon juice: It brightens the flavor and balances the sweetness of the apples.
  • Cool the filling: Ensure your apple filling is cool before assembling to prevent soggy wrappers.
  • Seal properly: Use the beaten egg to seal the edges well, preventing the filling from leaking during frying.
  • Fry in small batches: Avoid overcrowding the pan to ensure even cooking and crispiness.
  • Experiment with spices: Feel free to add cloves or allspice for a unique flavor twist.
  • Adjust sweetness: Taste the filling before sealing to adjust the sugar to your liking.
  • Keep the oil temperature consistent: Maintain the oil at 350°F to achieve that perfect golden-brown color.

Common Mistakes and Troubleshooting

  • Wrappers tearing: If your wrappers are too dry, they can tear. Keep them covered with a damp cloth while you work.
  • Filling leakage: Ensure seals are tight and use enough egg wash to secure edges.
  • Under-cooked filling: Make sure the filling is cooked thoroughly before filling the wrappers.
  • Oil splatter: To minimize splatter, gently lower the egg rolls into the oil rather than dropping them in.

Variations on the Classic Recipe

Feel free to get creative with your Apple Pie Egg Rolls! Here are some fun variations:

  • Berry Bliss: Add mixed berries to the apple filling for a fruity twist.
  • Caramel Delight: Mix in caramel bits with the apple filling for a gooey center.
  • Spiced Pumpkin: Substitute some apples with pumpkin puree and add pumpkin spice for a seasonal treat.
  • Chocolate Lovers: Drizzle the finished egg rolls with melted chocolate for an indulgent dessert.

Storage and Make-Ahead Instructions

These egg rolls can be made ahead of time, making them a convenient option for gatherings:

  • Make Ahead: Prepare the apple filling a day in advance and store it in the refrigerator. Assemble the egg rolls just before frying.
  • Freezing: Assemble the egg rolls and freeze them in a single layer on a baking sheet. Once frozen, transfer them to a freezer bag. They can be fried from frozen; just add a couple of extra minutes to the cooking time.
  • Reheating: If you have leftovers, reheat them in an air fryer for a few minutes to regain their crispiness.

Frequently Asked Questions

  • Can I bake these egg rolls instead of frying? Yes! Preheat your oven to 400°F, brush the egg rolls with oil, and bake for about 20-25 minutes, turning halfway through.
  • What type of apples are best for this recipe? A mix of tart and sweet apples, like Granny Smith and Honeycrisp, work beautifully.
  • Can I use store-bought pie filling? Absolutely! Store-bought apple pie filling can save time, just remember to drain it if it’s too watery.
  • How do I know when the egg rolls are done frying? They should be golden brown and crispy, typically around 2-3 minutes per side.
  • Can I make the filling spicy? Yes! Add a pinch of cayenne or chili powder for a kick.
  • What’s the best way to eat these egg rolls? Serve them warm with a drizzle of caramel sauce and a scoop of vanilla ice cream!
  • How can I make these gluten-free? Use gluten-free egg roll wrappers and ensure all other ingredients are gluten-free.
  • Can these be made vegan? Substitute the butter with coconut oil and the egg wash with a mixture of flour and water to seal the wrappers.

Nutritional Tips and Dietary Adaptations

For those looking to adapt this recipe for specific dietary needs:

  • Lower Sugar: Reduce the amount of sugar in the filling and consider substituting with a natural sweetener.
  • Extra Fiber: Add oats or flaxseeds to the apple filling for an added nutritional boost.
  • Healthier Fats: Opt for air frying instead of deep frying to reduce fat content.

Equipment Recommendations

To make your cooking experience enjoyable, here are some essential tools:

  • Skillet: A large skillet is ideal for cooking the apple filling evenly.
  • Deep Fryer or Heavy Pot: For frying, a deep fryer or a heavy pot will help maintain oil temperature.
  • Spatula: A slotted spatula is perfect for flipping and removing the egg rolls from the oil.
  • Cooling Rack: Use a cooling rack over a baking sheet to let the egg rolls drain without getting soggy.

Serving Suggestions

Make your presentation special by serving your Apple Pie Egg Rolls with:

  • Drizzled Caramel Sauce: A sweet touch that elevates the flavors.
  • Whipped Cream: Lightens the dish and adds a creamy texture.
  • Ice Cream: Vanilla or cinnamon ice cream pairs wonderfully with the warm egg rolls.

Conclusion

These delightful Apple Pie Egg Rolls are more than just a dessert; they’re a way to bring joy and warmth to your kitchen and your table. With their crispy exterior and sweet apple filling, they’re sure to become a favorite in your home. So gather your ingredients, invite some friends or family over, and enjoy the process of creating something beautiful and delicious. Happy cooking!

Apple Pie Egg Rolls

Prep Time 15 minutes
Cook Time 10 minutes
Total Time 25 minutes
Servings 4 pieces
Calories 250
Delight in these crispy apple pie egg rolls, filled with spiced apple filling and coated in cinnamon sugar for a perfect treat.

Ingredients

Filling

  • 2 tablespoons unsalted butter
  • 0.25 cup brown sugar
  • 1 teaspoon ground cinnamon
  • 0.25 teaspoon ground nutmeg
  • 4-5 medium apples apples, peeled, cored, and diced
  • 1 tablespoon lemon juice
  • 2 tablespoons cornstarch
  • 0.25 cup water
  • 1 teaspoon vanilla extract
  • 15-20 egg roll wrappers egg roll wrappers
  • 1 large egg, beaten
  • oil for frying oil, for frying (enough to submerge egg rolls)
  • 0.5 cup granulated sugar
  • 2 tablespoons ground cinnamon (for coating)

Optional toppings

  • to taste caramel sauce, whipped cream, vanilla ice cream (for serving)

Instructions 

  • Melt butter, add sugar, cinnamon, nutmeg; cook until sugar dissolves. Add apples and lemon juice, cook until slightly softened.
  • Mix cornstarch with water, add to filling along with vanilla; cook until thickened. Cool the filling.
  • Place a wrapper in diamond shape, add 1-2 tbsp filling, fold edges, and roll to seal.
  • Heat oil to 350°F, fry egg rolls until golden, then drain on paper towels.
  • Toss fried egg rolls in cinnamon sugar, serve warm with toppings if desired.

Notes

Ensure not to overfill the egg rolls to prevent leakage during frying.
Calories: 250kcal
Cost: $15
Course: Dessert
Cuisine: American
Keyword: apple, dessert, egg roll

Whimsical Keto Ghost Meringue Cookies: A Festive Treat

Are you ready to bring some playful charm into your kitchen this Halloween? These Keto Ghost Meringue Cookies are not only delightfully spooky but also low in carbs, making them a perfect treat for anyone following a ketogenic diet. With just four main ingredients, you can whip up these airy, crispy cookies that are sure to impress your family and friends. In this guide, you’ll discover everything you need to know about making these whimsical treats, from the ingredients to tips for perfecting your meringues.

Why You’ll Love This Recipe

This recipe for Keto Ghost Meringue Cookies is more than just a delicious dessert; it offers numerous benefits that make it a must-try for any home chef.

  • Simple Ingredients: Using just four key ingredients, this recipe is straightforward and accessible, even for beginners.
  • Low Carb Delight: With zero carbs, these meringue cookies fit perfectly into a keto lifestyle, allowing you to indulge without guilt.
  • Perfect for Celebrations: Their playful ghostly shape makes them an ideal treat for Halloween parties, gatherings, or even just a fun family activity.
  • Customizable Decor: Get creative! Use candy eyes and paint to personalize your meringues, making them as unique as your imagination.
  • Long-Lasting Treats: These cookies can be stored for days, making them a convenient option for sweet cravings throughout the week.

Ingredients Breakdown

Before you dive into the baking process, let’s explore the ingredients you’ll need to create these delightful meringue cookies:

  • 4 Egg Whites: Fresh and at room temperature, these are the base for your meringues. Ensure that no yolk is mixed in, as it can prevent the egg whites from reaching the desired stiff peaks.
  • 1/4 Teaspoon Cream of Tartar: This ingredient stabilizes the egg whites, helping them achieve the perfect texture.
  • Pinch of Salt: Just a small amount enhances the flavor of the meringues.
  • 1/2 Cup Powdered Erythritol: A sugar-free sweetener that gives the cookies their sweetness without the carbs.
  • Candy Eyes (Optional): These add a playful touch to your ghost cookies and can be found at most baking supply stores.
  • Black Food Paint (Optional): For adding details like ghost mouths, this is a fun addition to personalize your cookies.
  • Piping Tip and Bags (Optional): A 1A piping tip can help you achieve beautiful shapes, while piping bags make the process easier.

Step-by-Step Instructions

Close-up view of ghost-shaped meringue cookies decorated with candy eyes.

Now that you have your ingredients ready, follow these detailed steps to create your Keto Ghost Meringue Cookies:

  1. Preheat the Oven: Set your oven to 200°F (93°C). Line a baking tray with parchment paper and set it aside.
  2. Prepare the Egg Whites: In a large, clean, and dry bowl, combine the egg whites, cream of tartar, and a pinch of salt. Using an electric mixer, beat the mixture until it becomes foamy. Tip: Ensure your bowl is free of grease to allow the egg whites to whip properly.
  3. Add Sweetener Gradually: Slowly add the powdered erythritol while continuing to beat the mixture. Keep beating until you achieve very stiff peaks, which usually takes about 3-5 minutes. The meringue should be so stiff that you can turn the bowl upside down without it falling out.
  4. Pipe the Ghost Shapes: Transfer the meringue to a piping bag fitted with a 1A tip or cut a large hole about 3/4 inch wide. Pipe ghost shapes onto the prepared baking tray, spacing them about 1/2 inch apart.
  5. Add Decoration: If using, carefully place candy eyes on the piped meringues. You can also use a small paintbrush to add a mouth with black food paint.
  6. Bake the Cookies: Place the tray in the preheated oven and bake for 1 hour. After the hour is up, turn off the oven and let the meringues sit inside undisturbed for an additional hour to set and harden further.

Pro Tips for Perfect Meringues

To ensure your Keto Ghost Meringue Cookies turn out perfectly, keep these expert tips in mind:

  • Room Temperature Eggs: Using eggs at room temperature helps achieve better volume when whipping the egg whites.
  • Clean Equipment: Any grease or residue on your mixing bowl or beaters can interfere with the whipping process, so ensure everything is spotless.
  • Stiff Peaks Importance: Make sure the meringue reaches stiff peaks, as this is crucial for the cookies to hold their shape during baking.
  • Oven Calibration: Ovens can vary; consider using a thermometer to ensure your oven is at the correct temperature for baking meringues.
  • Humidity Consideration: Avoid making meringues on humid days, as moisture can affect their texture and prevent them from drying out properly.
  • Experiment with Flavors: Feel free to add extracts like vanilla or almond for an extra flavor dimension in your meringues.
  • Use Different Shapes: While ghosts are fun, you can pipe meringues in various shapes for different occasions.
  • Storage Tips: Store your meringue cookies in an airtight container to keep them crisp.

Common Mistakes and Troubleshooting

Even experienced bakers can encounter issues when making meringues. Here’s how to troubleshoot common problems:

  • Runny Meringue: If your meringue won’t hold its shape, it may be due to moisture or leftover egg yolk. Ensure everything is dry and clean before starting.
  • Soft Peaks: If your meringue is not forming stiff peaks, continue beating. Sometimes it just needs a bit more time.
  • Cracked Meringues: Cracks can occur due to rapid temperature changes. Allow meringues to cool in the oven to prevent this.
  • Sticky Texture: If your meringues feel sticky after baking, they may need more time in the oven. Let them dry out longer.

Variations to Try

Get creative with your Keto Ghost Meringue Cookies by experimenting with these fun variations:

  • Chocolate Meringue: Add unsweetened cocoa powder to the meringue mixture for a rich chocolate flavor.
  • Flavored Meringues: Mix in a few drops of your favorite extracts, such as peppermint or lemon, to change the flavor profile.
  • Colored Meringues: Use food coloring to tint the meringue before piping for a vibrant display.
  • Mini Ghosts: Pipe smaller meringue shapes for bite-sized treats that are perfect for snacking.

Storage and Make-Ahead Instructions

These Keto Ghost Meringue Cookies can last quite a while if stored correctly:

  • Storage: Keep the cookies in an airtight container at room temperature for up to a week. If you live in a humid area, consider using a desiccant to absorb moisture.
  • Make-Ahead: You can prepare the meringue mixture and pipe the shapes a day in advance. Bake them fresh the next day for the best texture.

Frequently Asked Questions

Here are some common questions about making Keto Ghost Meringue Cookies:

  • Can I use a different sweetener? Yes, but ensure it’s powdered for the best texture. Some may affect the flavor and texture differently.
  • What if my meringue doesn’t form stiff peaks? Ensure your equipment is clean and dry. If the problem persists, your eggs might be too old.
  • Can I freeze meringue cookies? Freezing is not recommended as it can alter their texture. It’s best to store them at room temperature.
  • How can I make these meringues more festive? Decorate with colored sprinkles or edible glitter for an extra festive touch!
  • What’s the best way to pipe meringues? Practice makes perfect! Use a steady hand and try different piping tips for various shapes.
  • Can I make chocolate meringues? Absolutely! Just incorporate unsweetened cocoa powder into your meringue mixture.
  • How do I know when they’re done baking? They should feel dry to the touch and lift easily off the parchment paper.
  • What should I do if they’re sticky after baking? They may need longer in the oven. Let them dry out for extra time.

Nutritional Tips and Dietary Adaptations

This recipe is not only delightful but also fits within various dietary needs:

  • Low Carb: These cookies are naturally low in carbs, making them suitable for keto diets.
  • Gluten-Free: With no flour involved, these meringues are a great gluten-free treat.
  • Diabetic-Friendly: Using erythritol makes these cookies a safe choice for those managing blood sugar levels.

Equipment Recommendations

Having the right tools can make the meringue-making process smoother:

  • Electric Mixer: A stand or hand mixer is essential for whipping the egg whites to stiff peaks.
  • Piping Bags and Tips: These help you shape your meringues easily and beautifully.
  • Baking Tray and Parchment Paper: A quality baking tray lined with parchment ensures easy removal of the cookies.

Serving Suggestions

These Keto Ghost Meringue Cookies are versatile and can be served in various ways:

  • As Party Favors: Package them in cute bags for Halloween party favors.
  • With Coffee or Tea: Pair them with your favorite beverage for a delightful treat.
  • On a Dessert Table: Display them alongside other low-carb treats for a festive spread.

In conclusion, making Keto Ghost Meringue Cookies is a joyful and rewarding experience that brings a touch of whimsy to any festive occasion. With this comprehensive guide, you’ll be equipped to create these delightful treats with confidence. So, gather your ingredients, get into the spirit of the season, and enjoy the process of bringing these playful cookies to life. Happy baking!

Keto Ghost Meringue Cookies

Prep Time 10 minutes
Cook Time 1 hour
Total Time 1 hour 10 minutes
Servings 12 cookies
Calories 50
Delight in these spooky, sugar-free meringue cookies perfect for Halloween or any festive occasion. Crispy, cute, and easy to make!

Ingredients

Egg Whites

  • 4 pieces egg whites

Cream of Tartar

  • 0.25 teaspoon cream of tartar

Salt

  • Pinch salt

Powdered Erythritol

  • 0.5 cup powdered erythritol

Candy Eyes

  • optional candy eyes (for decoration)

Black Food Paint

  • optional black food paint (for decorating mouths)

Piping Tip

  • optional 1A piping tip (for piping shapes)

Piping Bags

  • optional piping bags (for piping)

Small Paint Brush

  • optional small paint brush (for decorating mouths)

Instructions 

  • Preheat oven to 200°C. Line a baking tray with parchment paper.
  • Beat egg whites, cream of tartar, and salt until foamy. Add erythritol gradually and beat until stiff peaks form.
  • Pipe ghost shapes onto the tray. Decorate with candy eyes and paint mouths if desired.
  • Bake for 1 hour, then turn off oven and let sit for another hour to set.

Notes

Ensure your mixing bowl is completely clean for best stiff peaks.
Calories: 50kcal
Cost: $10
Course: Dessert
Cuisine: American
Keyword: ghost, keto, meringue

Discover the Joy of Baking: Your Ultimate Guide to Maple Oat Bread

Welcome to a delightful culinary adventure where the warmth of home baking meets the wholesome goodness of oats and maple syrup. In this article, I’ll guide you through a comforting recipe for Maple Oat Bread, perfect for cozy breakfasts or as a delightful snack. Whether you’re a seasoned baker or just starting out, this recipe is designed to make you feel confident and inspired in the kitchen. Let’s dive in and create a loaf that feels like home, shall we?

Why You’ll Love This Recipe

This Maple Oat Bread is not just any bread; it’s a heartwarming treat that brings together simple ingredients for a flavor-packed experience. Here are some reasons why you’ll fall in love with this recipe:

  • Wholesome ingredients: Made with rolled oats and pure maple syrup, this bread is not only delicious but also nutritious.
  • Versatile use: Great for breakfast, sandwiches, or as a snack, this bread can adapt to your needs.
  • Easy to make: With straightforward steps, even novice bakers can create a lovely loaf without stress.
  • Free from preservatives: Homemade means you know exactly what’s in your bread, ensuring a fresher and healthier option.
  • Perfect texture: The combination of oats and all-purpose flour results in a soft, yet hearty loaf that’s a joy to slice.

Ingredient Breakdown

Let’s get into the specifics of what you need to make this delicious bread:

  • 2½ cups boiling water: This helps to soften the oats.
  • 1 cup rolled oats: Use old-fashioned oats for the best texture.
  • 1 package instant dry yeast: This is key for the bread to rise effectively.
  • ¾ cup maple syrup: Choose pure maple syrup for the best flavor.
  • 2 teaspoons salt: Balances the sweetness and enhances flavor.
  • 1 tablespoon oil: Adds moisture to the dough.
  • 5 cups all-purpose flour: This forms the structure of the bread.

**Substitutions**: If you’re looking to tweak the recipe a bit, consider the following substitutions:

  • Whole wheat flour: Swap part of the all-purpose flour for whole wheat for added nutrition.
  • Honey or agave syrup: These can replace maple syrup if you prefer a different sweetener.
  • Olive oil: Can be used instead of other cooking oils for a Mediterranean twist.
  • Gluten-free flour: If needed, use a gluten-free blend, ensuring that it’s suitable for bread making.

How to Make Maple Oat Bread

Close-up view of freshly baked Maple Oat Bread with a golden crust.

Now, let’s get baking! Follow these steps for a perfect loaf:

  • Step 1: In a large mixing bowl, combine the boiling water and rolled oats. Set aside for 1 hour to allow the oats to soften.
  • Step 2: Add the maple syrup, yeast, and oil to the cooled oatmeal mixture and stir to combine. Then, mix in 3 cups of flour and the salt until well incorporated. The mixture will be a loose dough.
  • Step 3: Gradually stir in the remaining 2 cups of flour until the dough comes together. Transfer to a lightly floured surface and knead for about 8-10 minutes until smooth and elastic, adding more flour if necessary.
  • Step 4: Place the kneaded dough in a lightly oiled bowl, cover it with a damp cloth, and let it rise in a warm place for 1 hour.
  • Step 5: Once risen, punch down the dough to release air bubbles. Divide it in half and shape into two loaves. Place in a loaf pan that’s been lightly coated with cooking spray.
  • Step 6: Cover the pans with a cotton kitchen towel and let them rise again for another hour.
  • Step 7: Preheat your oven to 350°F (175°C). Bake the bread for 40 minutes or until golden brown on top.
  • Step 8: Remove the bread from the oven and allow it to cool on a wire rack before slicing and serving.

Pro Tips for Success

To ensure your Maple Oat Bread comes out perfectly every time, keep these expert tips in mind:

  • Temperature matters: Ensure your water is hot, but not boiling, when mixing with oats to avoid cooking them.
  • Watch the dough: If the dough is too sticky, add flour gradually until it achieves a smooth consistency.
  • Rising time is crucial: Make sure to give the dough enough time to rise; it helps develop flavor and texture.
  • Check for doneness: The bread should sound hollow when tapped on the bottom; this indicates it’s fully baked.
  • Cool completely: Allow your bread to cool completely on a wire rack before slicing for the best texture.
  • Store properly: Keep your bread in a sealed bag or container at room temperature for up to 3 days.
  • Freeze for later: If you want to save some, slice the bread and freeze it in an airtight bag; it will last for up to 3 months.
  • Experiment with toppings: Try spreading butter, cream cheese, or even almond butter on your slices for added flavor!

Common Mistakes and Troubleshooting

Even the most experienced bakers can run into issues. Here are some common mistakes and how to troubleshoot them:

  • Dense bread: If your bread is too dense, it may be due to insufficient rising time or too much flour. Ensure proper measurements and allow adequate rising time.
  • Overly sticky dough: This can happen if there’s too much moisture. Add flour gradually as needed while kneading.
  • Uneven baking: If your bread is browning too quickly, consider lowering the oven temperature slightly.

Variations to Try

Feel free to get creative with your Maple Oat Bread! Here are some delicious variations:

  • Add nuts or seeds: Incorporate walnuts or sunflower seeds for a delightful crunch.
  • Fruity twist: Add dried cranberries or blueberries for a hint of sweetness and flavor.
  • Spiced version: Sprinkle in some cinnamon or nutmeg for a warm, spiced flavor.
  • Herb-infused: Add fresh herbs like rosemary or thyme before baking for a savory twist.

Storage and Make-Ahead Instructions

To keep your Maple Oat Bread fresh, here are some storage tips:

  • Room temperature: Store in a sealed bag or container for up to 3 days.
  • Freezer-friendly: For longer storage, slice the bread and freeze it in an airtight bag; it will last up to 3 months.
  • Make-ahead option: You can prepare the dough and refrigerate it overnight; just allow it to come to room temperature before shaping and baking.

Frequently Asked Questions

Here are some of the most common questions about making Maple Oat Bread:

  • Can I use steel-cut oats instead of rolled oats? No, rolled oats are recommended for this recipe as steel-cut oats will not soften enough during baking.
  • What can I serve with this bread? It pairs wonderfully with butter, jam, or as a sandwich base for your favorite fillings.
  • How can I tell if my bread is done? The bread should be golden brown and sound hollow when tapped.
  • Can I make this bread vegan? Yes, simply replace the oil with a plant-based option and leave out any dairy toppings.
  • How long does it take to rise? The dough typically rises for about 1 hour, but this can vary depending on the temperature of your kitchen.
  • Is this recipe easy to double? Absolutely! Just double all the ingredients and use larger loaf pans if necessary.
  • What should I do if my dough doesn’t rise? Check the expiration date on your yeast and ensure the water was warm, not hot.
  • Can I add spices to the bread? Yes, spices like cinnamon or nutmeg can enhance the flavor—feel free to experiment!

Nutritional Tips and Dietary Adaptations

This Maple Oat Bread not only tastes great, but it also offers nutritional benefits:

  • High in fiber: The oats provide a good source of dietary fiber, aiding digestion.
  • Low in preservatives: By making it yourself, you avoid unnecessary additives found in store-bought bread.
  • Customizable sweetness: Adjust the amount of maple syrup to suit your taste and dietary needs.

Recommended Equipment

To achieve the best results, here’s a list of essential equipment:

  • Mixing bowls: At least one large bowl for mixing the dough.
  • Loaf pans: Two standard loaf pans for shaping the bread.
  • Kitchen towel: To cover the dough while it rises.
  • Wire rack: For cooling the bread after baking.
  • Dough scraper: Helpful for kneading and shaping the dough.

Serving Suggestions

This Maple Oat Bread is truly versatile. Here are some serving ideas to enhance your experience:

  • Breakfast Toast: Serve warm with a spread of butter or almond butter and a drizzle of honey.
  • Sandwiches: Use it as a base for delicious sandwiches filled with turkey, avocado, or fresh veggies.
  • Snack Time: Enjoy slices with a side of fresh fruit or yogurt for a wholesome snack.
  • French Toast: Transform leftover slices into delicious French toast for a special brunch treat.

In conclusion, baking your own Maple Oat Bread is a rewarding experience that fills your home with warmth and delicious aromas. I hope this comprehensive guide helps you feel inspired to give it a try. Remember, cooking is not just about feeding your body, but also your soul. Enjoy the process, and happy baking!

Maple Oat Bread

Prep Time 1 hour
Cook Time 40 minutes
Total Time 1 hour 40 minutes
Servings 10 slices
Calories 180
A hearty and sweet bread made with oats and maple syrup, perfect for breakfast or snacks.

Ingredients

Dough

  • 2.5 cups boiling water
  • 1 cup rolled oats
  • 1 package instant dry yeast
  • 0.75 cup maple syrup
  • 2 teaspoons salt
  • 1 tablespoon oil
  • 5 cups all-purpose flour

Instructions 

  • Combine boiling water and oats; let sit for 1 hour.
  • Add maple syrup, yeast, and oil; stir. Mix in 3 cups flour and salt to form a loose dough.
  • Stir in remaining flour until dough forms; knead for 8-10 minutes until smooth.
  • Let dough rise in oiled bowl, covered, for 1 hour.
  • Shape into loaves, place in pans, and let rise for 1 hour.
  • Bake at 375°F (190°C) for 40 minutes; cool before slicing.

Notes

For a richer flavor, brush the crust with butter after baking.
Calories: 180kcal
Cost: $15
Course: Bread
Keyword: maple syrup, Oats