Author

Noah

Browsing

Embrace the Flavors of Fall with Caramel Apple Punch

As the leaves turn golden and the air becomes crisp, there’s no better way to celebrate the season than with a comforting and refreshing Caramel Apple Punch. This delightful drink blends the sweet, familiar taste of apple cider with the rich depth of caramel sauce and the effervescence of ginger ale, creating a perfect beverage for cozy gatherings and festive celebrations. Whether you’re hosting a Thanksgiving feast or enjoying a quiet evening at home, this punch will surely bring warmth and joy to your table.

In this comprehensive guide, we’ll explore everything you need to know about making this exceptional punch, from the ingredients and preparation to serving suggestions and variations. So, grab your favorite punch bowl and let’s dive in!

Why You’ll Love This Recipe

  • Simple Preparation: This Caramel Apple Punch requires minimal effort, taking just 10 minutes to prepare, allowing you to spend more time enjoying with loved ones.
  • Customizable Flavor: Tailor the sweetness and spice level to your taste by adjusting the amount of caramel sauce and pumpkin pie spice.
  • Perfect for Any Occasion: Whether it’s a fall festival, Thanksgiving, or a cozy family night, this punch fits all gatherings, making it a versatile choice.
  • Visually Stunning: With vibrant apple slices and cranberries, this punch is not just delicious—it’s a feast for the eyes, ready to impress your guests.
  • Kid-Friendly Option: Easily make a non-alcoholic version by omitting any spirits, ensuring everyone can enjoy this festive drink.

Ingredients You’ll Need

Here’s a detailed breakdown of the ingredients that create the delicious base for your Caramel Apple Punch:

  • 2 64-oz containers apple cider: This forms the crisp, fruity base of the punch, bringing that unmistakable fall orchard freshness.
  • 2 liters ginger ale: Adding bubbles and a touch of sweetness makes the punch effervescent and lively.
  • 2/3 cup caramel sauce: The star of the show, offering rich, creamy sweetness and a buttery depth that’s simply divine. You can use Torani’s brand or homemade caramel sauce for the best flavor.
  • 1/2 teaspoon pumpkin pie spice: This spice blend enhances the autumnal flavor profile, giving each sip a warm, cozy essence.
  • 6 cups ice: Ensures that your punch is served chilled and refreshing, perfect for a fall day.
  • 2 large red apples (sliced thinly): They add a sweet crunch and beautiful color to the punch.
  • 2 large green apples (sliced thinly): Their tartness balances the sweetness of the punch, creating a harmonious flavor.
  • 2 cups fresh cranberries: They add a pop of color and a slight tartness that complements the sweetness of the caramel.

How to Make Caramel Apple Punch

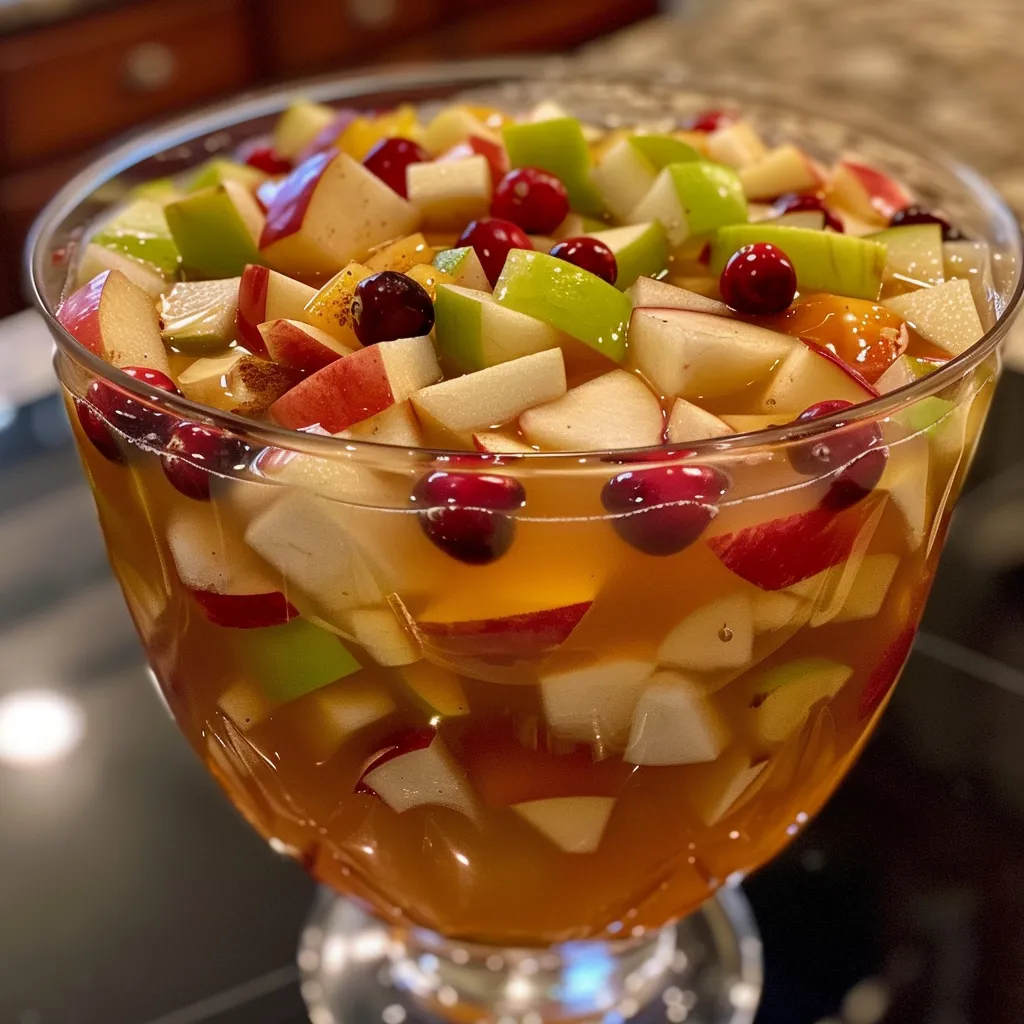
Close-up of a glass of Caramel Apple Punch, garnished with apple slices and cranberries.

Creating this delightful punch is quick and straightforward. Just follow these simple steps:

  1. In a large punch bowl, add the apple cider, ginger ale, caramel sauce, and pumpkin pie spice.
  2. Whisk to combine, then add the ice, sliced apples, and cranberries. Stir until well combined.
  3. Serve immediately and enjoy the delightful flavors of fall!

Pro Tips for Perfect Punch

  • Chill All Ingredients: For the best flavor and refreshment, chill all ingredients before mixing. This helps maintain the punch’s fizziness and ensures it’s served cold.
  • Use Fresh Ingredients: Freshly sliced apples and cranberries not only taste better but also look more appealing in the punch.
  • Adjust Sweetness: If you prefer a sweeter punch, feel free to add more caramel sauce to taste. Conversely, you can reduce it for a less sweet profile.
  • Mix Right Before Serving: Prepare the punch just before serving to keep the ginger ale bubbly and fresh.
  • Garnish Creatively: Consider garnishing each glass with a cinnamon stick or a sprinkle of extra pumpkin pie spice for an added touch.
  • Make It Ahead: You can prepare the non-carbonated elements (cider, caramel, and spices) ahead of time and mix in the ginger ale just before serving.
  • Serving Temperature: Serve the punch in a chilled bowl or pitcher to keep it refreshingly cold for longer.
  • Consider Alcohol Options: If you’d like to add a little kick, consider incorporating a splash of spiced rum or apple brandy for an adult version.

Common Mistakes and Troubleshooting

Even the best home chefs can face challenges. Here are some common mistakes to avoid and tips to troubleshoot:

  • Using Warm Ingredients: Avoid using warm apple cider or ginger ale, as this will dilute the punch and diminish its refreshing nature.
  • Skipping the Spice: Don’t skip the pumpkin pie spice; it adds a crucial layer of flavor that defines the essence of fall.
  • Over-Mixing: Stir gently when combining ingredients to retain the carbonation of the ginger ale. Over-mixing can lead to a flat punch.
  • Not Adjusting for Sweetness: Taste your punch before serving and adjust the sweetness if necessary; everyone’s palate is different.

Delicious Variations to Try

Feel free to get creative with your Caramel Apple Punch. Here are some variations to inspire you:

  • Spiced Rum Punch: Add 1-2 cups of spiced rum for an adult twist that enhances the autumnal flavors.
  • Cranberry-Apple Punch: Substitute half of the apple cider with cranberry juice for a tart and tangy flavor.
  • Sparkling Water Alternative: Replace ginger ale with club soda or sparkling water for a less sweet, refreshing drink.
  • Caramel Apple Slush: Blend the ingredients with ice for a slushie version, perfect for warm fall days.

Storage and Make-Ahead Instructions

This punch is best enjoyed fresh, but if you have leftovers, here’s how to store and prepare it ahead of time:

  • Storage: Store any leftover punch in an airtight container in the refrigerator for up to 2 days. Note that the carbonation will diminish over time.
  • Make-Ahead: Prepare the cider mixture (cider, caramel, and spices) up to a day in advance. Add ginger ale and ice just before serving.

Frequently Asked Questions

  • Can I make this punch non-alcoholic? Absolutely! Just omit any alcohol and enjoy a delightful drink for everyone.
  • What type of apple cider should I use? Fresh, unfiltered apple cider is best for maximum flavor, but store-bought works fine too.
  • How long can I store leftovers? Leftover punch can be stored in the refrigerator for up to 2 days, but it’s best enjoyed fresh.
  • Can I use store-bought caramel sauce? Yes, store-bought caramel sauce works perfectly; just ensure it’s a good quality for the best flavor.
  • What can I use instead of ginger ale? You can substitute ginger ale with sparkling water or club soda for a less sweet version.
  • How do I make this punch more festive? Consider adding seasonal garnishes like cinnamon sticks, star anise, or even a sprinkle of nutmeg.
  • Is this punch kid-friendly? Yes! Just skip the alcohol, and it’s a delightful treat for all ages.
  • Can I add other fruits? Certainly! Feel free to add slices of oranges or pears for an extra burst of flavor.

Nutritional Tips and Dietary Adaptations

For those mindful of their dietary choices, here are some tips:

  • Lower Sugar Options: Use sugar-free caramel sauce or reduce the amount of caramel for a lower-sugar version.
  • Gluten-Free: This punch is naturally gluten-free, making it suitable for various dietary needs.
  • Dairy-Free: Ensure your caramel sauce is dairy-free if you have lactose intolerance.

Essential Equipment for Making Punch

To make your Caramel Apple Punch, you’ll need:

  • Large Punch Bowl: A spacious bowl or pitcher to accommodate all the ingredients.
  • Whisk: For combining the ingredients thoroughly.
  • Serving Spoon: To mix and serve the punch smoothly.
  • Measuring Cups: For accurately measuring your ingredients.

Serving Suggestions

When it comes to serving your punch, consider these ideas:

  • Glassware: Serve in clear glass punch cups to showcase the vibrant colors of the punch.
  • Garnish: Use slices of apples or fresh cranberries as decorative garnishes in each glass.
  • Pairing: Complement with light snacks like cheese platters, crackers, or fall-themed desserts for a complete experience.

In conclusion, the Caramel Apple Punch is more than just a drink; it’s a celebration of the flavors and warmth of the season. With its delightful combination of apple cider, caramel, and ginger ale, it’s sure to be a hit at any gathering. Remember, cooking and serving should be about enjoyment—so take your time, savor every sip, and share the joy of homemade creations. Cheers to fall!
Caramel Apple Punch Recipe

Prep Time 10 minutes
Total Time 10 minutes
Servings 12 cups
Calories 150
A delightful and refreshing fall punch combining apple cider, caramel, and fresh fruits for a festive gathering.

Ingredients

Beverages

  • 128 oz apple cider
  • 2 liters ginger ale
  • 0.67 cup caramel sauce (Torani's brand or homemade)
  • 0.5 teaspoon pumpkin pie spice
  • 6 cups ice
  • 2 large red apples (sliced thinly)
  • 2 large green apples (sliced thinly)
  • 2 cups fresh cranberries

Instructions 

  • Add apple cider, ginger ale, caramel sauce, and pumpkin pie spice to a punch bowl.
  • Whisk to combine, then add ice, sliced apples, and cranberries. Stir well.
  • Serve immediately and enjoy!

Notes

For a colder punch, chill ingredients beforehand.
Calories: 150kcal
Cost: $15
Course: Beverage
Cuisine: American
Keyword: apple, fall, party

Unveil the Magic of Caramel Apple Trifle

Welcome to a culinary adventure that brings together the comforting flavors of fall in a delightful dessert! This Caramel Apple Trifle combines layers of moist cake, creamy vanilla pudding, and sweet apple filling, all drizzled with rich caramel sauce. Whether you’re hosting a gathering or enjoying a cozy evening at home, this trifle recipe is sure to impress. Let’s dive into the details and uncover why you’ll love making this dessert from scratch.

Why You’ll Love This Recipe

This Caramel Apple Trifle is not just a treat for the tastebuds; it’s a feast for the eyes and a comforting reminder of home. Here are some reasons why this trifle will become a staple in your dessert repertoire:

  • Easy to assemble: With simple ingredients and straightforward steps, you can whip this up in no time, even if you’re new to the kitchen.
  • Versatile flavors: The combination of spiced cake and sweet apples creates a harmonious blend that appeals to all palates.
  • Perfect for any occasion: Whether it’s a holiday gathering or a casual dinner, this dessert fits right in.
  • Make-ahead friendly: Prepare your trifle a day in advance, allowing the flavors to meld beautifully.
  • Customizable layers: Feel free to experiment with different cake flavors, pudding, and toppings to make it your own!

Ingredients: A Detailed Breakdown

To create a truly indulgent Caramel Apple Trifle, you’ll need the following ingredients:

  • 1 Box of Cake Mix: Choose from spice, yellow, or even pound cake. You can opt for a store-bought mix to save time.
  • 1 Container of Cool Whip: This will add a fluffy texture. You can use homemade whipped cream if you prefer.
  • 1 Large Box of Vanilla Instant Pudding: This provides a creamy layer that balances the cake and apples.
  • 1 Jar of Caramel Topping Sauce: Essential for that rich, sweet drizzle.
  • 2 Cans of Apple Pie Filling: This will be the star of your trifle, adding juiciness and flavor.

Step-by-Step Directions

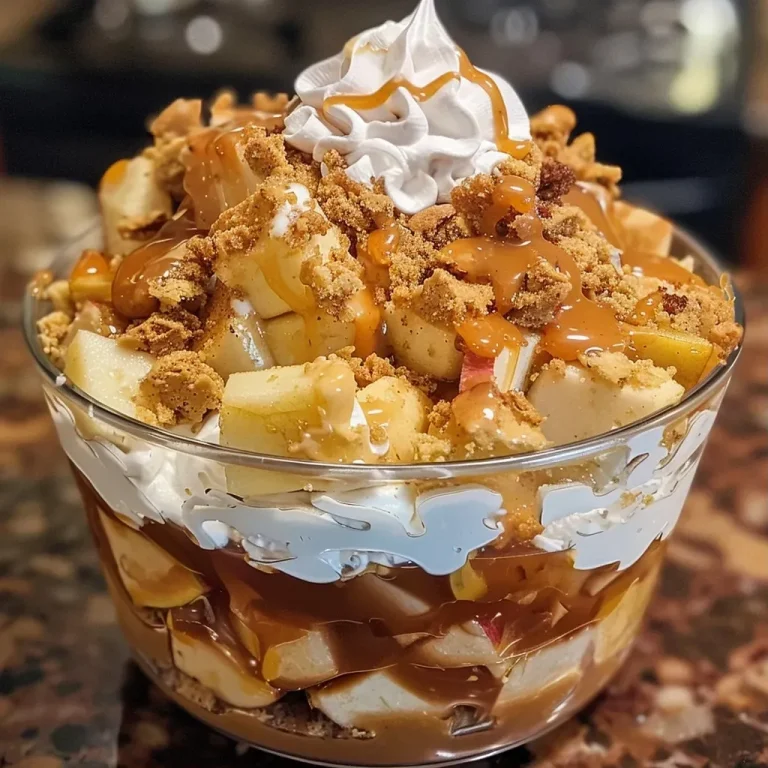
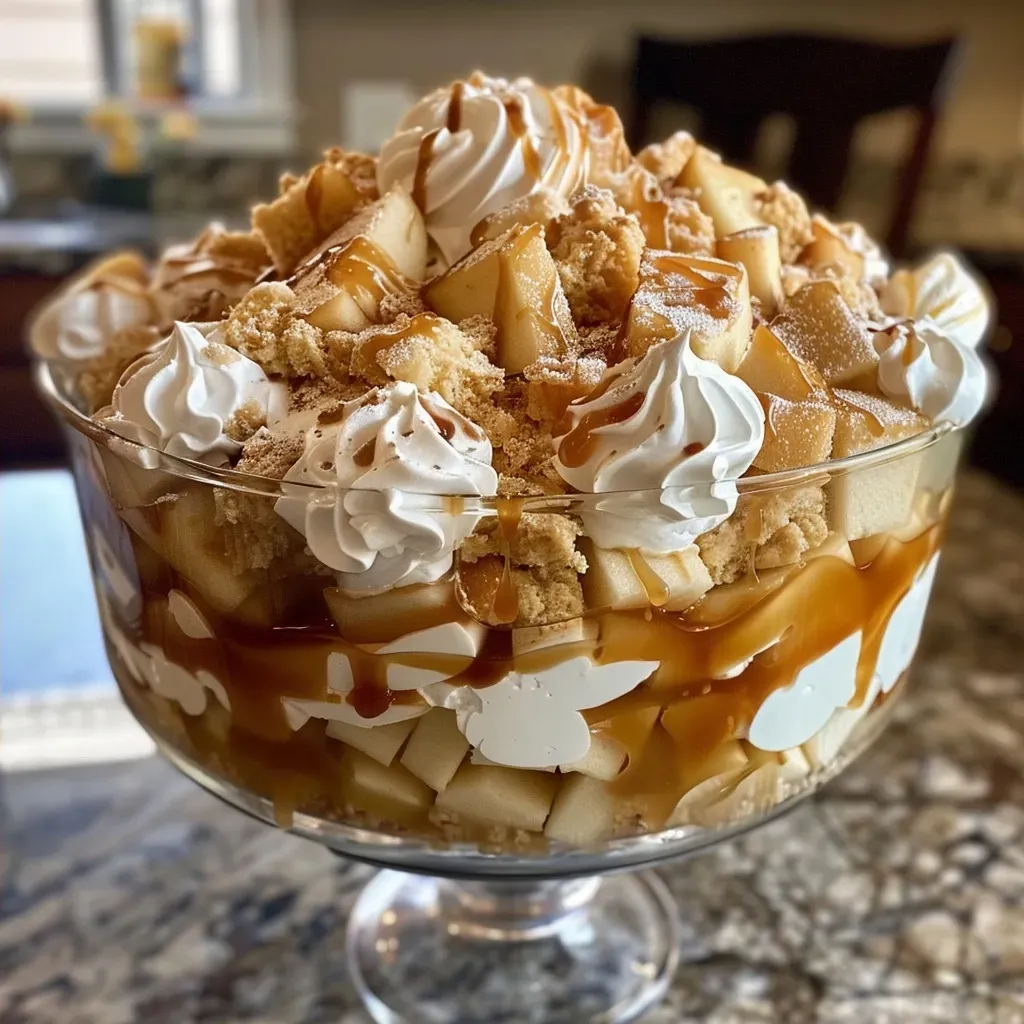
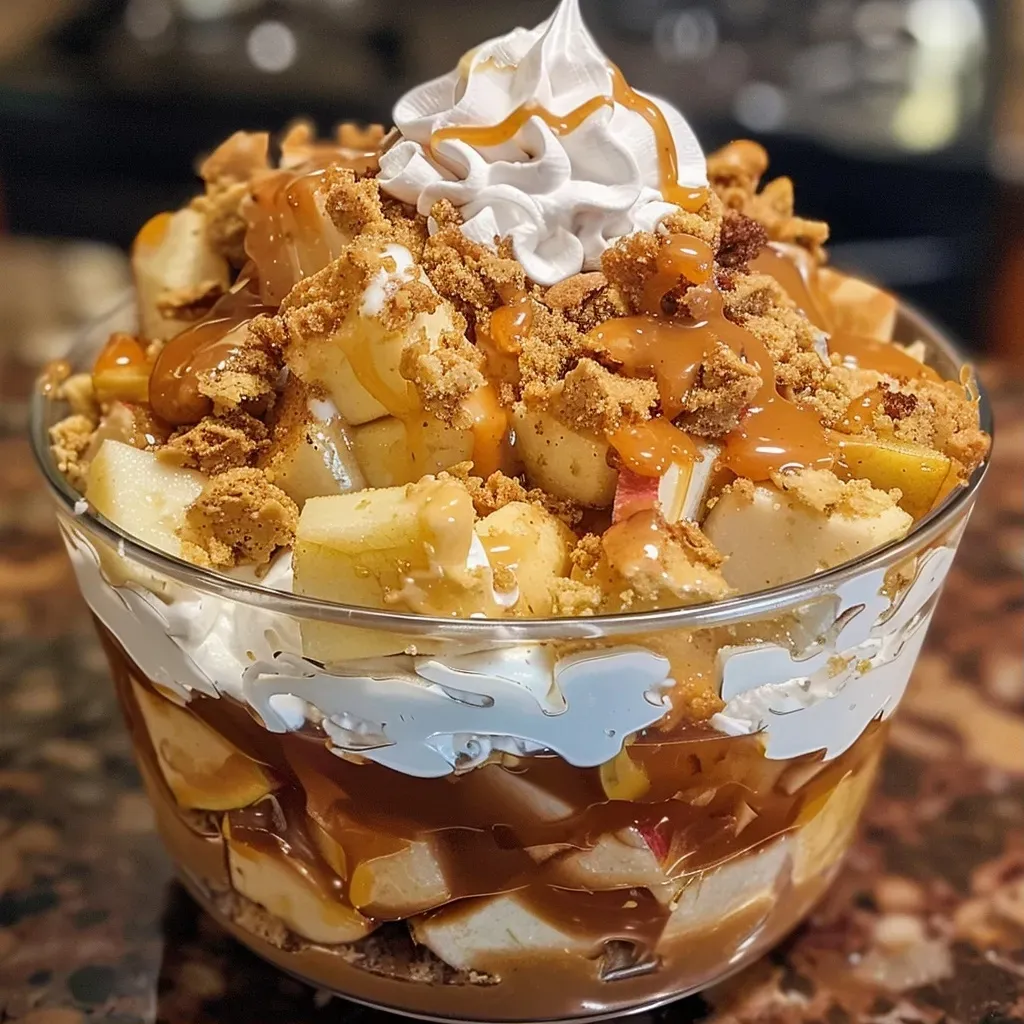
Close-up view of a layered Caramel Apple Trifle with apple pie filling and caramel sauce.

Now that you have your ingredients ready, let’s go through the steps to create your Caramel Apple Trifle:

  • Prepare the Cake: If using a store-bought cake, you can get started right away; otherwise, bake your cake according to package instructions and let it cool completely.
  • Make the Pudding: Combine the pudding mix with cold milk and whisk until smooth. Chill in the refrigerator for about 5 minutes.
  • Start Layering: In a large trifle dish or glass bowl, begin with a layer of cake pieces at the bottom.
  • Drizzle with Caramel Sauce: Generously drizzle caramel sauce over the cake layer.
  • Add Pudding Layer: Spread a layer of the chilled vanilla pudding over the caramel.
  • Incorporate Apple Pie Filling: Spoon in a layer of apple pie filling, ensuring it’s evenly spread.
  • Add Cool Whip: Top with a layer of Cool Whip, smoothing it out over the apples.
  • Repeat the Layers: Continue layering with remaining cake, caramel, pudding, apple filling, and Cool Whip until all ingredients are used.
  • Final Touch: Finish with a dollop of Cool Whip and a drizzle of caramel sauce on top.
  • Chill and Serve: Allow the trifle to chill in the refrigerator for at least an hour before serving to let the flavors meld.

Pro Tips for the Best Trifle

To elevate your Caramel Apple Trifle even further, consider these expert tips:

  • Layering technique: For a visually appealing trifle, use clear glass to showcase the beautiful layers.
  • Flavor balance: Adjust the amount of caramel sauce based on your sweetness preference; you can always add more or less.
  • Texture matters: Ensure your cake is completely cool to avoid sogginess when layered with pudding and apples.
  • Ingredient quality: Using high-quality ingredients, especially for the caramel and apples, can significantly enhance the flavor.
  • Chill time: Allowing the trifle to sit overnight can deepen the flavors and improve overall texture.
  • Personalize your pudding: Consider adding spices like cinnamon or nutmeg to your pudding mix for an extra hint of warmth.
  • Garnish with nuts: Top with chopped pecans or walnuts for added crunch and flavor contrast.
  • Fruit variations: Try adding slices of fresh fruit like pears or berries for a refreshing twist.
  • Serving size: Depending on your audience, adjust the portion sizes. Individual cups can also make for a lovely presentation.

Common Mistakes and Troubleshooting

Even the best chefs can run into hiccups. Here’s how to troubleshoot common issues:

  • Soggy layers: If your trifle ends up too soggy, ensure your cake is completely cooled and consider using less pudding or apple filling.
  • Too sweet: If the trifle is overly sweet, balance it with a dollop of unsweetened whipped cream or a sprinkle of sea salt.
  • Layering issues: If layers are not holding up, avoid over-soaking the cake with caramel sauce; a light drizzle is sufficient.
  • Texture concerns: For a creamier trifle, ensure your pudding is chilled correctly and set before layering.

Variations to Try

Don’t hesitate to get creative! Here are some delightful variations to suit your taste:

  • Chocolate Delight: Substitute chocolate pudding for vanilla and add chocolate chips between layers.
  • Caramel Nut Crunch: Incorporate crushed nuts and a layer of toffee bits for added texture.
  • Cinnamon Swirl: Mix cinnamon into the pudding and layer with diced apples and walnuts for a spiced twist.
  • Pumpkin Spice: Use pumpkin puree in the pudding and layer with gingerbread cake for a seasonal treat.

Storage and Make-Ahead Instructions

Your Caramel Apple Trifle can be prepared ahead of time, making it a perfect dessert for busy days. Here’s how to store it:

  • Refrigeration: Store the trifle covered in the refrigerator for up to 3 days. The flavors will continue to develop.
  • Freezing: It’s best not to freeze this dessert, as the texture of the whipped cream and pudding can change when thawed.
  • Make-ahead tips: You can prepare individual components (cake, pudding, and apple filling) a day in advance and assemble just before serving.

Nutritional Information and Dietary Adaptations

While this trifle is a decadent treat, it can be adapted for various dietary preferences:

  • Gluten-free option: Use a gluten-free cake mix and ensure all other ingredients are gluten-free.
  • Lower sugar alternative: Choose sugar-free pudding and light whipped cream to reduce sugar content.
  • Vegan version: Substitute the cake mix, pudding, and whipped cream with plant-based alternatives.

Recommended Equipment

To make your trifle-making journey smooth and enjoyable, here’s what you’ll need:

  • Trifle dish or glass bowl: A clear dish highlights the beautiful layers.
  • Mixing bowls: Use various sizes for mixing cake batter and pudding.
  • Whisk: Essential for mixing pudding and beating cream.
  • Spatula: For layering and spreading pudding and whipped cream smoothly.

Serving Suggestions

When it comes time to serve your masterpiece, consider these ideas:

  • Individual servings: For a more personal touch, serve in clear cups or jars for each guest.
  • Garnish: Sprinkle with extra caramel sauce, chopped nuts, or a sprinkle of cinnamon for visual appeal.
  • Pair with beverages: Serve alongside coffee, tea, or a warm cider for a delightful experience.

Frequently Asked Questions

Here are some common questions about making a Caramel Apple Trifle:

  • Can I use fresh apples instead of pie filling? Yes, but you’ll need to add sugar and spices to mimic the flavor of apple pie filling.
  • How long does this dessert last? It can last up to 3 days in the refrigerator if stored properly.
  • Can I use a different flavor of pudding? Absolutely! Feel free to experiment with chocolate, butterscotch, or even pumpkin spice pudding.
  • Is this recipe suitable for kids? Yes, it’s a fun dessert that kids can help assemble!
  • Can I make it gluten-free? Yes, just use a gluten-free cake mix and ensure other ingredients are gluten-free.
  • What’s the best way to transport it? If taking it to an event, assemble it in a sturdy trifle dish with a lid or transport the layers separately and assemble on-site.
  • Can this be frozen? It’s best enjoyed fresh, as freezing can alter the texture of the whipped cream and pudding.
  • How can I make it healthier? You can use sugar-free pudding, low-fat whipped cream, and whole grain cake mix.

Conclusion

Creating a Caramel Apple Trifle is not just about the delicious layers; it’s a journey filled with flavor, creativity, and joy. As you gather your ingredients and embark on this delightful recipe, remember that the heart of cooking lies in enjoying the process and sharing it with loved ones. So take your time, savor each step, and embrace the warmth of this comforting dessert. Happy cooking!

Caramel Apple Trifle

Prep Time 20 minutes
Cook Time 10 minutes
Total Time 30 minutes
Servings 8 servings
Calories 350
A delicious layered dessert combining cake, caramel, apples, and whipped topping for a perfect treat.

Ingredients

Cake

  • 1 box Cake Mix (spice, yellow, pound cake, store bought, etc.)

Cool Whip

  • 1 container Container of Cool Whip or 2 Small Containers

Pudding

  • 1 large box Vanilla Instant Pudding

Caramel Sauce

  • 1 jar Jar Caramel Topping Sauce

Apple Filling

  • 2 cans Cans of Apple Pie Filling

Instructions 

  • Layer cooled cake at the bottom of the trifle dish.
  • Spread caramel sauce over the cake.
  • Add a layer of vanilla pudding, then apple filling, and Cool Whip. Repeat layers and top with Cool Whip and caramel.

Notes

Chill the assembled trifle for at least 1 hour before serving for best flavor.
Calories: 350kcal
Cost: $15
Course: Dessert
Cuisine: American
Keyword: apple, caramel, trifle

Delightful Graveyard Pudding Cookie Cups: A Spooktacular Treat

Fall is here, and with it comes the excitement of Halloween festivities! One of my favorite ways to celebrate this season is by creating fun and playful treats that not only look amazing but also taste delicious. Introducing the Graveyard Pudding Cookie Cups—a whimsical dessert that’s perfect for gatherings, parties, or just a cozy night in. With layers of rich chocolate pudding, fluffy whipped cream, and festive decorations, these pudding cookie cups are sure to be a hit!

Why You’ll Love This Recipe

This recipe isn’t just about looks; it’s packed with reasons to love it:

  • Fun Presentation: The spooky theme makes these cups a perfect addition to any Halloween spread, delighting both kids and adults alike.
  • Easy to Assemble: With simple steps and minimal cooking involved, these pudding cups can be whipped up in no time!
  • Customizable Layers: Feel free to get creative with the layers; you can add your favorite candies or even incorporate fruit for a refreshing twist.
  • Make-Ahead Treat: These cups can be prepared a day in advance, allowing you to enjoy your party without any last-minute stress.
  • Deliciously Decadent: The combination of chocolate pudding and Cool Whip creates a rich, creamy dessert that’s irresistibly tasty.

Ingredients for Graveyard Pudding Cookie Cups

Here’s what you’ll need to create these delightful treats:

  • 5.1 oz Chocolate Instant Pudding Mix: The base of our delicious pudding layers, providing rich chocolate flavor.
  • 3 Cups Milk: Essential for mixing with the pudding mix for the perfect creamy texture.
  • 8 oz Cool Whip: Adds a light and airy element that complements the pudding beautifully.
  • 24 Oreo Cookies: Crushed to form a delicious crust and topping that resembles grave dirt.
  • 6 Milano Double Chocolate Cookies: These serve as the tombstones for our spooky graveyard theme.
  • Black Frosting or Edible Marker: Used to create the ‘RIP’ inscriptions on the tombstones.
  • 6 Candy Pumpkins: Fun decorations that add a pop of color to your dessert.
  • Googley Eyes: For a playful touch that makes your pudding cups even more fun.
  • Gummy Worms: Optional, but they add a creepy-crawly element that enhances the Halloween theme!

Step-by-Step Instructions

Close-up view of Graveyard Pudding Cookie Cups decorated with candy pumpkins and gummy worms.

Let’s dive into how to assemble these spooky treats:

  1. Using black frosting or an edible marker, write ‘RIP’ on each of the Milano cookies to create tombstones. Set aside.
  2. In a stand mixer, combine the pudding mix and milk, whisking on medium speed for about 2 minutes until well combined.
  3. Gently fold in the Cool Whip until the mixture is smooth and blended.
  4. Crush the Oreo cookies into fine crumbs using a food processor.
  5. In each clear plastic cup, sprinkle 3-4 tablespoons of crushed Oreos at the bottom.
  6. Press a few googley eyes around the edges between the crumbs and the cup, making it look like they’re peeking out.
  7. Spoon in a layer of the chocolate pudding mixture evenly on top of the crumbs.
  8. Repeat the last three steps for a second layer.
  9. Finish by sprinkling more Oreo crumbs on top until they almost reach the lip of the cup.
  10. Firmly insert one cookie tombstone into the center of each pudding cup.
  11. Gently place a candy pumpkin beside each tombstone.
  12. If desired, embellish with gummy worms for an extra spooky touch.

Storage and Make-Ahead Instructions

These Graveyard Pudding Cookie Cups can be made a day in advance. Store them in the fridge until you’re ready to serve. Just be sure to cover them with plastic wrap to prevent any odors from seeping in. They will stay fresh for up to 2 days, but they are best enjoyed within the first 24 hours for optimal texture.

Expert Tips for Perfect Pudding Cups

To ensure your Graveyard Pudding Cookie Cups turn out perfectly, consider these tips:

  • Use Chilled Milk: For a quicker pudding set and better texture, use cold milk when mixing with the pudding.
  • Folding Technique: When incorporating Cool Whip, fold gently to maintain the lightness of the whipped cream.
  • Crushing Oreos: Ensure the Oreos are crushed finely for a smooth crust and topping.
  • Layering: Take your time while layering; a little patience will yield beautiful, visible layers.
  • Decorative Touches: Get creative with additional decorations; edible glitter or sprinkles can add a fun flair!
  • Portion Control: These cups are rich, so consider using smaller cups for serving if you’re hosting a larger gathering.
  • Flavor Variations: Consider using vanilla pudding instead of chocolate for a different flavor profile.
  • Garnish Ideas: Fresh mint leaves can add a pop of color and freshness if you want to elevate your presentation.

Variations to Try

If you want to mix things up, here are some delicious variations to consider:

  • Vanilla Graveyard Cups: Substitute chocolate pudding with vanilla pudding for a different flavor.
  • Fruit Layering: Add a layer of sliced bananas or strawberries between the pudding layers for a fruity twist.
  • Nutty Crunch: Incorporate chopped nuts or granola into the layers for added texture and crunch.
  • Candy Corn Surprise: Add candy corn to the top layer for a festive touch that screams Halloween!

Common Mistakes and Troubleshooting

Here are some common pitfalls to avoid while making your pudding cups:

  • Overmixing the Pudding: Mixing the pudding too much can cause it to become grainy. Mix just until combined.
  • Too Much Liquid: Avoid adding too much milk, as this can result in a runny pudding mixture.
  • Not Chilling: If you skip chilling the cups before serving, the layers may not hold together well.
  • Skipping the Crust: The Oreo crust adds flavor and texture; don’t skip this step!

Frequently Asked Questions

Here are some common questions about making Graveyard Pudding Cookie Cups:

  • Can I make these pudding cups ahead of time? Yes, they can be prepared a day in advance and stored in the fridge.
  • What if I don’t have Oreo cookies? You can substitute with any chocolate cookie or graham crackers for a different flavor.
  • Can I use homemade pudding? Absolutely! If you prefer, you can make your pudding from scratch using your favorite recipe.
  • How long do these last in the fridge? They will stay fresh for up to 2 days but are best enjoyed within the first 24 hours.
  • Can I freeze these pudding cups? Freezing is not recommended, as it can affect the texture of the whipped cream.
  • What can I use instead of Cool Whip? Homemade whipped cream is a great alternative for a fresher taste.
  • Can I add more layers? Absolutely! Feel free to get creative with your layers and ingredients.
  • Are there any gluten-free options? You can use gluten-free cookies for the crust and toppings to make this dessert gluten-free.

Nutritional Tips and Dietary Adaptations

For those looking to adjust the recipe to meet dietary needs:

  • Lower Calorie: Use sugar-free pudding mix and light Cool Whip to reduce calories.
  • Dairy-Free: Substitute with almond or coconut milk and a dairy-free whipped cream option.
  • Vegan Option: Use vegan cookies and plant-based pudding and cream alternatives.

Equipment Recommendations

To make this recipe, you’ll need:

  • Stand Mixer: For easy mixing of the pudding and whipped cream.
  • Food Processor: To crush the Oreo cookies into fine crumbs quickly.
  • Clear Plastic Cups: Allows for beautiful layering of the pudding and decorations.
  • Spatula: For folding in the Cool Whip and layering the pudding.

Serving Suggestions

When it comes time to serve, consider pairing these pudding cups with:

  • Spooky Drinks: Serve alongside themed beverages like a witch’s brew or pumpkin spice latte.
  • Halloween-Themed Snacks: Offer other fun treats like mummy dogs or spider deviled eggs for a complete Halloween spread.
  • Party Plates: Use themed plates and napkins to enhance the festive atmosphere.

Bringing together all these elements creates a warm, inviting experience for your guests, allowing them to indulge in the joy of Halloween treats.

Conclusion

Creating these Graveyard Pudding Cookie Cups is more than just a recipe; it’s about making memories and enjoying the process of cooking and sharing with loved ones. So gather your ingredients, invite some friends over, and have fun in the kitchen. Remember, cooking is about simplicity and joy, and these delightful cups embody just that! Happy Halloween!

Graveyard Pudding Cookie Cups

Prep Time 20 minutes
Total Time 20 minutes
Servings 6 cups
Calories 350
A fun and spooky dessert featuring layered pudding, cookies, and creepy decorations perfect for Halloween.

Ingredients

Pudding and Dairy

  • 5.1 oz Chocolate Instant Pudding Mix
  • 3 Cups Milk
  • 8 oz Cool Whip

Cookies

  • 24 Oreo Cookies
  • 6 Milano Double Chocolate Cookies (Tombstones)

Decorations

  • Black Frosting or Black Edible Marker Black Frosting or Edible Marker
  • 6 Candy Pumpkins
  • Googley Eyes Googley Eyes
  • Gummy Worms Gummy Worms

Instructions 

  • Write RIP on each Milano cookie with frosting or edible marker; set aside.
  • Whisk pudding mix and milk until thickened, then fold in Cool Whip.
  • Crush Oreos into fine crumbs.
  • Layer crumbs, pudding, and repeat; top with crumbs.
  • Insert a cookie tombstone into each cup, add candy pumpkins, and decorate with gummy worms and googly eyes.

Notes

Use a piping bag for neat decoration and refrigerate before serving for best results.
Calories: 350kcal
Cost: $15
Course: Dessert
Keyword: cookies, Halloween, pudding

Welcome to a delightful culinary journey where we explore the comforting and delicious world of homemade dips! Today, I’m excited to share my Knorr Spinach Dip in a Bread Bowl recipe—a perfect blend of creamy goodness that not only pleases the palate but also creates a warm and inviting centerpiece for any gathering. This spinach dip is rich, flavorful, and served in a crusty bread bowl that makes it a hit at parties, family gatherings, or a cozy night in. Let’s dive into this simple yet satisfying recipe that truly celebrates the joy of cooking at home.

Why You’ll Love This Recipe

  • Effortless Preparation: With minimal ingredients and simple steps, this dip is perfect for both novice and experienced cooks alike.
  • Versatile Serving Options: Enjoy the dip with fresh veggies, crackers, or bread, making it a flexible choice for any occasion.
  • Rich and Creamy Texture: The combination of sour cream and mayonnaise creates a wonderfully creamy dip that’s hard to resist.
  • Impressive Presentation: Serving the dip in a bread bowl not only elevates its appearance but also adds an extra layer of flavor.
  • Customizable Ingredients: Easily adapt the recipe to suit your taste by adding different spices or veggies, making it your own.

Ingredients You’ll Need

To create this delicious spinach dip, gather the following ingredients:

  • 10 ounces (283 grams) frozen chopped spinach: A staple in many kitchens, frozen spinach provides convenience and retains essential nutrients.
  • 1 packet (40 grams) Knorr vegetable recipe mix: This mix adds a savory depth of flavor, making it a must-have in your pantry.
  • 1 cup (208 grams) mayonnaise: For creaminess and richness; feel free to use low-fat options if desired.
  • 2 cups (454 grams) sour cream: This ingredient contributes to the dip’s smooth texture and tangy flavor.
  • 1 can (8 ounces, 227 grams) sliced water chestnuts, drained and chopped: Adds a satisfying crunch and unique texture.
  • 3 scallions, thinly sliced (optional): For a fresh, oniony flavor that brightens the dip.
  • 1 sourdough boule: The star of the show, this bread provides a delicious vessel for the dip.
  • Fresh veggies of your choice: Carrots, cucumber, and bell peppers are great options for dipping.

How to Make Knorr Spinach Dip

Follow these straightforward steps to whip up your spinach dip:

  1. In a microwave-safe, lidded container, combine the frozen spinach and two tablespoons of water. Microwave on high until just hot, about four minutes, depending on your microwave.
  2. Let it cool slightly, then place the spinach in a fine-mesh strainer. Use a fork or your hands to press out as much liquid as possible to avoid a watery dip.
  3. In a mixing bowl, stir the Knorr vegetable recipe mix into the mayonnaise and sour cream until well combined. Add the chopped water chestnuts and drained spinach, mixing thoroughly to break up any clumps.
  4. Cover the bowl and chill in the refrigerator for at least two hours to allow the flavors to meld.
  5. Prepare the bread bowl by slicing the top off the sourdough boule and removing most of the soft insides, leaving a 1/4 to 1/2-inch layer of bread inside.
  6. Fill the hollowed bread bowl with your chilled spinach dip. Place it in the center of a serving platter and surround it with fresh veggies for dipping.

Pro Tips for the Perfect Spinach Dip

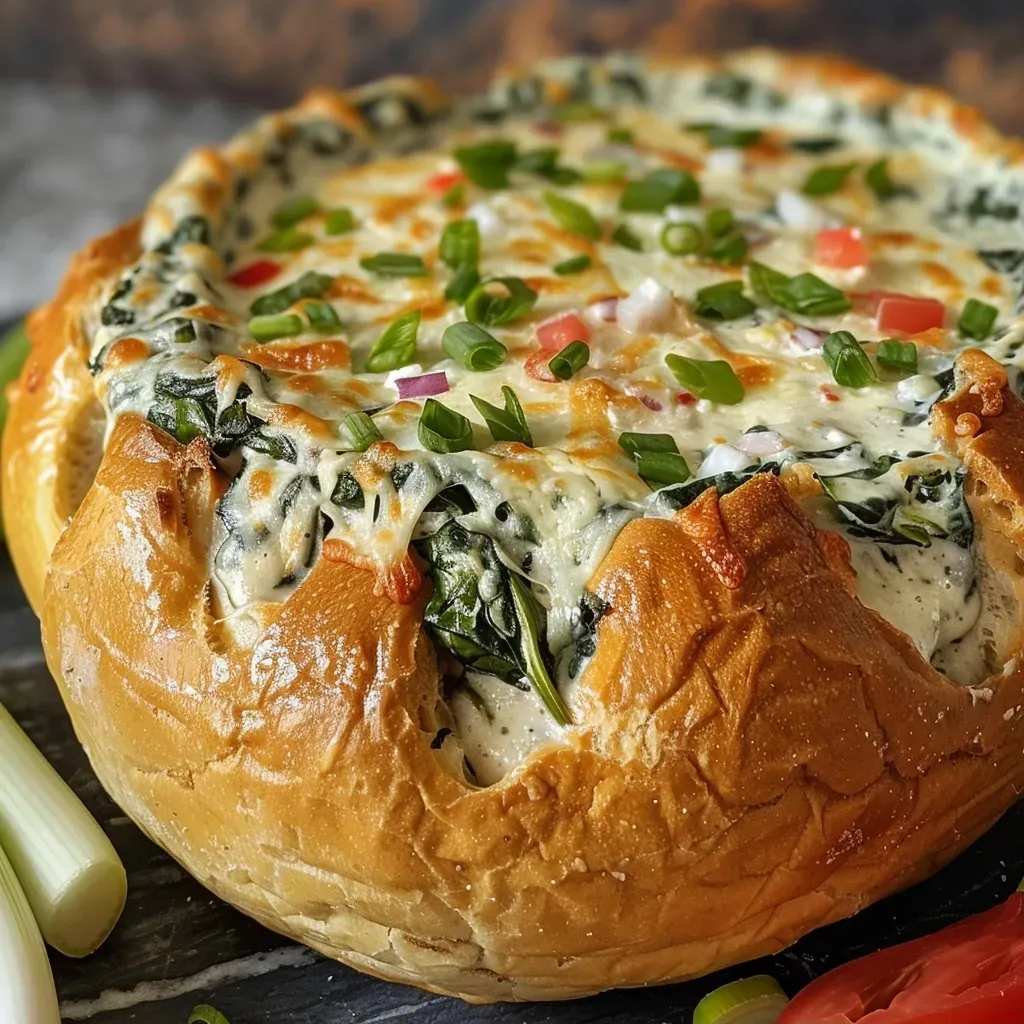
Close-up view of a bread bowl filled with creamy spinach dip, surrounded by fresh vegetables.
  • Thaw and Drain Spinach Properly: Ensure you press out as much moisture as possible from the spinach to avoid a runny dip.
  • Chill Before Serving: Allowing the dip to chill not only enhances the flavor but also helps achieve the right texture.
  • Use Fresh Ingredients: Whenever possible, opt for fresh veggies and herbs to elevate the flavor profile.
  • Experiment with Seasonings: Don’t hesitate to add garlic powder, onion powder, or even hot sauce for a spicy kick!
  • Serve with a Variety of Dippers: Mix it up with different veggies, chips, or even pretzels to cater to all tastes.
  • Make Ahead: This dip can be prepared a day in advance, making it a perfect option for busy hosts.
  • Customize the Bread Bowl: Consider using different types of bread like ciabatta or rye for a unique twist.
  • Store Leftovers Properly: Keep any leftover dip in an airtight container in the refrigerator for up to three days.

Common Mistakes and Troubleshooting

Here are some common pitfalls to avoid when making your spinach dip:

  • Skipping the Drainage Step: Not draining the spinach properly can lead to a watery dip. Always press out excess moisture!
  • Not Chilling the Dip: Serving the dip immediately may result in a loss of flavor. Chill it for the best results.
  • Using Low-Quality Ingredients: Opt for good-quality mayonnaise and sour cream to enhance the dip’s overall taste.
  • Overmixing the Ingredients: Mixing too vigorously can lead to a loss of texture. Stir gently to combine.

Variations to Try

Feel free to get creative with your spinach dip! Here are some tasty variations:

  • Cheesy Spinach Dip: Add 1 cup of shredded cheese (like cheddar or mozzarella) for a cheesy twist.
  • Spicy Spinach Dip: Mix in diced jalapeños or a few dashes of hot sauce for some heat.
  • Herbed Spinach Dip: Incorporate fresh herbs like dill or parsley for a refreshing flavor.
  • Greek Spinach Dip: Add crumbled feta cheese and Kalamata olives for a Mediterranean flair.

Storage and Make-Ahead Instructions

This dip can be made ahead of time, making it a great choice for parties. Here’s how to store it:

  • Refrigerate: Keep the dip in an airtight container in the refrigerator for up to three days.
  • Freezing: While it’s best enjoyed fresh, you can freeze any leftover dip for up to a month. Thaw in the refrigerator before serving.
  • Prepare the Bread Bowl Separately: Hollow out your bread bowl a few hours before serving to keep it fresh.

Frequently Asked Questions

Here are some common questions about making spinach dip:

  • Can I use fresh spinach instead of frozen? Yes, but you’ll need to blanch and chop it first. Make sure to squeeze out excess moisture.
  • What can I serve with spinach dip? Fresh veggies, crackers, breadsticks, or chips are all great options!
  • How long does the dip last in the fridge? The dip can last up to three days in the fridge when stored properly.
  • Can I make this dip vegan? Substitute mayonnaise and sour cream with vegan alternatives for a plant-based version.
  • Is this dip gluten-free? Yes, as long as you use gluten-free bread for the bowl and ensure all ingredients are gluten-free.
  • Can I add meats to the dip? Absolutely! Cooked bacon or diced ham can add a delicious savory element.
  • What’s the best way to serve this dip? Present it in the bread bowl and surround it with an assortment of fresh dippers for a beautiful display.
  • Can I make this dip spicy? Yes! Add diced jalapeños or a splash of hot sauce to give it a kick.

Nutrition Tips and Dietary Adaptations

This spinach dip can be made to fit various dietary needs:

  • Low-Calorie Option: Use low-fat mayonnaise and Greek yogurt instead of sour cream for a lighter dip.
  • Gluten-Free: Ensure your bread bowl and any dippers are gluten-free.
  • Vegetarian: This recipe is naturally vegetarian but can be made vegan with simple substitutions.
  • Nut-Free: The recipe is nut-free but always check ingredient labels to be safe.

Equipment Recommendations

To make this recipe, you’ll need:

  • Microwave-safe container: For cooking the spinach.
  • Mixing bowl: To combine the ingredients.
  • Fine-mesh strainer: For draining the spinach.
  • Serving platter: To present your dip beautifully.

Serving Suggestions

Pair your spinach dip with:

  • Fresh Vegetables: Carrots, celery, and bell pepper strips add color and crunch.
  • Crackers: Choose an assortment of your favorite crackers for variety.
  • Bread Cubes: Use the bread you removed from the boule for dipping.
  • Chips: Tortilla chips or pita chips work well for a different texture.

Now that you have the ultimate guide to making Knorr Spinach Dip in a Bread Bowl, you’re ready to impress your friends and family with this delicious centerpiece. Enjoy the process of cooking, and remember, the best meals are the ones made with love and shared with those you cherish. Happy cooking!

Knorr Spinach Dip in a Bread Bowl

Prep Time 20 minutes
Cook Time 10 minutes
Total Time 30 minutes
Servings 8 servings
Calories 350
A creamy, flavorful spinach dip served inside a hollowed-out sourdough bread bowl, perfect for gatherings and parties.

Ingredients

Spinach

  • 10 ounces frozen chopped spinach
  • 1 packet Knorr vegetable recipe mix
  • 1 cup mayonnaise
  • 2 cups sour cream
  • 1 can sliced water chestnuts (8-ounce (227 grams), drained and chopped)
  • 3 scallions scallions (thinly sliced (optional))
  • 1 sourdough boule sourdough boule (for serving)
  • to taste fresh veggies (for dipping)

Instructions 

  • Microwave spinach with 2 tbsp water until hot, about 4 minutes.
  • Press out excess liquid from spinach using a strainer and fork or fingers.
  • Mix vegetable recipe mix into mayonnaise and sour cream, then stir in water chestnuts and spinach.
  • Chill the dip for at least 2 hours before serving.
  • Hollow out the sourdough boule, leaving a 1/4- to 1/2-inch bread layer, and fill with dip.
  • Place the bread bowl on a platter, surround with fresh veggies, and serve.

Notes

Use the bread removed from the boule as dippable bread or breadcrumbs for added flavor.
Calories: 350kcal
Cost: $15
Course: Appetizer
Keyword: Bread Bowl, Dip, Spinach

Welcome to the delightful world of caramel apple slices! If you’re looking for a quick and satisfying snack or dessert, you’ve come to the right place. This recipe combines the crispness of fresh apple slices with the rich indulgence of caramel, creating a treat that’s perfect for every occasion—from after-school snacks to festive gatherings. Let’s dive into the sweet simplicity of making these delightful treats!

Why You’ll Love This Recipe

This caramel apple slices recipe is bound to become a favorite for many reasons. Here are just a few:

  • Quick and Easy: This recipe can be prepared in under 15 minutes, making it perfect for those busy days.
  • Customizable: Whether you prefer nuts, chocolate, or sprinkles, you can easily tailor the toppings to your taste.
  • Kid-Friendly: Kids will adore these sweet slices, making them a great option for family gatherings or school events.
  • Perfect for Sharing: Arrange your caramel apple slices on a platter for a stunning and shareable treat.
  • Seasonal Delight: This recipe captures the essence of fall, invoking nostalgic memories with every bite.

Ingredients for the Best Caramel Apple Slices

Here’s what you’ll need to make these scrumptious caramel apple slices:

  • Apples: Choose firm, crisp apples like Granny Smith or Honeycrisp for the best flavor and texture.
  • Caramel Sauce: You can use store-bought caramel sauce or make your own for a richer taste.
  • Kosher or Sea Salt: Optional, for sprinkling to enhance the caramel flavor.
  • Toppings: Get creative with chopped nuts, chocolate chips, sprinkles, or toffee bits!

How to Make Caramel Apple Slices: Step-by-Step Guide

Follow these simple steps to create your delicious caramel apple slices:

1. Prepare the Apples

Wash, core, and slice the apples into 1/2-inch thick pieces. For optimal freshness:

  • To prevent browning, soak the apple slices in a solution of 1/2 teaspoon kosher salt per cup of room temperature water for 5 minutes. Rinse and set aside.

2. Melt the Caramel

Choose your preferred method for melting the caramel:

  • Stovetop: In a saucepan over low heat, stir until smooth.
  • Microwave: Heat in 30-second intervals, stirring until creamy.

3. Drizzle the Caramel

Using a squeeze bottle or spoon, drizzle the melted caramel over the apple slices, leaving about 1 inch uncoated for easy picking.

4. Add Toppings

While the caramel is still warm, sprinkle your choice of toppings over the apple slices.

5. Serve and Enjoy!

Serve your caramel apple slices immediately for the best experience. Enjoy the blend of sweet and tart flavors!

Pro Tips for Success

Close-up of caramel apple slices drizzled with caramel and topped with nuts.

Here are some expert insights to enhance your caramel apple slice-making experience:

  • Use Fresh Apples: Choose apples that are firm and wax-free to ensure the best adhesion of caramel.
  • Dry Thoroughly: Ensure apple slices are completely dry before dipping to prevent the caramel from sliding off.
  • Experiment with Flavors: Try different types of caramel, like salted caramel or chocolate caramel, for a unique twist.
  • Keep it Warm: If making for a gathering, keep melted caramel warm in a slow cooker on low.
  • Make Ahead: Prep your apple slices and toppings ahead of time for a stress-free assembly.

Common Mistakes and Troubleshooting

Even the best cooks can run into a few hiccups. Here’s how to avoid some common mistakes:

  • Caramel Too Thick: If your caramel is too thick, add a little heavy cream to loosen it.
  • Apples Browning: Soak in lemon juice and water to keep them looking fresh.
  • Too Much Topping: Remember, less is more. A few toppings can enhance the flavor without overpowering it.

Variations to Try

Looking to switch things up? Here are some fun variations of caramel apple slices:

  • Chocolate-Dipped: Dip the apple slices in melted chocolate for a rich twist.
  • Nutty Delight: Roll the caramel-coated apples in chopped nuts for added crunch.
  • Spiced Caramel: Add a pinch of cinnamon or nutmeg to the caramel for a seasonal flavor.
  • Savory Touch: Use pretzel pieces instead of sweet toppings for a sweet-salty combo.

Storage and Make-Ahead Instructions

To keep your caramel apple slices fresh:

  • In the Fridge: Store in an airtight container for up to 3 days. The apples may soften slightly but will still taste delicious.
  • Make-Ahead: Prepare the apple slices and toppings ahead of time, but assemble just before serving for optimal texture.

Frequently Asked Questions (FAQs)

Here are some common questions about making caramel apple slices:

  • Can I use any type of apple? Yes, but tart apples like Granny Smith work best for balancing the sweetness of the caramel.
  • Can I use store-bought caramel? Absolutely! Store-bought caramel sauce is a convenient option.
  • How do I prevent the caramel from sliding off? Ensure the apple slices are dry and use a slightly thicker caramel sauce.
  • What toppings work best? Chopped nuts, chocolate chips, and sprinkles are all great choices!
  • Can I make these vegan? Yes, use vegan caramel and ensure the toppings are dairy-free.
  • How long do they last? They’re best enjoyed fresh but can be stored in the fridge for up to 3 days.
  • What’s a good way to serve them at a party? Arrange them on a platter with different toppings on the side for a fun build-your-own experience.
  • Can I freeze caramel apple slices? It’s not recommended, as the texture can change upon thawing.

Nutrition Tips and Dietary Adaptations

For a healthier version of caramel apple slices, consider these adaptations:

  • Lower Sugar: Use homemade caramel with less sugar or a sugar-free alternative.
  • Gluten-Free: Ensure all ingredients are certified gluten-free, especially toppings.
  • Nut-Free: Omit nuts or use seeds as a topping instead for a nut-free version.

Equipment Recommendations

To make your caramel apple slices with ease, here’s what you’ll need:

  • Sharp Knife: For slicing apples cleanly.
  • Cutting Board: A sturdy surface for preparation.
  • Microwave-Safe Bowl: For melting caramel, if using the microwave method.
  • Wax Paper: To prevent sticking when cooling the caramel-coated apple slices.

Serving Suggestions

Serve your caramel apple slices on a beautiful platter, perhaps paired with a warm beverage like cider or coffee. They’re fabulous for:

  • After-school treats for kids.
  • Festive gatherings and parties.
  • Picnics or outdoor events, where a sweet snack is appreciated.

These delightful caramel apple slices are sure to bring smiles and satisfaction to your table. They’re easy to make, fun to customize, and perfect for any occasion. So grab your ingredients and enjoy the sweet journey of creating these delicious treats!

Easy Caramel Apple Slices

Prep Time 10 minutes
Cook Time 5 minutes
Total Time 15 minutes
Servings 4 people
Calories 150
Enjoy a simple and delicious treat with crisp apple slices drizzled with rich caramel and topped with your favorite goodies.

Ingredients

Fruits

  • 3 medium apples (see note)
  • 1/2 cup caramel sauce
  • 1/4 teaspoon kosher or sea salt (optional for preserving and sprinkling)
  • to taste chopped nuts, chocolate chips, sprinkles, toffee bits, etc. (for topping)

Instructions 

  • Wash, core, and slice the apples into 1/2-inch pieces. Soak in salt water for 5 minutes, then rinse and set aside.
  • Drizzle caramel sauce over the apple slices, leaving about 1 inch at the top for easy picking. Sprinkle with salt if desired.
  • Sprinkle toppings over the apples. Serve immediately.

Notes

For best results, serve immediately to enjoy the crispness of the apples.
Calories: 150kcal
Cost: $10
Course: Dessert
Keyword: apples, caramel, topping

Start Your Day Right with Wholesome Apple Butter Pancakes

Welcome to a cozy morning ritual that brings warmth and comfort to your breakfast table! If you love the delightful flavors of fall, then these Apple Butter Pancakes are sure to become a favorite. Combining the rich essence of apple butter with spices, these pancakes are not just delicious; they’re a way to embrace the heart of home cooking. Let’s dive into this easy-to-follow recipe that will transform your breakfast experience!

Why You’ll Love This Recipe

These pancakes are more than just a tasty treat; they are a celebration of simple ingredients that come together beautifully. Here are five reasons why you will adore this recipe:

  • Quick and Easy: With straightforward steps and minimal prep time, you can whip up these pancakes in no time, perfect for busy mornings.
  • Comforting Flavors: The warm spices and sweet apple flavor create a nostalgic experience, making each bite a hug for your taste buds.
  • Customizable: This recipe allows for various substitutions and additions, so you can make it your own every time.
  • Perfect for Meal Prep: You can make a batch ahead of time and reheat them for a quick breakfast during the week.
  • Nourishing Ingredients: Packed with wholesome ingredients, these pancakes provide a satisfying start to your day.

Ingredients for Apple Butter Pancakes

Before we get cooking, let’s gather our ingredients. Here’s what you’ll need:

  • 1¼ cups all-purpose flour: This is the base of your pancakes.
  • 2 tbsp granulated sugar: Adds a touch of sweetness to the mix.
  • 2 tsp baking powder: Essential for making the pancakes fluffy.
  • 2 tsp cinnamon: For that warm, comforting flavor.
  • ½ tsp ground ginger: A little spice goes a long way!
  • ½ tsp salt: Enhances the flavors.
  • ⅛ tsp nutmeg: A hint of nutmeg adds depth.
  • 1 cup milk: Use your choice of milk—dairy or non-dairy.
  • ¼ cup apple butter: The star of the show!
  • 2 tbsp melted butter: For richness and flavor.
  • 1 egg: Binds the ingredients together.
  • Syrup & pecans for topping: Optional, but highly recommended!

Step-by-Step Instructions for Making Apple Butter Pancakes

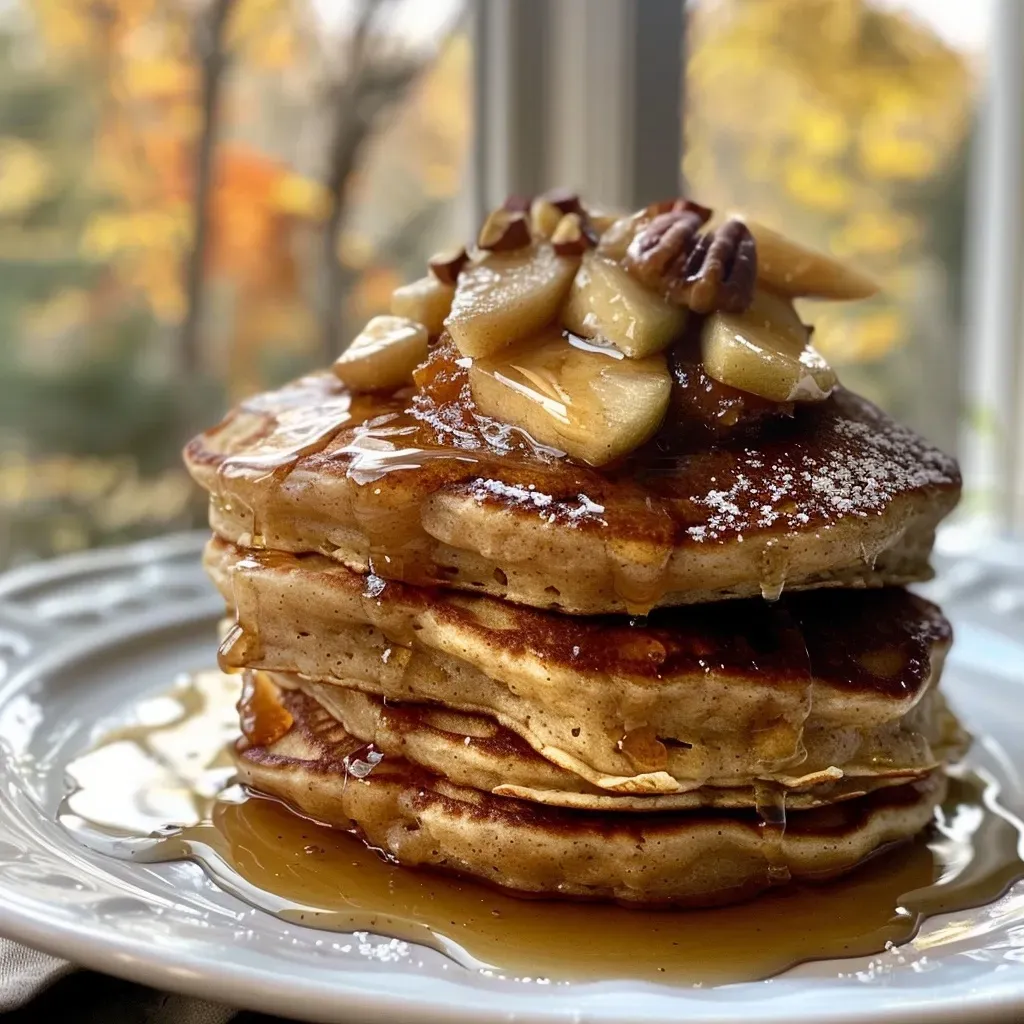
Close-up of fluffy apple butter pancakes drizzled with syrup and topped with pecans.

Now that we have everything ready, let’s get cooking!

  1. Mix Dry Ingredients: In a medium bowl, whisk together the flour, sugar, baking powder, cinnamon, ginger, salt, and nutmeg.
  2. Prepare Wet Mixture: In a large bowl, stir together the milk, apple butter, melted butter, and egg until well combined.
  3. Combine Mixtures: Gently fold the wet mixture into the dry ingredients until just incorporated. Be careful not to overmix!
  4. Heat the Skillet: Preheat a skillet or griddle to 325 degrees Fahrenheit.
  5. Cook the Pancakes: Ladle the batter onto the skillet and cook for about 3-5 minutes on each side until golden brown.
  6. Serve: Top with melted butter, maple syrup, and pecans for an extra crunch.

Pro Tips for Perfect Apple Butter Pancakes

To ensure your pancakes turn out perfectly every time, consider these expert tips:

  • Don’t Overmix: A few lumps are okay! Overmixing can lead to dense pancakes.
  • Adjust Consistency: If the batter seems too thick, add a splash of milk to loosen it up.
  • Experiment with Flavors: Feel free to add chocolate chips, nuts, or berries to the batter for added texture and flavor.
  • Temperature Check: Ensure your skillet is adequately heated before cooking to achieve a golden crust.
  • Keep Warm: Place cooked pancakes in a warm oven while you finish cooking the rest.
  • Substitute Wisely: If you’re out of apple butter, you can use pumpkin puree or mashed bananas for a different twist.
  • Make it Gluten-Free: Substitute all-purpose flour with a gluten-free blend for a gluten-free option.
  • Storing Leftovers: Store leftover pancakes in an airtight container in the fridge for up to 3 days.

Common Mistakes and Troubleshooting

Even the best cooks can encounter challenges. Here are some common mistakes and how to avoid them:

  • Pancakes are Flat: Ensure your baking powder is fresh for a proper rise.
  • Overcooked Edges: Lower the heat if pancakes are browning too quickly.
  • Too Sweet: Reduce sugar if you prefer a less sweet pancake, especially if using sweet toppings.
  • Dry Pancakes: Avoid overcooking; keep an eye on them as they can go from perfect to dry quickly.

Variations to Try

Feel free to mix things up with these fun variations:

  • Spiced Apple Pancakes: Add a pinch of allspice or clove for a bolder flavor.
  • Apple Cinnamon Swirl: Swirl some additional apple butter into the batter before cooking.
  • Nutty Banana Pancakes: Incorporate mashed bananas and chopped nuts into the batter.
  • Chocolate Chip Delight: Fold in chocolate chips for a sweet twist.

Storage and Make-Ahead Instructions

Planning ahead? Here’s how to store and prepare your pancakes:

  • Refrigeration: Store cooked pancakes in an airtight container in the fridge for up to 3 days.
  • Freezing: For longer storage, freeze pancakes in a single layer, then transfer to a freezer bag for up to 2 months.
  • Reheating: Reheat in the toaster, microwave, or skillet until warmed through.
  • Make Ahead Batter: Prepare the batter the night before and store it in the fridge for a quick breakfast!

Frequently Asked Questions

Here are some common questions about Apple Butter Pancakes:

  • Can I use store-bought apple butter? Yes, store-bought apple butter works perfectly in this recipe!
  • How can I make these pancakes vegan? Substitute the egg with a flax egg and use plant-based milk and butter.
  • Can I double the recipe? Absolutely! This recipe can easily be doubled for larger gatherings.
  • What toppings do you recommend? Maple syrup, whipped cream, or fresh fruit are all delicious options!
  • Can I make these pancakes gluten-free? Yes, use a gluten-free flour blend in place of all-purpose flour.
  • How do I store leftovers? Store in an airtight container in the fridge for up to 3 days.
  • Can I add more spices? Definitely! Feel free to experiment with spices to suit your taste.
  • What’s the best way to reheat pancakes? Reheat in a skillet or microwave until warmed through.

Nutritional Tips and Dietary Adaptations

For those looking to tweak their pancakes for health reasons:

  • Lower Sugar: Reduce the sugar in the recipe or use a sugar substitute.
  • Whole Wheat Option: Substitute half of the all-purpose flour with whole wheat flour for added fiber.
  • Dairy-Free: Use almond milk or coconut milk in place of regular milk.
  • Protein Boost: Add protein powder to the batter for a nutritional boost.

Essential Equipment for Cooking

Here’s what you’ll need to make these pancakes:

  • Mixing Bowls: For combining ingredients.
  • Whisk: To ensure a smooth batter.
  • Skillet or Griddle: A nonstick surface is ideal for cooking pancakes.
  • Spatula: For flipping those pancakes with ease.

Serving Suggestions

Make your pancakes even more delightful with these serving ideas:

  • Fresh Fruit: Serve with sliced bananas, berries, or apples for a refreshing contrast.
  • Yogurt: A dollop of Greek yogurt adds creaminess and protein.
  • Nuts: Chopped walnuts or pecans add a nice crunch.
  • Whipped Cream: A touch of whipped cream makes for a decadent treat.

Conclusion: Savor the Comfort of Apple Butter Pancakes

There’s something truly special about starting your day with a stack of freshly made Apple Butter Pancakes. Not only are they easy to make, but they also embody the warmth and comfort of home cooking. Whether you’re enjoying them with family on a lazy Sunday morning or whipping them up for a quick weekday breakfast, these pancakes are sure to bring joy. So, gather your ingredients, get cooking, and savor each delightful bite!

Apple Butter Pancakes

Prep Time 10 minutes
Cook Time 10 minutes
Total Time 20 minutes
Servings 4 servings
Calories 350
Delight in fluffy pancakes infused with the rich flavor of apple butter, perfect for a cozy breakfast.

Ingredients

Dry ingredients

  • 1.25 cups all-purpose flour
  • 2 tbsp granulated sugar
  • 2 tsp baking powder
  • 2 tsp cinnamon
  • 0.5 tsp ground ginger
  • 0.5 tsp salt
  • 0.125 tsp nutmeg

Wet ingredients

  • 1 cup milk
  • 0.25 cup apple butter
  • 2 tbsp melted butter
  • 1 egg egg

Toppings

  • Syrup & pecans for topping

Instructions 

  • Whisk together dry ingredients in a bowl.
  • Mix wet ingredients in a large bowl.
  • Combine wet and dry mixtures until smooth.
  • Cook pancakes on a preheated skillet at 165°C for 3-5 minutes per side.
  • Serve topped with syrup and pecans.

Notes

For extra flavor, add a splash of vanilla extract to the wet mixture.
Calories: 350kcal
Cost: $12
Course: Breakfast
Cuisine: American
Keyword: pancakes

Indulge in Guilt-Free Delights: Low Carb Apple Cupcakes

Welcome to your new favorite dessert destination! These Low Carb Apple Cupcakes with decadent caramel frosting are not just a treat for your taste buds but also a celebration of wholesome ingredients. Crafted for those who love a sweet indulgence without the guilt, this recipe shines with the delightful flavors of Granny Smith apples and rich cream cheese. Whether you’re following a keto diet or simply looking for a healthier dessert option, these cupcakes promise satisfaction in every bite. Let’s dive into the details of this deliciously easy recipe!

Why You’ll Love This Recipe

  • Low Carb Delight: With minimal carbohydrates, these cupcakes fit perfectly into your keto lifestyle, allowing you to enjoy dessert guilt-free.
  • Flavorful Ingredients: Using almond flour and fresh Granny Smith apples creates a moist and flavorful cupcake that’s hard to resist.
  • Quick and Easy: This recipe is simple and quick to prepare, making it perfect for both beginner bakers and experienced chefs alike.
  • Customizable Toppings: The cupcakes can be topped with various frostings or enjoyed plain, allowing for creativity in presentation.
  • Great for Any Occasion: Whether it’s a birthday, holiday, or just a weekend treat, these cupcakes are sure to impress your friends and family.

Ingredient Breakdown

Let’s look at what you’ll need to make these scrumptious cupcakes, along with some substitution suggestions to suit your dietary preferences:

  • 1/2 cup Lakanto Golden: This sugar substitute keeps the cupcakes low-carb. You can also use Swerve or erythritol if you prefer.
  • 5 tbsp butter (softened): For a dairy-free option, consider using coconut oil.
  • 4 large eggs: Eggs provide structure and moisture. Flax eggs can be used as a vegan alternative.
  • 2 tbsp heavy whipping cream: Substitute with coconut cream for a dairy-free version.
  • 1 tsp vanilla extract: Pure vanilla enhances the flavor. You can use almond extract for a different twist.
  • 10-15 drops apple flavoring oil: Optional, but it intensifies the apple flavor. If unavailable, you can skip it.
  • 2 tbsp coconut flour: This helps absorb moisture; if you don’t have it, you can use additional almond flour.
  • 1 1/2 cups almond flour: The star ingredient that keeps the cupcakes low-carb.
  • 2 tbsp baking powder: This ensures your cupcakes rise beautifully.
  • 1/2 tsp ground cinnamon: Adds warmth and spice. Consider using pumpkin spice for a seasonal twist.
  • 1/2 cup Granny Smith apple (peeled and diced): The core of the recipe, providing natural sweetness and tartness.
  • 4 tbsp butter (softened) for frosting: Essential for creating creamy frosting.
  • 2 tsp vanilla for frosting: Enhances the flavor of the frosting.
  • 1/3 cup Lakanto Golden for frosting: Keeps the frosting low-carb and sweet.
  • 2 tbsp heavy whipping cream for frosting: Adds a rich texture. Use coconut cream for a dairy-free option.
  • 8 oz cream cheese (softened): The base for your rich frosting. Vegan cream cheese can be used to make it dairy-free.

Step-by-Step Instructions

Side view of low carb apple cupcakes topped with caramel frosting.

Follow these easy steps to create your Low Carb Apple Cupcakes:

  1. Preheat the oven to 350 degrees F and line a 12-cavity muffin tin with cupcake liners.
  2. In a large bowl, beat the butter and Lakanto Golden until light and fluffy. Add the eggs, followed by heavy cream, vanilla extract, and apple flavoring.
  3. Incorporate the coconut flour, almond flour, baking powder, and cinnamon. Mix well, then gently fold in the diced apple.
  4. Distribute the batter evenly into the prepared cupcake liners, filling each about 1/4 full.
  5. Bake for 25-30 minutes or until a toothpick inserted into the center comes out clean.
  6. Remove from the oven and allow to cool completely before frosting.
  7. To prepare the frosting, melt the butter in a small saucepan over medium-high heat. Stir in the Lakanto Golden and vanilla until melted. Lower the heat and simmer for 2 minutes.
  8. Whisk in the heavy cream and remove from heat. Transfer to a heat-resistant bowl and let cool.
  9. Once cool, add the cream cheese and beat with an electric mixer until smooth and creamy. Refrigerate until the cupcakes are cool and ready to frost.

Pro Tips for Perfect Cupcakes

  • Room Temperature Ingredients: Ensure that your eggs, butter, and cream cheese are at room temperature for better mixing and texture.
  • Don’t Overmix: Mix just until combined to avoid dense cupcakes.
  • Check Doneness Early: Ovens can vary, so check your cupcakes a few minutes before the recommended baking time.
  • Cool Completely: Allow cupcakes to cool fully before frosting to prevent melting the frosting.
  • Use Fresh Apples: Fresh Granny Smith apples provide the best flavor and texture.
  • Experiment with Flavors: Feel free to add nuts or additional spices to customize your cupcakes.
  • Frosting Variations: Try adding cocoa powder to your frosting for a chocolate twist!
  • Presentation Counts: Garnish with a sprinkle of cinnamon or a slice of apple for an appealing look.

Common Mistakes and Troubleshooting

Even the most seasoned bakers can make mistakes. Here are some common pitfalls and how to avoid them:

  • Overbaking: Keep an eye on the cupcakes; they continue to cook slightly after being removed from the oven.
  • Using Cold Ingredients: Cold ingredients don’t mix well, leading to uneven texture. Always use room temperature items.
  • Substituting Incorrectly: Not all substitutes work the same. Ensure you research substitutions to maintain balance in the recipe.
  • Ignoring Cooling Time: Attempting to frost warm cupcakes leads to melted frosting. Patience is key!

Delightful Variations

Feel free to experiment with these variations to keep your baking exciting:

  • Chocolate Chip Apple Cupcakes: Fold in sugar-free chocolate chips for a chocolatey twist.
  • Spiced Apple Cupcakes: Add nutmeg or allspice for a more complex flavor profile.
  • Nutty Apple Cupcakes: Mix in chopped walnuts or pecans for added texture and flavor.
  • Caramel Drizzle: Drizzle melted sugar-free caramel sauce over the frosted cupcakes for added decadence.

Storage and Make-Ahead Instructions

To ensure your cupcakes stay fresh:

  • Store in an Airtight Container: Keep them in an airtight container in the fridge for up to 5 days.
  • Freezing Options: These cupcakes freeze well. Wrap each cupcake individually and store in a freezer-safe container for up to 3 months.
  • Frosting Storage: Frosting can be made ahead and stored in the fridge for up to a week. Just re-whip before using.

Comprehensive FAQ

Here are some frequently asked questions to help you navigate this recipe:

  • Can I use a different fruit instead of apples? Yes, you can try pears or berries for different flavor profiles.
  • Are these cupcakes suitable for kids? Absolutely! They’re a healthier dessert option that kids will love.
  • What if I don’t have almond flour? You can use sunflower seed flour or a gluten-free all-purpose flour blend.
  • Can I make these cupcakes vegan? Yes, substitute eggs with flax eggs and use dairy-free options for other ingredients.
  • How do I know when they’re done baking? A toothpick inserted should come out clean without wet batter.
  • Can I use other sweeteners? Yes, any granulated sugar substitute that measures like sugar can work.
  • What’s the best way to frost the cupcakes? A piping bag gives a beautiful finish, but you can also spread with a knife.
  • How do I prevent the cupcakes from sinking? Ensure your baking powder is fresh and don’t overmix the batter.

Nutritional Information and Dietary Adaptations

These cupcakes not only taste great but are also a healthier option for dessert lovers:

  • Low in Carbs: Ideal for those on a ketogenic diet.
  • Gluten-Free: Made with almond and coconut flour, perfect for gluten-sensitive individuals.
  • Protein-Rich: Eggs and cream cheese provide protein, helping you feel satisfied.
  • Customizable: Adjust sweetness and flavors to suit your dietary needs.

Recommended Equipment

To make your baking experience smooth, here’s what you’ll need:

  • Muffin Tin: A 12-cavity muffin tin is essential for baking.
  • Mixing Bowls: Use a large bowl for mixing the batter and a smaller one for the frosting.
  • Electric Mixer: An electric mixer makes it easier to achieve the creamy texture of the frosting.
  • Measuring Cups and Spoons: Accurate measurements ensure your recipe turns out perfectly every time.

Serving Suggestions

These cupcakes are delightful on their own, but here are some serving ideas:

  • With Fresh Fruit: Serve alongside slices of fresh apple or a berry medley.
  • Pair with Tea or Coffee: These cupcakes are perfect for a cozy afternoon tea or coffee break.
  • Garnish with Nuts: Top with chopped nuts for an extra crunch.
  • Serve at Parties: Bring them to gatherings for a healthy dessert option that everyone can enjoy.

Conclusion

These Low Carb Apple Cupcakes with decadent caramel frosting are not just a dessert; they are an experience that embraces the essence of home cooking. With simple ingredients and a straightforward process, baking becomes a joyful endeavor rather than a chore. So, gather your loved ones, enjoy the process, and savor every bite of these delightful cupcakes. Happy baking!

Low Carb Apple Cupcakes with Caramel Frosting

Prep Time 15 minutes
Cook Time 30 minutes
Total Time 45 minutes
Servings 12 cupcakes
Calories 250
Delight in these moist, low-carb apple cupcakes topped with rich caramel frosting, perfect for a guilt-free treat.

Ingredients

Dough

  • 0.5 cup Lakanto Golden (or other sugar substitute)
  • 5 tbsp butter (softened)
  • 4 large eggs
  • 2 tbsp heavy whipping cream
  • 1 tsp vanilla extract
  • 10-15 drops apple flavoring oil
  • 2 tbsp coconut flour
  • 1.5 cups Almond Flour
  • 2 tbsp Baking Powder
  • 0.5 tsp ground cinnamon
  • 0.5 cup granny smith apple (peeled and diced)

Frosting

  • 4 tbsp butter (sotened)
  • 2 tsp vanilla
  • 1/3 cup Lakanto golden
  • 2 tbsp heavy whipping cream
  • 8 oz cream cheese (softened)

Instructions 

  • Preheat oven to 350°F (175°C) and line a 12-cup muffin tin with liners.
  • Beat butter and Lakanto until fluffy, add eggs, cream, vanilla, and apple flavoring.
  • Mix in coconut flour, almond flour, baking powder, cinnamon, then fold in diced apple.
  • Distribute batter into liners and bake 25-30 minutes until a toothpick comes out clean.
  • Cool cupcakes, then prepare frosting by melting butter, adding Lakanto and vanilla, simmering 2 minutes, then stirring in cream. Cool and beat in cream cheese until smooth.

Notes

Ensure cupcakes are fully cooled before frosting for best results.
Calories: 250kcal
Cost: $15
Course: Dessert
Keyword: apple, cupcakes, Low-Carb

Welcome to Your New Favorite Comfort Food

There’s something incredibly satisfying about a warm, savory shepherd’s pie, especially when it features the sweet, creamy goodness of sweet potatoes. This Sweet Potato Turkey Shepherd’s Pie is not just a dish; it’s a hug in a bowl—a cozy twist on a classic that combines hearty turkey, vibrant vegetables, and a luscious sweet potato topping. Perfect for busy weeknights or leisurely family dinners, this recipe is designed to bring warmth and comfort to your table.

Why You’ll Love This Recipe

This shepherd’s pie is more than just a meal—it’s an experience. Here’s why:

  • Nutritious and Wholesome: Packed with lean turkey and nutrient-rich sweet potatoes, this dish is a powerhouse of vitamins and minerals.
  • Comforting Flavor: The combination of savory turkey, aromatic spices, and sweet potato creates a flavor profile that’s both familiar and exciting.
  • Easy to Prepare: With straightforward steps and minimal fuss, you can whip up this meal even on your busiest days.
  • Make-Ahead Friendly: This dish can be prepared in advance, making it perfect for meal prep or family gatherings.
  • Customizable: Whether you prefer different meats or additional veggies, this recipe can easily be tailored to your tastes.

Ingredient Breakdown

To create this delicious Sweet Potato Shepherd’s Pie, here’s what you’ll need:

  • 2 lb sweet potatoes: Peeled and cut into 1-inch cubes. You can substitute with regular potatoes for a classic version.
  • 3 tbsp olive oil: I recommend using Bertolli Extra Virgin for roasting for its rich flavor.
  • 1/2 cup milk: This adds creaminess to the sweet potato topping; consider using almond or oat milk for a dairy-free option.
  • 1 onion: Diced into 1/2-inch pieces, this adds a lovely sweetness when sautéed.
  • 1 lb ground turkey: Feel free to substitute with lean beef or plant-based ground meat for a vegetarian version.
  • 12 oz frozen vegetables: A classic mixed variety works well, or use your favorites like peas and carrots.
  • 1 tbsp soy sauce: This adds depth to the flavor profile; tamari can be used for a gluten-free option.
  • Spices: Garlic powder, Worcestershire sauce, poultry seasoning, salt, and black pepper enhance the overall taste.
  • Thickening agents: Use cornstarch and broth to create a luscious sauce.

Step-by-Step Guide to Making Shepherd’s Pie

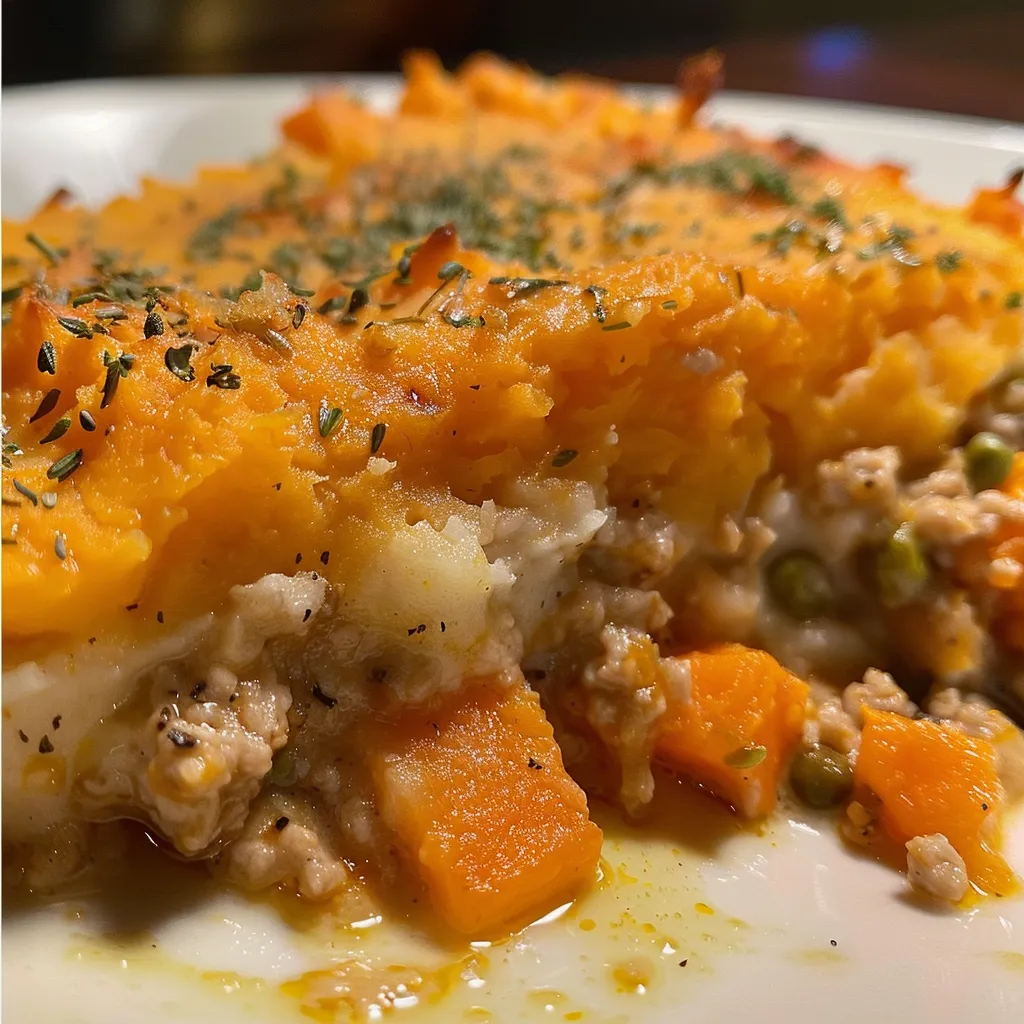
Close-up side view of a Sweet Potato Turkey Shepherd’s Pie, showcasing a golden-brown topping and colorful filling.

Ready to create your comforting masterpiece? Follow these steps:

Step 1: Roast the Sweet Potatoes

Preheat your oven to 425°F (220°C). Spread the sweet potato cubes on a baking sheet, drizzle with 2 tbsp olive oil, and season with salt. Roast for about 25-30 minutes until tender.

Step 2: Prepare the Filling

In a large skillet, heat 1 tbsp olive oil over medium heat. Add the diced onion and sauté until translucent. Add the ground turkey, breaking it apart, and cook until browned. Stir in garlic powder, Worcestershire sauce, soy sauce, and frozen vegetables. Cook for an additional 5-7 minutes.

Step 3: Create the Savory Sauce

In a small bowl, mix cornstarch with broth until smooth. Pour this into the skillet with the turkey and vegetables. Stir until the sauce thickens, about 3-5 minutes.

Step 4: Mash the Sweet Potatoes

Once the sweet potatoes are roasted, remove them from the oven and mash with 1/2 cup milk until smooth and creamy. Adjust seasoning as desired.

Step 5: Assemble the Pie

In a baking dish, spread the turkey filling evenly, then top with the mashed sweet potatoes. Use a spoon to create peaks for extra texture.

Step 6: Bake to Perfection

Bake in the preheated oven for 25-30 minutes or until the top is golden and bubbling. For an extra crisp, broil for a few minutes at the end.

Common Mistakes and Troubleshooting

To ensure your shepherd’s pie turns out perfectly every time, avoid these common pitfalls:

  • Overcooking sweet potatoes: This can lead to a watery topping. Roast until just tender.
  • Not seasoning enough: A well-seasoned filling is key to flavor; taste and adjust as needed.
  • Skipping the sauce thickening: This step is essential for a cohesive filling.

Make-Ahead and Storage Instructions

This shepherd’s pie can be prepared ahead of time:

  • Refrigerate: Assemble the pie, cover it tightly, and refrigerate for up to 2 days.
  • Freeze: Unbaked pies can be frozen for up to 3 months. Thaw overnight in the fridge before baking.
  • Reheat: Bake straight from the fridge or freezer, adjusting baking time as necessary.

FAQ About Sweet Potato Shepherd’s Pie

Here are some common questions about this recipe:

  • Can I use different meats? Yes, ground beef, chicken, or plant-based alternatives work well.
  • What can I serve with this dish? A simple green salad or steamed vegetables complement the flavors nicely.
  • Can I make this dairy-free? Absolutely! Use plant-based milk and omit butter in the mashed sweet potatoes.
  • How long does it take to cook? The total cooking time is around 1 hour, including prep and baking.
  • Is this recipe gluten-free? Yes, when using gluten-free soy sauce and checking other labels.
  • How can I add extra veggies? Feel free to toss in spinach, zucchini, or bell peppers in the filling.
  • Can I use fresh sweet potatoes? Yes, just ensure they are peeled and cut into cubes before roasting.
  • How do I store leftovers? Store in an airtight container in the fridge for up to 3 days.

Nutritional Benefits and Dietary Adaptations

This Sweet Potato Shepherd’s Pie not only satisfies your taste buds but also offers numerous health benefits:

  • Rich in vitamins: Sweet potatoes are high in vitamin A and C, supporting your immune system.
  • Lean protein source: Ground turkey provides a low-fat protein option.
  • Fiber-packed: The inclusion of vegetables and sweet potatoes contributes to your daily fiber intake.

Equipment Recommendations

To make your cooking experience smoother, here’s what I recommend:

  • Large baking dish: Ideal for assembling your shepherd’s pie.
  • Skillet: A non-stick skillet makes sautéing and browning easier.
  • Potato masher: For creating that perfect smooth sweet potato topping.
  • Oven mitts: Keep your hands safe when handling hot dishes!

Serving Suggestions

Once your shepherd’s pie is out of the oven and golden brown, consider these serving ideas:

  • Garnish with fresh herbs: Sprinkle chopped parsley or thyme for a fresh touch.
  • Serve with a crunchy salad: A simple arugula or mixed greens salad complements the dish beautifully.
  • Pair with crusty bread: A slice of whole-grain bread is perfect for mopping up any leftover sauce.

Conclusion: Enjoy the Process

Cooking is about more than just preparing food; it’s about enjoying the journey. I hope this Sweet Potato Turkey Shepherd’s Pie recipe brings you warmth, comfort, and joy in your kitchen. Remember, the best meals are made with love and care, so take your time and savor every step. Happy cooking!

Sweet Potato Turkey Shepherd’s Pie - FlirtyFood

Prep Time 20 minutes
Cook Time 40 minutes
Total Time 1 hour
Servings 4 servings
Calories 450
A comforting and flavorful shepherd’s pie featuring sweet potatoes and ground turkey, perfect for a cozy dinner.

Ingredients

Vegetables

  • 2 lb sweet potatoes (peeled and cut into 1-inch cubes)
  • 3 tbsp olive oil (for roasting) (preferably Bertolli Extra Virgin)
  • 1/2 cup milk
  • 2 tsp salt
  • 1 tbsp olive oil
  • 1 each onion (diced into 1/2-inch pieces)
  • 1 lb ground turkey
  • 3/4 tsp garlic powder
  • 1.5 tsp salt
  • 1.5 tbsp worcestershire sauce (Lea & Perrins)
  • 1 tsp poultry seasoning
  • 1 tbsp soy sauce
  • 12 oz frozen vegetables (Birds Eye classic mixed)
  • 1 cup milk (room temperature helps prevent the sauce from breaking)
  • 2 tbsp cornstarch
  • 1/2 cup broth
  • 1/4 tsp black pepper

Instructions 

  • Roast sweet potatoes in olive oil at 400°F (200°C) until tender, about 25 minutes.
  • Sauté diced onion and ground turkey until cooked through, then add garlic powder, salt, Worcestershire sauce, poultry seasoning, and soy sauce.
  • Mix frozen vegetables with cooked turkey mixture and set aside.
  • Prepare gravy by dissolving cornstarch in broth, then simmer with milk and black pepper until thickened.
  • Spread mashed sweet potatoes over the turkey mixture, then top with gravy and bake at 375°F (190°C) for 20 minutes.

Notes

For extra flavor, add a pinch of thyme or rosemary to the mashed sweet potatoes before baking.
Calories: 450kcal
Cost: $15
Course: Main Course
Cuisine: American
Keyword: sweet potato

Welcome to Your New Favorite Fall Recipe

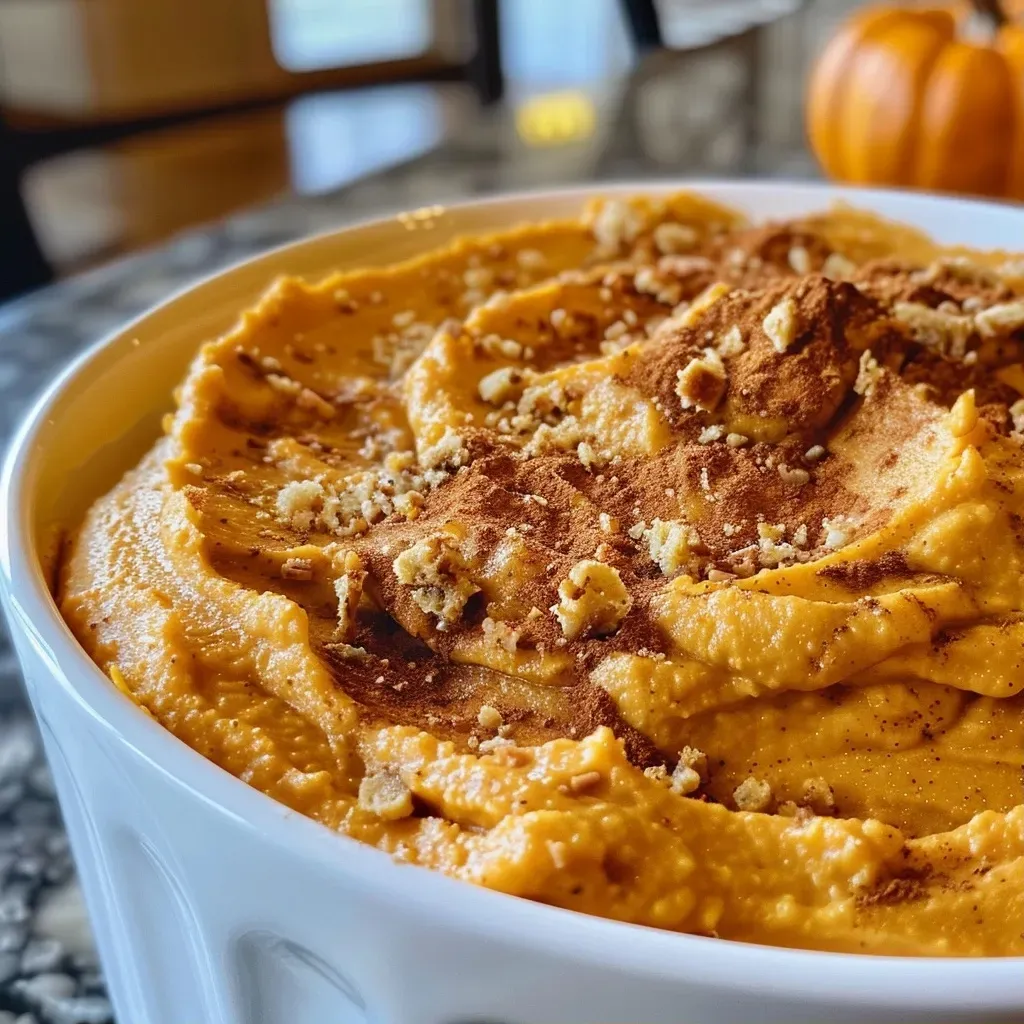
As the leaves turn and the air becomes crisp, there’s nothing quite like the warmth of a cozy dip to brighten your gatherings. This delightful pumpkin dip is a perfect blend of creaminess and spiced sweetness, making it an ideal addition to your autumn festivities. With minimal ingredients and a simple preparation, you can create a dish that not only tastes fantastic but also impresses your friends and family. Let’s dive into the world of pumpkin dip and explore how to make this comforting treat.

Why You’ll Love This Recipe

This pumpkin dip isn’t just any dip; it’s a celebration of flavors and simplicity. Here are just a few reasons why this recipe will become a staple in your kitchen:

  • Quick and Easy Preparation: With just a few simple steps, you can whip up this dip in no time, allowing you to spend more time enjoying your guests.
  • Versatile Flavor: The combination of cream cheese and pumpkin puree creates a rich, creamy texture that pairs well with various dippers, from apples to crackers.
  • Seasonal Delight: The warm spices of pumpkin pie spice and cinnamon evoke the essence of fall, making it a perfect seasonal treat.
  • Make-Ahead Option: This dip can be prepared in advance, allowing the flavors to meld beautifully in the refrigerator.
  • Diet-Friendly Adaptations: Easily modify this recipe to accommodate dietary needs, including gluten-free and dairy-free options.

Ingredient Breakdown

Let’s explore the ingredients that come together to create this mouthwatering pumpkin dip, along with some helpful substitutions.

  • 8 ounces cream cheese: Make sure it’s softened for easy mixing. You can substitute with dairy-free cream cheese for a vegan option.
  • 15 ounces pumpkin puree: Use canned pumpkin for convenience, but homemade puree offers a fresher taste.
  • ½ cup light brown sugar: This adds a lovely sweetness. If you prefer less sugar, consider using maple syrup as a natural alternative.
  • 1½ teaspoons vanilla extract: This enhances the flavor profile. If you want a different twist, try almond extract.
  • 2 teaspoons pumpkin pie spice: A must for that iconic fall flavor. You can create your own blend using cinnamon, nutmeg, and ginger.
  • ½ teaspoon ground cinnamon: An essential spice that complements the pumpkin.
  • ¼ teaspoon ground ginger: Adds warmth. If you don’t have ginger, you can omit it without compromising the taste.

How to Make This Pumpkin Dip

Close-up view of creamy Pumpkin Dip in a bowl, with a smooth texture.

Now that we have our ingredients ready, let’s get to the fun part—making the dip!

  1. In a medium-sized mixing bowl, beat the softened cream cheese using a handheld mixer on medium-high speed for about 1 minute until smooth. Use a silicone spatula to scrape down the sides.
  2. Lower the mixer speed to low and add the canned pumpkin puree, brown sugar, and vanilla extract. Increase the mixer speed to medium and continue mixing for another minute, then scrape down the sides of the bowl.
  3. Lower the mixer speed again and add the pumpkin pie spice, ground cinnamon, and ground ginger. Increase the speed to medium and mix for an additional 30 seconds.
  4. Tightly cover the pumpkin dip and refrigerate for at least 1 hour before serving. This step helps the flavors to marry beautifully.

Pro Tips for Perfect Pumpkin Dip

To ensure your pumpkin dip turns out perfectly, consider these expert tips:

  • Room Temperature Ingredients: Before starting, make sure your cream cheese is at room temperature for a smoother blend.
  • Mixing Technique: Avoid overmixing once you add the pumpkin puree to prevent a watery consistency.
  • Chill Time: Don’t skip the chilling step! It’s essential for developing the flavors.
  • Experiment with Spices: Feel free to add a pinch of nutmeg or allspice for an extra flavor punch.
  • Serving Style: Serve with graham crackers, apple slices, or even pretzels for a delightful contrast.
  • Presentation Matters: For added flair, garnish with crushed graham crackers or a sprinkle of cinnamon on top.
  • Adjust Sweetness: Taste the mixture before chilling and adjust the sweetness to your liking.
  • Storage Tips: If you have leftovers, store them in an airtight container in the refrigerator for up to 5 days.
  • Serving Temperature: This dip is best served chilled, but you can let it sit at room temperature for about 15 minutes before serving for a softer texture.

Common Mistakes and Troubleshooting

If you encounter any hiccups while making your pumpkin dip, here are some common mistakes and how to avoid them:

  • Watery Dip: Ensure that your cream cheese is fully softened before mixing to avoid a watery consistency.
  • Too Sweet: If you find the dip too sweet, balance it out by adding a pinch of salt or more spices.
  • Flavorless Dip: Don’t hesitate to adjust the spices to your taste; sometimes, a little more cinnamon or pumpkin pie spice can elevate the flavor.

Delicious Variations of Pumpkin Dip

Looking to mix things up? Here are some delightful variations you can try:

  • Chocolate Pumpkin Dip: Add ¼ cup of cocoa powder for a rich, chocolaty twist.
  • Nutty Pumpkin Dip: Incorporate ½ cup of finely chopped pecans or walnuts for a crunchy texture.
  • Maple Pumpkin Dip: Substitute brown sugar with maple syrup for a unique flavor.
  • Spicy Pumpkin Dip: Add a pinch of cayenne pepper or chopped jalapeños for a spicy kick.

Storage and Make-Ahead Instructions

This pumpkin dip can be made ahead of time, making it an ideal choice for gatherings:

  • Refrigeration: After preparing, tightly cover the dip and store it in the refrigerator for up to 5 days.
  • Make-Ahead: Prepare the dip a day in advance to allow the flavors to develop.
  • Freezing: While not recommended for long-term storage, you can freeze the dip for up to a month. Thaw in the refrigerator overnight before serving.

Frequently Asked Questions

Here are some common questions about pumpkin dip and their answers:

  • Can I use pumpkin pie filling instead of pumpkin puree? It’s best to use pure pumpkin puree as pie filling contains added sugars and spices that may alter the flavor of your dip.
  • What can I dip in pumpkin dip? Consider using sliced apples, ginger snap cookies, graham crackers, or pretzels for dipping.
  • How long does pumpkin dip last? When stored properly in an airtight container, it can last in the refrigerator for up to 5 days.
  • Can I make this dip dairy-free? Yes! Substitute cream cheese with a dairy-free alternative to make it suitable for those with lactose intolerance.
  • Is pumpkin dip gluten-free? Yes, as long as you use gluten-free dippers.
  • Can I add whipped cream to the dip? Absolutely! Fold in some whipped cream for a lighter and fluffier dip.
  • What spices can I use instead of pumpkin pie spice? You can create your own blend using equal parts cinnamon, nutmeg, and ginger.
  • How can I make this dip healthier? Consider reducing the sugar content or using Greek yogurt as a base for added protein.

Nutrition Tips and Dietary Adaptations

This pumpkin dip can be enjoyed without guilt. Here are some nutritional tips:

  • Low-Calorie Option: Use low-fat cream cheese to reduce calories without sacrificing flavor.
  • Add Protein: Mix in some Greek yogurt for a protein boost.
  • Fiber Boost: Serve with fresh fruits and whole-grain crackers for added fiber.

Essential Equipment for Making Pumpkin Dip

To prepare this pumpkin dip, you’ll need:

  • Mixing Bowl: A medium-sized bowl for mixing the ingredients.
  • Handheld Mixer: To achieve a smooth and creamy consistency.
  • Silicone Spatula: For scraping down the sides of the bowl.
  • Airtight Container: For storing leftovers.

Serving Suggestions

Now that your pumpkin dip is ready, here are some delightful serving suggestions:

  • Garnish with Spices: A sprinkle of cinnamon or nutmeg on top adds an inviting touch.
  • Creative Dippers: Serve with an assortment of dippers like celery sticks, pretzel crisps, and graham crackers.
  • Festive Presentation: Consider serving it in a hollowed-out pumpkin for a charming autumn display.

Conclusion

Creating your own pumpkin dip is not just about the delicious flavors; it’s about embracing the joy of cooking and sharing with loved ones. With its creamy texture and warm spices, this dip will surely become a favorite at your gatherings. Remember, cooking is about enjoying the process and finding delight in the flavors you create. Happy cooking!

Pumpkin Dip

Prep Time 10 minutes
Total Time 10 minutes
Servings 8 ounces
Calories 250
A creamy and flavorful pumpkin dip perfect for fall gatherings or as a sweet treat. Easy to prepare and delicious to enjoy.

Ingredients

Dairy

  • 8 ounces cream cheese, (softened)
  • 15 ounces pumpkin puree
  • 0.5 cup light brown sugar, (packed)
  • 1.5 teaspoons vanilla extract
  • 2 teaspoons pumpkin pie spice
  • 0.5 teaspoon ground cinnamon
  • 0.25 teaspoon ground ginger

Instructions 

  • Beat the softened cream cheese for 1 minute until smooth, scraping down the sides.
  • Add pumpkin puree, brown sugar, and vanilla; mix for 1 minute, then scrape sides.
  • Add pumpkin pie spice, cinnamon, and ginger; mix for 30 seconds.
  • Cover and refrigerate for at least 1 hour before serving.

Notes

Serve chilled with crackers or fruit for a delightful snack.
Calories: 250kcal
Cost: $10
Course: Dessert
Cuisine: American
Keyword: pumpkin

Discover the Joy of Cinnamon Sugar Pita Chips

If you’re looking for a simple yet delightful snack that brings warmth and comfort into your home, look no further than cinnamon sugar pita chips. In just a few easy steps, you can transform ordinary pita bread into crunchy, sweet bites that are perfect for any occasion. Whether you’re hosting a cozy gathering or indulging in a quiet night at home, this recipe will satisfy your cravings and impress your guests. Let’s dive into the world of sweet and crunchy bliss!

Why You’ll Love This Recipe

This cinnamon sugar pita chips recipe is a must-try for several reasons:

  • Quick Preparation: With just a handful of ingredients, you can whip up these delicious chips in no time.
  • Versatile Snack: Enjoy them on their own or pair them with your favorite dips for a delightful treat.
  • Healthier Alternative: Baked, not fried, these chips are a better choice for snacking.
  • Customizable Flavors: Feel free to experiment with spices and toppings to create your unique version.
  • Perfect for Sharing: These chips are great for parties, movie nights, or simply enjoying with family.

Ingredients You’ll Need

To make cinnamon sugar pita chips, gather the following ingredients:

  • 4 large wholemeal pita bread/pita pockets: These are the base for your chips and will crisp up beautifully.
  • 4 flat tablespoons (60g) butter or non-dairy spread: This adds richness and helps the sugar and cinnamon adhere.
  • 2 tablespoons (30g) white sugar: Provides the essential sweetness for that perfect cinnamon sugar flavor.
  • 1 teaspoon ground cinnamon: The star ingredient that gives these chips their warm, inviting taste.

How to Make Cinnamon Sugar Pita Chips Recipe

A close-up view of crispy cinnamon sugar pita chips arranged on a plate.

Follow these simple steps to create your own cinnamon sugar pita chips:

  1. Preheat your oven: Set your oven to 350°F (180°C or 160°C) to prepare for baking.
  2. Butter the pita: Spread both sides of each pita with butter or non-dairy margarine.
  3. Sprinkle the sugar: On one side of each pita, sprinkle the sugar evenly.
  4. Add cinnamon: Sprinkle cinnamon evenly over the same side of the pita. Hold the teaspoon higher for more even distribution.
  5. Cut into wedges: Use a pizza cutter or sharp knife to slice the pita into small pieces.
  6. Arrange on a baking tray: Spread the chips on a baking tray, ensuring they don’t overlap. You may need to bake in batches.
  7. Bake: Place in the oven for about 10 minutes. Check after 5 minutes and adjust baking time as needed for your oven.
  8. Cool and Serve: Once crispy, remove from the oven and enjoy your chips alone or with dips like cinnamon honey yogurt.

Pro Tips for Perfect Cinnamon Sugar Pita Chips

To ensure your chips turn out perfectly every time, consider these expert insights:

  • Choose the right pita: Wholemeal pita pockets work best for a hearty texture.
  • Don’t rush the baking: Monitor closely to avoid burning, as ovens can vary.
  • Experiment with sugars: Try brown sugar for a deeper flavor or coconut sugar for a healthier twist.
  • Consider spices: Add nutmeg or allspice for a unique flavor profile.
  • Store properly: Keep in an airtight container to maintain crispness.
  • Make ahead: These chips can be prepped and stored for later enjoyment.
  • Use a non-stick tray: This helps prevent sticking and ensures even crisping.
  • Don’t skip cooling: Allow chips to cool completely for maximum crunch.

Common Mistakes and Troubleshooting

Here are some frequent pitfalls and how to avoid them:

  • Over-baking: Keep an eye on your chips; they can burn quickly. Start checking at the 5-minute mark.
  • Uneven seasoning: Make sure to sprinkle sugar and cinnamon evenly to maintain consistent flavor.
  • Using stale pita: Fresh pita bread will yield the best texture and taste.
  • Not cooling properly: If you store chips before they’re fully cooled, they may lose their crunch.

Variations of Cinnamon Sugar Pita Chips

Feel free to get creative with these variations:

  • Chocolate Drizzle: After baking, drizzle melted chocolate over the cooled chips for a decadent treat.
  • Fruit-Flavored Sugar: Use flavored sugar, like orange or lemon, to add a citrus twist.
  • Savory Spice Blend: Substitute cinnamon with your favorite savory spices for a different flavor.
  • Herbed Yogurt Dip: Serve with a dip made from Greek yogurt and fresh herbs for a savory option.

Storage and Make-Ahead Instructions

To keep your cinnamon sugar pita chips fresh:

  • Store in an airtight container: This will help maintain their crispness for several days.
  • Make ahead: Prepare and bake in advance, then store for later snacking.
  • Freeze for longer storage: Place baked chips in a freezer-safe bag and freeze for up to a month. Reheat in the oven before serving.

Frequently Asked Questions

Here are some common questions about cinnamon sugar pita chips:

  • Are pita chips healthy? Baked pita chips are generally healthier than fried snacks, especially when made with wholemeal pita.
  • Can I substitute tortillas for pita bread? Yes, tortillas can be used, but the texture will differ slightly.
  • Can I freeze pita chips? Yes, once baked, they can be frozen for future snacking.
  • What dips pair well with these chips? Consider yogurt dips, hummus, or even chocolate dips for a sweet treat.
  • How long do these chips last? When stored properly, they can last up to a week or more.
  • Can I make these gluten-free? Absolutely! Use gluten-free pita bread for a suitable alternative.
  • How do I make them spicier? Add a pinch of cayenne or chili powder to the sugar and cinnamon mix.
  • What’s the best way to reheat them? Reheat in the oven for a few minutes to restore their crunchiness.

Nutrition Tips and Dietary Adaptations

For those conscious of dietary choices:

  • Lower sugar option: Reduce the amount of sugar or use a sugar substitute like stevia.
  • Butter alternatives: Use coconut oil or olive oil for a different flavor and healthier fat option.
  • Whole grain goodness: Opt for wholemeal pita for added fiber and nutrients.

Equipment Recommendations

To make this recipe, you’ll need:

  • Baking Tray: A sturdy baking tray is essential for even cooking.
  • Pizza Cutter: This makes cutting the pita into wedges easy and efficient.
  • Oven Mitts: Protect your hands while handling hot trays.

Serving Suggestions

Here are some ideas to serve your cinnamon sugar pita chips:

  • With yogurt dip: A cinnamon honey yogurt dip complements the chips beautifully.
  • As a dessert: Serve with a scoop of vanilla ice cream for a delightful dessert.
  • At parties: Create a snack platter with various dips and fresh fruits.

Conclusion

In summary, these cinnamon sugar pita chips are not just a snack; they are an experience that brings joy and warmth to your kitchen. By following this easy recipe, you can create a delightful treat that’s perfect for sharing or enjoying alone. Remember, cooking is about enjoying the process, and with each bite of these sweet chips, you’ll be reminded of the simple pleasures in life. So gather your ingredients, preheat your oven, and enjoy making these delicious snacks at home!

Cinnamon sugar pita chips

Prep Time 5 minutes
Cook Time 10 minutes
Total Time 15 minutes
Servings 4 servings
Calories 150
Delicious homemade cinnamon sugar pita chips that are perfect for snacking or dipping. Easy to prepare and irresistibly crunchy.

Ingredients

Pita bread

  • 4 large wholemeal pita bread/pita pockets
  • 60 g butter or non dairy spread
  • 30 g white sugar
  • 1 teaspoon ground cinnamon

Instructions 

  • Preheat oven to 350°F (180°C).
  • Spread pita halves with butter on both sides.
  • Sprinkle sugar and cinnamon evenly over one side.
  • Cut into small pieces and arrange on baking tray.
  • Bake for 10 minutes until crisp. Check and bake longer if needed.
  • Enjoy your cinnamon sugar pita chips!

Notes

Hold the teaspoon higher above the pita for an even sprinkle of cinnamon.
Calories: 150kcal
Cost: $5
Course: Snack
Keyword: Cinnamon, pita, sugar