Author

Noah

Browsing

Indulge in a Chilled Delight: Frozen Chocolate Peanut Butter Banana Bites

Welcome to a delightful world of flavors where simple ingredients come together to create a frozen treat that’s both satisfying and nourishing. These Chocolate Peanut Butter Banana Bites are the perfect combination of creamy peanut butter, sweet bananas, and rich chocolate, making them an ideal snack or dessert. If you’re looking for a way to indulge your sweet tooth without the guilt, you’ve found it! Let’s dive into this easy and enjoyable recipe that will elevate your snacking experience.

Why You’ll Love This Recipe

Here are just a few reasons why these frozen bites will become a staple in your kitchen:

  • Quick and Easy: With just three main ingredients, this recipe is incredibly simple to prepare. No baking required!
  • Healthy Indulgence: Made with natural ingredients, these bites offer a healthier alternative to traditional sweets.
  • Kid-Friendly: Perfect for children and adults alike, these bites are a fun way to get some fruit into your diet.
  • Versatile: You can easily customize the recipe with different nut butters or toppings to suit your taste.
  • Freezer Friendly: Store them in the freezer for a quick snack whenever you need a sweet treat!

Ingredients Breakdown

Let’s explore the ingredients you’ll need to make these delectable bites:

  • 3 firm but ripe bananas: Look for bananas that are yellow with a few brown spots for maximum sweetness.
  • 1/4 cup natural smooth peanut butter: Feel free to substitute with almond butter or sunflower seed butter for a nut-free option.
  • 280 grams dark chocolate: Use high-quality chocolate for the best flavor. You can also use chocolate chips if you prefer.
  • 2 teaspoons coconut oil: This is optional, but it helps to create a smoother melting chocolate.

Expert Tips for Success

Side view of chocolate-dipped banana pieces showcasing creamy peanut butter inside.

To ensure your Frozen Chocolate Peanut Butter Banana Bites turn out perfectly, here are some expert tips:

  • Choosing Bananas: Make sure your bananas are ripe but still firm. Overripe bananas can become mushy and hard to work with.
  • Peanut Butter Consistency: Use a creamy peanut butter for easier spreading, or crunchy if you prefer a bit of texture.
  • Melting Chocolate: Melt chocolate slowly in a double boiler or microwave to prevent burning; stir until smooth.
  • Layering: For a more decadent treat, add a sprinkle of sea salt on top of the chocolate before it sets.
  • Freezer Space: Make sure you have enough space in your freezer for the baking sheet where the banana bites will set.
  • Portion Control: Consider cutting the bananas into smaller bite-sized pieces for a more snackable treat.
  • Storage: Store them in an airtight container to prevent freezer burn.
  • Experiment: Feel free to add toppings like crushed nuts or shredded coconut for extra flavor and crunch!

Common Mistakes and Troubleshooting

Here are some common pitfalls to avoid while making your frozen bites:

  • Over-melting chocolate: If your chocolate is too hot, it can seize up. Always melt at low temperatures.
  • Using unripe bananas: Unripe bananas won’t have the same sweetness or creaminess, affecting the flavor.
  • Not freezing long enough: Ensure the banana bites are well-frozen before serving to maintain their shape.

Delicious Variations

Feel free to switch things up with these fun variations:

  • Nut Butter Swap: Try almond butter or cashew butter for a different flavor profile.
  • Chocolate Coating: Use white chocolate or milk chocolate instead of dark chocolate for a sweeter bite.
  • Flavor Additions: Add a pinch of cinnamon or a splash of vanilla extract to the peanut butter for a flavor boost.
  • Fruit Additions: Consider adding a slice of strawberry or a dollop of yogurt in between banana slices for extra flavor.

Storage and Make-Ahead Instructions

These bites can be made ahead of time for easy snacking later:

  • Freezing: Place the banana bites on a parchment-lined baking sheet and freeze until solid. Transfer to an airtight container for long-term storage.
  • Storage Duration: They can be kept in the freezer for up to three months. Just let them sit at room temperature for a few minutes before enjoying.

Frequently Asked Questions

Here are some common questions about this recipe:

  • Can I use other fruits? Yes! Feel free to experiment with other fruits like strawberries or apples.
  • How long do they last in the freezer? They can last up to three months if stored properly in an airtight container.
  • What’s the best way to melt the chocolate? Use a double boiler or microwave in short intervals, stirring until smooth.
  • Can I make them vegan? Yes! Use dairy-free chocolate and ensure your nut butter is vegan.
  • What if I don’t have coconut oil? You can skip it, but it helps create a smoother chocolate coating.
  • Can I make these without chocolate? Absolutely! The banana and peanut butter combination is delicious on its own.
  • How do I serve these bites? They’re great on their own or served with a drizzle of chocolate sauce on top.
  • Can I use crunchy peanut butter? Yes! Crunchy peanut butter adds a delightful texture to the bites.

Nutritional Insights and Dietary Adaptations

These frozen banana bites are not only delicious but also provide some nutritional benefits:

  • Natural Sweetness: The bananas add a natural sweetness, reducing the need for added sugars.
  • Healthy Fats: Peanut butter is a source of healthy fats and protein, making these bites a satisfying snack.
  • Vegan Option: By using plant-based chocolate and nut butter, you can easily make this recipe vegan-friendly.

Essential Equipment

To make these delightful treats, you’ll need a few simple kitchen tools:

  • Baking Sheet: For freezing the banana bites.
  • Parchment Paper: To prevent sticking and for easy cleanup.
  • Microwave or Double Boiler: For melting chocolate smoothly.
  • Spatula: For spreading peanut butter evenly on the banana slices.

Serving Suggestions

Enjoy these frozen bites as a snack, or get creative with your serving:

  • As a Dessert: Pair with a scoop of vanilla ice cream for an indulgent treat.
  • On a Platter: Serve alongside fresh fruits or nuts for a balanced snack platter.
  • With Coffee: Enjoy with your morning coffee for a sweet pick-me-up.

With their delightful combination of flavors and textures, these Frozen Chocolate Peanut Butter Banana Bites are sure to be a hit. Whether you’re treating yourself or sharing with loved ones, these bites make for a deliciously satisfying snack. Enjoy the process, and let these bites bring joy to your kitchen!

Yummy Frozen Chocolate Peanut Butter Banana Bites

Prep Time 15 minutes
Cook Time 10 minutes
Total Time 25 minutes
Servings 12 pieces
Calories 150
Delight in these easy, frozen treats combining ripe bananas, creamy peanut butter, and rich chocolate for a perfect snack or dessert.

Ingredients

Fruits

  • 3 pieces bananas (firm but ripe)

Nut Butter

  • 0.25 cup natural smooth peanut butter (or your choice of nut butter)

Chocolate

  • 280 grams dark chocolate, chopped or chocolate chips (about 10 oz)
  • 2 teaspoons coconut oil (optional, but suggested)

Instructions 

  • Slice bananas into bite-sized pieces and place on a baking sheet.
  • Spread a small amount of peanut butter onto each banana piece.
  • Freeze the banana and peanut butter bites for about 15 minutes.
  • Melt the dark chocolate with coconut oil until smooth.
  • Dip each frozen banana piece into the melted chocolate and place back on the sheet.
  • Freeze for an additional 10 minutes before serving.

Notes

For best results, keep the bites frozen until ready to serve.
Calories: 150kcal
Cost: $10
Course: Dessert
Keyword: Banana, Chocolate, peanut butter

Welcome to a delightful journey of baking as we explore the rich and comforting world of our Moist and Fluffy Oat Flour Chocolate Cake. This gluten-free treat is not just a cake; it’s an experience that celebrates the joy of home cooking. If you’re looking to impress friends, family, or simply indulge in a sweet moment alone, this cake is your perfect companion. With simple ingredients that you probably already have in your kitchen, and a straightforward process that encourages you to savor each step, let’s dive into this delicious creation!

Why You’ll Love This Recipe

There are countless reasons to love this chocolate oat cake, but here are five that stand out:

  • Gluten-Free Goodness: Perfect for those with gluten sensitivities or anyone looking to reduce gluten intake without compromising on taste.
  • Rich Flavor: The combination of cocoa and chocolate chips creates a decadent chocolate experience that satisfies every sweet tooth.
  • Healthier Ingredients: Made with oat flour and yogurt, this cake is naturally sweetened and packed with nutrients, making it a guilt-free indulgence.
  • Easy to Make: With straightforward steps and minimal equipment, you can whip this cake up in no time—even on a busy day!
  • Versatile Recipe: This cake serves as a perfect base for various toppings and fillings, allowing you to customize it according to your mood or occasion.

Ingredients: A Closer Look

Let’s break down the ingredients that make this cake not only delicious but also approachable for home bakers:

  • Oat Flour: You can easily make oat flour by blending rolled oats in a high-speed blender until fine. This gives the cake a unique texture and flavor.
  • Granulated Sugar: Sweetens the cake while balancing its rich chocolate flavor. Feel free to substitute with coconut sugar for a lower glycemic index.
  • Unsweetened Cocoa Powder: Essential for that deep chocolate flavor. Opt for high-quality cocoa for the best results.
  • Light Brown Sugar: Adds moisture and a hint of caramel flavor. You can use all granulated sugar if you prefer.
  • Cornstarch: Helps to create a tender crumb in this chocolate cake.
  • Baking Powder & Baking Soda: These leavening agents ensure your cake rises beautifully.
  • Salt: A pinch of salt enhances the overall flavor of the cake.
  • Eggs: Provide structure and moisture. For a vegan alternative, consider using flax eggs.
  • Milk: Any milk works, but almond or oat milk can make this recipe dairy-free.
  • Plain Yogurt: Adds moisture and tang. Greek yogurt works wonderfully here.
  • Oil: Choose a neutral oil like canola or sunflower, or use melted coconut oil for a hint of flavor.
  • Vanilla Extract: Adds depth and warmth to the cake.
  • Mini Chocolate Chips: Sprinkled throughout the batter and on top for that extra chocolatey goodness.

How to Make This Chocolate Oat Cake

Now that we have our ingredients sorted, let’s dive into the baking process!

Step-by-Step Instructions

Follow these simple steps to create your perfect chocolate oat cake:

  1. Preheat your oven to 350ºF (175ºC). Prepare an 8×8-inch baking dish by greasing it or lining it with parchment paper for easy removal.
  2. Blending the Oats: If you’re making your own oat flour, place the rolled oats in a high-speed blender and blend until fine. This should take about 30-60 seconds.
  3. Mix Dry Ingredients: Add the cocoa powder, granulated sugar, brown sugar, cornstarch, baking powder, baking soda, and salt to the blender. Blend again briefly to combine.
  4. Combine Wet Ingredients: In a separate bowl, whisk together the eggs, milk, yogurt, oil, and vanilla extract until well combined.
  5. Mix Wet and Dry Ingredients: Pour the wet mixture into the dry ingredients in the blender or a mixing bowl and blend or mix until just combined. The batter will be thin, similar to thick chocolate milk.
  6. Let It Rest: Allow the batter to rest for about 10 minutes. This helps the oats absorb moisture and bind the crumb.
  7. Fold in Chocolate Chips: Stir in half of the mini chocolate chips into the batter, then pour the mixture into the prepared pan. Sprinkle the remaining chocolate chips on top.
  8. Bake the Cake: Bake for 40-45 minutes, or until a toothpick inserted into the center comes out clean. Remember, the top might look set while the inside is still baking, so check carefully.
  9. Cool and Frost: Once baked, let the cake cool in the pan for about 10-15 minutes, then transfer it to a wire rack to cool completely before frosting.

Frosting Your Cake

While the cake cools, you can prepare a simple frosting:

  • Ingredients for Frosting:
    • 5 tablespoons unsalted butter, softened
    • 3 cups powdered sugar
    • ⅓ cup unsweetened cocoa powder
    • 2 tablespoons yogurt
    • ¼ teaspoon salt
    • 3-4 tablespoons milk

Instructions:

  1. In a large bowl, beat the softened butter until creamy.
  2. Add 2 cups of powdered sugar, cocoa powder, yogurt, and salt. Mix until combined.
  3. Gradually add the remaining powdered sugar and milk until you achieve a fluffy, spreadable consistency.
  4. Spread the frosting generously over the cooled cake.

Pro Tips for Baking Success

Detailed image of a gluten-free chocolate cake with a soft, fluffy interior and a glossy chocolate frosting.

To ensure your cake turns out perfectly, keep these tips in mind:

  • Measure Accurately: Use a kitchen scale for precise measurements, especially for the oat flour.
  • Don’t Overmix: Mix just until combined to keep the cake tender.
  • Check Doneness: Use a toothpick to check for doneness, but be aware that the cake may look set before it’s fully cooked inside.
  • Let It Cool: Allow the cake to cool completely before frosting to prevent the frosting from melting.
  • Experiment with Flavors: Add a splash of espresso or almond extract for a different flavor profile.
  • Use Quality Ingredients: The better the ingredients, the more delicious your cake will be.
  • Store Properly: Wrap leftover cake in plastic wrap and store in the refrigerator to maintain freshness.
  • Serve with Fruit: Fresh berries or bananas on top of the frosting add a refreshing touch.

Common Mistakes and Troubleshooting

Even the best bakers make mistakes sometimes. Here’s how to avoid common pitfalls:

  • Dense Texture: If your cake turns out dense, it may be due to overmixing. Be gentle when mixing wet and dry ingredients.
  • Too Crumbly: If the cake crumbles too much, it might not have been baked long enough or the oats were not blended finely enough.
  • Dry Cake: Ensure you’re measuring your ingredients accurately, and don’t let the cake bake for too long.
  • Frosting Issues: If frosting is too thick, add more milk a teaspoon at a time until you reach the desired consistency.

Variations to Try

This recipe is versatile! Here are some variations you can try:

  • Add Nuts: Fold in chopped walnuts or pecans for added crunch and flavor.
  • Fruit Additions: Incorporate mashed bananas or applesauce for natural sweetness and moisture.
  • Different Frosting: Try a cream cheese frosting or a simple glaze for a different twist.
  • Layered Cake: Bake in two round pans, frost between layers for a stunning presentation.

Storage and Make-Ahead Instructions

This cake can be made ahead of time and stored for later enjoyment:

  • Room Temperature: Store the cake covered at room temperature for up to 2 days.
  • Refrigerator: Keep in the fridge for up to a week; just be sure to wrap it well!
  • Freezing: The cake freezes beautifully. Wrap slices in plastic wrap and foil, and freeze for up to 3 months.

Frequently Asked Questions

Here are some common questions about this chocolate oat cake:

  • Can I make this cake dairy-free? Yes, use dairy-free yogurt and milk alternatives.
  • What is the best way to store leftover cake? Wrap in plastic and store in the fridge or freeze for longer storage.
  • Can I substitute oat flour with regular flour? Yes, but the cake will no longer be gluten-free.
  • How can I make this recipe vegan? Substitute eggs with flax eggs and use plant-based yogurt and milk.
  • What can I serve with this cake? It’s delicious on its own or served with whipped cream or fresh fruit.
  • How long does it take to bake? Bake for 40-45 minutes, but check for doneness with a toothpick.
  • Can I use other sweeteners? Yes, consider maple syrup or honey, but adjust the liquid content accordingly.
  • Is it possible to add more chocolate? Absolutely! You can add more chocolate chips or drizzle melted chocolate on top.

Nutritional Tips and Dietary Adaptations

This cake can be a part of a balanced diet:

  • Protein Boost: Add a scoop of protein powder to the batter for a nutritional boost.
  • Lower Sugar: Use less sugar or a sugar substitute for a healthier option.
  • Fiber-Rich: Oat flour is rich in fiber, which is great for digestive health.

Recommended Equipment

To make your baking experience smooth, here’s a list of helpful tools:

  • High-Speed Blender: For grinding oats into flour.
  • Mixing Bowls: A variety of sizes for mixing ingredients.
  • Measuring Cups and Spoons: Accurate measurements are key to success.
  • Rubber Spatula: Great for scraping the sides of your mixing bowls.
  • Baking Pan: An 8×8-inch pan is perfect for this recipe.

Serving Suggestions

When it comes to serving this delectable cake, the possibilities are endless:

  • Fresh Fruit: Top with sliced strawberries or raspberries for a fruity contrast.
  • Whipped Cream: Add a dollop of whipped cream for extra indulgence.
  • Chocolate Drizzle: Drizzle melted chocolate on top for added flair.
  • Ice Cream: Serve warm with a scoop of vanilla ice cream for a delightful dessert.

Baking is a wonderful way to express creativity and bring joy into your kitchen. This Moist and Fluffy Oat Flour Chocolate Cake is not just a recipe; it’s an invitation to embrace the art of cooking with confidence and enjoyment. I hope you find as much joy in making this cake as I do in sharing it with you. Happy baking!

Moist, Fluffy Oat Flour Chocolate Cake Gluten Free

Prep Time 15 minutes
Cook Time 45 minutes
Total Time 1 hour
Servings 8 slices
Calories 350
This gluten-free chocolate cake is moist, fluffy, and packed with rich cocoa flavor, perfect for any celebration or treat.

Ingredients

Dry Ingredients

  • 2 cups gluten-free certified rolled oats or oat flour
  • ⅔ cup granulated sugar
  • ⅓ cup unsweetened cocoa powder
  • ¼ cup light brown sugar
  • 2 tablespoons cornstarch
  • 1½ teaspoons baking powder
  • ½ teaspoon baking soda
  • ¼ teaspoon salt

Wet Ingredients

  • 2 large eggs
  • ¾ cup milk (any preferred)
  • ⅓ cup plain whole milk yogurt
  • ¼ cup oil (any preferred)
  • 2 teaspoons vanilla extract

Chocolate Chips

  • ½ cup mini chocolate chips divided
  • 3 tablespoons unsalted butter softened
  • 3 cups powdered sugar divided
  • ⅓ cup unsweetened cocoa powder
  • 2 tablespoons yogurt
  • ¼ teaspoon salt
  • 3-4 tablespoons milk (any preferred)

Instructions 

  • Preheat oven to 350ºF (175ºC). Grease an 8x8-inch pan or line with parchment.
  • Process oats into flour in a blender, then add dry ingredients and blend. Mix wet ingredients separately, then combine with dry. Rest batter 10 minutes, then fold in ¼ cup chocolate chips.
  • Pour batter into prepared pan, top with remaining chocolate chips, and bake for 40-45 minutes. Cool completely before frosting.
  • Make frosting by beating butter, powdered sugar, cocoa, yogurt, and salt. Add milk and remaining powdered sugar, beat until fluffy. Spread on cooled cake.

Notes

Ensure to check cake doneness with a toothpick; it should come out clean.
Calories: 350kcal
Cost: $15
Course: Dessert
Cuisine: gluten-free
Keyword: Chocolate, Oats

Start Your Day Right with a Nourishing Acai Smoothie Bowl

There’s something about a vibrant acai smoothie bowl that brings a sense of joy and freshness to your mornings. In just a few minutes, you can whip up a delicious and nutritious bowl that not only tantalizes your taste buds but also provides a healthy start to your day. This acai smoothie bowl is perfect for breakfast or as a refreshing snack. With a handful of simple ingredients, you can create a colorful masterpiece packed with flavor and health benefits.

In the following sections, we’ll dive deep into the world of acai bowls—exploring their origins, the health benefits they offer, and how to customize them to suit your taste. Whether you’re a seasoned kitchen pro or just beginning your culinary journey, this guide will help you make the most of your acai smoothie bowl experience.

Why You’ll Love This Recipe

  • Quick and Easy: This acai smoothie bowl comes together in less than 10 minutes, making it the perfect solution for busy mornings when you need something nutritious and delicious.
  • Minimal Ingredients: With just a handful of simple ingredients, this recipe is accessible and budget-friendly. You likely have most of them in your kitchen already!
  • Customizable: Feel free to add your favorite fruits, nuts, or seeds to make this bowl uniquely yours. The possibilities are endless!
  • Nutrient-Packed: Acai berries are rich in antioxidants, fiber, and healthy fats, making this bowl not only tasty but also beneficial for your health.
  • Visually Stunning: The vibrant colors of the acai and fresh toppings make this bowl as beautiful as it is delicious, perfect for sharing on social media.

Understanding Acai: What is It?

Acai berries are small, dark purple fruits native to the Amazon rainforest. They have gained popularity worldwide for their health benefits, often touted as a superfood. These berries are rich in antioxidants, particularly anthocyanins, which contribute to their deep color and provide numerous health benefits.

Incorporating acai into your diet can support overall health by:

  • Boosting Heart Health: The antioxidants in acai may help lower cholesterol levels and improve heart health.
  • Enhancing Brain Function: Acai berries can promote cognitive function and may even help prevent age-related decline.
  • Supporting Weight Management: Low in sugar and high in fiber, acai can help you feel full and satisfied.

Ingredient Breakdown and Substitutions

Close-up view of a homemade acai smoothie bowl with fresh fruit toppings.

Here’s a closer look at the key ingredients for your acai smoothie bowl:

  • Frozen Acai Packet: The star of the show! Look for unsweetened acai puree packets at your local grocery store or online. If you can’t find them, you can use acai powder as a substitute, but adjust the quantity based on your preference.
  • Bananas: I recommend using ripe bananas for natural sweetness and creaminess. If you don’t have bananas, you can substitute with avocado for a creamy texture.
  • Berries: I prefer using frozen mixed berries, particularly those from Wyman’s of Maine, for their flavor and convenience. Feel free to use any combination of strawberries, blueberries, or raspberries.
  • Almond Milk: Unsweetened almond milk adds a creamy base to the smoothie. You can easily swap it for coconut milk, soy milk, or any milk of your choice.
  • Vanilla Extract: A splash of vanilla enhances the flavor of the smoothie bowl. If you want a different flavor profile, try adding a pinch of cinnamon or a splash of almond extract.

Step-by-Step Instructions to Make Your Acai Smoothie Bowl

Ready to create your own acai masterpiece? Follow these simple steps:

  • Step 1: Prepare the frozen fruit base. In a blender, combine 1.5 peeled and sliced bananas, 1.25 cups of frozen berries, one acai packet (run it under hot water for 5 seconds to soften), and 2/3 cup of almond milk. Add a splash of vanilla extract.
  • Step 2: Blend the ingredients until smooth and creamy. If the mixture is too thick, add more almond milk gradually until you achieve your desired consistency.
  • Step 3: Pour the smoothie mixture into a bowl, then top it with your favorite toppings—think sliced fruits, granola, nuts, seeds, or drizzles of honey or nut butter.

Pro Tips for the Perfect Acai Smoothie Bowl

To ensure your acai smoothie bowl is a hit every time, here are some expert insights:

  • Use Frozen Ingredients: Frozen fruit gives your smoothie bowl a thick and creamy texture. If you use fresh fruit, consider adding ice to achieve the right consistency.
  • Don’t Overblend: Stop blending as soon as the mixture is smooth. Overblending can make the bowl too thin, losing that coveted creamy texture.
  • Experiment with Toppings: Get creative with toppings! Try adding chia seeds, shredded coconut, or different nut butters for added flavor and nutrition.
  • Layer Flavors: Mix different fruits into your base for a burst of flavor. For example, try adding mango or kiwi for a tropical twist.
  • Make it Ahead: If you’re short on time, prepare the base the night before and store it in the fridge. Just blend and add toppings in the morning!

Common Mistakes to Avoid

  • Using Too Much Liquid: Adding too much milk can make your smoothie bowl too thin. Start with less and gradually add more if needed.
  • Not Thawing the Acai: Always run the acai packet under hot water for a few seconds to soften it before blending. This helps achieve a smoother texture.
  • Skipping the Toppings: Toppings are crucial for texture and flavor! Don’t skip them—experiment with different combinations!

Delicious Variations to Try

Feeling adventurous? Here are some fun variations to mix up your acai bowl experience:

  • Tropical Acai Bowl: Add pineapple and coconut milk to your base, and top with shredded coconut and sliced mango.
  • Chocolate Acai Bowl: Incorporate cocoa powder into the blend for a chocolatey twist, and top with cacao nibs and banana slices.
  • Green Acai Bowl: Blend in a handful of spinach or kale for a nutrient boost and vibrant color.
  • Nutty Acai Bowl: Add a tablespoon of nut butter to the blend for creaminess and rich flavor, topped with chopped nuts and seeds.

Storage and Make-Ahead Instructions

If you want to prepare your acai smoothie bowl ahead of time, here’s how:

  • Refrigerate: Store the base in an airtight container in the fridge for up to 24 hours. Just give it a quick blend before serving.
  • Freeze: For longer storage, freeze the smoothie base in ice cube trays. When you’re ready, blend the frozen cubes with a splash of almond milk for a quick meal.

Frequently Asked Questions

Here are some common questions about acai smoothie bowls:

  • Can I use fresh acai berries? Fresh acai berries are not readily available in most places, so frozen puree packets are the best option.
  • Are acai bowls healthy? Yes! They are packed with antioxidants, vitamins, and minerals, especially when topped with fruits and nuts.
  • How can I make my acai bowl vegan? This recipe is already vegan! Just ensure your toppings are plant-based as well.
  • Can I make this smoothie bowl without a blender? A blender is recommended for a smooth consistency, but you can use a food processor if necessary.
  • What can I use instead of bananas? Avocado or silken tofu can be great substitutes for creaminess.
  • Can I add protein powder? Absolutely! Adding a scoop of your favorite protein powder can enhance the nutritional profile.
  • How do I know if my acai is good quality? Look for unsweetened acai packets with minimal additives. The color should be deep purple.
  • What are the best toppings for an acai bowl? Fresh fruits, granola, nuts, seeds, and drizzles of honey or nut butter are all excellent choices.

Nutrition Tips and Dietary Adaptations

This acai smoothie bowl is not only delicious but also adaptable to fit various dietary needs:

  • Gluten-Free: All ingredients are naturally gluten-free.
  • Nut-Free: Substitute almond milk with oat milk or coconut milk to make it nut-free.
  • Low-Sugar: Opt for unsweetened almond milk and skip added sweeteners if you’re watching your sugar intake.

Essential Equipment for Making Acai Bowls

To make your acai smoothie bowl, you’ll need:

  • High-Speed Blender: A good-quality blender is essential for achieving a smooth and creamy consistency.
  • Measuring Cups and Spoons: Accurate measurements ensure the best flavor and texture.
  • Bowl and Spoon: A beautiful bowl enhances the presentation of your acai masterpiece.

Serving Suggestions

Serve your acai smoothie bowl immediately after preparing. You can enjoy it as a hearty breakfast, a post-workout snack, or even dessert! Pair it with a cup of herbal tea or a refreshing juice for a delightful meal experience.

Conclusion

Making a nourishing acai smoothie bowl at home is not only simple but also incredibly rewarding. With just a few ingredients and a bit of creativity, you can enjoy a delicious and healthy meal that fuels your day. So, gather your ingredients, unleash your culinary creativity, and savor the vibrant flavors of your homemade acai bowl. Remember, cooking is all about enjoying the process, and I hope this recipe inspires you to find joy in your kitchen. Happy cooking!

Homemade Acai Smoothie Bowl

Prep Time 10 minutes
Total Time 10 minutes
Servings 2 servings
Calories 350
A vibrant and nutritious smoothie bowl perfect for a quick breakfast or snack. Packed with berries, banana, and acai, it's both delicious and energizing.

Ingredients

Fruits

  • 1.5 bananas bananas (peeled and sliced into 2-inch coins)
  • 1.25 cups berries (preferably from Wyman's of Maine)
  • 1 acai packet acai packet (run under hot water for 5 seconds to soften)

Liquid

  • 2.75 cups almond milk (unsweetened, e.g., Almond Breeze)
  • 0.25 teaspoon vanilla extract

Instructions 

  • Add bananas, berries, acai, almond milk, and vanilla extract to a blender.
  • Blend until smooth and creamy.
  • Pour into bowls and serve immediately.

Notes

You can top the bowl with granola, seeds, or additional fruit for extra texture.
Calories: 350kcal
Cost: $8
Course: Breakfast
Cuisine: American
Keyword: Acai, Healthy, Smoothie

Discover the Joy of Quick Mongolian Beef Noodle Stir Fry

Cooking can be a delightful escape from the hustle and bustle of daily life, and Mongolian Beef Noodle Stir Fry is the perfect dish to embrace that joy. In under 30 minutes, this recipe brings together savory flavors, fresh vegetables, and tender beef, creating a meal that feels just as satisfying as your favorite takeout, but made with love in your own kitchen. Whether you’re a busy professional, a parent looking for a quick weeknight dinner, or simply someone who enjoys a hearty meal, this recipe will fit seamlessly into your routine.

Why You’ll Love This Recipe

  • Quick and Easy: Ready in under 30 minutes, making it ideal for busy nights.
  • Flavor-Packed: Combines savory soy sauce with fresh ginger and garlic for a mouthwatering taste.
  • Customizable: Use your favorite vegetables and noodles to make the dish your own.
  • Healthy Ingredients: Packed with protein and veggies, it’s a wholesome meal that’s good for you.
  • Perfect Texture: The stir-fry technique ensures that the beef is tender and the vegetables are crisp.

Ingredient Breakdown

The beauty of this dish lies in its simplicity and adaptability. Here’s what you’ll need:

  • 1 lb flank steak: Sliced thinly against the grain for tenderness.
  • 8 oz egg noodles: Or any preferred type of noodles, such as lo mein or rice noodles.
  • 1 cup bell peppers: Sliced, using a mix of red and green for color.
  • 1 cup snow peas: Trimmed for a fresh, crunchy addition.
  • 3 tbsp soy sauce: Use low-sodium for a healthier option.
  • 2 tbsp cornstarch: For thickening the sauce and giving it that glossy finish.
  • 2 tbsp vegetable oil: Essential for frying and bringing everything together.
  • 3 cloves garlic: Minced for aromatic depth.
  • 1 inch ginger: Grated or minced for a zesty kick.

Pro Tips for the Best Stir Fry

Juicy Mongolian beef stir fry with egg noodles and vibrant bell peppers in a bowl.

To elevate your Mongolian Beef Noodle Stir Fry and ensure perfect results every time, keep these tips in mind:

  • Slice against the grain: This keeps the beef tender and easy to chew.
  • Use high heat: Cooking on high heat allows for that perfect sear on the beef and maintains crisp vegetables.
  • Prep ingredients ahead: Have everything chopped and ready to go for a smooth cooking experience.
  • Don’t overcrowd the pan: Stir-frying in batches if necessary keeps everything cooking evenly.
  • Experiment with vegetables: Feel free to add broccoli, carrots, or any seasonal veggies you enjoy.
  • Let the sauce thicken: Allow for a few extra minutes of cooking after adding the sauce to achieve that desired consistency.
  • Marinate the beef: For an even deeper flavor, let the beef marinate in soy sauce and garlic for 30 minutes before cooking.
  • Keep it quick: Stir-frying should be fast! Have all your ingredients prepped and ready to keep the cooking process swift.
  • Adjust seasoning to taste: If you like it spicier, add some chili sauce or sriracha.

Avoiding Common Mistakes

Even seasoned cooks can run into pitfalls during stir-fry cooking. Here are some common mistakes to avoid:

  • Not prepping ingredients: A lack of prep leads to overcooked ingredients or a chaotic cooking process.
  • Using low-quality beef: Opt for flank steak or sirloin for the best results; tougher cuts will detract from the dish.
  • Cooking at low heat: This results in steaming rather than stir-frying, which can make your dish soggy.
  • Skipping the cornstarch: It’s essential for that glossy, thick sauce; don’t skip this ingredient!
  • Ignoring the resting time: Letting cooked beef rest for a few minutes before slicing retains its juices.

Delicious Variations

This recipe is incredibly versatile. Here are some tasty variations you might enjoy:

  • Vegetarian Option: Substitute beef with tofu or seitan and use vegetable broth instead of soy sauce for a plant-based meal.
  • Spicy Mongolian Beef: Add sliced jalapeños or a dash of chili flakes to the sauce for a heat boost.
  • Coconut Curry Twist: Add coconut milk and curry paste for a unique flavor profile that’s creamy and delicious.
  • Peanut Sauce Variation: Swap the soy sauce for a peanut sauce for a nutty flavor that pairs well with the beef.

Storage and Make-Ahead Instructions

This dish can be prepared ahead of time and stored for future meals. Here’s how:

  • Refrigerate: Store leftovers in an airtight container in the fridge for up to 3 days.
  • Freeze: The stir fry can be frozen for up to a month. Let it cool completely before transferring to a freezer-safe container.
  • Reheat: For best results, reheat on the stovetop over medium heat, adding a splash of water or broth to revive the dish.

Comprehensive FAQ

Here are some common questions about making Mongolian Beef Noodle Stir Fry:

  • What type of beef is best? Flank steak or sirloin works best due to their tenderness when sliced thinly.
  • Can I use different noodles? Absolutely! Ramen, lo mein, or even rice noodles can be used as a substitute.
  • How do I thicken the sauce? The cornstarch in the recipe will help thicken the sauce as it cooks.
  • Is this dish spicy? It’s not inherently spicy, but you can add chili sauce if desired.
  • Can I use frozen vegetables? Yes, frozen veggies can be a quick alternative; just ensure they are fully thawed before adding to the stir-fry.
  • How do I store leftovers? Store in an airtight container in the fridge for up to 3 days.
  • Can I make this dish ahead of time? Yes, you can prep the ingredients and store them separately until you’re ready to cook.
  • What should I serve with it? This dish is great on its own or served with a side of steamed rice or stir-fried greens.

Nutritional Tips and Dietary Adaptations

This dish can be adapted to suit various dietary needs:

  • Low-Carb Option: Substitute noodles with zucchini noodles or cauliflower rice for a lower-carb meal.
  • Gluten-Free: Use tamari instead of soy sauce and ensure your noodles are gluten-free.
  • Dairy-Free: This recipe is naturally dairy-free, making it suitable for those with lactose intolerance.

Essential Equipment for Your Stir Fry

To achieve the best results, here’s what you’ll need:

  • Wok or Large Skillet: Essential for high-heat cooking and even distribution of heat.
  • Sharp Knife: For slicing beef and vegetables thinly.
  • Spatula or Tongs: For tossing and stirring ingredients as they cook.
  • Measuring Cups and Spoons: To ensure precise ingredient amounts for perfect flavor.

Serving Suggestions

To enhance your meal, consider these serving ideas:

  • Garnish: Top with sesame seeds and chopped green onions for added flavor and crunch.
  • Side Dishes: Serve with a simple cucumber salad or steamed broccoli for a refreshing contrast.
  • Accompaniments: A light soy sauce or chili garlic sauce can add an extra kick to your dish.

In conclusion, Mongolian Beef Noodle Stir Fry is a comforting, quick, and satisfying meal that can easily become a favorite in your household. With its adaptable ingredients and straightforward preparation, it embodies the spirit of home cooking—nourishing, enjoyable, and uncomplicated. So gather your ingredients, turn up the heat, and savor the joy of making this delightful dish!

Mongolian Beef Noodle Stir Fry

Prep Time 10 minutes
Cook Time 15 minutes
Total Time 25 minutes
Servings 4 servings
Calories 550
A quick and flavorful stir fry combining tender beef, colorful vegetables, and savory sauce over noodles.

Ingredients

Meat

  • 1 lb flank steak (sliced thinly against the grain)

Noodles

  • 8 oz egg noodles (or preferred type)

Vegetables

  • 1 cup bell peppers (sliced, use red and green)
  • 1 cup snow peas (trimmed)

Sauce & Thickening

  • 3 tbsp soy sauce (use low-sodium if desired)
  • 2 tbsp cornstarch (for thickening the sauce)

Other

  • 2 tbsp vegetable oil (for frying)
  • 3 cloves garlic (minced)
  • 1 inch ginger (grated or minced)

Instructions 

  • Cook noodles according to package instructions, then drain and set aside.
  • Heat vegetable oil in a large skillet or wok over medium-high heat. Add sliced beef and cook until browned, about 3-4 minutes.
  • Add garlic and ginger; cook for 1 minute until fragrant. Then add bell peppers and snow peas, stir-fry for 2-3 minutes.
  • Mix soy sauce and cornstarch to make the sauce, then pour into the skillet. Cook until the sauce thickens, about 2 minutes.
  • Add cooked noodles to the skillet, toss to combine, and cook for another 1-2 minutes. Serve hot.

Notes

For extra flavor, garnish with chopped green onions or sesame seeds.
Calories: 550kcal
Cost: $15
Course: Main Course
Cuisine: Asian
Keyword: Beef, Stir Fry

Discover the Joy of a Creamy Pasta Salad

Embrace the art of home cooking with this delightful creamy pasta salad recipe that combines fresh vegetables, hearty beans, and a luscious dressing. Perfect for any occasion, whether it’s a summer BBQ, a potluck, or a cozy family dinner, this dish invites you to slow down and enjoy the flavors of comforting food. With every bite, you’ll experience the joy of nurturing your body and sharing good food with loved ones.

Why You’ll Love This Recipe

This creamy pasta salad isn’t just a meal; it’s an experience! Here are five reasons why you will love making and enjoying this recipe:

  • Quick and Easy: With a prep time of just 15 minutes, you can whip this salad together in no time, making it perfect for busy weeknights or last-minute gatherings.
  • Customizable Ingredients: Use whatever vegetables you have on hand, from bell peppers to zucchini, allowing you to tailor the salad to your taste preferences.
  • Nutritious and Satisfying: Packed with protein-rich beans and colorful veggies, this salad is not just delicious but also nourishing, keeping you satisfied and energized.
  • Perfect for Meal Prepping: This creamy pasta salad stores beautifully, making it an excellent choice for preparing meals ahead of time for lunches or quick dinners.
  • Versatile for Any Occasion: Whether it’s a picnic, a potluck, or a simple weeknight dinner, this salad fits every occasion, making it a staple in your recipe repertoire.

Ingredients Breakdown

Let’s dive deeper into the key ingredients that make this salad a standout, along with some thoughtful substitutions:

  • Pasta: 8 ounces of short pasta (fusilli, rotini, or elbows) creates the perfect base. You can also use gluten-free pasta if needed.
  • White Beans: 1 can (15 ounces) of drained white beans adds creaminess and protein. Consider substituting with chickpeas if you prefer.
  • Vegetables: 2 cups of chopped red bell pepper and 1 heaping cup of cucumber provide crunch and freshness. Feel free to swap in your favorite veggies, like cherry tomatoes or shredded carrots.
  • Shallots: 1 chopped shallot gives a mild onion flavor. You can replace it with green onions or finely chopped red onion.
  • Celery: 1 rib of chopped celery adds a nice crunch. If you’re not a fan, you can skip it or substitute with diced zucchini.
  • Pickles: ½ cup of chopped pickles lends a tangy bite. For a different flavor, try using capers or olives.
  • Dill and Oregano: 3 tablespoons of fresh dill or 1½ teaspoons of dried oregano enhances the flavor profile. Fresh herbs like parsley or basil can be great alternatives.
  • Corn: ½ cup of canned corn adds sweetness. You could use frozen corn or peas instead.
  • Olives: ½ cup of pitted olives introduces a salty element. Feel free to choose green or black olives, depending on your preference.
  • Dressing Ingredients: Combine ½ cup of vegan mayo or regular mayo, ½ cup of Greek yogurt, 2 tablespoons of lemon juice, 1 teaspoon of lemon zest, 1 tablespoon of maple syrup or honey, ¾ teaspoon of salt, and ⅛ teaspoon of black pepper for a creamy dressing.

How to Make Creamy Pasta Salad

Side view of a deliciously textured creamy pasta salad in a bowl.

Follow these simple steps to create a delectable creamy pasta salad:

  1. Cook the Pasta: Boil 8 ounces of short pasta in a large pot of salted water according to the package instructions. Drain and rinse under cold water for 15 seconds to stop the cooking process and maintain firmness.
  2. Prepare the Dressing: In a mixing bowl, whisk together the mayo, Greek yogurt, lemon juice, lemon zest, maple syrup, salt, and black pepper until smooth.
  3. Assemble the Salad: In a large bowl, combine the cooked pasta, drained white beans, chopped red bell pepper, cucumber, shallot, celery, pickles, dill, corn, and olives. Pour in the dressing and mix well until everything is evenly coated. Taste and adjust the seasoning as necessary.
  4. Serve or Store: You can serve immediately or cover and refrigerate for up to 3 days.

Pro Tips for Success

To ensure your creamy pasta salad turns out perfectly every time, keep these expert tips in mind:

  • Cook Pasta Al Dente: Cooking pasta just until firm will help prevent it from becoming mushy when mixed with the dressing.
  • Chill Before Serving: Letting the pasta salad chill for at least an hour allows the flavors to meld beautifully.
  • Use Fresh Ingredients: Opt for the freshest vegetables and herbs for the best flavor and texture.
  • Tweak the Dressing: Don’t hesitate to adjust the dressing ingredients to suit your taste; add more lemon for brightness or extra herbs for flavor.
  • Serve with a Garnish: Consider garnishing with extra herbs or a sprinkle of paprika for added color and flavor.
  • Make It Colorful: Use a variety of colorful veggies to make the dish visually appealing and nutritious.
  • Incorporate Protein: For a heartier salad, add cooked chicken, tofu, or chickpeas.
  • Experiment with Flavors: Try adding spices like smoked paprika or cumin for a unique twist.

Common Mistakes and Troubleshooting

Here are some common pitfalls to avoid when making your creamy pasta salad:

  • Overcooking the Pasta: This can lead to a mushy salad. Always err on the side of al dente.
  • Too Much Dressing: If you find the salad too wet, add more pasta or beans to balance it out.
  • Not Adjusting Seasoning: Always taste and adjust the seasoning before serving to ensure the best flavor.
  • Skipping the Chilling Step: Allowing the salad to chill enhances the flavor; skipping this step can result in a less flavorful dish.

Delicious Variations of Creamy Pasta Salad

To keep things exciting, here are some variations you can try:

  • Greek Style: Swap out the mayo for a yogurt-based dressing, and add feta cheese, olives, and chopped cucumbers for a Mediterranean twist.
  • Spicy Southwest: Incorporate diced jalapeños, black beans, corn, and a lime vinaigrette for a zesty flair.
  • Italian Classic: Mix in salami, mozzarella balls, and a drizzle of balsamic vinaigrette for an Italian-inspired dish.
  • Asian-Inspired: Use sesame oil instead of mayo, add shredded carrots, and top with sesame seeds for an Asian twist.

Storage and Make-Ahead Instructions

This creamy pasta salad is perfect for make-ahead meals:

  • Refrigeration: Store in an airtight container in the refrigerator for up to 3 days. It’s best enjoyed cold.
  • Make Ahead: Prepare the salad a day in advance for the best flavor, allowing the ingredients to meld together beautifully.
  • Freezing: This salad is not recommended for freezing as the texture of the pasta and vegetables can become mushy.

Frequently Asked Questions

Here are some common questions about creamy pasta salad:

  • Can I make creamy pasta salad ahead of time? Yes, it’s best to let the flavors develop by making it a day in advance.
  • How long can I store creamy pasta salad? It can be stored in an airtight container in the refrigerator for up to 3 days.
  • What type of pasta works best? Short pasta shapes like fusilli, rotini, or elbows hold the dressing well.
  • Can I use non-dairy yogurt? Absolutely! Non-dairy yogurt works just as well for a vegan option.
  • How can I make this salad spicier? Add diced jalapeños or a splash of hot sauce to the dressing for extra heat.
  • Can I add meat to this salad? Yes, cooked chicken or turkey can be added for extra protein.
  • What if the salad is too dry? Add more dressing or a splash of lemon juice to moisten it up.
  • Is this salad gluten-free? Use gluten-free pasta to make this salad suitable for a gluten-free diet.

Nutritional Tips and Dietary Adaptations

This creamy pasta salad can be adapted to fit various dietary needs:

  • For a Lighter Version: Reduce the amount of mayo and yogurt and add more vegetables.
  • Vegan Option: Use vegan mayo and non-dairy yogurt to make this dish plant-based.
  • Low-Carb Option: Substitute pasta with zucchini noodles or cauliflower rice for a lower-carb alternative.

Equipment Recommendations

For making this creamy pasta salad, having the right tools can make the process smoother:

  • Large Pot: For boiling the pasta, choose a pot large enough to accommodate plenty of water.
  • Mixing Bowls: Use large mixing bowls for combining the salad and dressing.
  • Whisk: A whisk is essential for making the dressing smooth and creamy.
  • Measuring Cups and Spoons: Ensure accuracy in ingredient measurements for best results.

Serving Suggestions

This creamy pasta salad is delightful on its own but can be enhanced with these serving ideas:

  • Pair with Grilled Meats: Serve alongside grilled chicken, steak, or shrimp for a well-rounded meal.
  • Garnish with Fresh Herbs: Sprinkle fresh herbs like parsley or dill on top for added freshness and presentation.
  • Serve in Lettuce Wraps: For a fun twist, serve the pasta salad in crunchy lettuce cups.

In conclusion, this creamy pasta salad is more than just a recipe; it’s a celebration of flavors, textures, and the joy of sharing good food with those you love. So, gather your ingredients, take a moment to enjoy the process, and savor every bite. Happy cooking!

Creamy Pasta Salad

Prep Time 15 minutes
Cook Time 10 minutes
Total Time 25 minutes
Servings 4 servings
Calories 450
A delicious and creamy pasta salad packed with fresh vegetables and a tangy dressing, perfect for picnics or quick meals.

Ingredients

Pasta

  • 8 ounces short pasta (fusilli, rotini, elbows, etc.)
  • 1 can 15-ounce white beans (drained)
  • 2 cups red bell pepper, chopped
  • 1 heaping cup cucumber, chopped
  • 1 shallot shallot, chopped
  • 1 rib celery, chopped
  • ½ cup pickles, chopped
  • 3 tablespoons dill or 1½ teaspoons dried oregano
  • ½ cup canned corn
  • ½ cup pitted olives
  • ½ cup vegan mayo or regular mayo
  • ½ cup Greek yogurt or non-dairy yogurt
  • 2 tablespoons lemon juice
  • 1 teaspoon lemon zest
  • 1 tablespoon maple syrup or honey
  • ¾ teaspoon salt or more to taste
  • ⅛ teaspoon black pepper

Instructions 

  • Cook the pasta in salted boiling water according to package instructions, then rinse under cold water for 15 seconds.
  • Whisk together mayo, yogurt, lemon juice, lemon zest, maple syrup, salt, and black pepper to make the dressing.
  • Combine cooked pasta, drained white beans, vegetables, pickles, herbs, corn, and olives in a large bowl. Pour dressing over and toss to coat.
  • Taste and adjust seasoning if needed. Serve immediately or refrigerate up to 3 days.

Notes

For best flavor, let the salad chill for at least 30 minutes before serving.
Calories: 450kcal
Cost: $15
Course: Salad
Keyword: Pasta

The Ultimate Guide to Crispy Air Fryer Potato Wedges

Welcome to your new favorite recipe for crispy air fryer potato wedges! This delightful dish combines simplicity and flavor, making it perfect for a cozy meal, a snack, or a side dish that will impress your family and friends. In this article, we will explore everything you need to know about creating these perfectly seasoned wedges, from ingredients and techniques to troubleshooting tips and serving suggestions. Follow along as we dive into the joy of cooking with an air fryer and discover how easy it is to make crispy potato wedges that are both satisfying and delicious.

Why You’ll Love This Recipe

There are countless reasons to adore this recipe for air fryer potato wedges. Here are just a few:

  • Quick to prepare: With minimal prep time, you can have these delicious wedges ready in under 30 minutes.
  • Healthier option: Enjoy the crispy texture of fried potatoes without the excess oil and mess involved in traditional frying.
  • Customizable flavors: Experiment with various seasonings to create your perfect flavor profile, whether you prefer classic or adventurous spices.
  • Perfectly crispy: The air fryer circulates hot air around the wedges, ensuring they are golden brown and crispy on the outside while soft and fluffy on the inside.
  • Great for sharing: Serve these wedges as a side dish at gatherings or enjoy them as a fun snack with friends and family!

Ingredients You’ll Need for Air Fryer Potato Wedges

Here’s what you’ll need to make these crispy air fryer potato wedges. Feel free to make substitutions based on your pantry and preferences!

  • 2 medium russet potatoes: Choose firm potatoes for the best texture.
  • 1 ½ tablespoons olive oil: This will help the seasonings stick and promote crispiness.
  • ½ teaspoon sea salt: Enhances the flavor of the potatoes.
  • ½ teaspoon ground paprika: Adds a subtle smokiness and beautiful color.
  • ½ teaspoon parsley flakes: For a touch of freshness and color.
  • ½ teaspoon chili powder: Optional, for a bit of heat.
  • ⅛ teaspoon ground black pepper: A dash for added flavor.

**Substitutions**: If you’re out of any specific spice, feel free to replace it with your favorite seasoning mix, garlic powder, or even a bit of grated Parmesan for a cheesy twist.

How to Make the Best Crispy Air Fryer Potato Wedges

Close-up of crispy golden potato wedges topped with herbs and spices.

Ready to dive into the cooking process? Let’s walk through the steps to create your crispy air fryer potato wedges!

Step-by-Step Instructions

  1. Preheat your air fryer: Set it to 400°F (200°C) to ensure your wedges cook evenly and become crispy.
  2. Prepare the potatoes: Start by slicing each potato lengthwise into halves. Then, halve each piece again lengthwise, and repeat once more with each quarter, yielding 16 evenly-sized wedges.
  3. Season the wedges: In a large mixing bowl, combine the potato wedges with olive oil, paprika, parsley, chili powder, salt, and black pepper. Toss until they are thoroughly coated with the seasoning mixture.
  4. Arrange in the air fryer: Place half of the seasoned potato wedges in the air fryer basket, ensuring they are in a single layer to allow for even cooking.
  5. Cook the wedges: Air fry for 10 minutes. After this time, use tongs to flip each wedge to ensure they crisp up evenly. Cook for an additional 5 minutes or until golden brown and crispy.
  6. Repeat the process: Transfer the cooked wedges to a plate and repeat with the remaining potato wedges.
  7. Serve and enjoy!: Serve the wedges hot, perhaps with a side of your favorite dipping sauce.

Pro Tips for Perfect Air Fryer Potato Wedges

To ensure your air fryer potato wedges come out perfectly every time, consider these expert insights:

  • Cut evenly: Aim for uniform sizes when cutting your wedges to promote even cooking.
  • Do not overcrowd: Cook in batches if necessary; overcrowding the basket can lead to soggy wedges.
  • Experiment with spices: Don’t hesitate to add your favorite herbs and spices to customize the flavor to your liking.
  • Soak the potatoes: For extra crispiness, soak the cut wedges in cold water for 30 minutes prior to seasoning and cooking.
  • Check doneness: Cooking times may vary based on your air fryer model, so always check for doneness and adjust as necessary.
  • Use cooking spray: For a lighter touch of oil, consider using cooking spray instead of drizzling olive oil directly.
  • Try different potatoes: While russet potatoes are ideal, feel free to experiment with Yukon Gold or sweet potatoes for different flavors and textures.
  • Serve with dipping sauces: Pair your wedges with homemade ranch, garlic aioli, or spicy ketchup for an enhanced experience.

Common Mistakes and Troubleshooting

Even the best cooks can run into a few hiccups. Here are some common mistakes to watch out for and how to avoid them:

  • Soggy wedges: This often happens when the potatoes are overcrowded in the air fryer. Always maintain a single layer for optimal crisping.
  • Under-seasoned wedges: Don’t skimp on the seasonings! Ensure each wedge is well-coated for maximum flavor.
  • Inconsistent cooking: If your wedges are cooking unevenly, consider shaking the basket halfway through cooking for better air circulation.
  • Burnt edges: Monitor your cooking time closely, especially if your air fryer runs hot. Adjust cooking times as necessary.

Variations on Air Fryer Potato Wedges

Feel free to switch things up with these tasty variations:

  • Cheesy wedges: Sprinkle grated cheese on the wedges during the last few minutes of cooking for a gooey, cheesy delight.
  • Herb-infused wedges: Add fresh rosemary or thyme to the seasoning mix for a fragrant, aromatic flavor.
  • Spicy sriracha wedges: Toss the wedges with sriracha before cooking for a spicy kick.
  • Sweet potato wedges: Substitute russet potatoes with sweet potatoes for a different flavor and added nutrients.

Storage and Make-Ahead Instructions

If you have leftovers or wish to prepare in advance, here’s how to store and reheat your air fryer potato wedges:

Storing Leftovers

Cool the wedges completely and place them in an airtight container. Store in the refrigerator for up to 3 days.

Reheating

To reheat, place the wedges back in the air fryer at 350°F (175°C) for 5-7 minutes to restore their crispiness.

Frequently Asked Questions

Here are some common questions about making air fryer potato wedges:

  • Can I use other types of potatoes? Yes, you can experiment with various types of potatoes, including Yukon Gold or sweet potatoes, for different flavors.
  • Do I need to peel the potatoes? It’s not necessary to peel the potatoes; leaving the skin on adds texture and nutrients.
  • Can I make these wedges ahead of time? Yes, you can prep the wedges in advance and store them in the refrigerator until you’re ready to cook.
  • What dipping sauces pair well? Try ketchup, ranch dressing, garlic aioli, or spicy mayo for a delicious dipping experience.
  • Can I freeze the wedges? While it’s possible to freeze the wedges, they may lose some crispiness when reheated.
  • How do I know when they are done? The wedges should be golden brown and crispy; you can also use a fork to test their tenderness.
  • Can I cook these in the oven? Yes, you can bake the wedges in the oven at a similar temperature, but they may require longer cooking times.
  • What if I don’t have an air fryer? You can cook them in a conventional oven or deep fry them, adjusting cooking times as needed.

Nutrition Tips and Dietary Adaptations

For a healthier twist, consider these dietary adaptations:

  • Oil alternatives: Use avocado oil or cooking spray for a lighter option.
  • Gluten-free: This recipe is naturally gluten-free; just ensure any additional seasonings are also gluten-free.
  • Low-carb option: Swap regular potatoes for cauliflower for a low-carb alternative.

Recommended Equipment

To make your cooking experience smooth, here’s a list of recommended equipment:

  • Air fryer: The star of the show! Choose a model with a good capacity for even cooking.
  • Cutting board and knife: Essential for slicing your potatoes evenly.
  • Mixing bowl: To combine the potatoes with the seasoning.
  • Tongs: For safely flipping the wedges while cooking.

Serving Suggestions

These crispy air fryer potato wedges are versatile and pair wonderfully with a variety of dishes. Consider serving them with:

  • Burgers: A classic pairing with juicy burgers for a satisfying meal.
  • Grilled meats: Perfect alongside grilled chicken or steak.
  • Salads: Add a crispy element to your favorite salad for extra texture.
  • As a snack: Enjoy them on their own or with a variety of dipping sauces.

In conclusion, making crispy air fryer potato wedges is an enjoyable and rewarding experience that anyone can master. By following this comprehensive guide, you’ll create a dish that is not only delicious but also adaptable to your tastes. So gather your ingredients, fire up your air fryer, and enjoy the process of cooking!

Air Fryer Potato Wedges Recipe

Prep Time 10 minutes
Cook Time 15 minutes
Total Time 25 minutes
Servings 4 servings
Calories 180
Enjoy crispy, seasoned potato wedges cooked effortlessly in your air fryer for a delicious snack or side dish.

Ingredients

Seasonings

  • 0.5 teaspoon sea salt
  • 0.5 teaspoon ground paprika
  • 0.5 teaspoon parsley flakes
  • 0.5 teaspoon chili powder
  • 0.125 teaspoon ground black pepper
  • 1.5 tablespoons olive oil
  • 2 medium russet potatoes

Instructions 

  • Preheat air fryer to 400°F (200°C). Slice potatoes into wedges.
  • Toss potato wedges with olive oil and seasonings until evenly coated.
  • Arrange half of the wedges in the air fryer basket in a single layer. Cook for 10 minutes.
  • Flip wedges and cook for an additional 5 minutes until crispy. Repeat with remaining wedges.
  • Serve hot and enjoy your seasoned potato wedges!

Notes

For extra crispiness, increase cooking time by a few minutes.
Calories: 180kcal
Cost: $10
Course: Side Dish
Cuisine: American
Keyword: Potatoes

Unveiling the Perfect Vanilla Yogurt Pound Cake

Welcome to your go-to guide for making a scrumptious Vanilla Yogurt Pound Cake! This delightful cake is not only moist and flavorful but also incredibly simple to prepare. Whether you’re baking for a special occasion or enjoying a quiet afternoon at home, this cake is sure to impress. With its tender crumb and rich vanilla flavor, it’s the ideal companion for coffee or tea, and it pairs beautifully with fresh berries or a dollop of whipped cream. Let’s dive into this easy yet satisfying recipe that celebrates the joy of baking!

Why You’ll Love This Recipe

This Vanilla Yogurt Pound Cake is a crowd-pleaser for several reasons:

  • Moist and Tender Texture: The addition of Greek yogurt ensures that each slice remains soft and moist, making it a perfect treat for any time of day.
  • Healthier Alternative: By using Greek yogurt instead of butter, this cake offers a lighter option with added protein, allowing you to indulge without the guilt.
  • Simple Ingredients: You probably have most of the ingredients in your pantry, making this a go-to recipe for impromptu baking.
  • Easy to Customize: With a few simple tweaks, you can easily adapt this recipe to suit your taste or dietary needs.
  • Perfect for Any Occasion: Whether it’s a birthday, a gathering, or just a cozy night in, this pound cake is versatile enough to be served on any occasion.

Ingredients You’ll Need

Here’s what you’ll need to create this delectable Vanilla Yogurt Pound Cake:

  • 1 ½ cups all-purpose flour (I recommend Bob’s Red Mill for quality)
  • 1/4 tsp salt
  • 1/8 tsp baking soda
  • 1 tsp baking powder
  • 1 cup non-fat vanilla or plain Greek yogurt (e.g., Dannon Oikos Triple Zero Vanilla)
  • 1 ¼ cups white sugar
  • 1/2 cup extra virgin olive oil or melted butter, cooled
  • 3 large eggs
  • 2 tsp vanilla extract (Nielsen-Massey is a great choice)
  • 1 tbsp vanilla bean paste (optional, but enhances flavor)

Step-by-Step Instructions

Side view of a golden-brown yogurt pound cake with a rich vanilla flavor.

Let’s get baking! Follow these straightforward steps to make your Vanilla Yogurt Pound Cake:

  1. Prepare the Pan and Oven: Preheat your oven to 350°F (180°C) and grease a loaf pan with butter or cooking spray.
  2. Mix the Dry Ingredients: In a medium bowl, whisk together the flour, salt, baking soda, and baking powder.
  3. Combine Wet Ingredients: In a large bowl, mix the Greek yogurt, sugar, olive oil (or butter), eggs, vanilla extract, and vanilla bean paste until smooth.
  4. Incorporate Dry Ingredients: Gradually add the dry mixture to the wet ingredients, stirring until just combined. Be careful not to overmix!
  5. Bake: Pour the batter into the prepared loaf pan and bake for 50-60 minutes or until a toothpick inserted into the center comes out clean.
  6. Cool and Serve: Allow the cake to cool in the pan for 10 minutes before transferring it to a wire rack to cool completely. Enjoy!

Pro Tips for the Best Pound Cake

To elevate your baking game, consider these helpful tips:

  • Room Temperature Ingredients: Make sure your eggs and yogurt are at room temperature for a smoother batter.
  • Don’t Overmix: Mix just until combined to ensure a light and tender crumb.
  • Watch the Oven: Keep an eye on your cake as baking times may vary slightly based on your oven.
  • Cool Completely: Let your cake cool fully before slicing to maintain its structure.
  • Experiment with Flavors: Try adding lemon zest or almond extract for a delicious twist.
  • Use Quality Vanilla: High-quality vanilla extract or paste makes a noticeable difference in flavor.
  • Test Doneness: Use a toothpick to check for doneness; it should come out clean or with a few crumbs.
  • Don’t Rush the Cooling: Allowing the cake to cool in the pan helps it set and makes it easier to remove.

Common Mistakes and Troubleshooting

If you’re ever in doubt, keep these common pitfalls in mind:

  • Too Dense: This can happen from overmixing the batter. Mix until just combined.
  • Dry Cake: Ensure you’re measuring flour correctly—spoon it into the measuring cup rather than scooping.
  • Not Rising: Check that your baking powder and baking soda are fresh. Old leavening agents can lead to flat cakes.
  • Burnt Edges: If the edges brown too quickly, cover the cake with foil halfway through baking.

Delicious Variations to Try

Feel free to get creative with your Vanilla Yogurt Pound Cake by trying these variations:

  • Citrus Twist: Add zest from one lemon or orange to the batter for a refreshing flavor.
  • Berry Burst: Fold in 1 cup of fresh blueberries or raspberries for a fruity touch.
  • Chocolate Swirl: Add 1/2 cup of cocoa powder to half the batter, then swirl together before baking.
  • Nutty Addition: Incorporate 1/2 cup chopped walnuts or pecans for added texture and flavor.

Storage and Make-Ahead Instructions

To keep your Vanilla Yogurt Pound Cake fresh and delicious:

  • Room Temperature: Store in an airtight container for up to 3 days.
  • Refrigeration: It can last up to a week in the fridge, wrapped well to prevent drying.
  • Freezing: Wrap the cooled cake tightly in plastic wrap and freeze for up to 3 months. Thaw at room temperature before serving.

Frequently Asked Questions

Here are some common questions and answers to help you perfect your baking:

  • Can I use flavored yogurt? Yes, flavored yogurt will add an extra layer of taste to your cake!
  • What if I don’t have Greek yogurt? You can substitute with regular yogurt, but the texture may be slightly different.
  • Is it possible to make this cake vegan? Yes, you can use plant-based yogurt and flax eggs as substitutes.
  • Can I use whole wheat flour? Absolutely! Just keep in mind the texture will be denser.
  • How can I make a glaze for the pound cake? Mix powdered sugar with a little milk or lemon juice to create a simple glaze.
  • What’s the best way to serve this cake? It’s delightful on its own or served with fresh berries and whipped cream.
  • How do I know when my cake is done? A toothpick inserted in the center should come out clean or with a few moist crumbs.
  • Can I double the recipe? Yes, simply double the ingredients and use a larger pan or bake in two loaf pans.

Nutritional Benefits and Dietary Adaptations

This Vanilla Yogurt Pound Cake not only satisfies your sweet tooth but can also be made to suit various dietary needs:

  • Lower Sugar Option: Substitute with a sugar alternative to reduce sweetness.
  • Gluten-Free Version: Use a 1:1 gluten-free baking flour blend for a gluten-free treat.
  • Higher Protein: Opt for a high-protein Greek yogurt to enhance the nutritional profile.

Essential Equipment Recommendations

For the best results, consider using the following tools:

  • Loaf Pan: A high-quality non-stick loaf pan ensures even baking and easy release.
  • Mixing Bowls: Use sturdy mixing bowls for both wet and dry ingredients.
  • Whisk: A good whisk helps achieve a smooth batter consistency.
  • Measuring Cups and Spoons: Accurate measurements are key for baking success.

Serving Suggestions

Elevate your Vanilla Yogurt Pound Cake experience with these serving ideas:

  • With Fresh Berries: Serve with a side of mixed berries for a refreshing contrast.
  • Whipped Cream: A dollop of whipped cream adds a delightful richness.
  • Drizzle with Honey: A light drizzle of honey enhances the cake’s flavor.
  • Pair with Coffee or Tea: This cake is perfect for afternoon tea or coffee breaks.

Conclusion

In conclusion, this Vanilla Yogurt Pound Cake is more than just a dessert; it’s a delightful experience that brings people together. With its comforting flavors and simple ingredients, you can easily make it your own. Whether you enjoy it plain, with a side of fruit, or as part of a larger dessert spread, this cake is sure to become a beloved recipe in your collection. Happy baking, and remember to enjoy the process as much as the finished product!

Classic Vanilla Yogurt Pound Cake

Prep Time 15 minutes
Cook Time 1 hour
Total Time 1 hour 15 minutes
Servings 8 slices
Calories 350
This moist and flavorful pound cake combines the richness of yogurt and vanilla for a delightful treat.

Ingredients

Dry ingredients

  • 2 cups all-purpose flour (such as Bob's Red Mill)
  • 1/4 tsp salt
  • 1/8 tsp baking soda
  • 1 tsp baking powder

Wet ingredients

  • 1 cup non-fat vanilla or plain Greek yogurt (e.g., Dannon Oikos Triple Zero Vanilla)
  • 1 1/4 cups white sugar
  • 1/2 cup extra virgin olive oil or melted butter, cooled
  • 3 large eggs

Flavorings

  • 2 tsp vanilla extract (e.g., Nielsen-Massey)
  • 1 tbsp vanilla bean paste (optional, e.g., Nielsen-Massey)

Instructions 

  • Preheat oven to 350°F (175°C). Grease a loaf pan.
  • In a bowl, whisk together flour, salt, baking soda, and baking powder.
  • In another bowl, mix yogurt, sugar, oil, eggs, vanilla extract, and vanilla bean paste until smooth.
  • Gradually add dry ingredients to wet ingredients, mixing until just combined.
  • Pour batter into prepared pan and bake for 60 minutes or until a toothpick inserted comes out clean.

Notes

Allow the cake to cool before slicing. For extra flavor, add a splash of vanilla extract.
Calories: 350kcal
Cost: $12
Course: Dessert
Cuisine: American
Keyword: pound cake

Discover the Joy of Baking: Decadent Gluten-Free Oat Flour Brownies

Welcome to the world of gluten-free baking, where deliciousness meets simplicity! In this article, we’re diving deep into the art of making rich and fudgy gluten-free oat flour brownies. Using straightforward ingredients, these brownies are not only easy to prepare but also bursting with flavor, making them the perfect treat for any occasion. Whether you’re an experienced baker or just starting your culinary journey, this recipe is designed to inspire and empower you to create something truly special!

Why You’ll Love This Recipe

There are countless reasons to fall in love with these gluten-free oat flour brownies. Here are just a few:

  • Rich Flavor: The combination of cocoa powder and dark chocolate chips creates a deep, indulgent chocolate flavor that satisfies any sweet tooth.
  • Simple Ingredients: With just a handful of pantry staples, you can whip up a batch of brownies that are both delightful and nourishing.
  • Gluten-Free Goodness: Made with oat flour, these brownies are perfect for those with gluten sensitivities, allowing everyone to enjoy a sweet treat.
  • Versatile Recipe: This brownie base can be easily adapted with various add-ins and flavorings to suit your taste preferences.
  • Quick to Make: From mixing to baking, you can have these brownies ready in under an hour—perfect for those spontaneous dessert cravings!

Ingredients You Need for This Recipe

Let’s gather our ingredients! Here’s what you’ll need to make these decadent brownies:

  • 1 cup granulated sugar: Sweetness is key for fudgy brownies.
  • 2 tbsp boiling water: This helps to dissolve the sugar and enhance the brownie’s texture.
  • ½ cup melted butter: Adds richness and moisture.
  • ½ tsp vanilla extract: A touch of vanilla enhances the overall flavor.
  • 2 large eggs (beaten): Provides structure and a lovely chewy texture.
  • ¾ cup oat flour: The star ingredient, offering a gluten-free base.
  • ½ tsp baking powder: Helps the brownies rise slightly.
  • ¾ tsp salt: Balances the sweetness.
  • ⅔ cup cocoa powder: For that deep chocolate flavor.
  • ½ cup powdered sugar: Adds sweetness and a touch of creaminess.
  • ½ cup mini dark chocolate chips: For melty chocolate goodness in every bite.

### Ingredient Substitutions

  • Butter: You can substitute with coconut oil or a dairy-free butter for a vegan option.
  • Granulated Sugar: Use coconut sugar or a sugar substitute like erythritol for a lower-calorie option.
  • Oat Flour: If you don’t have oat flour, you can blend rolled oats into a fine flour.
  • Eggs: For an egg-free version, try using flax eggs (1 tbsp ground flaxseed mixed with 2.5 tbsp water per egg).

How to Make These Gluten-Free Brownies

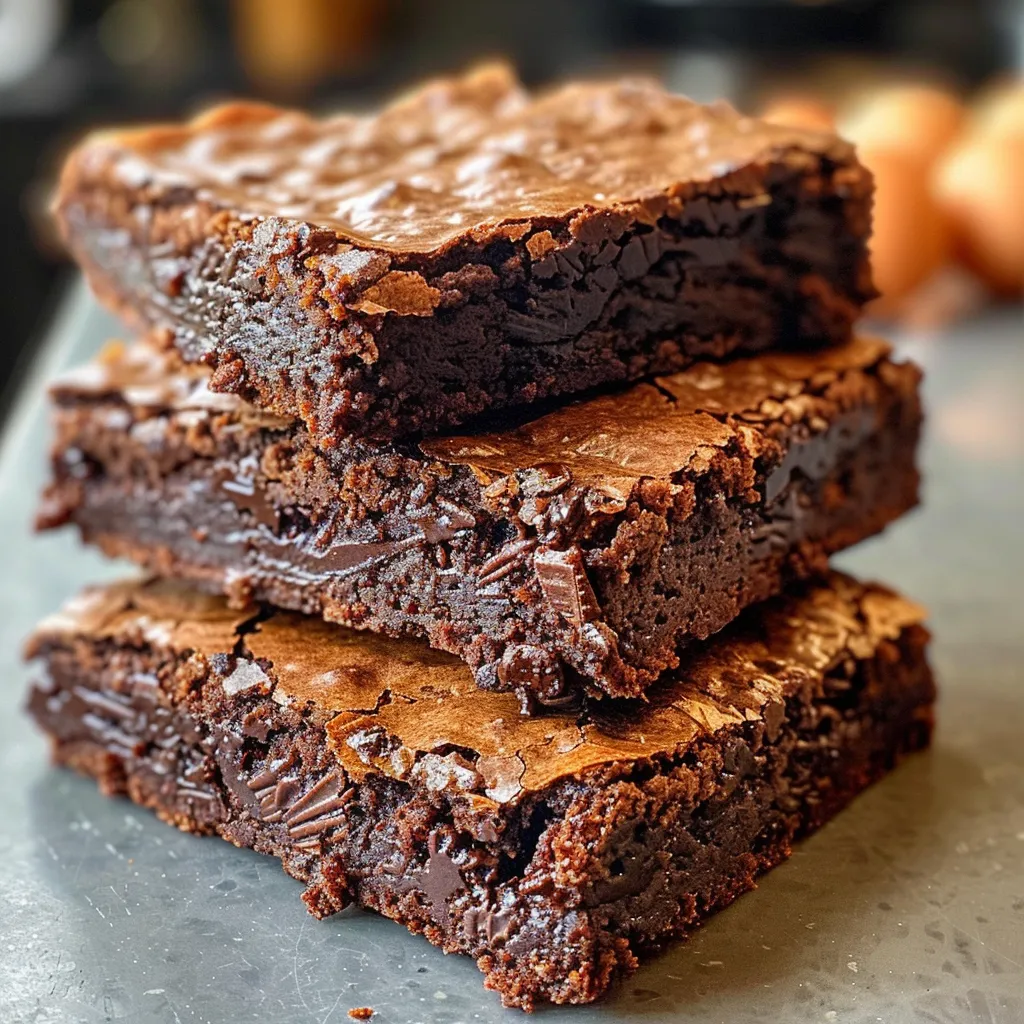
Side view of gluten-free oat flour brownies, highlighting their fudgy appearance and rich cocoa color.

Now that we have our ingredients ready, let’s dive into the step-by-step process of making these delicious brownies:

  1. Preheat the oven: Set your oven to 325°F (160°C). Prepare an 8×8 inch baking dish by spraying it with cooking spray and lining it with parchment paper. Don’t forget to spray the parchment paper as well!
  2. Mix the dry ingredients: In a medium bowl, combine the powdered sugar, baking powder, oat flour, cocoa powder, salt, and mini chocolate chips. Stir until evenly mixed.
  3. Prepare the wet mixture: In a large bowl, mix the granulated sugar with the boiling water until dissolved. Add the melted butter, vanilla extract, and beaten eggs. Mix until well combined.
  4. Combine wet and dry ingredients: Sprinkle the dry ingredient mixture over the wet ingredients. Stir gently until just combined; be careful not to over-mix!
  5. Bake: Pour the batter into the prepared baking pan and smooth the top. Bake for about 45 minutes, or until a toothpick inserted into the center comes out mostly clean.
  6. Cool: Allow the brownies to cool for about 2 hours (if you can resist!) before cutting them into squares.

Expert Tips for Making Healthy Brownies

To ensure your brownies turn out perfectly every time, here are some expert tips to keep in mind:

  • Don’t over-mix: Gently combine the ingredients to keep the brownies fudgy and tender.
  • Use quality cocoa powder: The type of cocoa powder can affect flavor; opt for high-quality, unsweetened cocoa for the best results.
  • Check for doneness: Every oven is different, so start checking your brownies a few minutes before the suggested baking time.
  • Let them cool: Allowing the brownies to cool completely before cutting helps them set and makes for cleaner cuts.
  • Experiment with add-ins: Feel free to add nuts, dried fruit, or even a swirled layer of peanut butter for a twist!
  • Store properly: Keep brownies in an airtight container at room temperature for up to 3 days or in the refrigerator for a week.
  • Use parchment paper: Lining your baking dish with parchment makes it easier to lift out the brownies once they’re baked.
  • Don’t skip the salt: Salt enhances the sweetness and balances the flavors, making your brownies even more delicious.

Common Mistakes and Troubleshooting

Even the best bakers can run into a few hiccups along the way. Here are some common mistakes and how to avoid them:

  • Brownies are too dry: This can happen if you overbake them or if the oven is too hot. Always check for doneness a few minutes before the suggested time.
  • Brownies are too gooey: If they’re too undercooked, they won’t set properly. Ensure they’re baked until a toothpick comes out mostly clean.
  • Uneven texture: This can result from not mixing the batter enough or using stale ingredients. Ensure everything is fresh and mixed well.

Variations to Try

This recipe is incredibly versatile, allowing you to put your own spin on it. Here are some variations to consider:

  • Nutty Brownies: Add ½ cup of chopped walnuts or pecans for added crunch and flavor.
  • Mint Chocolate Brownies: Stir in a few drops of peppermint extract for a refreshing twist.
  • Peanut Butter Swirl: Before baking, drop spoonfuls of peanut butter into the batter and use a knife to swirl it through.
  • Fruity Brownies: Incorporate ½ cup of dried cherries or cranberries for a sweet and tart flavor contrast.

Storage and Make-Ahead Instructions

These brownies can be made ahead of time and stored for later enjoyment. Here’s how:

  • Room Temperature: Store in an airtight container at room temperature for up to 3 days.
  • Refrigerator: Keep them in the fridge for up to a week. They may even taste better the next day as the flavors meld!
  • Freezer: Freeze brownies by wrapping them tightly in plastic wrap and placing them in an airtight container. They can last up to 3 months. Thaw at room temperature before serving.

Comprehensive FAQ

To help you navigate any questions you may have, here are some frequently asked questions about gluten-free oat flour brownies:

  • Can I use regular flour instead of oat flour? Yes, but the recipe will no longer be gluten-free. Substitute with all-purpose flour at a 1:1 ratio.
  • How do I know when the brownies are done? Insert a toothpick into the center; it should come out mostly clean with a few moist crumbs.
  • Can I substitute the eggs? Yes, you can use flax eggs or applesauce as a vegan alternative.
  • What type of cocoa powder should I use? Use unsweetened cocoa powder for the best flavor; Dutch-processed cocoa can also work well.
  • Can I add chocolate chips to the batter? Absolutely! Mini dark chocolate chips add extra chocolatey goodness.
  • What if I don’t have a baking pan? You can use a cast-iron skillet or any oven-safe dish; just adjust the baking time as needed.
  • Can I make these brownies dairy-free? Yes, simply use dairy-free butter or coconut oil in place of regular butter.
  • What’s the best way to cut brownies? For clean cuts, use a sharp knife and wipe it between cuts to avoid tearing the brownies.

Nutrition Tips and Dietary Adaptations

If you’re looking to make these brownies even healthier, consider these tips:

  • Reduce sugar: You can experiment with reducing the granulated sugar or using natural sweeteners like maple syrup or honey.
  • Add fiber: Incorporate ground flaxseeds or chia seeds for added nutrition and fiber.
  • Use dark chocolate: Opt for dark chocolate chips with a higher cocoa content for a more intense flavor and potential health benefits.

Equipment Recommendations

To make your baking experience seamless, here are a few essential tools:

  • Mixing bowls: A set of various sizes will help you combine ingredients easily.
  • Whisk: For blending wet ingredients and ensuring everything is well combined.
  • Measuring cups and spoons: Precision is key in baking, so invest in a good set.
  • Baking pan: An 8×8 inch square pan is ideal for brownies, but feel free to use whatever you have!
  • Parchment paper: This makes clean-up a breeze and prevents sticking.

Serving Suggestions

Once your brownies are baked and cooled, it’s time to enjoy them! Here are some serving ideas:

  • With Ice Cream: Serve warm brownies topped with a scoop of vanilla or chocolate ice cream for a delicious dessert.
  • Drizzled with Chocolate Sauce: A drizzle of melted chocolate on top adds an extra touch of sweetness.
  • With Fresh Berries: Pair brownies with fresh strawberries or raspberries for a fruity contrast.
  • With Whipped Cream: A dollop of whipped cream adds a light and airy texture to your decadent brownies.

Conclusion

In conclusion, these gluten-free oat flour brownies are a delightful treat that anyone can master. Whether you’re baking for yourself, friends, or family, this recipe promises to bring warmth and joy to your kitchen. Remember, cooking is about enjoying the process and experimenting with flavors. So, gather your ingredients, follow the steps, and soon you’ll be indulging in a rich, fudgy brownie that warms the heart. Happy baking!

Gluten-Free Oat Flour Brownies

Prep Time 15 minutes
Cook Time 45 minutes
Total Time 1 hour
Servings 9 pieces
Calories 250
Delicious fudgy brownies made with oat flour and dark chocolate chips, perfect for gluten-free treats.

Ingredients

Dry ingredients

  • 1 cup granulated sugar
  • 3/4 cup oat flour
  • 1/2 tsp baking powder
  • 3/4 tsp salt
  • 2/3 cup cocoa powder
  • 1/2 cup powdered sugar
  • 1/2 cup mini dark chocolate chips

Wet ingredients

  • 1/2 cup butter (melted)
  • 1/2 tsp vanilla extract
  • 2 large eggs (beaten)
  • 2 tbsp water boiling

Instructions 

  • Preheat oven to 325°F. Line an 8x8 baking dish with parchment paper and spray with cooking spray.
  • In a medium bowl, combine powdered sugar, baking powder, oat flour, cocoa powder, salt, and chocolate chips.
  • In a large bowl, mix granulated sugar with boiling water. Add melted butter, vanilla, and eggs; stir until smooth.
  • Gradually add dry ingredients to wet mixture, stirring until just combined. Do not over-mix.
  • Pour batter into prepared pan, smooth the top, and bake for 45 minutes. Cool before cutting.

Notes

For extra fudginess, slightly underbake and let cool completely.
Calories: 250kcal
Cost: $12
Course: Dessert
Cuisine: American
Keyword: brownies

The Joy of Baking: A Wholesome Apple Yogurt Cake Recipe

Welcome to a delightful baking experience! If you’re looking for a recipe that combines ease and flavor, this Apple Yogurt Cake is just the ticket. Not only is this cake incredibly moist and fluffy, but it’s also infused with warm spices that evoke comfort and nostalgia. Whether you’re a seasoned home chef or just starting out, this recipe will guide you through the process of creating a cake that feels both nourishing and indulgent.

Let’s dive into the heart of this recipe, where simple ingredients come together to create a cake that’s perfect for any occasion—be it a cozy afternoon tea, a family gathering, or a special celebration.

Why You’ll Love This Recipe

This Apple Yogurt Cake stands out for several reasons:

  • One-bowl convenience: All the ingredients mix together in one bowl, making cleanup a breeze.
  • Moist and fluffy texture: The combination of yogurt and apples ensures a cake that’s soft and tender.
  • Versatile serving options: Enjoy it as is, or elevate it with toppings like honey, caramel, or nuts.
  • Healthy indulgence: Yogurt adds a touch of creaminess while keeping the cake light and balanced.
  • Quick to prepare: With just a few steps, you can have this cake in the oven in no time!

Ingredients Breakdown

Here’s what you’ll need to make this scrumptious Apple Yogurt Cake:

  • 2 medium apples: Granny Smith, Honeycrisp, or Fuji work well for their balance of sweetness and tartness. Peel, core, and grate them for the best texture.
  • 1 cup plain yogurt: Greek yogurt can be used for a richer flavor and creamier texture.
  • 3/4 cup granulated sugar: Adjust to your taste; feel free to use less for a less sweet cake.
  • 1/2 cup vegetable oil or melted butter: This adds moisture. Butter gives a richer flavor.
  • 2 large eggs: Room temperature for even mixing.
  • 1 teaspoon vanilla extract: Enhances the sweetness and aroma.
  • 1 1/2 cups all-purpose flour: Provides the structure needed for the cake.
  • 1 teaspoon baking powder: Helps the cake rise.
  • 1/2 teaspoon baking soda: Works with the yogurt to create a fluffy texture.
  • 1 teaspoon ground cinnamon: Adds warmth and depth to the flavor.
  • 1/4 teaspoon ground nutmeg: A hint of nutmeg pairs beautifully with apples.
  • 1/4 teaspoon salt: Balances the sweetness.
  • Optional toppings: Powdered sugar, honey, caramel sauce, chopped walnuts, or pecans for added texture and flavor.

Step-by-Step Instructions

Juicy Apple Yogurt Cake showcased from the side, with a golden-brown crust and grated apples.

Ready to bake? Let’s get started!

  1. Preheat your oven: Set it to 350°F (175°C). Grease a 9×5-inch loaf pan or line it with parchment paper for easy cleanup.
  2. Mix the wet ingredients: In a large mixing bowl, whisk together the grated apples, yogurt, sugar, vegetable oil or melted butter, eggs, and vanilla extract until smooth.
  3. Combine the dry ingredients: In a separate bowl, whisk together the flour, baking powder, baking soda, cinnamon, nutmeg, and salt.
  4. Combine wet and dry ingredients: Gradually add the dry mixture to the wet ingredients, stirring gently until just combined. Be careful not to overmix—the batter should be slightly lumpy.
  5. Pour and bake: Pour the batter into the prepared loaf pan, spreading it evenly. Optionally, sprinkle chopped nuts or a dusting of cinnamon sugar on top. Bake for 45-55 minutes, or until a toothpick inserted into the center comes out clean.
  6. Cool and serve: Allow the cake to cool in the pan for 10 minutes before transferring it to a wire rack. Once completely cool, dust with powdered sugar and drizzle with honey or caramel sauce if desired. Slice and savor every bite!

Pro Tips for Perfect Apple Yogurt Cake

To ensure your cake turns out perfectly every time, consider these expert insights:

  • Use room temperature ingredients: This helps the batter mix together smoothly, ensuring a light and fluffy cake.
  • Don’t overmix: Stir just until the dry ingredients are incorporated to avoid a dense cake.
  • Check for doneness: If the top browns too quickly, cover it with aluminum foil to prevent burning.
  • Let it cool: Allow the cake to cool completely before slicing to maintain its moist texture.
  • Experiment with spices: Mix in ginger or cloves for a twist on the traditional flavor profile.
  • Double the recipe: Make two cakes at once for gatherings or to freeze for later enjoyment.
  • Store properly: Keep the cake in an airtight container to maintain freshness for up to 5 days.
  • Consider adding citrus: A tablespoon of lemon or orange zest can brighten the flavors beautifully.

Common Mistakes and Troubleshooting

Even the best bakers can encounter a few hiccups. Here’s how to fix common issues:

  • Too dry cake: This could be due to overbaking. Always check for doneness a few minutes before the recommended time.
  • Dense texture: Likely caused by overmixing the batter. Mix until the ingredients are just combined.
  • Uneven baking: Make sure your oven is preheated properly and consider rotating the cake halfway through baking.
  • Flavorless cake: Ensure you’re using fresh spices and quality ingredients for the best taste.

Delicious Variations to Try

Want to switch things up? Here are some variations to inspire your baking:

  • Carrot Apple Yogurt Cake: Add grated carrots for an extra layer of flavor and nutrition.
  • Chocolate Chip Apple Yogurt Cake: Fold in semi-sweet chocolate chips for a decadent twist.
  • Nutty Apple Yogurt Cake: Mix in chopped almonds or pecans for added crunch and flavor.
  • Spiced Apple Yogurt Cake: Incorporate ginger or allspice for a warm, holiday-inspired flavor.

Storage and Make-Ahead Instructions

To enjoy your Apple Yogurt Cake at its best, follow these storage tips:

  • Room temperature: Store the cake in an airtight container for up to 3 days.
  • Refrigeration: If you want it to last longer, keep it in the refrigerator for up to 5 days.
  • Freezing: Wrap slices in plastic wrap and place them in an airtight container. The cake can be frozen for up to 2 months. Thaw at room temperature before serving.

Frequently Asked Questions

Here are some common queries that might help you along the way:

  • Can I use other fruits? Yes! Pears or berries can also work beautifully in this recipe.
  • Is this cake gluten-free? You can substitute the all-purpose flour with a gluten-free blend, but results may vary.
  • How can I make this cake vegan? Substitute the eggs with flax eggs and use plant-based yogurt and oil.
  • Can I add a glaze? Absolutely! A simple powdered sugar glaze can add a lovely finish.
  • What can I serve with it? Pair with whipped cream, vanilla ice cream, or a dollop of yogurt for a delightful treat.
  • How do I know when it’s done? A toothpick inserted into the center should come out clean or with a few moist crumbs.
  • Can I make this in advance? Yes! The cake keeps well and even tastes better after a day or two.
  • What is the best way to slice it? Use a sharp knife and let the cake cool completely for clean slices.

Nutritional Insights and Dietary Adaptations

This Apple Yogurt Cake not only delights the palate but can also be adapted to suit various dietary needs:

  • Lower sugar option: Reduce sugar to 1/2 cup and rely on the natural sweetness of the apples.
  • Gluten-free option: Use a 1:1 gluten-free baking blend for a similar texture.
  • Higher protein version: Choose Greek yogurt for added protein and creaminess.
  • Reduced fat option: Substitute applesauce for the oil to cut down on fat content.

Essential Equipment

To make this Apple Yogurt Cake, you’ll need:

  • Mixing bowls: A large bowl for mixing and a smaller one for dry ingredients.
  • Whisk and spatula: For easy mixing and scraping the sides of the bowl.
  • Measuring cups and spoons: Ensure accuracy in your ingredients for the best results.
  • Loaf pan: A 9×5-inch loaf pan is ideal for this cake.
  • Wire rack: For cooling the cake properly.

Serving Suggestions

When it comes to serving your Apple Yogurt Cake, the options are endless:

  • Dust with powdered sugar: A simple touch that adds elegance.
  • Drizzle with honey or caramel: An indulgent addition that enhances the cake’s flavor.
  • Serve with fresh fruits: Fresh berries or a fruit salad can complement the cake beautifully.
  • Pair with beverages: Enjoy with a cup of tea, coffee, or even a glass of milk.

Conclusion

Baking this Wholesome Apple Yogurt Cake is not just about satisfying your sweet tooth; it’s about enjoying the process and the memories it creates. So gather your ingredients, take your time, and embrace the joy of cooking. Remember, great food doesn’t have to be complicated; it just needs a touch of love and care. Happy baking!

Apple Yogurt Cake

Prep Time 15 minutes
Cook Time 50 minutes
Total Time 1 hour 5 minutes
Servings 8 slices
Calories 320
This moist and fluffy Apple Yogurt Cake combines fresh grated apples with creamy yogurt, creating a delightful treat perfect for any occasion.

Ingredients

Fruits

  • 2 medium apples (Granny Smith, Honeycrisp, or Fuji) (peeled, cored, and grated)
  • 1 cup plain yogurt (Greek yogurt works too)
  • 3/4 cup granulated sugar
  • 1/2 cup vegetable oil or melted butter (for extra richness)
  • 2 large eggs
  • 1 teaspoon vanilla extract
  • 1 1/2 cups all-purpose flour
  • 1 teaspoon baking powder
  • 1/2 teaspoon baking soda
  • 1 teaspoon ground cinnamon
  • 1/4 teaspoon ground nutmeg
  • 1/4 teaspoon salt

Optional toppings

  • Powdered sugar (for dusting, optional)
  • honey or caramel sauce (drizzle, optional)
  • chopped walnuts or pecans (for added crunch, optional)

Instructions 

  • Preheat oven to 350°F (175°C). Grease a 9x5-inch loaf pan or line with parchment.
  • Mix grated apples, yogurt, sugar, oil, eggs, and vanilla until smooth.
  • Combine dry ingredients and gradually add to wet mixture, stirring gently.
  • Pour batter into prepared pan and bake for 45-55 minutes until a toothpick comes out clean.
  • Cool in pan for 10 minutes, then transfer to wire rack. Dust with powdered sugar and add optional toppings.
  • Slice and serve warm or at room temperature. Enjoy!

Notes

For extra flavor, sprinkle chopped nuts on top before baking or after cooling.
Calories: 320kcal
Cost: $15
Course: Dessert
Cuisine: American
Keyword: apple

Elevate Your Mornings with Greek Yogurt Breakfast Bowls

Are you looking for a nutritious and delicious way to start your day? Greek yogurt breakfast bowls are the perfect solution! Not only are they simple to prepare, but they also offer a myriad of health benefits, making them a fantastic addition to your morning routine. In this article, we’ll dive deep into the world of Greek yogurt bowls, explore their versatility, and provide you with everything you need to create your own energizing breakfast bowl that feels like a treat.

Why You’ll Love This Recipe

Greek yogurt breakfast bowls are more than just a meal; they’re a delightful experience that can transform your mornings. Here are five reasons why you’ll fall in love with this recipe:

  • Nourishing Ingredients: Packed with protein and probiotics, Greek yogurt supports gut health and keeps you feeling full longer.
  • Endless Customization: You can mix and match toppings to suit your taste, making it easy to switch up your breakfast routine.
  • Quick and Easy: With minimal prep time, you can whip up a delicious breakfast in less than 10 minutes.
  • Balanced Nutrition: This bowl incorporates fruits, nuts, and healthy fats, making it a well-rounded meal.
  • Great for Meal Prep: You can prepare components ahead of time, making busy mornings a breeze.

Ingredients Breakdown

Creating your Greek yogurt breakfast bowl requires just a few ingredients, many of which you might already have at home. Here’s what you’ll need:

  • 1 cup plain Greek yogurt: Choose full-fat or low-fat based on your preference for creaminess.
  • ½ cup fresh berries: Strawberries, blueberries, or raspberries work beautifully, but feel free to use your favorites!
  • 2 tablespoons granola: Store-bought or homemade, granola adds a delightful crunch.
  • 1 teaspoon honey or maple syrup: Optional, for a touch of sweetness.
  • 1 tablespoon chopped nuts or seeds: Almonds, chia seeds, or walnuts add healthy fats and protein.
  • Dash of cinnamon: For a warm, cozy flavor that elevates your bowl.

How to Make Your Greek Yogurt Breakfast Bowl

Side view of a colorful breakfast bowl featuring Greek yogurt, nuts, and honey.

Follow these simple steps to create your energizing Greek yogurt breakfast bowl:

  • Scoop the Greek yogurt into your bowl and smooth it out for a pretty presentation.
  • Arrange the fresh berries neatly over the top to make it visually appealing.
  • Sprinkle on the granola for that crunchy texture and add chopped nuts or seeds for extra protein.
  • If you’re in the mood for something sweet, drizzle honey or maple syrup over the bowl.
  • Finish with a dash of cinnamon for that extra warmth.

Expert Tips for the Perfect Bowl

To ensure your Greek yogurt breakfast bowl is as delightful as possible, keep these expert tips in mind:

  • Choose Quality Yogurt: Opt for high-quality Greek yogurt that’s rich and creamy for the best flavor.
  • Balance Your Toppings: Mix sweet and savory toppings to create layers of flavor and texture.
  • Use Seasonal Fruits: Incorporating seasonal fruits not only enhances taste but also boosts nutritional value.
  • Make It Ahead: Prepare yogurt and toppings in advance, storing them separately to maintain freshness.
  • Experiment with Flavors: Don’t hesitate to try different spices or flavorings, like vanilla extract or nutmeg.
  • Play with Textures: Combine creamy yogurt with crunchy seeds and chewy fruits for an exciting mouthfeel.
  • Stay Hydrated: Pair your breakfast bowl with a glass of water or herbal tea for a refreshing start.
  • Don’t Overdo the Sweeteners: A little goes a long way; aim for balance in flavor.

Common Mistakes to Avoid

Even the best recipes can go awry if common pitfalls are not avoided. Here are some mistakes to steer clear of:

  • Skipping the Protein: Ensure to add nuts or seeds for a balanced meal; just yogurt may leave you feeling hungry.
  • Using Too Much Sweetener: Overdoing it can overshadow the natural flavors of the ingredients.
  • Not Adding Enough Color: A visually appealing bowl is more appetizing; mix various fruits for a vibrant dish.
  • Ignoring the Texture: A mix of crunchy and creamy elements makes for a more satisfying experience.

Delicious Variations to Try

Looking to change things up? Here are four fantastic variations of your Greek yogurt breakfast bowl:

  • Chocolate Banana Bowl: Add cocoa powder to your yogurt and top with banana slices, granola, and a drizzle of chocolate syrup.
  • Tropical Paradise: Use mango, pineapple, and coconut flakes for a refreshing, beach-inspired bowl.
  • Nutty Delight: Top with almond butter, sliced apples, and a sprinkle of cinnamon for a cozy flavor.
  • Autumn Harvest: Mix in pumpkin puree and top with pecans and a dash of nutmeg for a seasonal twist.

Storage and Make-Ahead Instructions

Want to save time? Here’s how to store and prepare your Greek yogurt breakfast bowl:

  • Make-Ahead: Prepare the yogurt base and toppings separately. Store in airtight containers in the fridge for up to three days.
  • Storage: Keep the yogurt refrigerated. Avoid pre-mixing all ingredients to maintain freshness and texture.
  • Reheating: If using any cooked toppings, such as oatmeal, reheat them separately before serving.

Frequently Asked Questions

Got questions? Here are some common queries about Greek yogurt breakfast bowls:

  • Can I use non-dairy yogurt? Yes! Almond, coconut, or soy yogurt can be substituted for a dairy-free option.
  • Is Greek yogurt better than regular yogurt? Greek yogurt is thicker and contains more protein, making it a filling choice.
  • How can I make it more filling? Add protein sources like nut butter, seeds, or a scoop of protein powder.
  • Can I freeze yogurt bowls? You can freeze yogurt, but toppings should be added fresh after thawing.
  • What fruits work best? Berries, bananas, and stone fruits like peaches or plums are excellent choices.
  • How do I make it vegan? Use plant-based yogurt and skip honey, opting for agave syrup instead.
  • Are there any low-carb options? Yes! Use low-carb fruits like berries and skip sugary toppings.
  • What’s the best time to eat yogurt bowls? They’re great for breakfast but can also be enjoyed as snacks or desserts!

Nutrition Tips and Dietary Adaptations

To enhance the nutritional profile of your Greek yogurt breakfast bowl, consider these tips:

  • Boost Protein: Incorporate a scoop of protein powder or cottage cheese for an extra protein kick.
  • Add Fiber: Include chia seeds or flaxseeds to promote digestive health.
  • Go Low-Sugar: Use unsweetened yogurt and limit sweeteners to maintain a low-sugar meal.
  • Incorporate Superfoods: Add ingredients like spirulina or maca powder for enhanced nutrition.

Essential Equipment for Your Breakfast Bowl

Having the right kitchen tools can make preparation easier:

  • Bowls: Choose deep, wide bowls for an appealing presentation.
  • Measuring Cups: Ensures accurate portions for consistent results.
  • Spoons: A good set of spoons is essential for mixing and serving.
  • Storage Containers: Airtight containers are great for meal prepping and storing ingredients.

Serving Suggestions

Here are some delightful ways to serve your Greek yogurt breakfast bowl:

  • With a Side of Toast: Pair with whole-grain toast topped with avocado or nut butter.
  • As a Snack: Enjoy it as a mid-morning snack to keep your energy up.
  • At a Brunch: Serve alongside a fresh fruit platter for a colorful brunch spread.
  • On a Lazy Weekend: Take your time and enjoy with a cup of coffee or tea.

In conclusion, Greek yogurt breakfast bowls are a wonderful way to start your day on a nourishing note. With endless possibilities for customization, you’ll never get bored of this simple yet satisfying meal. So, gather your ingredients, unleash your creativity, and enjoy the joy of cooking as you prepare your very own energizing Greek yogurt breakfast bowl!

Energizing Greek Yogurt Breakfast Bowl

Prep Time 5 minutes
Total Time 5 minutes
Servings 1 bowl
Calories 250
A quick and nutritious breakfast bowl featuring creamy Greek yogurt topped with fresh berries, crunchy granola, nuts, and a hint of cinnamon for a delightful start to your day.

Ingredients

Dairy

  • 1 cup plain Greek yogurt (full-fat or low-fat)

Fruits

  • 0.5 cup fresh berries (strawberries, blueberries, raspberries, or your favorite mix)

Grains

  • 2 tablespoons granola (store-bought or homemade, crunchy is a plus)

Sweeteners

  • 1 teaspoon honey or maple syrup (optional)

Nuts & Seeds

  • 1 tablespoon chopped nuts or seeds (almonds, chia, walnuts, your choice)
  • Dash cinnamon

Instructions 

  • Scoop the Greek yogurt into your bowl and smooth it out.
  • Arrange the berries neatly over the yogurt.
  • Sprinkle on the granola and chopped nuts or seeds.
  • Drizzle with honey or maple syrup if desired.
  • Add a dash of cinnamon for flavor.

Notes

Feel free to customize the toppings for variety and extra flavor.
Calories: 250kcal
Cost: $8
Course: Breakfast
Cuisine: Greek
Keyword: Yogurt