Author

Noah

Browsing

Embrace the Flavors of Fall with a One-Pan Autumn Sausage Dinner

As the leaves turn golden and the air becomes crisp, it’s time to warm up your kitchen with the comforting aromas of autumn. This easy and delightful Autumn Sausage Dinner is a perfect way to showcase the seasonal bounty of butternut squash and Brussels sprouts. With minimal prep and cleanup, you can enjoy a cozy meal that brings the whole family together. Let’s dive in and discover how to create this beautiful dish.

Why You’ll Love This Recipe

  • Simple preparation: With just a few ingredients and straightforward steps, this recipe is perfect for busy weeknights.
  • Comforting flavors: The combination of savory sausage, sweet butternut squash, and earthy Brussels sprouts creates a mouthwatering experience.
  • One-pan convenience: Less cleanup means you can spend more time enjoying your meal and less time washing dishes.
  • Versatile ingredients: Feel free to customize with your favorite veggies or sausages, making this a flexible recipe.
  • Ideal for leftovers: It reheats beautifully, making it a great option for meal prep or cozy lunches.

Ingredients Breakdown

For this nutritious dish, you will need:

  • 3 cups butternut squash (peeled, seeded, cubed): A sweet and nutty base that pairs perfectly with savory elements.
  • 1 tablespoon olive oil: For roasting and enhancing flavors.
  • Salt and pepper: Essential seasonings to bring out the natural tastes of the vegetables.
  • 12 oz Brussels sprouts: These cruciferous beauties add a delightful crunch and nutritional value.
  • 2 tablespoons olive oil: For roasting the Brussels sprouts to perfection.
  • 12 oz cooked sausage (such as cajun, andouille, or smoked sausage): The protein that adds depth and richness.
  • Smoked paprika: A touch of smokiness to enhance the sausage flavors.
  • Fresh thyme: An aromatic herb that brightens the dish.

Feel free to substitute ingredients based on availability. For instance, you can use sweet potatoes instead of butternut squash or swap in different types of sausage.

Pro Tips for a Perfect Dish
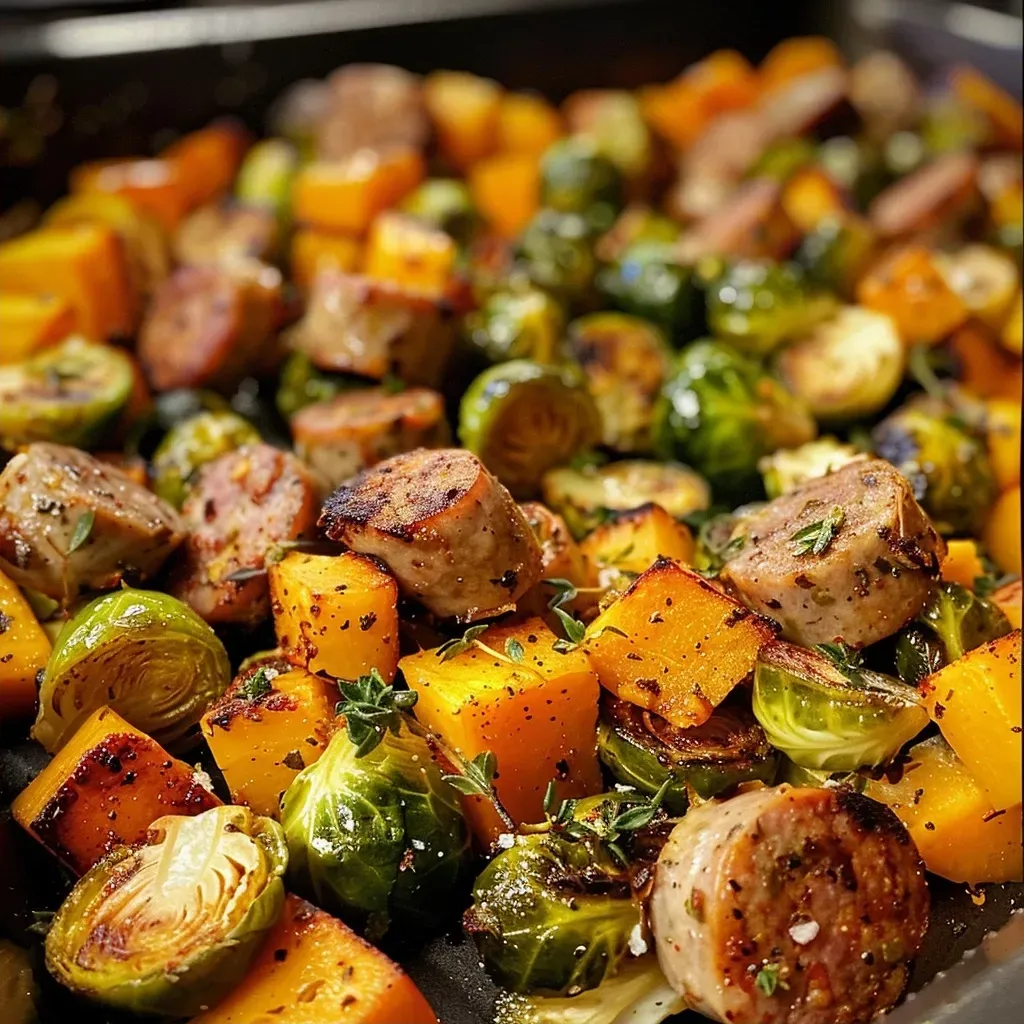
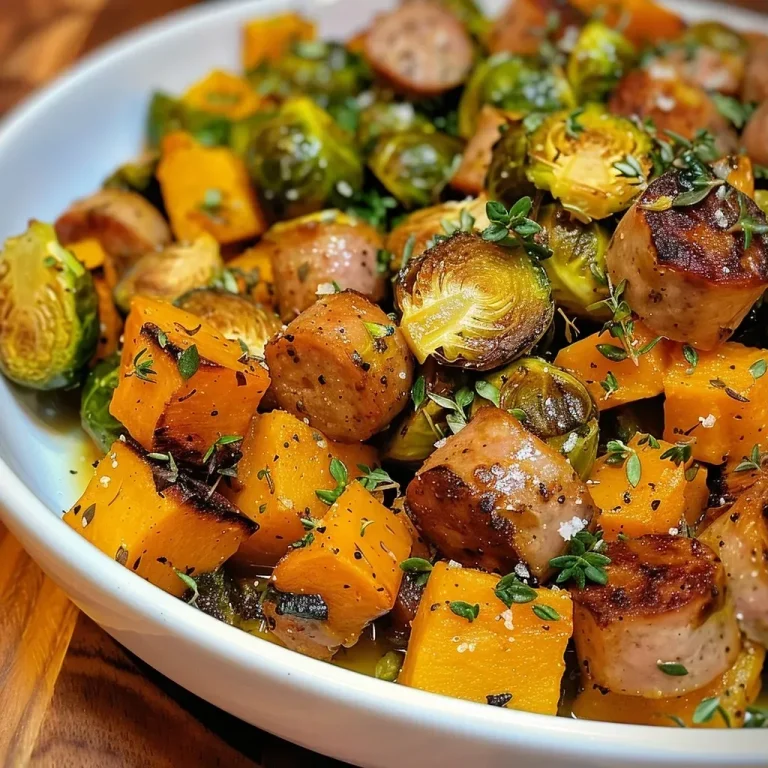
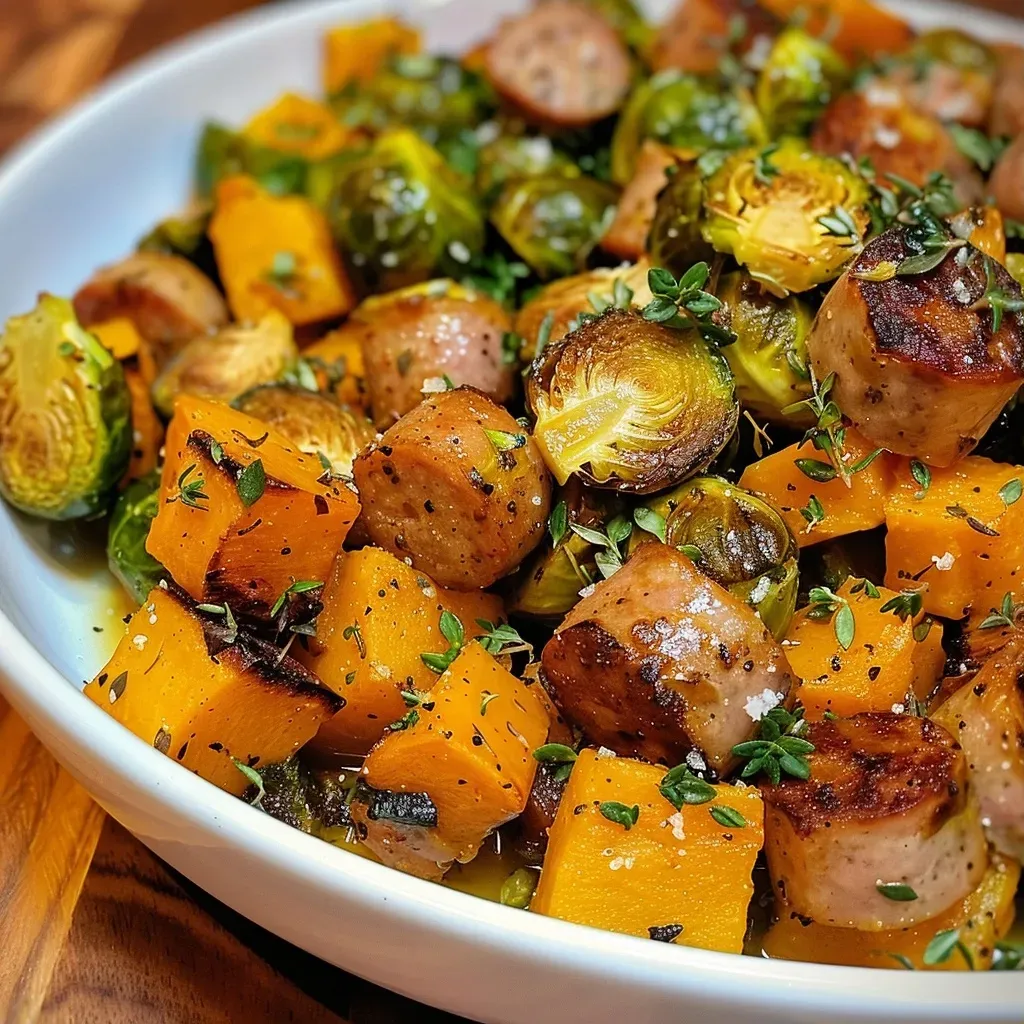
A vibrant, colorful dish showcasing sliced sausages with roasted vegetables, highlighting autumn flavors.
  • Uniform cuts: Ensure your butternut squash and Brussels sprouts are cut into similar sizes for even cooking.
  • Preheat your oven: Always preheat to the specified temperature to ensure proper roasting.
  • Don’t overcrowd the pan: Give your veggies space to roast; overcrowding can lead to steaming instead of roasting.
  • Check for doneness: Use a fork to test the tenderness of the squash and Brussels sprouts; they should be fork-tender and slightly caramelized.
  • Experiment with spices: Feel free to add your favorite herbs or spices to elevate the flavors.
  • Let it rest: Allow your dish to sit for a few minutes before serving to let the flavors meld.
  • Pair with a side: Serve with a light salad or crusty bread to round out the meal.

Common Mistakes and Troubleshooting

  • Overcooking the vegetables: Keep an eye on the oven to avoid mushy veggies. Aim for a golden-brown finish.
  • Skipping the seasoning: Don’t underestimate the importance of salt and pepper; they enhance all the flavors.
  • Using cold ingredients: Ensure your sausage is at room temperature before adding to the pan for even heating.

Delicious Variations to Try

  • Swap the sausage: Use chicken or turkey sausage for a lighter option.
  • Add apples: Diced apples can add a sweet contrast and enhance the autumn flavor.
  • Incorporate other vegetables: Try carrots, parsnips, or red onions for extra color and flavor.
  • Cheesy twist: Sprinkle grated cheese over the top during the last few minutes of roasting for a creamy finish.

Storage and Make-Ahead Instructions

This recipe is perfect for meal prep:

  • Refrigerate: Store leftovers in an airtight container in the fridge for up to 4 days.
  • Freeze: You can freeze this dish for up to 3 months; just be sure to cool it completely before freezing.
  • Reheat: Gently reheat in the oven or microwave until warmed through.

Frequently Asked Questions

  • Can I use frozen vegetables? Yes, frozen butternut squash and Brussels sprouts can work, but adjust cooking time as needed.
  • What type of sausage works best? Any cooked sausage can be used; choose your favorite flavor profile!
  • Can I make this vegetarian? Absolutely! Simply omit the sausage and add more vegetables or beans for protein.
  • How can I make this dish spicier? Add red pepper flakes or a dash of hot sauce for a kick.
  • Is this recipe gluten-free? Yes, as long as you choose gluten-free sausage.
  • What should I serve with this dish? A light salad or crusty bread pairs beautifully.
  • How do I know when it’s done? The dish is done when the squash is tender and slightly caramelized.
  • Can I prepare this ahead of time? Yes, you can chop the vegetables and store them in the fridge a day before cooking.

Nutritional Tips and Dietary Adaptations

This recipe offers a balance of flavors and nutrients:

  • High in fiber: The vegetables provide essential fiber, aiding digestion.
  • Protein-rich: The sausage adds protein, making this a well-rounded meal.
  • Low-carb option: With the focus on vegetables, it can fit well into a low-carb diet.

Essential Equipment Recommendations

To make your cooking experience enjoyable and efficient, consider using:

  • Cutting board: A sturdy board for chopping your vegetables.
  • Sharp knife: Ensures clean cuts for uniform cooking.
  • Roasting pan or sheet: A good-quality pan will help achieve perfect roasting.

Serving Suggestions

This Autumn Sausage Dinner is fantastic on its own, but here are a few ideas to elevate your meal:

  • Garnish with fresh herbs: A sprinkle of fresh thyme or parsley adds a beautiful touch.
  • Serve with a dollop of yogurt: A tangy yogurt can balance the flavors nicely.
  • Pair with wine: A light white wine can complement the dish beautifully.

Conclusion

As you gather around the table to enjoy this Autumn Sausage Dinner, take a moment to appreciate the simple joy of cooking and sharing a meal. This dish, filled with seasonal flavors and comforting warmth, is not just about nourishment—it’s about creating memories. Thank you for joining me on this culinary journey, and I hope you find joy in making this recipe your own!
Autumn Sausage Dinner with Roasted Veggies (Butternut Squash and Brussels Sprouts)

Prep Time 15 minutes
Cook Time 30 minutes
Total Time 45 minutes
Servings 4 servings
Calories 550
Enjoy a hearty and flavorful autumn-inspired dinner featuring roasted butternut squash, Brussels sprouts, and savory sausage.

Ingredients

Vegetables

  • 3 cups butternut squash (peeled, seeded, cubed)
  • 12 oz Brussels sprouts

Sausage

  • 12 oz cooked sausage (such as cajun sausage, andouille sausage, or smoked sausage)

Oils & Seasonings

  • 1 tablespoon olive oil
  • 2 tablespoons olive oil
  • to taste salt and pepper
  • to taste smoked paprika
  • to taste fresh thyme

Instructions 

  • Toss butternut squash with 1 tablespoon olive oil, salt, and pepper. Roast at 400°F (200°C) for 25-30 minutes.
  • Meanwhile, toss Brussels sprouts with 2 tablespoons olive oil, salt, and pepper. Roast for 20-25 minutes until crispy.
  • Slice cooked sausage and sauté in a skillet with smoked paprika and thyme until heated through.
  • Combine roasted vegetables and sausage. Serve hot.

Notes

Feel free to add a drizzle of balsamic glaze for extra flavor.
Calories: 550kcal
Cost: $15
Course: Main Course
Cuisine: American
Keyword: autumn, Roasted Veggies, Sausage

Start Your Day Right with Nourishing Granola

Welcome to a delightful morning ritual that nurtures both your body and soul. Granola, a beloved breakfast staple, becomes even more nourishing with this high protein homemade granola recipe. This wholesome dish is not only refined sugar-free but also filled with wholesome ingredients that create a satisfying start to your day. Whether you’re a busy professional, a parent on the go, or simply someone who loves to enjoy a nourishing breakfast, this recipe is here to make your mornings easier and more delicious.

In this comprehensive guide, we will walk you through the steps to create a perfect batch of granola, share expert tips, explore variations, and answer your most pressing questions. Let’s dive in!

Why You’ll Love This Recipe

This granola recipe stands out for several reasons:

  • High Protein Boost: Packed with protein from egg whites and nuts, this granola will keep you fuller for longer, making it an ideal breakfast or snack.
  • Refined Sugar-Free: By using natural sweeteners like maple syrup, you can enjoy a sweet treat without the sugar crash.
  • Customizable: Add your favorite nuts, seeds, or dried fruits to personalize your granola to fit your taste.
  • Easy to Make: With simple steps, you can whip up this granola in just under an hour, making it a quick and satisfying option.
  • Great for Meal Prep: Store it in an airtight container for a week, making it perfect for busy mornings.

Ingredient Breakdown

Understanding your ingredients is essential for a successful granola. Here’s what you’ll need and some potential substitutions:

  • 4 cups rolled oats: Oats are the base of your granola. You can substitute with gluten-free oats if necessary.
  • 1 cup chopped pecans or walnuts: These nuts add healthy fats and crunch. Feel free to replace them with almonds or hazelnuts.
  • ¼ cup pumpkin seeds or sunflower seeds: Both seeds provide additional nutrients. You could also use chia seeds or flaxseeds.
  • 6 egg whites: These are crucial for binding the ingredients. If you prefer a vegan option, consider using a flaxseed meal mixture (1 tablespoon flaxseed meal + 2.5 tablespoons water = 1 egg white).
  • ¼ cup maple syrup: This natural sweetener enhances flavor without refined sugars. Honey or agave syrup can also work as alternatives.
  • 1 teaspoon vanilla: Vanilla extract adds depth of flavor. Almond extract can be used for a unique touch.
  • 1 tsp cinnamon: A warm spice that complements the sweetness. Nutmeg or ginger can also be delightful.
  • Pinch of salt: A small amount enhances the overall flavor.

Steps to Make High Protein Homemade Granola

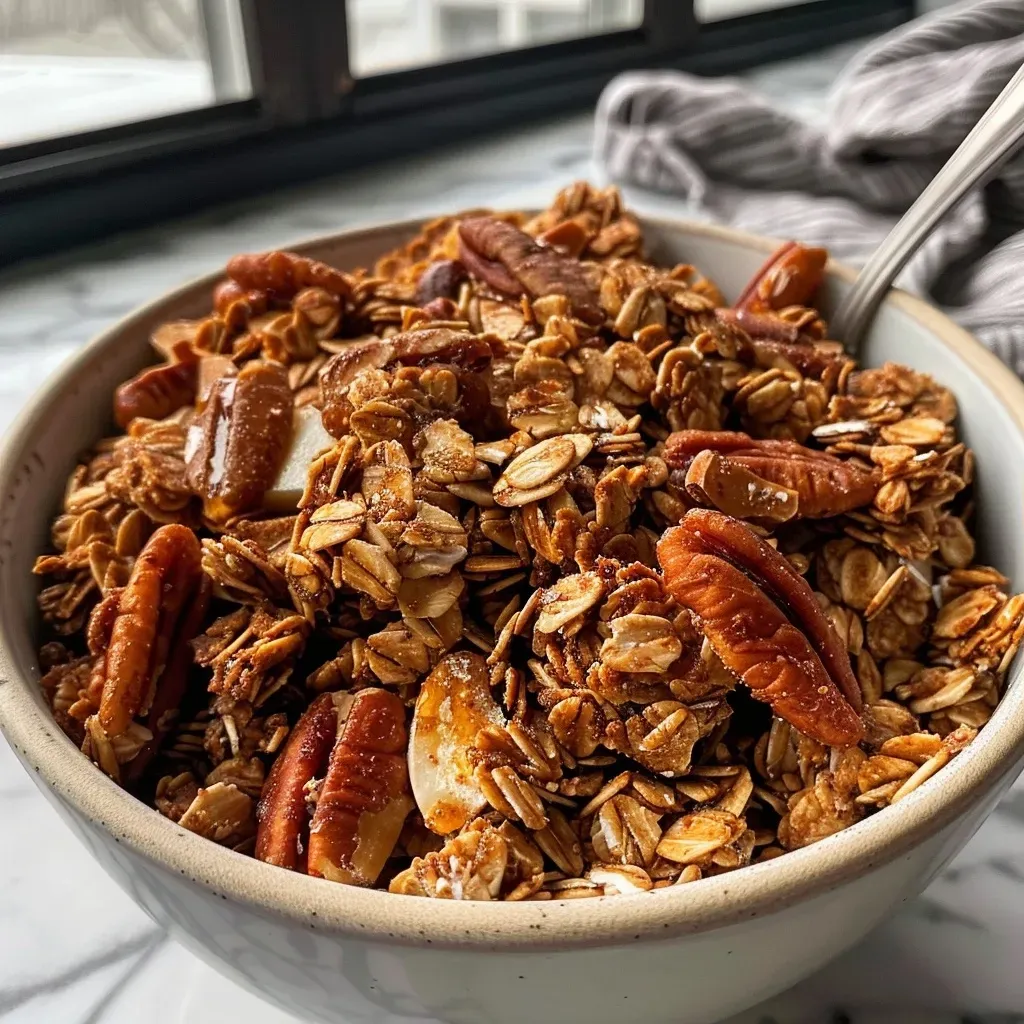
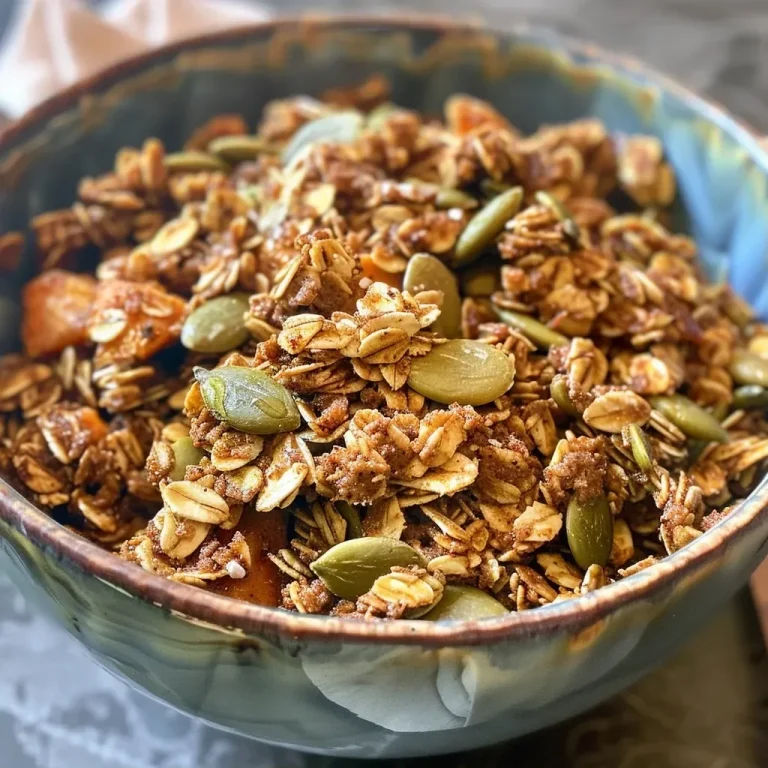
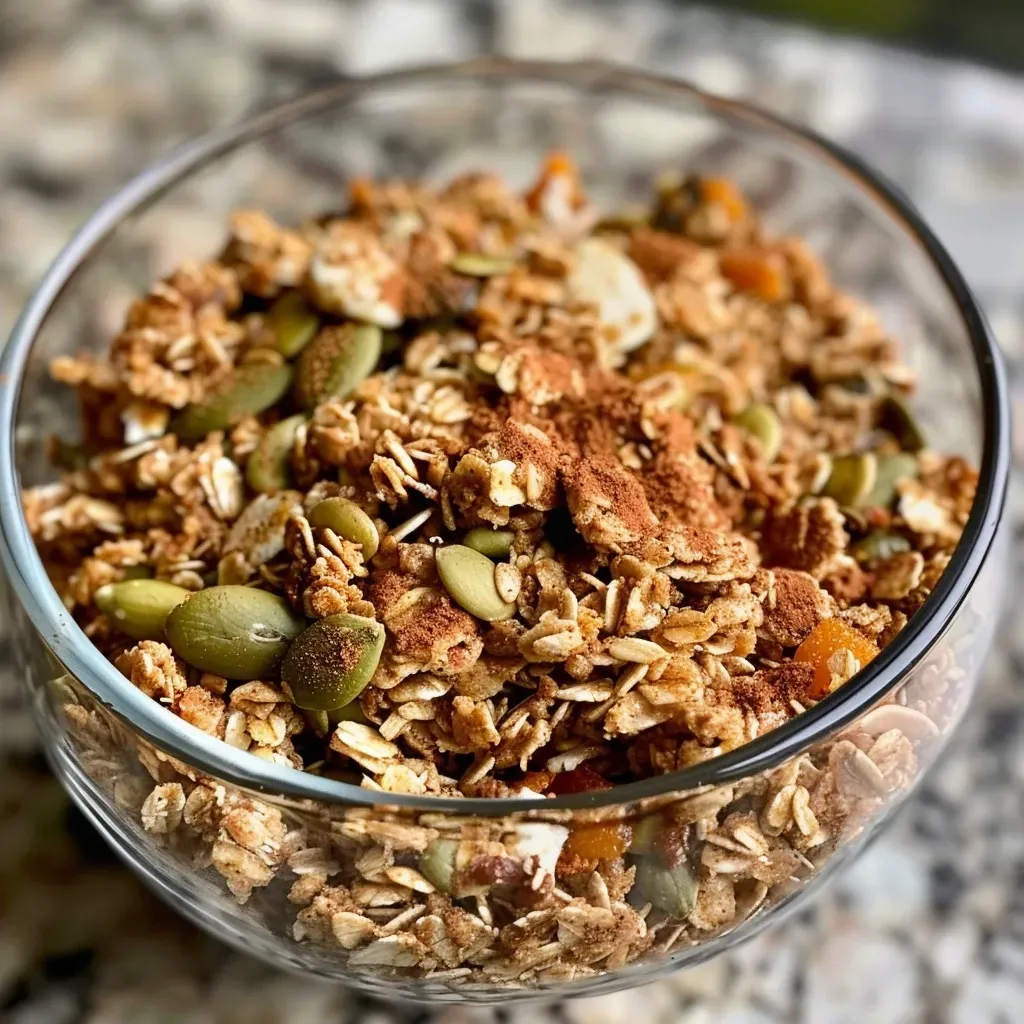
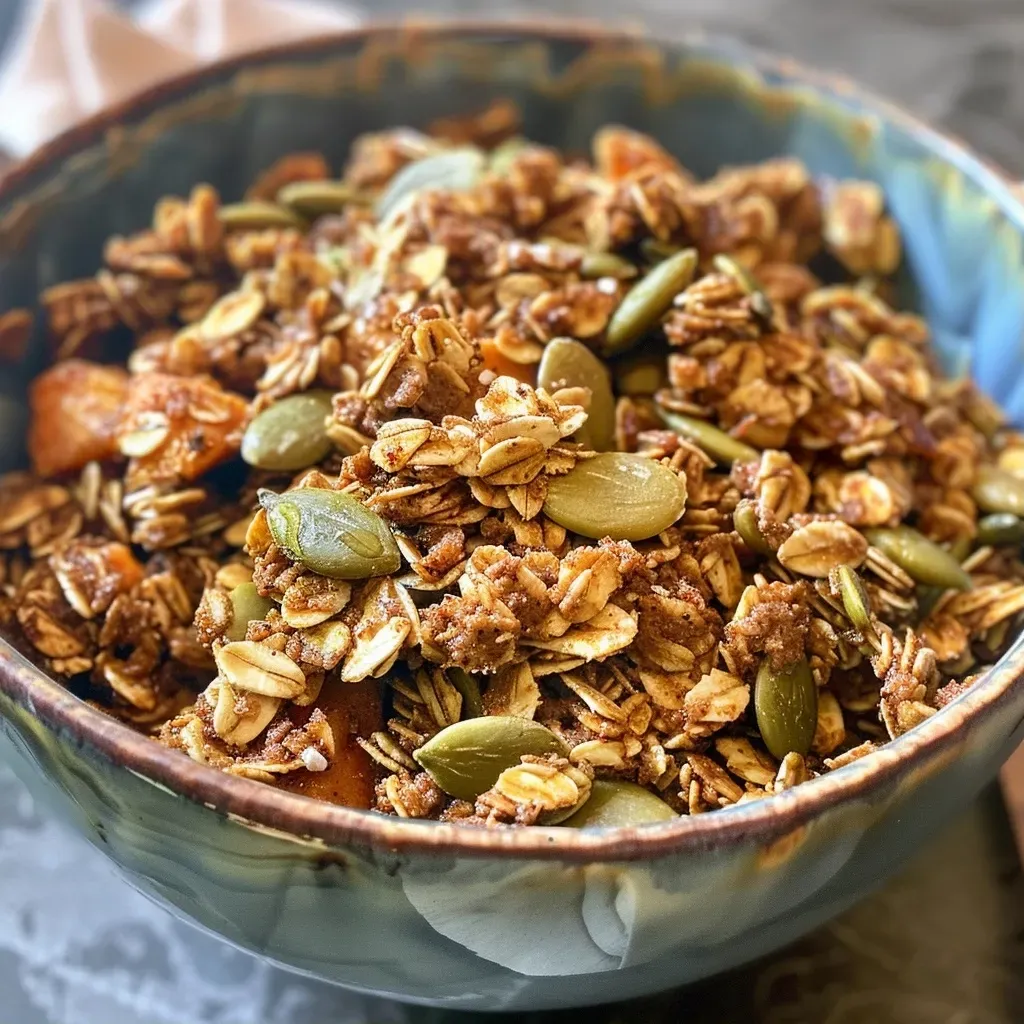
Side view of delicious granola featuring oats, nuts, and seeds.

Follow these simple steps to create your homemade granola:

  • Preheat your oven: Set it to 300°F (150°C) for even baking.
  • Whisk egg whites: In a bowl, whisk the egg whites until they become foamy.
  • Add wet ingredients: Incorporate maple syrup and vanilla into the egg whites, stirring until combined.
  • Mix dry ingredients: In a separate bowl, combine oats, nuts, seeds, cinnamon, and salt.
  • Combine mixtures: Pour the wet mixture into the dry ingredients and stir well until everything is evenly coated.
  • Spread and press: Transfer the mixture onto a baking sheet, spreading it out evenly and pressing it down firmly.
  • Bake: Place it in the oven for 45-60 minutes, until golden and crisp. Keep an eye on it to avoid burning.
  • Cool and break: Let it cool completely before breaking it into clusters.

Pro Tips for Perfect Granola

Enhance your granola-making experience with these expert tips:

  • Don’t overcrowd the baking sheet: This ensures even cooking and helps achieve a crispy texture.
  • Rotate your baking sheet: Halfway through baking, rotate the sheet to promote uniform browning.
  • Let it cool completely: Cooling is essential for achieving the crunchy clusters we all love.
  • Customize your mix-ins: Consider adding chocolate chips, dried fruits, or spices like cardamom for variety.
  • Store properly: Use an airtight container to keep your granola fresh; it can last up to a week.
  • Experiment with flavors: Try adding coconut flakes or different nut butters for unique variations.
  • Monitor baking time: Ovens vary, so check your granola periodically to prevent burning.
  • Adjust sweetness: Taste the mixture before baking and adjust the syrup if you prefer it sweeter.

Common Mistakes and Troubleshooting

Here are some common pitfalls to avoid when making granola:

  • Granola is too soft: Ensure you bake it long enough, as underbaking can lead to a chewy texture.
  • Burnt granola: Keep an eye on it during the last few minutes of baking; granola can go from perfect to burnt quickly.
  • Not enough clusters: Press down firmly on the mixture before baking to promote clustering.
  • Flavor is bland: Don’t shy away from spices and salt; they enhance the overall taste.

Variations to Try

Get creative with these delicious variations:

  • Tropical Delight: Add dried pineapple, coconut flakes, and macadamia nuts for a tropical twist.
  • Chocolate Lover’s Granola: Mix in cocoa powder and dark chocolate chips for a decadent treat.
  • Berry Burst: Incorporate dried cranberries or blueberries for a fruity flavor.
  • Spiced Pumpkin Granola: Add pumpkin puree and pumpkin spice for a seasonal favorite.

Storage and Make-Ahead Instructions

Storing your granola correctly ensures it stays fresh:

  • Cool completely: Always let your granola cool before storing it to prevent moisture buildup.
  • Airtight container: Use a glass jar or plastic container with a seal to keep it crunchy.
  • Make-ahead: Prepare a large batch and store it for up to 1 week for quick breakfasts or snacks.

Frequently Asked Questions

Here are some common questions regarding our high protein granola:

  • Can I make this granola vegan? Yes, substitute egg whites with a flaxseed mixture to bind the ingredients.
  • How do I make it gluten-free? Use gluten-free oats and ensure all other ingredients are certified gluten-free.
  • Can I add protein powder? Absolutely! Adding protein powder can enhance the protein content significantly.
  • What can I eat with granola? Enjoy it with yogurt, milk, or as a topping on smoothies and desserts.
  • How do I prevent it from getting soggy? Store it in an airtight container and keep it away from humidity.
  • Can I freeze granola? Yes, you can freeze it in a sealed bag for longer storage.
  • What sweeteners can I use besides maple syrup? Honey, agave syrup, or brown sugar are great alternatives.
  • How can I make it more nutritious? Add chia seeds, flaxseeds, or protein powder to boost its nutrition profile.

Nutrition Tips and Dietary Adaptations

To maximize the nutritional benefits of your granola:

  • Include a variety of nuts and seeds: This adds healthy fats, fiber, and protein.
  • Limit sweeteners: Use only enough to enhance flavor, keeping it as nutritious as possible.
  • Add dried fruits for natural sweetness: They provide vitamins and antioxidants.

Equipment Recommendations

Here’s what you’ll need to make your granola:

  • Baking sheet: A large, rimmed baking sheet is ideal for spreading the mixture.
  • Bowl for mixing: A large mixing bowl makes it easy to combine ingredients.
  • Whisk: A whisk is essential for aerating the egg whites.
  • Airtight container: For proper storage, keep your granola fresh and crunchy.

Serving Suggestions

Enjoy your homemade granola in various ways:

  • With yogurt: Layer it with your favorite yogurt and fresh fruits for a delicious parfait.
  • On top of smoothies: Sprinkle it over smoothies for added texture and nutrition.
  • As a snack: Enjoy it straight from the jar for a healthy snack anytime.

Conclusion

Creating your high protein homemade granola is not only rewarding but also a simple way to nourish your body. With this recipe and all the tips provided, you’re well on your way to mastering the art of granola-making. Remember, cooking is about enjoying the process, so take your time, experiment with flavors, and make it your own. Here’s to many delightful mornings ahead with your nourishing granola!

High Protein Refined Sugar Free Granola

Prep Time 10 minutes
Cook Time 50 minutes
Total Time 1 hour
Servings 8 cups
Calories 350
A delicious, high-protein granola that's free of refined sugar, perfect for a healthy breakfast or snack.

Ingredients

Dry ingredients

  • 4 cups rolled oats
  • 1 cup chopped pecans or walnuts
  • 0.25 cup pumpkin seeds or sunflower seeds

Wet ingredients

  • 6 egg whites egg whites
  • 0.25 cup maple syrup
  • 1 teaspoon vanilla
  • 1 tsp cinnamon
  • Pinch salt

Instructions 

  • Preheat oven to 300°F (150°C).
  • Whisk egg whites until foamy, then add wet ingredients and mix.
  • Add dry ingredients and mix thoroughly.
  • Spread mixture thinly on a baking sheet and press firmly.
  • Bake for 45-60 minutes until golden and crisp, then cool.

Notes

Store in an airtight container for best freshness.
Calories: 350kcal
Cost: $15
Course: Breakfast
Cuisine: Healthy
Keyword: Granola

Welcome to your new favorite meal! This recipe is all about making tender, flavorful turkey meatballs effortlessly in your slow cooker. If you’re looking for a simple, comforting dish that brings the warmth of home to your table, you’ve come to the right place. The combination of ground turkey, aromatic spices, and rich BBQ sauce creates a delightful harmony that is sure to please everyone. Whether you’re cooking for yourself or a crowd, these turkey meatballs are bound to become a staple in your kitchen.

Why You’ll Love This Recipe

This recipe isn’t just easy to follow; it also provides several benefits that make it a go-to for busy weeknights or cozy weekends.

  • Quick Preparation: With minimal prep time, you can have your meatballs ready to cook in under 15 minutes.
  • Slow Cooking Convenience: Set it and forget it! The slow cooker does all the work, allowing you to focus on other things.
  • Flavorful Results: The slow cooking process enhances the flavors, making the meatballs tender and juicy.
  • Versatile Dish: These meatballs can be served in various ways—over rice, in a sub, or on their own with a side salad.
  • Healthy Option: Using ground turkey keeps the dish lighter while still packing in protein and flavor.

Ingredients Breakdown

To make these delightful turkey meatballs, gather the following ingredients:

  • Ground turkey: This is the base of your meatballs. Feel free to use lean ground turkey for a healthier option.
  • Spices: A blend of garlic powder, onion powder, salt, and pepper will enhance the flavors. Don’t hesitate to experiment with your favorite herbs!
  • BBQ sauce: Choose your favorite brand or homemade version. This adds sweetness and tanginess to the dish.

Pro Tips for Perfect Turkey Meatballs

Here are some expert insights to ensure your turkey meatballs turn out perfectly every time:

  • Don’t Overmix: When combining the ingredients, mix just until combined to keep the meatballs tender.
  • Pan-Sear for Flavor: Searing the meatballs before placing them in the slow cooker locks in moisture and enhances the flavor.
  • Experiment with Flavors: Feel free to add fresh herbs or spices to customize the flavor profile to your liking.
  • Use a Cookie Scoop: This tool helps create uniformly sized meatballs, which ensures even cooking.
  • Check for Doneness: Make sure the internal temperature reaches 165°F (75°C) for safe consumption.
  • Keep it Moist: If your meatballs are turning out dry, consider adding a splash of chicken broth or an egg to the mixture.
  • Let Them Rest: Allowing the meatballs to rest for a few minutes after cooking helps the flavors meld.
  • Use Parchment Paper: If you’re searing them, line your baking sheet with parchment for easier cleanup.

Common Mistakes and Troubleshooting

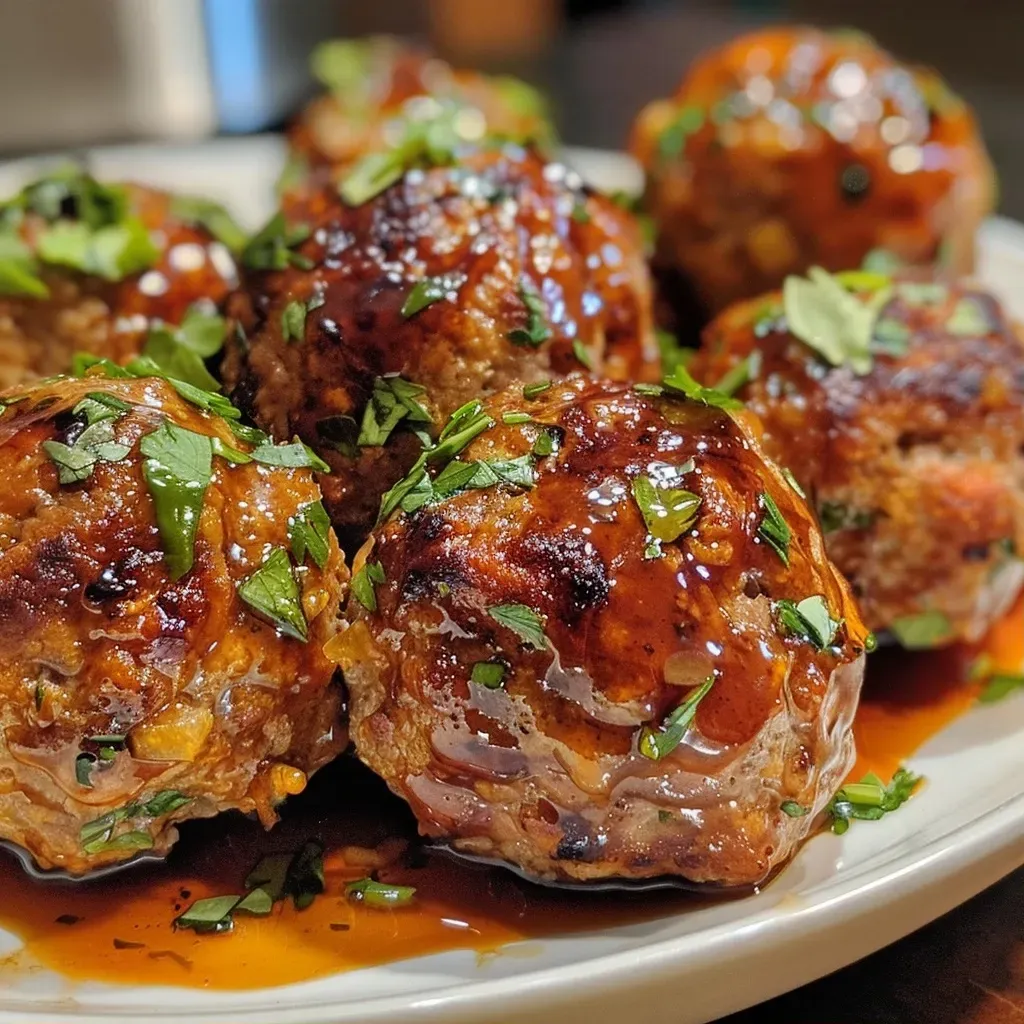
Side perspective of tender turkey meatballs, garnished and glistening.

Even the best cooks can make mistakes in the kitchen. Here’s how to avoid some common pitfalls:

  • Dry Meatballs: This can happen if you overcook them. Follow the cooking time closely and use a meat thermometer.
  • Too Loose Mixture: If your mixture is too wet, add breadcrumbs or a bit of flour to help bind the meatballs.
  • Flavorless Meatballs: Don’t be shy with your spices! Season generously and taste-test before cooking.
  • Sticking to the Pan: Ensure your pan is hot enough before adding meatballs and use a non-stick spray or oil.

Delicious Variations

Want to mix things up? Here are some delightful variations to consider:

  • Italian Style: Add chopped basil, oregano, and grated Parmesan to the turkey mixture for a classic Italian flavor.
  • Buffalo Turkey Meatballs: Substitute BBQ sauce with buffalo sauce for a spicy kick. Serve with celery sticks and blue cheese dressing.
  • Asian-Inspired: Mix in soy sauce, ginger, and green onions for a unique twist. Serve with rice and steamed vegetables.
  • Veggie-Packed: Fold in finely chopped vegetables such as spinach or bell peppers to boost nutrition and flavor.

Storage and Make-Ahead Instructions

These meatballs are perfect for meal prep! Here’s how to store and reheat them:

  • Refrigeration: Store cooked meatballs in an airtight container in the fridge for up to 4 days.
  • Freezing: Freeze meatballs in a single layer, then transfer to a freezer bag for up to 3 months.
  • Reheating: Reheat in the microwave or on the stovetop until warmed through. Add a splash of sauce to keep them moist.

Comprehensive FAQ

Here are some common questions about making turkey meatballs:

  • Can I use ground chicken instead of turkey? Yes, ground chicken works well and will yield similar results.
  • What can I substitute for BBQ sauce? You can use marinara sauce or teriyaki sauce for different flavor profiles.
  • How do I know when the meatballs are done? The internal temperature should reach 165°F (75°C).
  • Can I make these meatballs gluten-free? Absolutely! Just use gluten-free breadcrumbs and ensure your sauce is gluten-free.
  • Can I bake these instead of using a slow cooker? Yes, bake at 400°F (200°C) for 20-25 minutes or until cooked through.
  • How do I add more vegetables? Finely chop or grate vegetables and mix them in before cooking.
  • Are these meatballs healthy? Yes, using ground turkey makes them a leaner option while still being flavorful.
  • Can I make them spicy? Absolutely! Add crushed red pepper or hot sauce to the mixture for some heat.

Nutrition Tips and Dietary Adaptations

For those looking to make healthier choices, here are some nutrition tips:

  • Lean Protein: Ground turkey is a great source of lean protein. Opt for organic or free-range if possible.
  • Whole Grains: Serve with whole grain rice or pasta to boost fiber intake.
  • Vegetable Additions: Sneak in extra veggies to enhance both nutrition and flavor.
  • Dairy-Free Option: Substitute any dairy ingredients with plant-based alternatives to make it dairy-free.

Essential Equipment Recommendations

Having the right tools can make your cooking experience smoother:

  • Slow Cooker: A reliable slow cooker is essential for this recipe. Look for one with a timer function for best results.
  • Non-Stick Skillet: Great for searing the meatballs before slow cooking.
  • Meat Thermometer: Ensures your meatballs are cooked to the perfect temperature.
  • Cookie Scoop: Helps in forming uniform meatballs for even cooking.

Serving Suggestions

Here’s how to serve your turkey meatballs for maximum enjoyment:

  • Over Rice: Serve them on a bed of rice, drizzling extra sauce on top.
  • In a Sub: Place meatballs in a sub roll with cheese and marinara for a delicious sandwich.
  • On a Salad: Add to a fresh green salad for a satisfying meal.
  • With Pasta: Pair with your favorite pasta and sauce for a classic dinner option.

In conclusion, cooking should be a joyful experience that brings comfort and nourishment to your life. This recipe for turkey meatballs in a slow cooker is a perfect example of how simple ingredients can create something truly delightful. As you explore this recipe, remember to enjoy the process, experiment with flavors, and find joy in sharing your meal with others. Happy cooking!

Slow Cooker Turkey Meatballs

Prep Time 10 minutes
Cook Time 7 hours
Total Time 7 hours 10 minutes
Servings 4 servings
Calories 350
Enjoy tender and flavorful turkey meatballs cooked effortlessly in a slow cooker with a tangy BBQ sauce.

Ingredients

Meat

  • 1 pound ground turkey
  • 2 teaspoons spices (e.g., salt, pepper, garlic powder)
  • 1 cup BBQ sauce

Instructions 

  • Pan-sear the turkey meatballs to lock in flavor and moisture.
  • Add the meatballs to the slow cooker.
  • Pour BBQ sauce over the meatballs.
  • Cook on low for 6 to 7 hours.

Notes

For extra flavor, add chopped herbs or a splash of vinegar to the sauce.
Calories: 350kcal
Cost: $15
Course: Main Course
Cuisine: American
Keyword: Turkey

Cooking can be a delightful process, especially when it involves a dish as comforting as a **Dijon Chicken and Wild Rice Skillet**. This dish combines tender chicken thighs, nutty wild rice, and a medley of fresh vegetables, all brought together with a zesty dijon mustard sauce. It’s a one-pan wonder that not only simplifies cleanup but also fills your home with the warm aromas of a home-cooked meal. Let’s dive into why this recipe is perfect for your next weeknight dinner.

Why You’ll Love This Recipe

Here are five compelling reasons why this **Dijon Chicken and Wild Rice Skillet** should become a staple in your kitchen:

  • Quick and Easy: With a cooking time of about 30 minutes, this dish is perfect for busy evenings.
  • One-Pan Wonder: Enjoy the convenience of cooking everything in a single skillet, minimizing cleanup.
  • Flavorful and Nourishing: The combination of tender chicken, wild rice, and fresh vegetables creates a balanced meal with rich flavors.
  • Customizable: Easily adjust the ingredients based on your taste preferences or what you have on hand.
  • Perfect for Meal Prep: This skillet dish stores well, making it ideal for make-ahead lunches or dinners.

Ingredients Breakdown

Here’s what you’ll need to make this comforting dish:

  • 1 cup wild rice blend: Provides a nutty flavor and chewy texture. You can substitute with brown rice or quinoa if desired.
  • 2 tablespoons olive oil or butter: For sautéing the chicken and vegetables. Choose butter for a richer flavor.
  • 1 ½ pounds boneless, skinless chicken thighs: Cut into bite-sized pieces. Chicken breasts can also work but may need a bit more cooking time.
  • Kosher salt and black pepper: Essential for seasoning. Adjust according to your taste.
  • 1/2 cup carrots: Chopped into 1/2 inch pieces for sweetness and color.
  • 1/2 cup shallots: Adds a mild onion flavor. You can substitute with yellow onions if needed.
  • 1/2 cup honeycrisp apples: Chopped for a hint of sweetness and crunch.
  • 1 ½ cups broth (vegetable or chicken): Enhances the flavor of the rice. Homemade is best, but store-bought works fine.
  • 2 tablespoons dijon mustard: For that signature tangy flavor.
  • 1/2 teaspoon dried thyme leaves: Provides an aromatic touch.
  • 1 tablespoon fresh rosemary leaves, minced: Adds depth to the dish. You can use dried rosemary in a pinch.
  • 2 tablespoons optional: heavy cream: For a creamier sauce. Omit for a lighter version.

How to Make Dijon Chicken and Wild Rice Skillet

Follow these simple steps to create your delicious skillet:

  1. Cooking the Wild Rice: Start by cooking the wild rice according to the package directions. For added flavor, use a mix of half broth and half water. Season with salt and pepper to taste.
  2. Brown the Chicken: In a large skillet, heat 1 tablespoon of olive oil or butter over medium-high heat. Add the chicken thighs, seasoning them with salt and black pepper. Brown on both sides until cooked through, approximately 7-8 minutes. Remove the chicken and set aside.
  3. Sauté the Vegetables: In the same pan, add the remaining oil or butter. Add the carrots, shallots, and apples, cooking until softened, about 5-6 minutes.
  4. Add Broth and Seasonings: Pour in the broth, scraping any browned bits from the bottom. Bring to a boil, then stir in thyme and rosemary. Simmer for about 5 minutes until slightly reduced.
  5. Incorporate Chicken and Rice: Lower the heat to medium, whisk in the dijon mustard, and add the cooked chicken. If using, stir in the heavy cream and simmer for an additional 5 minutes.
  6. Combine and Serve: Mix in the wild rice, garnish with extra rosemary, and serve warm.

Pro Tips for Perfecting Your Skillet

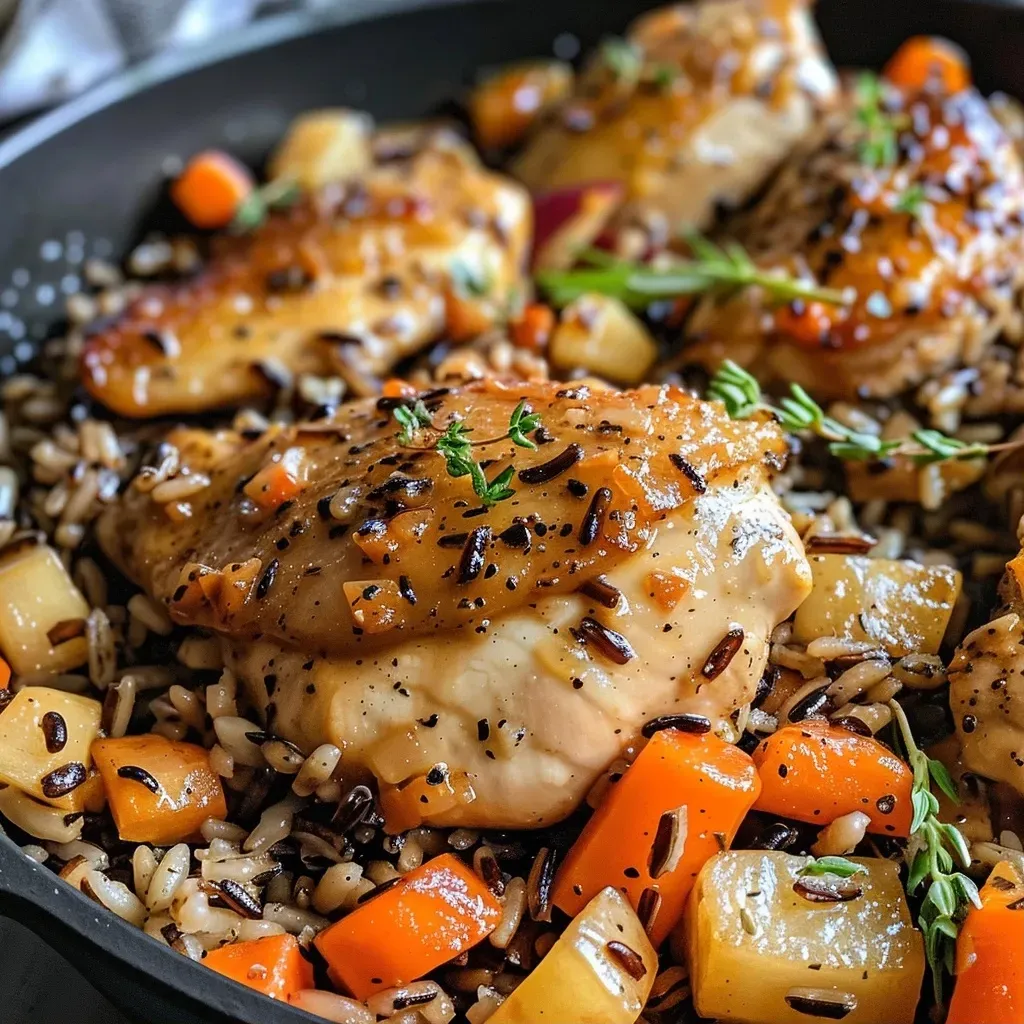
A side view of a delicious Dijon Chicken and Wild Rice Skillet, featuring colorful ingredients like carrots and apples.

Here are some expert insights to elevate your cooking experience:

  • Use Fresh Ingredients: Fresh vegetables and herbs will enhance the flavor of your dish significantly.
  • Don’t Overcrowd the Pan: Ensure the chicken pieces are spaced out; this helps them brown evenly.
  • Adjust Liquid as Needed: If the sauce seems too thin, let it simmer longer to reduce. If too thick, add a splash more broth.
  • Mix It Up: Feel free to add other vegetables such as spinach, bell peppers, or zucchini for more nutrition.
  • Make It Your Own: Experiment with different mustards or spices to customize the flavor to your liking.
  • Check for Doneness: Ensure the chicken reaches an internal temperature of 165°F (75°C) for safety.
  • Garnish for Presentation: A sprinkle of fresh herbs or a squeeze of lemon can brighten the dish.
  • Let It Rest: Allow the dish to sit for a few minutes before serving to enhance the flavors.

Common Mistakes and Troubleshooting

Here are some pitfalls to avoid when preparing your skillet:

  • Undercooking Rice: Ensure the rice is cooked fully before combining it with the chicken.
  • Overseasoning: Taste as you go to avoid overpowering the dish with salt or spices.
  • Not Prepping Ingredients: Having everything chopped and ready will streamline your cooking process.
  • Skipping the Browning Step: Browning the chicken adds depth and flavor; don’t skip this crucial step.

Variations to Try

Get creative with these variations to suit your taste:

  • Herbed Dijon Chicken: Add fresh basil and parsley for a fragrant twist.
  • Spicy Dijon Chicken: Incorporate a teaspoon of red pepper flakes for a kick of heat.
  • Creamy Mushroom Chicken: Add sliced mushrooms with the vegetables for an earthy flavor.
  • Vegetarian Option: Replace chicken with chickpeas or tofu and use vegetable broth for a delicious plant-based dish.

Storage and Make-Ahead Instructions

This dish is perfect for meal prep:

  • Refrigeration: Store any leftovers in an airtight container for up to 3-4 days.
  • Freezing: Freeze in portions for up to 2-3 months. Thaw overnight in the refrigerator before reheating.
  • Reheating: Gently reheat on the stove over low heat, adding a splash of broth if needed to restore moisture.

Frequently Asked Questions

Here are some common questions about the recipe:

  • Can I use brown rice instead of wild rice? Yes, but cooking times may vary; follow package instructions for brown rice.
  • Can I make this dish ahead of time? Absolutely! Prepare it in advance and refrigerate or freeze as needed.
  • What can I serve with this dish? It’s delicious on its own, but you can pair it with a simple green salad or crusty bread.
  • How can I make it gluten-free? Ensure your broth and mustard are certified gluten-free.
  • Can I use chicken breasts instead of thighs? Yes, but they may dry out more easily, so monitor cooking closely.
  • Is this dish suitable for kids? Yes, it’s mild and flavorful, making it appealing to children.
  • How do I store leftovers? Keep in an airtight container in the fridge for up to 4 days.
  • Can I add more vegetables? Yes! Feel free to incorporate your favorites.

Nutrition Tips and Dietary Adaptations

This dish is packed with nutrients:

  • Protein-Rich: Chicken thighs are a great source of protein, essential for muscle health.
  • Fiber Boost: Wild rice contains fiber, helping with digestion and satiety.
  • Lower Fat Option: Omit the heavy cream for a lighter version if desired.
  • Vegetarian-Friendly: Use chickpeas or lentils as a protein substitute for a plant-based meal.

Equipment Recommendations

To make this recipe, you’ll need:

  • Large Skillet: A cast iron skillet is ideal for even heat distribution.
  • Medium Pot: For cooking the wild rice separately if preferred.
  • Wooden Spoon: Perfect for stirring without scratching your skillet.
  • Measuring Cups and Spoons: For precise ingredient measurements.

Serving Suggestions

Serve your **Dijon Chicken and Wild Rice Skillet** warm, garnished with freshly chopped herbs. Pair it with:

  • Simple Green Salad: A light salad with a vinaigrette complements the richness of the dish.
  • Crusty Bread: Serve with a slice of sourdough or baguette to soak up the flavorful sauce.
  • Roasted Vegetables: Side dishes like roasted asparagus or Brussels sprouts add color and nutrition.

Cooking is not just about the meal; it’s about creating moments of joy and connection. This **Dijon Chicken and Wild Rice Skillet** is more than just a recipe; it’s an invitation to slow down, enjoy the process, and savor the flavors. Happy cooking!

Dijon Chicken and Wild Rice Skillet

Prep Time 15 minutes
Cook Time 30 minutes
Total Time 45 minutes
Servings 4 servings
Calories 550
A flavorful one-pan dish combining tender chicken, wild rice, and fresh vegetables in a Dijon mustard sauce.

Ingredients

Grains

  • 1 cup wild rice blend

Protein

  • 1.5 pounds boneless, skinless chicken thighs (cut into bite-sized pieces)

Vegetables & Fruits

  • 0.5 cup carrots (chopped into 1/2 inch pieces)
  • 0.5 cup shallots (chopped into 1/2 inch pieces)
  • 0.5 cup honeycrisp apples (chopped into 1/2 inch pieces)

Liquids & Condiments

  • 1.5 cups broth (vegetable or chicken)
  • 2 tablespoons dijon mustard
  • 0.5 teaspoon dried thyme leaves
  • 1 tablespoon fresh rosemary leaves (minced, plus more for garnish)
  • 2 tablespoons heavy cream (optional)

Instructions 

  • Cook wild rice according to package instructions, using broth and water for flavor. Set aside.
  • In a large skillet, brown chicken thighs in 1 tablespoon of oil until cooked through, then remove and set aside.
  • In the same skillet, sauté carrots, shallots, and apples until softened, about 5-6 minutes.
  • Add broth, thyme, and rosemary; simmer until reduced, then whisk in Dijon mustard and heavy cream if using. Return chicken to pan and simmer briefly.
  • Stir in cooked wild rice, garnish with extra rosemary, and serve warm.

Notes

Adjust seasonings to taste and enjoy!
Calories: 550kcal
Cost: $15
Course: Main Course
Cuisine: American
Keyword: chicken, dijon, Wild Rice

Welcome to a delightful journey back in time with these Homemade Fig Newton Bars. This recipe brings together the sweetness of dried figs, the brightness of fresh lemon juice, and the comforting embrace of buttery crust to create a treat that’s not only delicious but also simple to make. Whether you’re reminiscing about childhood snacks or simply looking for a wholesome dessert to share, this recipe is perfect for you.

In just a few simple steps, you’ll have a batch of soft, chewy fig bars that evoke nostalgia with every bite. Let’s dive into why you’ll love making these bars and how to get started!

Why You’ll Love This Recipe

  • Quick Preparation: These fig bars can be made in under an hour with minimal hands-on time, making them a great choice for busy days.
  • Wholesome Ingredients: Made with dried Turkish or Calimyrna figs and whole wheat flour, they offer a healthier alternative to store-bought snacks.
  • Versatile Treat: Perfect for lunchboxes, after-school snacks, or even as a delightful dessert for gatherings—these bars fit every occasion!
  • Customizable: You can easily adjust the filling or crust to suit your taste or dietary needs, making them a family favorite.
  • Memorable Flavor: The combination of sweet figs and a buttery crust creates a delicious flavor profile that feels both comforting and indulgent.

Ingredients for Homemade Fig Newton Bars

Here’s what you’ll need to whip up these delightful bars:

  • 8 ounces dried figs: Turkish or Calimyrna, stemmed and quartered for the best flavor and texture.
  • 2 cups apple juice: This helps to rehydrate the figs and create a syrupy filling.
  • Pinch of salt: Enhances the flavors in both the filling and the crust.
  • 2 teaspoons fresh lemon juice: Adds brightness and balances the sweetness of the figs.
  • 3/4 cup all-purpose flour: For a tender crust.
  • 1/2 cup whole wheat flour: Adds nutritional value and a nutty flavor.
  • 1/2 teaspoon baking powder: Helps the crust rise and become fluffy.
  • 1/4 teaspoon salt: For flavor in the crust.
  • 6 tablespoons unsalted butter, softened: Creates a rich, buttery crust.
  • 3/4 cup packed light brown sugar: For sweetness and moisture.
  • 1 large egg: Binds the ingredients together.
  • 2 teaspoons vanilla extract: Adds depth to the flavor.

Pro Tips for Making the Best Fig Newton Bars

  • Use dried figs: Fresh figs have too much moisture and can result in a soggy filling. Dried figs provide the ideal jammy texture.
  • Let the filling cool: Allow the fig mixture to cool slightly before pureeing, ensuring a smoother consistency.
  • Chill the top crust: Freezing the reserved dough for the top crust makes it easier to handle and prevents it from becoming overly soft during assembly.
  • Don’t overfill: Spread the fig mixture evenly but avoid overfilling, as this can make the bars difficult to cut.
  • Rotate the pan: For even baking, rotate your pan halfway through the baking time.
  • Allow cooling time: Let the bars cool completely in the pan before cutting to ensure clean edges.
  • Sprinkle with powdered sugar: For an elegant touch, dust the cooled bars with powdered sugar before serving.
  • Store properly: Keep the bars in an airtight container to maintain freshness for up to a week.

Common Mistakes and Troubleshooting

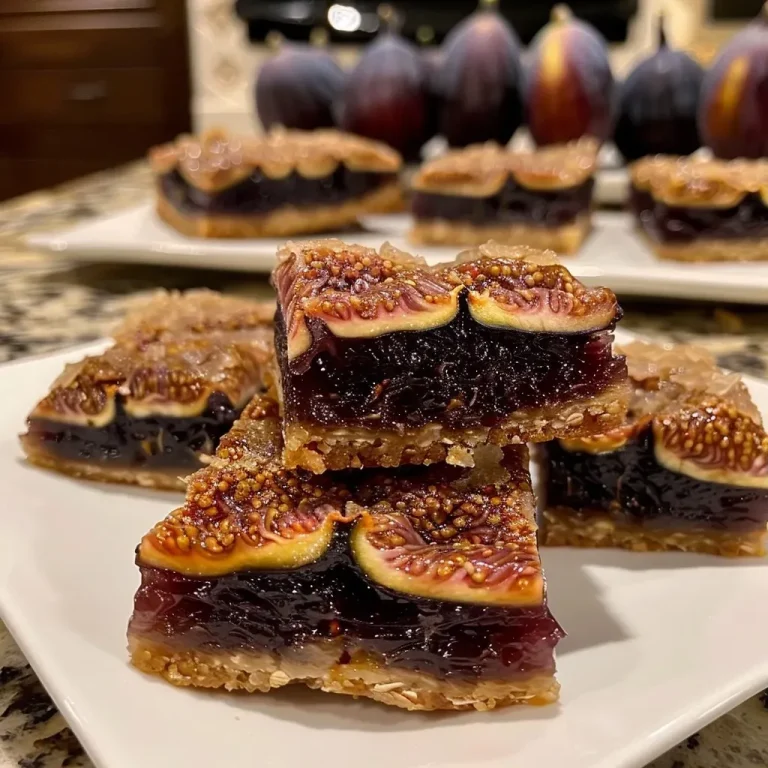
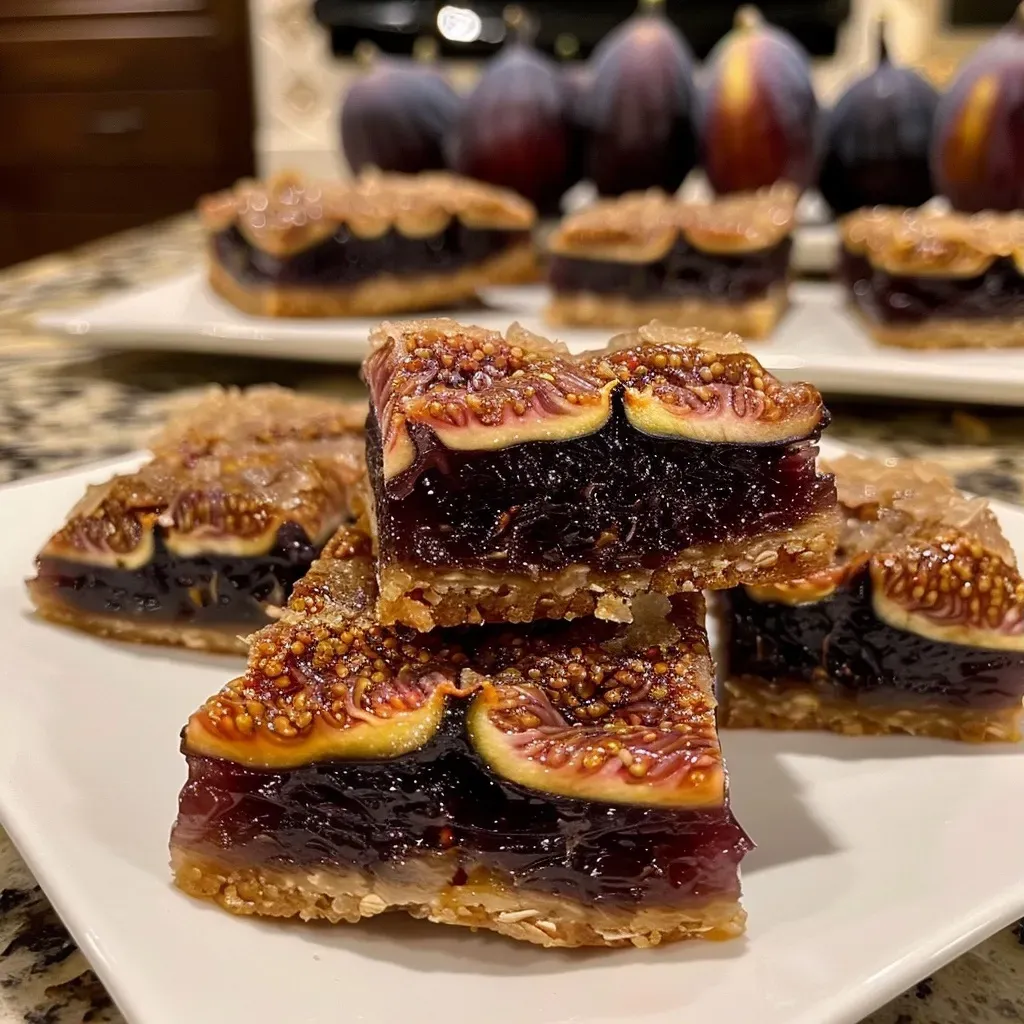
Side view of a freshly baked Fig Newton bar, showing layers of dough and fig filling.
  • Soggy filling: If you notice a wet texture, ensure you’ve simmered the figs long enough to thicken the mixture.
  • Crust too crumbly: If your dough is too dry, consider adding a splash of milk or water to help bind it.
  • Bars falling apart: Make sure to let the bars cool completely before cutting; this helps them set properly.
  • Uneven baking: If the edges brown too quickly, cover the pan with foil to prevent burning.

Variations to Try

Feeling adventurous? Here are some variations to customize your fig bars:

  • Nuts and seeds: Add chopped walnuts or sunflower seeds to the crust for added crunch and nutrition.
  • Spiced figs: Stir in a pinch of cinnamon or nutmeg to the fig filling for a warm, spiced flavor.
  • Different fruits: Substitute figs with other dried fruits like apricots or prunes for a unique twist.
  • Chocolate drizzle: Drizzle melted dark chocolate over the cooled bars for an indulgent touch.

How to Store and Make Ahead

These fig bars not only taste amazing fresh but also store well for later enjoyment!

  • Room temperature: Store in an airtight container at room temperature for up to 5 days.
  • Refrigeration: For extended freshness, refrigerate for up to a week.
  • Freezing: Wrap individual bars in plastic wrap and place them in a freezer-safe bag for up to 3 months. Thaw in the fridge before enjoying.

Frequently Asked Questions

  • Can I use fresh figs instead of dried? Fresh figs have too much moisture and can cause a soggy filling; dried figs are recommended.
  • What can I substitute for apple juice? If you don’t have apple juice, you can use water with a tablespoon of honey for sweetness.
  • Are these bars healthy? They contain whole grains and fruit, making them a healthier alternative to many commercial snacks.
  • How can I make these gluten-free? Substitute the all-purpose flour with a gluten-free flour blend.
  • Can I add spices to the filling? Yes, adding spices like cinnamon or cardamom can enhance the flavor profile!
  • What’s the best way to serve them? They’re delicious served alone or with a dollop of yogurt for added creaminess.
  • How long do they take to bake? Bake the bars for about 25 to 30 minutes, or until golden brown.
  • Can I double the recipe? Absolutely! Just use a larger baking pan and adjust the baking time as needed.

Nutritional Tips and Dietary Adaptations

If you’re looking to adapt this recipe for dietary needs, consider the following:

  • Vegan option: Substitute the egg with a flax egg (1 tablespoon ground flaxseed + 3 tablespoons water).
  • Low-sugar version: Reduce the brown sugar or use a sugar substitute suitable for baking.
  • High-fiber option: Incorporate more whole wheat flour or add chia seeds for extra fiber.

Equipment Recommendations

To make your baking experience smooth, here’s a list of tools that you’ll find handy:

  • Medium saucepan: For simmering the fig filling.
  • Food processor: To puree the fig mixture into a smooth filling.
  • Mixing bowls: One for the dry ingredients and another for the wet ingredients.
  • 8-inch square baking pan: Perfect size for your fig bars.
  • Parchment paper: To line the pan for easy removal of the bars.

Serving Suggestions

These fig bars are versatile and can be enjoyed in various ways:

  • With tea or coffee: Pair them with your favorite hot beverage for a cozy afternoon treat.
  • As a breakfast option: Serve them alongside yogurt and fresh fruits for a wholesome breakfast.
  • At gatherings: Cut them into bite-sized pieces for easy serving at parties or potlucks.

With this comprehensive guide, you’re all set to create delectable fig bars that not only satisfy your sweet tooth but also bring a sense of nostalgia to your kitchen. Remember, cooking is about enjoying the process and sharing joy through food. Happy baking!

Homemade Fig Newton Bars

Prep Time 30 minutes
Cook Time 50 minutes
Total Time 1 hour 20 minutes
Servings 12 bars
Calories 250
Enjoy homemade Fig Newton bars with a luscious fig filling and tender crust, perfect for a sweet snack or dessert.

Ingredients

Filling

  • 8 ounces dried Turkish or Calimyrna figs (stemmed and quartered)
  • 2 cups apple juice
  • Pinch salt
  • 2 teaspoons fresh lemon juice

Crust

  • 3/4 cup all-purpose flour
  • 1/2 cup whole wheat flour
  • 1/2 teaspoon baking powder
  • 1/4 teaspoon salt
  • 6 tablespoons unsalted butter (softened)
  • 3/4 cup light brown sugar (packed)
  • 1 large egg
  • 2 teaspoons vanilla extract

Instructions 

  • Simmer figs, apple juice, and salt until soft and syrupy, then cool and puree with lemon juice to make filling.
  • Mix flours, baking powder, and salt; beat butter and sugar until fluffy, then add egg and vanilla.
  • Combine dry ingredients with butter mixture; reserve 3/4 cup for topping and press remaining into a pan.
  • Bake crust until golden, then cool slightly. Roll reserved dough for top crust, freeze until needed.
  • Spread fig filling over crust, top with frozen dough, and bake until golden. Cool, cut into squares, and serve.

Notes

Ensure the fig mixture is thick enough before spreading to prevent sogginess.
Calories: 250kcal
Cost: $15
Course: Dessert
Cuisine: American
Keyword: Fig

Discover the Joy of Dubai Chocolate Protein Bark

Welcome to a delightful journey of flavor and health with our Dubai Chocolate Protein Bark. This recipe brings together the rich taste of chocolate and the satisfying crunch of pistachios, creating a nutritious snack that’s perfect for any time of day. Not only is it easy to make, but it also offers a range of health benefits that will keep you feeling energized and satisfied. In this article, we’ll delve into the reasons you’ll love this recipe, provide detailed ingredient information, expert tips, variations, and much more!

Why You’ll Love This Recipe

This Dubai Chocolate Protein Bark is not just any snack—it’s a harmonious blend of flavor and nourishment. Here are five reasons to indulge:

  • High Protein Content: Each bite is packed with protein, making it an ideal post-workout snack or a midday boost.
  • Nutrient-Rich Ingredients: With ingredients like farmer cheese and pistachio butter, you’re fueling your body with essential nutrients.
  • Gut Health Benefits: The cultures in Lifeway Kefir Butter and farmer cheese promote digestion and contribute positively to your gut health.
  • Simple & Quick to Make: This recipe requires minimal effort and can be prepared in under an hour, including freezing time.
  • Customizable Toppings: You can tailor the bark to your liking with various toppings and flavor combinations.

Ingredient Breakdown

Let’s explore the key ingredients used in this delightful recipe and some potential substitutions:

  • Frozen Kataifi: This shredded pastry adds a unique crunch. If unavailable, try using shredded coconut or crushed nuts for texture.
  • Lifeway Kefir Butter: A creamy base that enhances flavor. Unsalted butter or coconut oil can be used as substitutes.
  • Farmer Cheese: Provides protein and a creamy texture. In a pinch, ricotta or cottage cheese can serve as alternatives.
  • Pistachio Spread: Offers a nutty richness. You may use almond or cashew butter for different flavor profiles.
  • Chocolate (Milk or Dark): Choose your favorite chocolate. For a dairy-free option, use vegan chocolate chips.
  • Pistachios: The perfect topping for crunch. Feel free to swap with any nuts or seeds you enjoy.

Pro Tips for Perfect Protein Bark

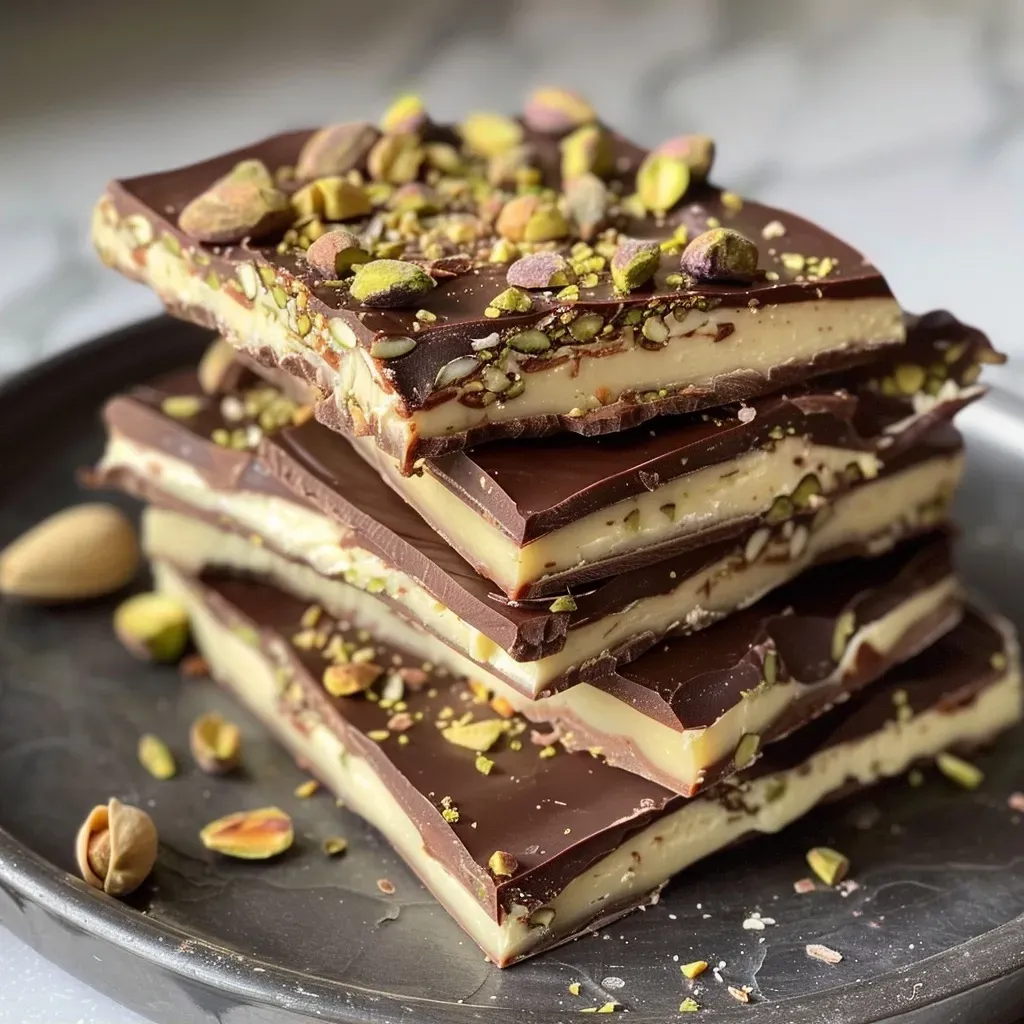
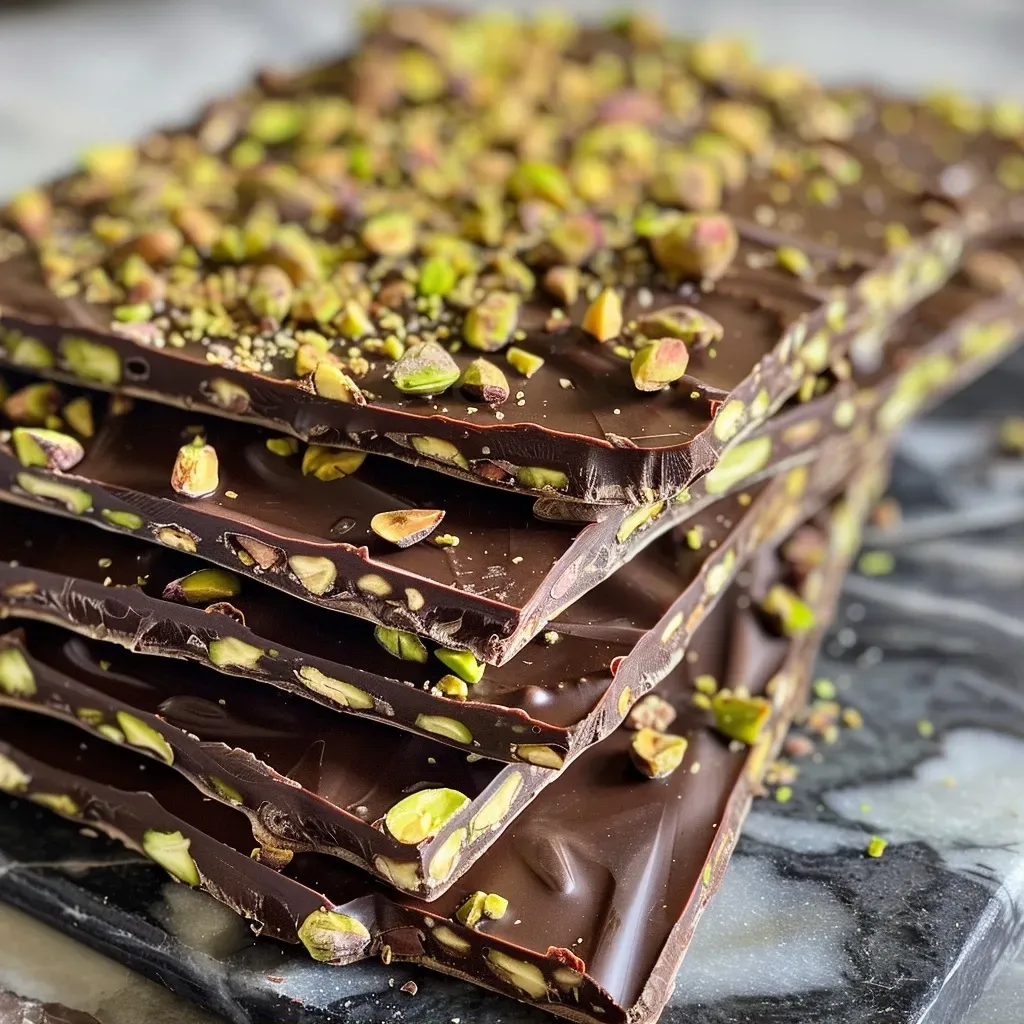
A detailed view of Dubai Chocolate Protein Bark showcasing layers of chocolate and pistachio.

Here are some expert insights to help you create the best Dubai Chocolate Protein Bark:

  • Don’t Overheat the Butter: Melt the Lifeway Kefir butter just until it’s liquid—overheating can alter the texture.
  • Chill Your Ingredients: Ensure your ingredients are cold before mixing to maintain the integrity of the bark.
  • Mix Thoroughly: Blend the farmer cheese and pistachio spread until completely smooth for a creamy consistency.
  • Evenly Spread the Mixture: Make sure to spread the mixture evenly on the baking sheet to ensure consistent texture and thickness.
  • Mind the Freezing Time: Allow enough time for the bark to set completely. This ensures it breaks easily without crumbling.
  • Use Parchment Paper: This prevents sticking and makes it easier to remove the bark after freezing.
  • Experiment with Flavors: Add spices like cinnamon or cardamom for an exotic twist.
  • Cut into Uniform Pieces: Use a sharp knife to cut the bark into even squares or rectangles for easy serving.

Common Mistakes and Troubleshooting

Even the best recipes can have hiccups. Here’s how to avoid common pitfalls:

  • Bark is Too Soft: Ensure you’ve allowed enough time for the bark to freeze completely. If it’s still soft, give it more time in the freezer.
  • Chocolate Doesn’t Set Properly: Melt the chocolate gently and make sure it’s not too hot when swirling into the mixture.
  • Sticky Texture: This can happen if the farmer cheese or pistachio spread is too warm. Always use chilled ingredients.

Variations to Try

Feel free to get creative with these variations:

  • Nut-Free Option: Omit the pistachios and use sunflower seed butter instead of pistachio spread.
  • Chocolate-Coconut Bark: Add shredded coconut to the mixture for a tropical twist.
  • Spiced Bark: Incorporate a pinch of cayenne or chili powder for a hint of heat.
  • Fruit-Infused Bark: Mix in dried fruits like cranberries or apricots for a sweet contrast.

Storage and Make-Ahead Instructions

This protein bark is perfect for meal prep and can be stored effectively:

  • Storage: Keep the bark in an airtight container in the freezer for up to two months. For best results, separate layers with parchment paper.
  • Make-Ahead: Prepare the bark a day or two in advance. Just slice and store in the freezer until ready to enjoy.

Comprehensive FAQ

Here are some frequently asked questions about Dubai Chocolate Protein Bark:

  • Can I use other types of cheese? Yes, ricotta or cottage cheese can be substituted for farmer cheese.
  • Is this recipe gluten-free? Yes, if you use gluten-free kataifi or a suitable alternative.
  • Can I use different nuts? Absolutely! Feel free to substitute with your favorite nuts or seeds.
  • How can I make it vegan? Use plant-based butter, vegan chocolate, and a non-dairy cheese alternative.
  • Is this a healthy snack? Yes, it’s rich in protein and contains healthy fats, making it a nutritious choice.
  • Can I add protein powder? Yes, adding a scoop of your favorite protein powder can boost the protein content.
  • What’s the best way to serve it? Serve chilled, and you can also pair it with a glass of milk or a smoothie.
  • How long does it take to freeze? It typically takes 2-3 hours for the bark to set completely.

Nutrition Tips and Dietary Adaptations

For those looking to enhance their nutritional intake, consider these tips:

  • Balance Your Plate: Pair the protein bark with a piece of fruit or a yogurt for a balanced snack.
  • Mind Your Portions: Although nutritious, keep serving sizes in check to avoid excess calories.
  • Adapt for Dietary Needs: This recipe can be adjusted to fit various dietary preferences—gluten-free, vegan, and more.

Equipment Recommendations

Here’s what you’ll need to make this recipe:

  • Baking Sheet: A standard-sized baking sheet lined with parchment paper works best.
  • Food Processor: Essential for blending the creamy ingredients smoothly.
  • Mixing Bowls: Have a few on hand for combining ingredients.
  • Measuring Cups and Spoons: Accurate measurements ensure the best results.

Serving Suggestions

To enhance your snacking experience, consider these serving ideas:

  • With Nut Milk: Pair the bark with almond or oat milk for a satisfying treat.
  • As a Topping: Crumble it over yogurt or oatmeal for added texture and flavor.
  • For Gifting: Wrap pieces in parchment and present them in a mason jar for a thoughtful homemade gift.

In conclusion, the Dubai Chocolate Protein Bark is not just a recipe; it’s an invitation to enjoy the process of cooking with simplicity and pleasure. Whether you make it for yourself or share it with friends, this delightful treat will surely satisfy your cravings while keeping you nourished. Happy cooking!

Dubai Chocolate Protein Bark

Prep Time 15 minutes
Cook Time 10 minutes
Total Time 25 minutes
Servings 8 pieces
Calories 350
A delicious and crunchy chocolate protein bark infused with pistachios and shredded pastry, perfect for a healthy treat.

Ingredients

Main

  • 1/2 cup frozen Kataifi (shredded pastry), thawed
  • 1 tbsp Lifeway Kefir Butter
  • 1 3/4 cups Farmer Cheese
  • 3/4 cup pistachio spread (pistachio butter)
  • 1/2 cup melted milk or dark chocolate (chips or bar)
  • 1/4 cup raw or roasted shelled pistachios (unsalted or salted)

Instructions 

  • Line a baking sheet with parchment paper.
  • Melt Lifeway Kefir butter and toast Kataifi until golden, then cool.
  • Blend Farmer Cheese and pistachio spread until smooth.
  • Spread mixture on the prepared sheet, then swirl with melted chocolate and top with Kataifi and pistachios.
  • Freeze for 2-3 hours until firm, then cut into pieces and serve.

Notes

Store in the freezer for best texture and freshness.
Calories: 350kcal
Cost: $15
Course: Dessert
Cuisine: Dubai
Keyword: Chocolate, Pistachio, Protein

Embrace the Essence of Autumn with Pumpkin Spice Caramel Popcorn

As the leaves turn golden and the air becomes crisp, there’s no better way to savor the season than with a delightful treat that encapsulates the essence of autumn. This Pumpkin Spice Caramel Popcorn recipe is not just a snack; it’s an experience—a comforting blend of sweet caramel, warm spices, and crunchy nuts that will make your heart sing. Perfect for cozy evenings or festive gatherings, this recipe invites you to slow down, enjoy the process, and indulge in the flavors of fall.

Why You’ll Love This Recipe

Here are five compelling reasons why this Pumpkin Spice Caramel Popcorn is bound to become a favorite in your home:

  • Easy to Make: With simple ingredients and straightforward steps, this recipe is perfect for all skill levels, allowing you to whip up a batch quickly and effortlessly.
  • Flavorful Combination: The unique pairing of caramel and pumpkin spice creates a delightful flavor profile that is both comforting and festive.
  • Customizable: You can easily modify the recipe by adding your favorite nuts, seeds, or even chocolate for a personal touch.
  • Great for Sharing: Whether it’s for a gathering, as a gift, or just because, this popcorn is a crowd-pleaser that everyone will enjoy.
  • Perfect for Any Occasion: From cozy movie nights to holiday celebrations, this treat fits seamlessly into any seasonal activity.

Ingredients Breakdown

Gathering the right ingredients is crucial for crafting the perfect Pumpkin Spice Caramel Popcorn. Here’s what you’ll need:

  • 12 cups plain popcorn (freshly popped): Air-popped or microwave popcorn works great. Just avoid buttered varieties to keep the flavors balanced.
  • 1 cup cashews: For a rich, nutty flavor and added crunch. Feel free to substitute with your favorite nuts.
  • 1 cup pecan halves: These add a lovely sweetness and texture. Walnuts or almonds can be used as alternatives.
  • 1 cup unsalted butter: Essential for the caramel base; unsalted ensures you can control the saltiness.
  • 2 cups brown sugar: This is what gives your caramel its rich, deep flavor. You can use light or dark brown sugar based on your preference.
  • 3/4 cup light corn syrup: This keeps the caramel smooth and prevents it from crystallizing.
  • 1 teaspoon kosher salt: Balances the sweetness of the caramel.
  • 1 teaspoon baking soda: This helps the caramel achieve a light, airy texture.
  • 1 teaspoon vanilla extract: Adds depth and enhances the caramel flavor.
  • 1/2 teaspoon pumpkin pie spice: Infuses the popcorn with that signature fall flavor.
  • 1/2 teaspoon ground cinnamon: Complements the pumpkin spice and adds warmth.

How to Make Pumpkin Spice Caramel Popcorn

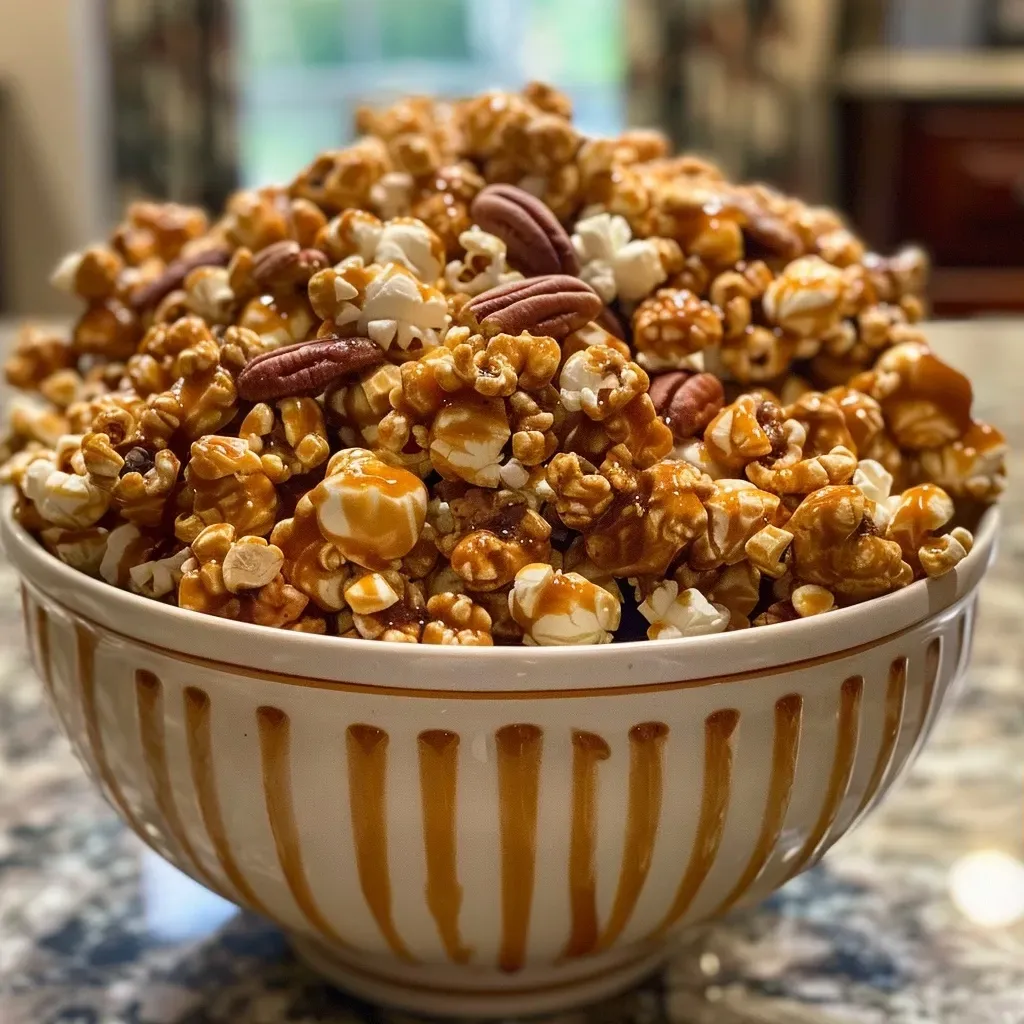
A side view of crispy popcorn mixed with cashews and pecans, all drizzled in pumpkin spice caramel.

Ready to create this delightful snack? Follow these simple steps:

  1. Preheat your oven to 250°F (120°C).
  2. Combine the popcorn, cashews, and pecans in a large baking pan or disposable pan, ensuring an even spread.
  3. Prepare the caramel: In a medium-sized pot, combine the butter, brown sugar, corn syrup, and salt. Bring to a gentle boil over medium heat.
  4. Cook the caramel: Allow the mixture to boil undisturbed until it reaches 250°F (120°C) on a candy thermometer, which should take about 5 minutes.
  5. Mix in baking soda and spices: Remove the pot from heat, then stir in the baking soda, vanilla, pumpkin pie spice, and cinnamon until well blended.
  6. Combine with popcorn: Pour the caramel mixture over the popcorn and use a large spoon to gently stir until every kernel is evenly coated.
  7. Bake the popcorn: Spread the mixture back into the baking pan and bake for 1 hour, stirring and breaking up any clumps every 15 minutes.
  8. Cool before serving: Once baked, remove from the oven and let it cool completely before enjoying.

Expert Tips for Perfecting the Cooking Process

To achieve the best results, consider these expert insights:

  • Use a candy thermometer: This ensures your caramel reaches the perfect temperature for the right texture.
  • Don’t rush the cooling process: Allowing the popcorn to cool completely helps the caramel harden, making it crunchy rather than sticky.
  • Store in an airtight container: This keeps your popcorn fresh and prevents it from becoming chewy.
  • Experiment with flavors: Try adding a pinch of cayenne for a spicy kick or swapping in different nuts.
  • Use fresh ingredients: Fresh popcorn and nuts will enhance the overall flavor and texture of your snack.
  • Double the recipe: This is a crowd-pleaser, so make extra for sharing or gifting!
  • Watch the baking time: Oven temperatures can vary; keep an eye on your popcorn to prevent burning.
  • Mix in chocolate: For an indulgent twist, drizzle melted chocolate over the cooled popcorn.

Common Mistakes and Troubleshooting

Even seasoned cooks can run into hiccups. Here’s how to avoid common pitfalls:

  • Sticky popcorn: Ensure your caramel reaches the correct temperature before mixing.
  • Burnt caramel: Keep a close watch as it cooks; once it starts boiling, it can burn quickly.
  • Uneven coating: Stir the popcorn thoroughly to ensure every piece gets that delicious caramel coverage.
  • Soft texture: Make sure to bake long enough to achieve that perfect crunch.

Delicious Variations to Try

Feel free to get creative with your popcorn! Here are some fun variations:

  • Chocolate Drizzle: Melt dark or white chocolate and drizzle over the cooled popcorn for a sweet touch.
  • Spicy Kick: Add a dash of cayenne pepper to the caramel for a surprising heat.
  • Nutty Delight: Mix in other nuts like almonds or hazelnuts for added flavor and texture.
  • Dried Fruit Addition: Toss in some dried cranberries or cherries after baking for a fruity contrast.

Storage and Make-Ahead Instructions

Planning ahead? Here’s how to store your Pumpkin Spice Caramel Popcorn:

  • Room Temperature: Store in an airtight container at room temperature for up to one week.
  • Freezing: For longer storage, you can freeze the popcorn in a vacuum-sealed bag for up to three months. Just allow it to thaw before serving.
  • Make-Ahead: Prepare the popcorn a day in advance for gatherings. Just ensure it’s completely cooled before storing.

Comprehensive FAQ

Here are some frequently asked questions about Pumpkin Spice Caramel Popcorn:

  • What is Pumpkin Spice Caramel Popcorn?: It’s a sweet snack made from popcorn coated in caramel infused with pumpkin spices.
  • How do I store Pumpkin Spice Caramel Popcorn?: Store it in an airtight container at room temperature for freshness.
  • Can I use microwave popcorn?: Yes, just ensure it’s plain and unbuttered for the best results.
  • What nuts can I substitute?: Almost any nut works well; almonds, walnuts, or peanuts are great choices.
  • Is it possible to make it dairy-free?: Absolutely! Use dairy-free butter or a suitable substitute.
  • How long does it take to make?: The entire process takes about an hour, including baking time.
  • Can I add chocolate?: Yes! Drizzling melted chocolate on top adds a delicious layer of flavor.
  • What’s the best way to reheat it?: If it becomes soft, place it in a 250°F oven for about 10 minutes to regain its crunch.

Nutritional Tips and Dietary Adaptations

To make this treat even more appealing to various dietary needs, consider these adaptations:

  • Gluten-Free: This recipe is naturally gluten-free; just ensure your popcorn is certified gluten-free.
  • Lower Sugar Option: You can reduce the amount of brown sugar to cut down on sweetness.
  • Nut-Free Version: Omit the nuts or replace them with seeds like pumpkin or sunflower seeds.

Essential Equipment Recommendations

Gathering the right tools can make your cooking experience smoother. Here’s what you’ll need:

  • Candy Thermometer: Essential for achieving the perfect caramel consistency.
  • Large Baking Pan: A sturdy pan is necessary for mixing and baking your popcorn.
  • Medium Pot: For cooking the caramel sauce.
  • Large Spoon or Spatula: To mix the caramel and popcorn thoroughly.
  • Airtight Container: For storing your delicious popcorn after it cools.

Serving Suggestions

Enjoy your Pumpkin Spice Caramel Popcorn in various ways:

  • As a Snack: Perfect for movie nights or as an afternoon treat.
  • Gift Idea: Package it in a cute jar for a thoughtful homemade gift.
  • Party Favors: Place in small bags for guests to take home after gatherings.

Conclusion: A Cozy Treat for All

Indulging in this Pumpkin Spice Caramel Popcorn is more than just enjoying a snack; it’s about embracing the warmth and comfort of the fall season. With its delightful flavors and satisfying crunch, it’s a treat that brings people together. So gather your ingredients, take your time in the kitchen, and enjoy the process of creating something truly special. Happy cooking!

Pumpkin Spice Caramel Popcorn

Prep Time 10 minutes
Cook Time 1 hour 10 minutes
Total Time 1 hour 20 minutes
Servings 8 cups
Calories 2500
A deliciously spiced caramel popcorn treat perfect for fall gatherings or cozy nights.

Ingredients

Main

  • 12 cups plain popcorn (freshly popped)
  • 1 cup cashews
  • 1 cup pecan halves
  • 1 cup unsalted butter
  • 2 cups brown sugar
  • 3/4 cup light corn syrup
  • 1 teaspoon kosher salt
  • 1 teaspoon baking soda
  • 1 teaspoon vanilla extract
  • 1/2 teaspoon pumpkin pie spice
  • 1/2 teaspoon ground cinnamon

Instructions 

  • Preheat oven to 250°F (120°C).
  • Combine popcorn, cashews, and pecans in a large baking pan.
  • Cook butter, brown sugar, corn syrup, and salt until boiling and reach 250°F (120°C).
  • Remove from heat, stir in baking soda, vanilla, pumpkin pie spice, and cinnamon.
  • Pour caramel over popcorn, stir gently, and bake for 1 hour, stirring every 15 minutes.
  • Cool completely before serving.

Notes

Store in an airtight container for freshness.
Calories: 2500kcal
Cost: $15
Course: Snack
Cuisine: American
Keyword: Popcorn

Discover the Joy of Cooking with One-Pot Cheesy Pumpkin and Sausage Pasta

Welcome to the comforting world of home cooking! This One-Pot Cheesy Pumpkin and Sausage Pasta is your ultimate solution for busy evenings when you crave something delicious yet straightforward. With a delightful blend of flavors, this dish combines the creaminess of pumpkin, the savory notes of Italian sausage, and the melt-in-your-mouth texture of Gouda cheese, all in one pot. It’s not just a meal; it’s a warm embrace for your taste buds!

In this guide, you’ll find everything you need to know about creating this cozy dish, from the ingredients to expert tips, and variations to make it your own. Let’s dive into the delightful experience of making your kitchen a heartwarming sanctuary.

Why You’ll Love This Recipe

  • Quick and Easy: Ready in under 30 minutes, this recipe is perfect for those busy nights when you want something flavorful without fuss.
  • One-Pot Wonder: Less cleanup means more time savoring your creation! Everything cooks together, allowing the flavors to meld beautifully.
  • Seasonal Comfort: The addition of pumpkin gives this dish a delightful autumnal twist—perfect for cozy dinners.
  • Kid-Friendly: With its creamy texture and savory sausage, this pasta dish is a hit with little ones and adults alike.
  • Customizable: Easily adjust ingredients and spices to suit your taste or dietary needs, creating a unique dish every time.

Ingredients Breakdown

To create your One-Pot Cheesy Pumpkin and Sausage Pasta, gather the following ingredients:

  • 11 ounces al fresco Sweet Italian chicken sausage
  • 12 ounces penne pasta
  • 1 cup half and half (fat-free option available)
  • 1 cup pumpkin puree (canned or homemade)
  • 1 cup water
  • 1 cup Gouda cheese, shredded
  • 1 teaspoon salt
  • 1/2 teaspoon pepper
  • Optional: Chopped cilantro and shredded Parmesan cheese for garnish.

**Substitutions**: If you can’t find al fresco chicken sausage, feel free to use any type of Italian sausage, turkey sausage, or even a plant-based alternative for a vegetarian option. For the cheese, while Gouda is recommended for its creaminess, you can use mozzarella or cheddar as delicious alternatives.

Step-by-Step Instructions

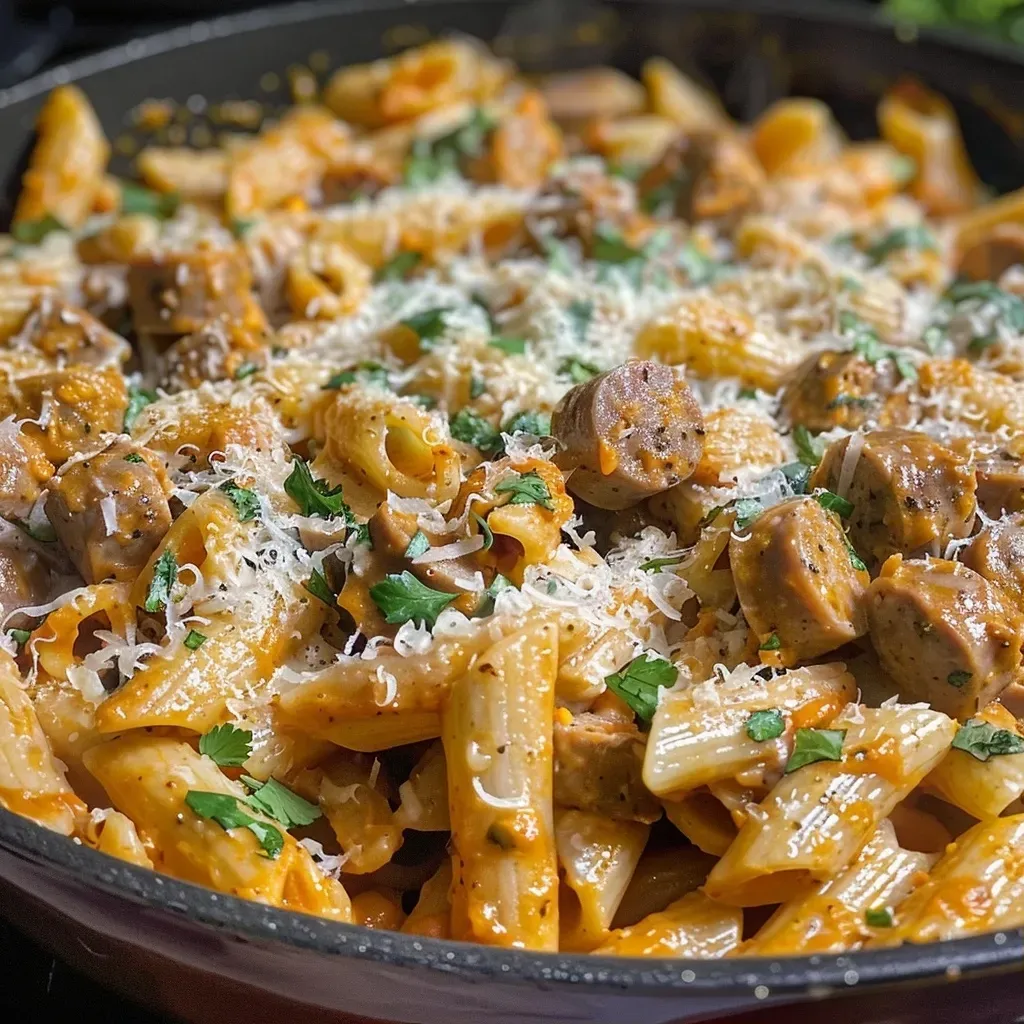
Side view of creamy pasta dish featuring pumpkin and Italian sausage in a bowl.

Follow these simple steps to create your dish:

  1. In a pot over medium heat, brown the chicken sausage for about 3 minutes until it’s nicely cooked and slightly crispy.
  2. Add in the penne pasta, pumpkin puree, half and half, water, salt, and pepper. Stir to combine.
  3. Bring the mixture to a boil, then reduce the heat to a simmer. Cover and cook for 15 minutes or until the pasta is tender.
  4. Once the pasta is cooked, fold in the Gouda cheese until it melts beautifully into the sauce.
  5. Garnish with cilantro and Parmesan cheese, if desired, before serving.

This simple yet delightful method ensures that the pasta absorbs the rich flavors of the sauce while keeping the dish creamy and comforting.

Pro Tips for Success

  • Don’t Rush the Browning: Allow the sausage to brown well to develop a deeper flavor base.
  • Stir Occasionally: While cooking, give the pot a gentle stir now and then to prevent sticking.
  • Adjust Consistency: If the sauce is too thick, add a splash more water or half and half to achieve your desired creaminess.
  • Season to Taste: Feel free to add extra spices like garlic powder or red pepper flakes for a flavor boost.
  • Use Fresh Ingredients: Fresh herbs can elevate the dish—try adding some thyme or sage for a lovely aromatic touch.
  • Don’t Overcook the Pasta: Keep an eye on the pasta; you want it perfectly al dente!
  • Let It Rest: Allow the dish to sit for a few minutes before serving to help the flavors meld together.
  • Double the Recipe: This dish is perfect for leftovers—make a larger batch for easy meals throughout the week!

Common Mistakes and Troubleshooting

Cooking can sometimes lead to unexpected situations. Here are a few common mistakes to avoid:

  • Too Much Liquid: If your sauce is too watery, let it simmer uncovered for a few more minutes to thicken.
  • Burnt Sausage: If the sausage is browning too quickly, reduce the heat to medium-low to prevent burning.
  • Sticking Pasta: Ensure you’re stirring occasionally to keep the pasta from sticking to the bottom of the pot.
  • Cheese Clumping: If the cheese clumps instead of melting, remove the pot from heat and stir gently until smooth.

Variations to Try

Feel free to get creative with your One-Pot Cheesy Pumpkin and Sausage Pasta! Here are some variations:

  • Vegetarian Option: Substitute sausage with sautéed mushrooms and spinach for a hearty, meatless version.
  • Spicy Kick: Add diced jalapeños or crushed red pepper flakes to spice up your dish.
  • Extra Veggies: Incorporate diced bell peppers or zucchini for added nutrition and flavor.
  • Herb-Infused: Mix in fresh herbs like basil or parsley at the end for a burst of freshness.

Storage and Make-Ahead Instructions

This pasta dish can be made ahead of time and stored in the refrigerator for up to three days. To reheat, simply warm it on the stove, adding a splash of water or half and half to loosen the sauce. You can also freeze leftovers for up to three months. When ready to enjoy, thaw overnight in the refrigerator and reheat as instructed.

Comprehensive FAQ

  • Can I use fresh pumpkin instead of canned puree? Yes, just make sure to cook and puree it first.
  • Is this dish gluten-free? You can use gluten-free pasta to make this dish suitable for a gluten-free diet.
  • How do I make this recipe dairy-free? Substitute the half and half with a non-dairy milk and use a dairy-free cheese.
  • What can I serve with this pasta? A simple side salad or garlic bread pairs beautifully with this dish.
  • Can I make this in a slow cooker? Yes, combine all ingredients and cook on low for 4-6 hours, stirring occasionally.
  • What is the nutritional information for this dish? It varies based on specific ingredients, but it’s generally around 400 calories per serving.
  • Can I add protein? Absolutely! Cooked chicken or shrimp would be great additions.
  • How do I store leftovers? Store in an airtight container in the fridge for up to three days, or freeze for longer storage.

Nutritional Tips and Dietary Adaptations

This dish is not only comforting but can also be nutritious. Here are some tips:

  • Increase Fiber: Add more vegetables such as spinach or kale to boost fiber content.
  • Opt for Whole Grains: Use whole grain or legume-based pasta for added nutrition.
  • Control Portions: Serve with a side of steamed vegetables to maintain balance and control portions.

Equipment Recommendations

For this recipe, you’ll need:

  • Large Pot or Dutch Oven: Essential for cooking everything in one pot.
  • Wooden Spoon: Perfect for stirring without scratching your pot.
  • Measuring Cups and Spoons: Accurate measurements help ensure perfect results.

Serving Suggestions

This creamy pasta is delightful on its own but can be complemented with:

  • Crusty garlic bread for a comforting touch.
  • A fresh green salad dressed with a light vinaigrette.
  • Steamed seasonal vegetables for added nutrition.

Conclusion

Cooking is an art filled with love and warmth, and this One-Pot Cheesy Pumpkin and Sausage Pasta embodies that spirit perfectly. It’s a dish that not only satisfies the palate but also brings people together. Whether you’re making it for a family dinner or a cozy night in, it promises to be a comforting delight. Remember, the kitchen is a place of exploration and joy. So, get cooking, and enjoy every moment of it!

One Pot Cheesy Pumpkin and Sausage Pasta

Prep Time 10 minutes
Cook Time 20 minutes
Total Time 30 minutes
Servings 4 servings
Calories 650
A creamy, comforting pasta dish combining sweet Italian sausage, pumpkin, and Gouda cheese in one easy pot.

Ingredients

Meat

  • 11 ounces al fresco Sweet Italian chicken Sausage

Pasta

  • 12 ounces penne pasta

Dairy & Liquids

  • 1 cup half and half (fat free)
  • 1 cup pumpkin puree
  • 1 cup water
  • 1 cup Gouda cheese, shredded
  • 1 teaspoon salt
  • 0.5 teaspoon pepper

Optional Garnish

  • chopped cilantro and shredded parmesan cheese (for garnish)

Instructions 

  • Brown sausage in a pot over medium heat for 3 minutes.
  • Add pasta, pumpkin, half and half, water, salt, and pepper. Bring to a boil.
  • Reduce to a simmer, cover, and cook for 15 minutes until pasta is tender.
  • Stir in Gouda cheese until melted.
  • Garnish with cilantro and parmesan, if desired.

Notes

Use fresh cilantro and parmesan for best flavor.
Calories: 650kcal
Cost: $15
Course: Main Course
Cuisine: American
Keyword: Pasta, pumpkin, Sausage

As the crispness of autumn settles in, there’s something truly comforting about baking gluten-free pumpkin cookies. This delightful recipe melds the warm, rich flavors of pumpkin with a hint of sweetness, perfect for cozy gatherings or simply enjoying at home. In this article, you’ll discover not only how to create the best gluten-free pumpkin cookies but also valuable tips, variations, and answers to all your baking questions.

Why You’ll Love This Recipe

  • Comforting Flavors: These cookies bring together classic autumn flavors, enhancing any gathering with warmth and joy.
  • Easy to Make: With simple ingredients and straightforward steps, even novice bakers can enjoy success.
  • Gluten-Free Appeal: Perfect for those on gluten-free diets, these cookies ensure everyone can indulge.
  • Customizable Options: You can easily tweak the recipe to suit your taste preferences or dietary needs.
  • Perfect for Any Season: While ideal for fall, the comforting taste of these cookies can be enjoyed year-round.

Ingredient Breakdown and Substitutions

Understanding the ingredients is key to achieving the best results. Here’s a detailed look at each component:

  • Butter: 1/2 cup room temperature butter (dairy-free or regular). If you’re dairy-free, try using coconut oil or a plant-based butter alternative.
  • Brown Sugar: 1/2 cup light brown sugar adds moisture and depth. You can use coconut sugar for a healthier option.
  • White Sugar: 3/4 cup white sugar balances the flavors. Feel free to substitute half with maple syrup for extra moisture.
  • Pumpkin Puree: 1/2 cup pure pumpkin puree is essential for that rich flavor. Canned pumpkin is often recommended for consistency, but homemade works too.
  • Vanilla Extract: 2 teaspoons enhance the flavor profile. Always opt for pure vanilla extract for the best taste.
  • Gluten-Free All-Purpose Flour: 2 cups gluten-free all-purpose 1:1 baking flour is a must. Ensure it includes xanthan gum for better texture.
  • Baking Soda: 1 teaspoon helps the cookies rise perfectly.
  • Pumpkin Pie Spice: 2 1/4 teaspoons add a warm, spicy flavor. If unavailable, create a mix using cinnamon, nutmeg, and ginger.
  • Cinnamon: 1/4 teaspoon enhances the warmth. You can adjust the amount based on your taste preference.
  • Salt: 1/4 teaspoon balances sweetness.
  • Chocolate Chips: 1 cup chocolate chips for a delightful finish. Dark chocolate chips can add a richer flavor.

Step-by-Step Instructions

Now that you have your ingredients ready, let’s dive into the process:

  1. Preheat the oven: Set your oven to 350 degrees Fahrenheit (175 degrees Celsius) to get it ready for the cookies.
  2. Cream the Butter and Sugars: In a medium mixing bowl, add the butter and both sugars. Use an electric mixer to cream them together until well combined and light.
  3. Add Pumpkin and Vanilla: Mix in the pumpkin puree and vanilla extract until fully integrated.
  4. Combine Dry Ingredients: Gradually add in your dry ingredients (excluding the chocolate chips) and mix until a dough forms.
  5. Fold in Chocolate Chips: Gently fold in the chocolate chips with a spatula, ensuring they’re evenly distributed.
  6. Scoop the Dough: Line a baking sheet with parchment paper. Scoop out heaping tablespoons of dough, spaced a few inches apart. If you prefer smaller cookies, feel free to adjust the size!
  7. Bake: Place the cookies in the oven and bake for 13-18 minutes or until they are slightly golden brown on the edges and matte in the center.
  8. Cool and Serve: Allow the cookies to cool for at least 30 minutes before enjoying. For extra gooeyness, sprinkle a few chocolate chips on top as soon as they come out of the oven.

Pro Tips for Perfect Cookies

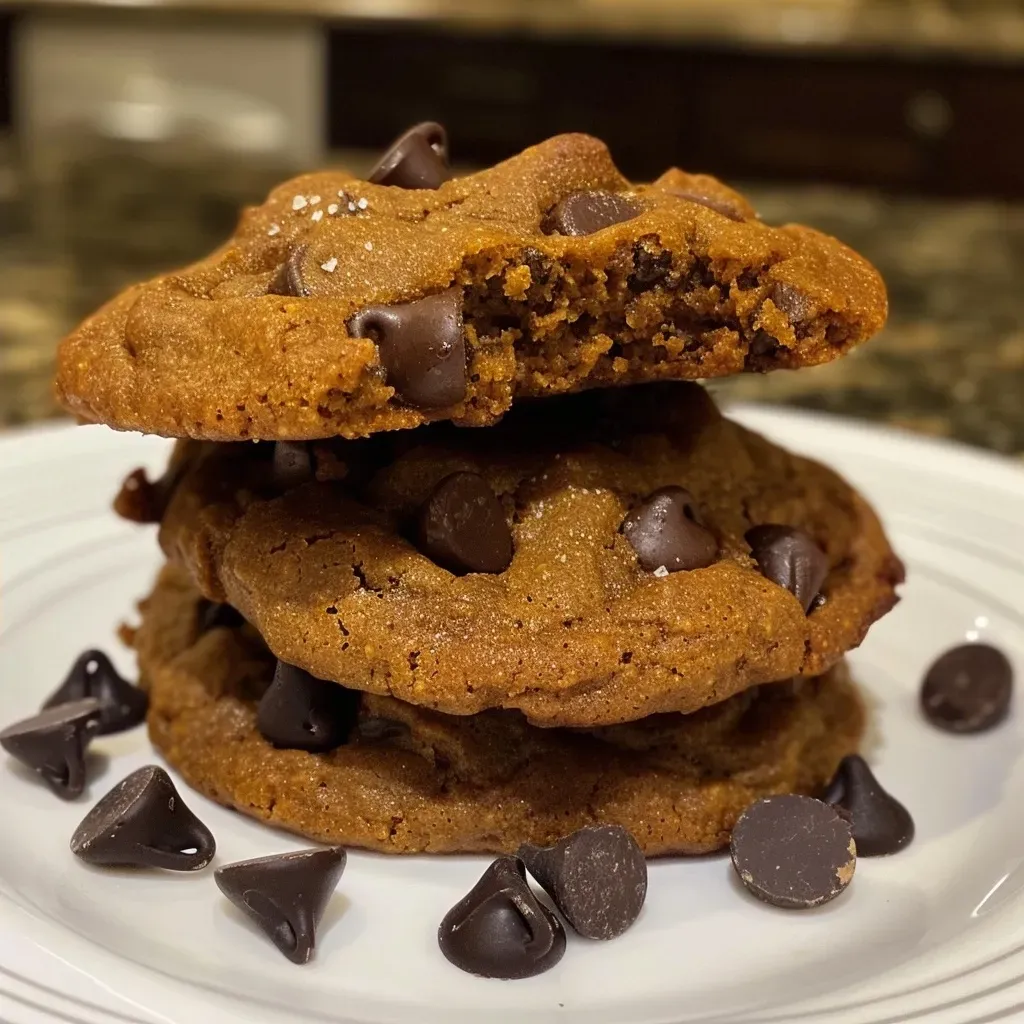
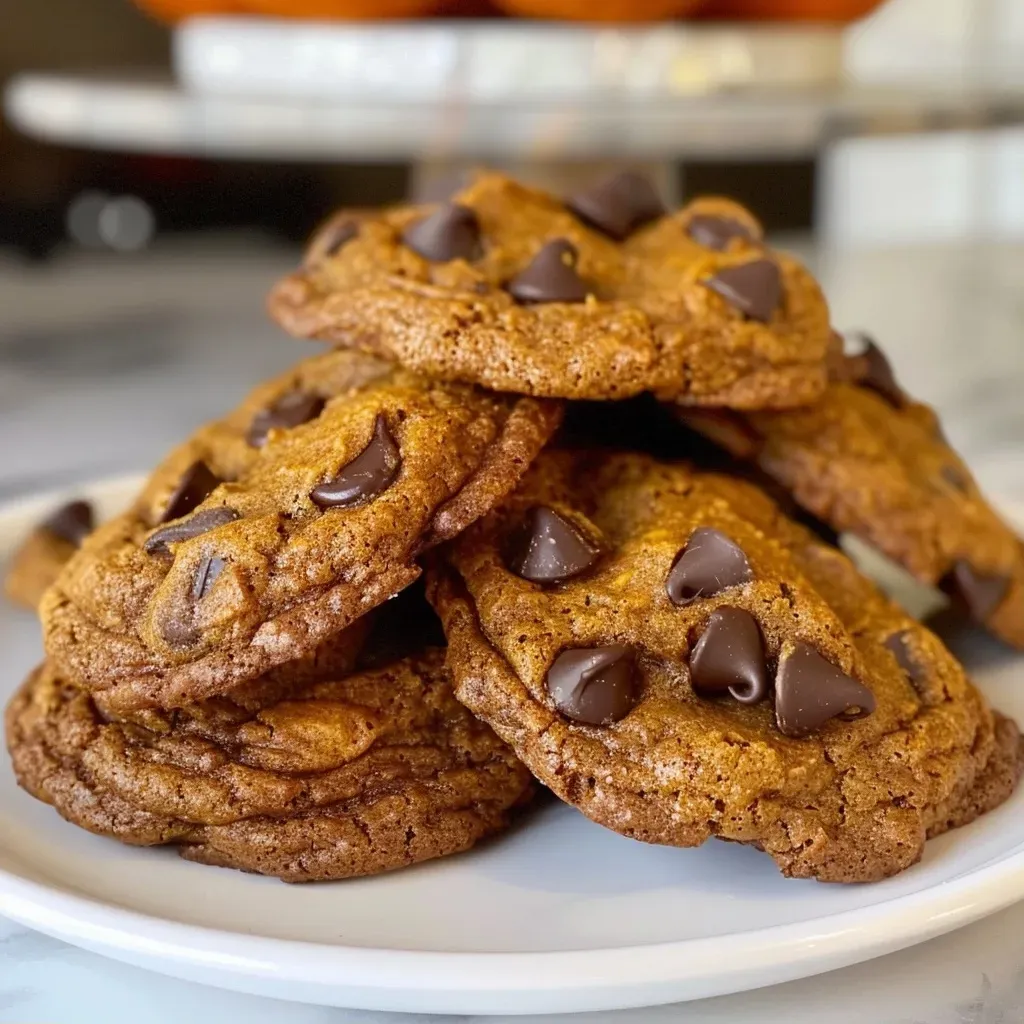
Side view of freshly baked gluten-free pumpkin cookies featuring a soft, chewy texture.
  • Room Temperature Ingredients: Ensure your butter is at room temperature for easier mixing and better texture.
  • Monitor Baking Time: Keep an eye on the cookies as they bake. For softer cookies, take them out as soon as they’re golden around the edges.
  • Chill the Dough: If you have time, chilling the dough for 30 minutes can enhance the flavors and prevent the cookies from spreading too much.
  • Use Quality Ingredients: Opt for high-quality chocolate chips and spices to elevate the flavor of your cookies.
  • Don’t Overmix: Once you add the dry ingredients, mix just until combined to keep the cookies tender.
  • Experiment with Flavors: Feel free to add nuts, dried fruit, or other spices to personalize your cookies.
  • Check for Doneness: If you’re unsure, press a cookie lightly; it should spring back slightly.
  • Store Properly: To keep cookies fresh, store them in an airtight container at room temperature for up to a week.

Common Mistakes and Troubleshooting

Even seasoned bakers can run into issues. Here are some common mistakes and how to avoid them:

  • Dough Too Sticky: If your dough feels overly sticky, you may need to add a bit more gluten-free flour until it reaches a manageable consistency.
  • Too Dry Cookies: Be careful not to overbake; remove the cookies when they’re slightly underbaked for a chewier texture.
  • Flat Cookies: If your cookies spread too much, consider chilling the dough before baking to help maintain their shape.
  • Uneven Baking: Rotate your baking sheet halfway through baking to ensure even heat distribution.

Delicious Variations

Make your gluten-free pumpkin cookies unique with these variations:

  • Spiced Pumpkin Cookies: Add 1/2 teaspoon of nutmeg or ginger for an extra kick of flavor.
  • Nutty Addition: Incorporate 1/2 cup of chopped walnuts or pecans for a delightful crunch.
  • Frosted Cookies: Top your cooled cookies with a cream cheese or vanilla glaze for an indulgent treat.
  • Pumpkin Oatmeal Cookies: Add 1 cup of gluten-free oats for a heartier texture and more fiber.

Storage and Make-Ahead Instructions

Want to enjoy your cookies later? Here’s how to store and prepare them in advance:

  • Room Temperature Storage: Store cookies in an airtight container at room temperature for up to 7 days.
  • Freezing Unbaked Dough: Portion out the dough into scoops on a baking sheet, freeze until solid, then transfer to a zip-top bag. Bake from frozen, adding a few extra minutes to the baking time.
  • Freezing Baked Cookies: Place cooled cookies in a single layer in a freezer-safe container, and they can last for up to 3 months.

Frequently Asked Questions

  • Can I use fresh pumpkin instead of canned? Yes, but ensure it’s pureed and drained properly to avoid excess moisture.
  • What gluten-free flour should I use? A 1:1 gluten-free flour blend works best, especially one that contains xanthan gum.
  • Can I make these cookies vegan? Absolutely! Substitute the butter with coconut oil and use flax eggs instead of regular eggs.
  • How can I make these cookies less sweet? Reduce the amount of white sugar used in the recipe.
  • What can I add for extra flavor? Consider adding nuts, dried fruits, or a sprinkle of sea salt on top.
  • How do I know when the cookies are done? They should be golden around the edges but still soft in the center.
  • Can I double the recipe? Yes, simply double all the ingredients and ensure you have enough baking sheets.
  • How do I prevent my cookies from spreading too much? Chill the dough before baking and ensure your butter is not too warm.

Nutritional Tips and Dietary Adaptations

These gluten-free pumpkin cookies can be tailored to suit various dietary needs:

  • Lower Sugar Option: Use a natural sweetener like stevia or monk fruit to reduce sugar content.
  • Increased Fiber: Add chia seeds or ground flaxseeds to boost fiber without altering the flavor.
  • Nut-Free Option: Ensure any chocolate chips used are nut-free and consider replacing nuts with seeds.

Essential Equipment Recommendations

To make your baking experience seamless, consider having the following equipment:

  • Mixing Bowls: A set of mixing bowls in various sizes for easy preparation.
  • Electric Mixer: While a whisk works, an electric mixer saves time and effort.
  • Baking Sheets: Invest in quality, non-stick or parchment-lined baking sheets for even baking.
  • Ice Cream Scoop: Use this for portioning out the dough uniformly.

Serving Suggestions

These gluten-free pumpkin cookies shine when served in various delightful ways:

  • Warm from the Oven: Enjoy them fresh out of the oven for a gooey texture.
  • With Coffee or Tea: Pair them with your favorite warm beverage for a cozy treat.
  • As a Dessert Platter: Serve alongside other seasonal treats for a delightful dessert spread.

Conclusion

Creating warm and wholesome gluten-free pumpkin cookies is not just about baking; it’s about crafting something that brings joy and comfort. Whether you’re enjoying them on a brisk autumn evening or sharing them with loved ones, these cookies will surely delight. Remember, cooking is about experimentation and joy, so embrace the process, and happy baking!

Gluten Free Pumpkin Cookies

Prep Time 10 minutes
Cook Time 15 minutes
Total Time 25 minutes
Servings 24 cookies
Calories 150
Delight in these soft, chewy gluten-free pumpkin cookies infused with warm spices and chocolate chips, perfect for fall treats or any time you crave a comforting dessert.

Ingredients

Dairy-Free & Regular Butter & Sugars

  • 1/2 cup room temperature butter (dairy free or regular)
  • 1/2 cup light brown sugar
  • 3/4 cup white sugar

Pumpkin & Vanilla

  • 1/2 cup pure pumpkin puree
  • 2 teaspoons vanilla extract

Dry Ingredients

  • 2 cups gluten free all purpose 1:1 baking flour
  • 1 teaspoon baking soda
  • 2 1/4 teaspoons pumpkin pie spice
  • 1/4 teaspoon cinnamon
  • 1/4 teaspoon salt
  • 1 cup chocolate chips

Instructions 

  • Preheat oven to 350°F (175°C).
  • Cream butter and sugars, then add pumpkin and vanilla.
  • Mix in dry ingredients, then fold in chocolate chips.
  • Scoop dough onto parchment-lined baking sheet and bake for 13-18 minutes.
  • Let cool 30 minutes before serving. Optional: add extra chocolate chips on top.

Notes

For softer cookies, slightly underbake and let cool.
Calories: 150kcal
Cost: $15
Course: Dessert
Keyword: cookies, Gluten-Free, pumpkin

Embrace the Flavors of Fall with Pumpkin Spice Protein Granola

As the leaves turn and the air gets crisp, there’s something truly special about the comforting flavors of fall, and what better way to celebrate than with a warm bowl of homemade pumpkin spice protein granola? This nourishing recipe combines the heartwarming essence of pumpkin spice with the wholesome goodness of protein-packed ingredients to create a breakfast or snack that not only delights your taste buds but also fuels your day.

This pumpkin spice protein granola is not just a treat; it’s a delightful way to start your morning or enjoy as a snack. With its rich flavors and satisfying crunch, this granola is perfect for those cozy autumn days. Let’s dive into this delightful recipe that promises comfort and nourishment, bringing joy to your kitchen and your table.

Why You’ll Love This Recipe

This pumpkin spice protein granola offers more than just flavor. Here are some reasons to fall in love with it:

  • Healthful Ingredients: Made with wholesome oats, seeds, and pumpkin, this granola provides essential nutrients while keeping sugar levels balanced.
  • Protein Boost: With added protein powder, it’s perfect for fueling your mornings or recovering after workouts.
  • Versatile Enjoyment: Enjoy it as a breakfast cereal, a topping for yogurt, or a crunchy snack on its own.
  • Easy to Make: With simple steps, you can whip up a batch in under an hour.
  • Customizable: Feel free to adjust the spices or add your favorite nuts and dried fruits to personalize your blend.

Ingredients Breakdown

To create this delicious pumpkin spice protein granola, you’ll need the following ingredients:

  • 3 cups gluten-free rolled oats: A hearty base that provides fiber and texture.
  • ¾ cup pumpkin seeds: Packed with nutrients, these seeds add crunch and a boost of healthy fats.
  • 1 teaspoon pumpkin spice: A blend of warm spices that embodies the essence of fall.
  • 1 teaspoon cinnamon: Adds warmth and depth to the granola.
  • ¼ teaspoon salt: Enhances the flavors and balances sweetness.
  • 2 scoops vanilla protein powder: Provides the protein boost you need to keep you satisfied.
  • 1/3 cup maple syrup: Natural sweetness that pairs perfectly with the spices.
  • ¼ cup coconut oil: Adds richness and helps bind the granola together.
  • 1/3 cup canned pumpkin: Gives the granola its signature fall flavor and moisture.
  • 2 teaspoons vanilla extract: Enhances the overall flavor profile.

Step-by-Step Instructions

Side view of crunchy granola mixed with pumpkin seeds and spices, arranged appetizingly.

Follow these simple steps to make your pumpkin spice protein granola:

  1. Preheat and Prepare: Preheat your oven to 325 degrees F. Line a baking sheet with parchment paper and lightly spray it with non-stick spray.
  2. Mix Dry Ingredients: In a large bowl, combine the oats, pumpkin seeds, pumpkin spice, cinnamon, and salt. Stir until well mixed.
  3. Heat Wet Ingredients: In a separate microwave-safe bowl, combine the maple syrup, coconut oil, canned pumpkin, and vanilla extract. Heat for about 30 seconds, stir, and then heat for another 30 seconds until everything is well combined.
  4. Add Protein Powder: Stir the protein powder into the warm mixture until smooth and fully incorporated.
  5. Combine Mixtures: Pour the liquid mixture over the oat mixture, stirring well to ensure everything is evenly coated.
  6. Spread and Bake: Spread the granola mixture evenly onto the prepared baking sheet. Bake for 40-44 minutes, stirring twice during baking to achieve an even golden color.

Pro Tips for Perfect Granola

To ensure your pumpkin spice protein granola turns out perfectly, consider these expert tips:

  • Stirring is Key: Stir the granola every 15 minutes while baking to prevent uneven browning.
  • Customize the Sweetness: If you prefer a sweeter granola, add an extra tablespoon of maple syrup.
  • Use Fresh Ingredients: Ensure your spices and oats are fresh to maximize flavor.
  • Experiment with Mix-ins: Consider adding nuts, dried fruits, or chocolate chips after baking for added flavor and texture.
  • Store Properly: Keep granola in an airtight container to maintain its crunch and freshness.
  • Cool Completely: Allow the granola to cool completely on the baking sheet before storing to prevent sogginess.
  • Mind the Temperature: Baking at too high a temperature can cause the granola to burn; stick to 325°F for best results.
  • Try Different Protein Powders: Experiment with different flavors of protein powder to find your favorite combination.

Common Mistakes and Troubleshooting

Even the best recipes can come with a few hiccups. Here’s how to troubleshoot:

  • Granola is Too Chewy: Ensure you’ve baked it long enough; the longer it bakes, the crunchier it will become.
  • Burnt Granola: If you notice it browning too quickly, lower the oven temperature slightly.
  • Flavor is Lacking: Always taste and adjust spices according to your preference before baking.
  • Granola Clumps Together: If you prefer clumpy granola, press it down firmly when spreading on the baking sheet.

Delicious Variations

Feel free to get creative with these variations of your pumpkin spice protein granola:

  • Nutty Delight: Add ½ cup chopped walnuts or pecans for added crunch and healthy fats.
  • Fruitful Twist: Mix in ½ cup dried cranberries or raisins after baking for a sweet touch.
  • Chocolate Lovers: Incorporate ½ cup dark chocolate chips or cacao nibs for a decadent flavor.
  • Spicy Kick: Add a pinch of cayenne pepper to the spice mix for a subtle heat.

Storage and Make-Ahead Instructions

To keep your granola fresh:

  • Storing: Store the cooled granola in an airtight container at room temperature for up to 2 weeks.
  • Freezing: For longer storage, freeze granola in an airtight bag for up to 3 months.
  • Make-Ahead: Prepare a batch on the weekend to enjoy throughout the week, making breakfast or snacking effortless.

Frequently Asked Questions

Here are some common questions about making pumpkin spice protein granola:

  • Can I use regular oats? Yes, but ensure they are gluten-free if you have dietary restrictions.
  • How can I make this granola vegan? Substitute the honey with agave syrup and use a plant-based protein powder.
  • What can I pair this granola with? Yogurt, milk, or a smoothie bowl are all excellent choices!
  • Can I add fresh pumpkin? Fresh pumpkin can be used, but it will change the moisture content; adjust accordingly.
  • Is this granola suitable for kids? Absolutely! It’s a healthy treat that children will love.
  • How do I make it less sweet? Reduce the amount of maple syrup used in the recipe.
  • Can I use other types of seeds? Yes, feel free to substitute with sunflower seeds or chia seeds.
  • How long does it take to bake? Approximately 40-44 minutes, stirring occasionally.

Nourishing Flavors for a Healthy Crunch Time!

With its delightful combination of spices, wholesome ingredients, and protein boost, this pumpkin spice protein granola is a must-try for anyone looking to enjoy the flavors of fall. Not only is it easy to prepare, but it also makes for a nutritious snack or breakfast option that can be tailored to your liking. So, roll up your sleeves, gather your ingredients, and let’s celebrate the season with this comforting and delicious granola. Happy cooking! 🍂

Pumpkin Spice Protein Granola

Prep Time 10 minutes
Cook Time 40 minutes
Total Time 50 minutes
Servings 8 servings
Calories 350
A delicious and nutritious homemade granola infused with pumpkin spice and protein, perfect for a healthy snack or breakfast.

Ingredients

Dry ingredients

  • 3 cups gluten-free rolled oats
  • ¾ cup pumpkin seeds
  • 1 teaspoon pumpkin spice
  • 1 teaspoon cinnamon
  • ¼ teaspoon salt

Wet ingredients

  • 2 scoops vanilla protein powder
  • 1/3 cup maple syrup
  • ¼ cup coconut oil
  • 1/3 cup canned pumpkin
  • 2 teaspoons vanilla extract

Instructions 

  • Preheat oven to 325°F (160°C). Mix dry ingredients in a bowl.
  • Combine wet ingredients in a microwave-safe bowl and heat for 30 seconds, then stir and heat another 30 seconds.
  • Stir protein powder into the liquid mixture until smooth.
  • Pour wet mixture over dry ingredients and coat evenly.
  • Spread on a sheet pan and bake for 40-44 minutes, stirring twice.

Notes

Store in an airtight container for up to two weeks.
Calories: 350kcal
Cost: $15
Course: Breakfast
Cuisine: American
Keyword: Granola, Protein, pumpkin