
Author

Noah

Browsing

Discover the Joy of Roasted Parmesan Cauliflower Bites

Welcome to a delightful culinary journey where simplicity meets flavor! Today, we’re diving into a recipe that not only satisfies your taste buds but also brings warmth and comfort to your dining table: Roasted Parmesan Cauliflower Bites. This dish is perfect as a snack or a side, featuring crispy, golden cauliflower florets coated in a rich blend of parmesan and spices. Let’s explore why you’ll love this recipe, how to make it, and some tips to elevate your cooking experience!

Why You’ll Love This Recipe

This recipe is more than just a dish; it’s an experience. Here’s why you’ll crave these roasted cauliflower bites:

  • Quick and Easy Preparation: With minimal prep time, this recipe is perfect for busy weeknights. You can have delicious bites on your table in under 40 minutes.
  • Flavorful and Versatile: The combination of parmesan, garlic, and paprika creates a rich flavor profile that can be adjusted to your liking. Add more spices or herbs to customize it!
  • Health-Conscious Choice: Cauliflower is a low-calorie vegetable packed with nutrients. These bites are a healthier alternative to traditional snacks.
  • Perfect for Any Occasion: Whether it’s a casual family dinner, a festive gathering, or a movie night, these bites fit right in.
  • Kid-Friendly and Adult-Approved: Even picky eaters will enjoy these crispy bites, making them a great way to introduce more vegetables into your meals.

Ingredients for Roasted Parmesan Cauliflower Bites

Here’s what you’ll need to make these delicious bites:

  • 1 medium head of cauliflower: The star of the dish, fresh and firm.
  • 2 tablespoons extra virgin olive oil: For roasting and adding richness.
  • ½ cup freshly grated parmesan cheese: Adds a savory, cheesy flavor that elevates the dish.
  • 1 teaspoon garlic powder: Provides a subtle garlic flavor that complements the cheese.
  • 1 teaspoon paprika: Adds a hint of smokiness and color.
  • Salt to taste: Enhances all the flavors.

Feel free to adjust these ingredients or substitute based on your preferences. For example, you can use nutritional yeast for a vegan option instead of parmesan or add chili flakes for a spicy kick.

Step-by-Step Instructions for Crispy Roasted Parmesan Cauliflower Bites
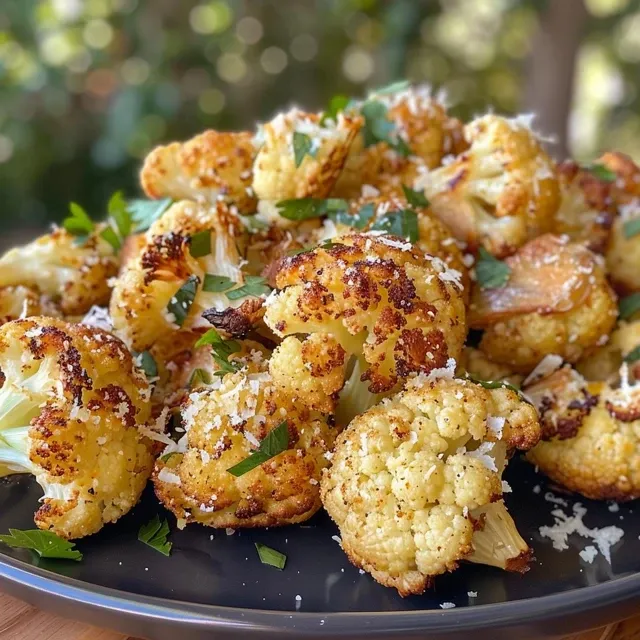
Side view of golden brown roasted cauliflower pieces coated in cheese.

Follow these straightforward steps to create your roasted parmesan cauliflower bites:

  1. Preheat your oven to 425°F (220°C) for optimal roasting.
  2. Prepare your baking sheet: Line a baking sheet with parchment paper or lightly grease it to prevent sticking.
  3. Toss cauliflower florets: In a large bowl, mix the cauliflower florets with olive oil until well-coated.
  4. Add seasonings: Sprinkle garlic powder, paprika, and salt over the florets, then mix thoroughly to ensure even coverage.
  5. Incorporate parmesan cheese: Add the grated parmesan and toss again until all the florets are evenly coated.
  6. Spread on the baking sheet: Arrange the cauliflower in a single layer to allow for proper roasting.
  7. Roast in the oven: Bake for 25-30 minutes, or until the cauliflower is golden brown and crispy.

Pro Tips for the Best Results

To take your roasted parmesan cauliflower bites to the next level, consider these expert tips:

  • Don’t overcrowd the baking sheet: Give each floret enough space to ensure they roast evenly and become crispy.
  • Experiment with spices: Feel free to mix in your favorite herbs or spices like Italian seasoning or lemon zest for added flavor.
  • Use fresh parmesan: Freshly grated parmesan melts better and offers a more robust flavor than pre-grated options.
  • Check for doneness: Ovens vary, so keep an eye on your cauliflower during the last few minutes of roasting.
  • Serve immediately: These bites are best enjoyed fresh out of the oven when they’re crispy.
  • Garnish for flair: Top with fresh herbs like parsley or chives after roasting for an extra pop of color and flavor.
  • Try different cheeses: Mix in other cheese varieties like cheddar or feta for a unique twist!
  • Adjust cooking time for larger florets: If your florets are larger, extend the cooking time slightly to ensure they are tender inside.

Common Mistakes and Troubleshooting

Here are some common pitfalls to avoid while making roasted parmesan cauliflower bites:

  • Florets too big: Cutting florets too large can lead to uneven cooking. Aim for bite-sized pieces.
  • Not preheating the oven: Always preheat your oven to ensure even cooking and crispiness.
  • Skipping the parchment paper: Using parchment paper helps prevent sticking and makes cleanup easier.
  • Overcrowding the baking sheet: Be sure to spread the cauliflower out; otherwise, they’ll steam rather than roast.

Variations on Roasted Parmesan Cauliflower Bites

Get creative with these tasty variations:

  • Buffalo Cauliflower Bites: Toss the cooked cauliflower in buffalo sauce after roasting for a spicy kick.
  • Herb-Crusted Cauliflower: Add chopped fresh herbs like thyme or rosemary to the coating for an aromatic flavor.
  • Cheesy Italian Cauliflower: Mix in some Italian seasoning with the parmesan for a Mediterranean twist.
  • Asian-Inspired Cauliflower: Use sesame oil instead of olive oil and sprinkle with sesame seeds before serving.

Make Ahead and Storage Instructions

These roasted parmesan cauliflower bites can be made ahead of time and stored:

  • Make ahead: You can prep the cauliflower and seasonings up to a day in advance. Just store them in an airtight container in the fridge until you’re ready to roast.
  • Storage: Store any leftovers in an airtight container in the refrigerator for up to 3 days. Reheat in the oven at 350°F (175°C) for best results.
  • Freezing: You can freeze the uncooked, seasoned cauliflower florets. Place them in a single layer on a baking sheet until frozen, then transfer to a freezer bag. They can be roasted directly from the freezer, adding a few extra minutes to the cooking time.

Comprehensive FAQ

Here are some frequently asked questions about roasted parmesan cauliflower bites:

  • Can I use frozen cauliflower? Yes, frozen cauliflower can be used, but make sure to thaw and drain excess moisture before seasoning.
  • How can I make this dish gluten-free? This recipe is naturally gluten-free! Just ensure that any seasoning or cheese you use is also gluten-free.
  • What can I serve with these bites? They pair wonderfully with dips like ranch or garlic aioli, or as a side dish with grilled meats.
  • Can I use other vegetables? Absolutely! This method works well with broccoli, Brussels sprouts, or even carrots.
  • What if I don’t have parmesan? You can substitute with other hard cheeses like pecorino or nutritional yeast for a vegan option.
  • How do I reheat leftovers? Reheat in the oven to maintain crispiness, avoiding the microwave.
  • Can I make these bites spicy? Yes! Add red pepper flakes or cayenne pepper to the seasoning mix for some heat.
  • How do I know when the cauliflower is done? Look for a golden brown color and a crispy texture. You can also check tenderness with a fork.

Nutritional Tips and Dietary Adaptations

For a healthier approach, consider these adaptations:

  • Low-carb option: This recipe is already low in carbs, making it suitable for keto diets.
  • Vegan adaptation: Replace parmesan cheese with nutritional yeast and use a plant-based oil for coating.
  • Calorie-conscious choice: Use less olive oil or a spray oil for a lighter version.
  • Add fiber: Incorporate other vegetables like bell peppers or zucchini for more nutrients.

Recommended Equipment

To make this recipe, you’ll need:

  • Baking sheet: A sturdy baking sheet allows for even roasting.
  • Parchment paper: Helps with easy cleanup and prevents sticking.
  • Mixing bowl: For tossing the cauliflower with oil and seasonings.
  • Sharp knife: For cutting the cauliflower into bite-sized florets.

Serving Suggestions

Enjoy these roasted parmesan cauliflower bites in various ways:

  • As an appetizer: Serve with a dipping sauce of your choice.
  • As a side dish: Complement grilled chicken or fish for a balanced meal.
  • In a salad: Toss them into a fresh salad for added texture and flavor.
  • In wraps: Use them as a filling in wraps along with fresh veggies.

With this comprehensive guide, you’re all set to create mouthwatering roasted parmesan cauliflower bites that your friends and family will love. Remember, cooking is about enjoying the process, so take your time and savor every moment in the kitchen. Happy cooking!

Roasted Parmesan Cauliflower Bites

Prep Time 10 minutes
Cook Time 30 minutes
Total Time 40 minutes
Servings 4 servings
Calories 180
Enjoy these crispy, cheesy cauliflower bites that make a perfect snack or side dish.

Ingredients

Cauliflower

  • 1 medium head cauliflower
  • 2 tablespoons extra virgin olive oil
  • ½ cup freshly grated parmesan cheese
  • 1 teaspoon garlic powder
  • 1 teaspoon paprika
  • Salt to taste salt (Adjust as preferred)

Instructions 

  • Preheat oven to 425°F (220°C). Line a baking sheet.
  • Toss cauliflower with olive oil, then sprinkle garlic powder, paprika, and salt.
  • Add parmesan and toss to coat evenly.
  • Spread on baking sheet and roast for 25-30 minutes until golden and crispy.
Notes

For extra crispiness, broil for an additional 2 minutes.
Calories: 180kcal
Cost: $12
Course: Appetizer, Side Dish
Cuisine: American
Keyword: Cauliflower, Cheese

Start Your Day Right: The Ultimate Vanilla Berry Protein Smoothie Bowl

Welcome to your new favorite breakfast! This Vanilla Berry Protein Smoothie Bowl is not just a meal; it’s a celebration of flavor and nutrition. Packed with fresh berries, creamy yogurt, and a scoop of protein powder, this bowl is designed to keep you energized and satisfied throughout your busy day. Whether you’re looking for a quick breakfast or a post-workout boost, this smoothie bowl has got you covered. Let’s dive into why you’ll love this recipe!

Why You’ll Love This Recipe

This smoothie bowl is more than just a pretty dish; it offers numerous benefits that make it a standout choice:

  • Quick and Convenient: Ready in less than 10 minutes, making it perfect for busy mornings.
  • Customizable: Easily adjust ingredients based on your dietary needs or preferences.
  • Nutrient-Dense: Packed with vitamins, minerals, and antioxidants from fresh berries.
  • Protein-Powered: A scoop of protein powder keeps you full and supports muscle recovery.
  • Visually Appealing: The vibrant colors of the berries and toppings make for an Instagram-worthy breakfast.

Ingredient Breakdown

Let’s take a closer look at what goes into this delicious smoothie bowl:

  • Frozen mixed berries (1 to 1.5 cups): Use a blend of strawberries, blueberries, and raspberries for a burst of flavor and antioxidants.
  • Frozen banana (1 small, in chunks): Adds natural sweetness and creaminess to the base.
  • Vanilla protein powder (1 scoop): Choose between whey or plant-based for your protein needs.
  • Greek yogurt (1/3 to 1/2 cup): Use plain or vanilla for extra creaminess and protein; opt for dairy-free yogurt if needed.
  • Milk of choice (1/4 to 1/2 cup): Almond, oat, or dairy milk works well—choose based on your preference.
  • Chia seeds (1 tablespoon): Excellent source of fiber and omega-3 fatty acids; they help thicken the bowl.
  • Nut butter (1 tablespoon): Almond, peanut, or cashew butter adds healthy fats and flavor.
  • Vanilla extract (1/2 teaspoon): Enhances the overall flavor profile.
  • Optional sweetener (1–2 teaspoons): Maple syrup, honey, or stevia can be added to taste.
  • Toppings: Sliced banana, fresh berries, granola, coconut flakes, cacao nibs, or hemp seeds for added crunch and nutrition.

Pro Tips for the Perfect Smoothie Bowl

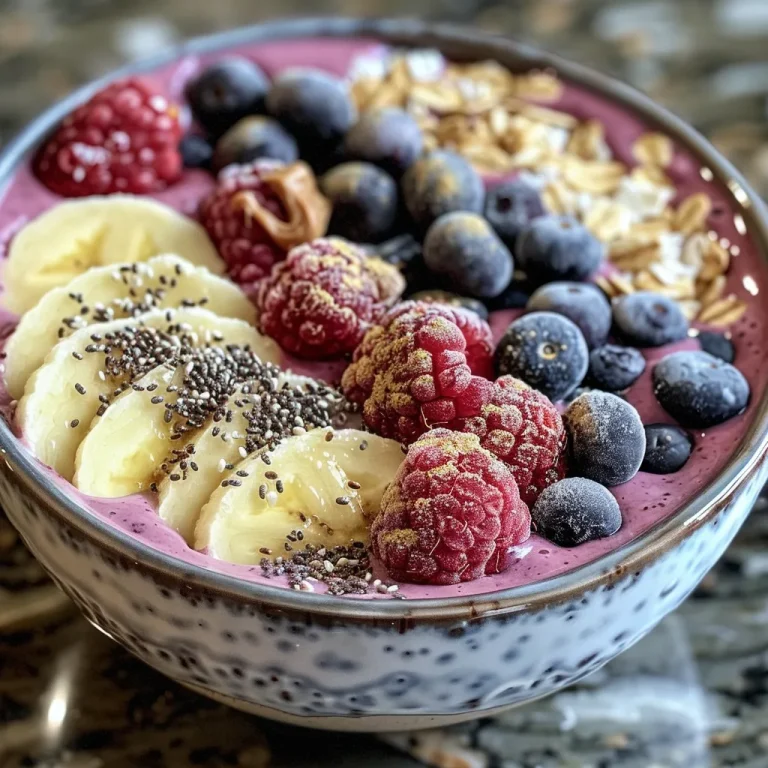
Thick smoothie bowl made with mixed berries, banana, and protein powder, garnished with nuts and seeds.

Here are some expert insights to ensure your smoothie bowl turns out perfectly every time:

  • Start with the right base: Always add the frozen fruits first in the blender for a thick texture.
  • Blend with care: Use a low setting to pulse the ingredients, gradually adding liquid until the desired consistency is reached.
  • Adjust sweetness: Taste before serving and add sweetener as needed, especially if using tart berries.
  • Chill your bowl: A chilled bowl helps maintain the thickness of your smoothie.
  • Experiment with toppings: Mix and match toppings to create new flavor combinations.
  • Make it a meal: Add oats or quinoa for extra substance if you want a heartier bowl.
  • Prep ahead: Freeze individual portions of fruit for a quick grab-and-blend in the morning.
  • Watch your liquid: Start with less milk; you can always add more to reach the right consistency.
  • Use a tamper: If using a high-powered blender, a tamper can help push ingredients down for a smooth blend.

Common Mistakes and Troubleshooting

Even the most seasoned cooks can make mistakes. Here are some common pitfalls and how to avoid them:

  • Too thin or runny: If your smoothie bowl is too thin, add more frozen fruit or a scoop of protein powder to thicken it.
  • Not enough flavor: If your smoothie tastes bland, increase the amount of vanilla extract or add a touch of sweetener.
  • Over-blending: Blend just until smooth; over-blending can warm the mixture and make it lose its creamy texture.
  • Too much liquid: Start with a smaller amount of milk to maintain that thick, enjoyable consistency.

Delicious Variations

Feeling adventurous? Here are some tasty variations to try:

  • Chocolate Banana Smoothie Bowl: Add a scoop of chocolate protein powder and top with cacao nibs.
  • Tropical Twist: Use frozen mango and pineapple, and top with shredded coconut.
  • Green Power Bowl: Add a handful of spinach or kale for a nutrient boost without altering the flavor.
  • Nutty Delight: Stir in a scoop of almond butter into the mix for an extra creamy, nutty finish.

Storage and Make-Ahead Instructions

This smoothie bowl is best enjoyed fresh, but you can prepare components in advance:

  • Make-ahead: Pre-measure and freeze your fruits in individual bags for easy blending.
  • Storage: If you have leftovers, store them in an airtight container in the fridge for up to 24 hours. The bowl may thin out, so consider adding more frozen fruits when you re-blend.

Comprehensive FAQ

Here are some common questions about smoothie bowls:

  • Can I use fresh berries instead of frozen? Yes, but you may need to add ice to achieve the desired thickness.
  • Is this recipe gluten-free? Absolutely! All ingredients listed are gluten-free.
  • Can I use a different type of protein powder? Yes, feel free to substitute with your favorite protein powder.
  • What can I use instead of yogurt? You can use a dairy-free yogurt alternative or silken tofu for a creamy texture.
  • How can I make this smoothie bowl vegan? Use plant-based protein powder and dairy-free yogurt and milk.
  • What toppings do you recommend? Sliced fruits, nuts, seeds, and granola are all excellent choices.
  • How do I make this recipe lower in calories? Reduce the amount of nut butter and sweetener, and use less yogurt.
  • Can I meal prep smoothie bowls? Yes, prepare the base and freeze it in individual servings for quick breakfasts.

Nutritional Tips and Dietary Adaptations

To ensure this smoothie bowl aligns with your dietary goals, consider the following:

  • Protein Needs: Choose a protein powder that fits your dietary needs—plant-based for vegans or whey for non-vegans.
  • Low Sugar Option: Limit sweeteners and use naturally sweet fruits like ripe bananas.
  • Healthy Fats: Incorporate nut butters or seeds for added nutrition and satiety.
  • Fiber Boost: Add flaxseeds or oats for additional fiber and nutrients.

Equipment Recommendations

To make your smoothie bowl preparation a breeze, consider these essential tools:

  • High-Powered Blender: Invest in a quality blender for smooth blending and texture.
  • Measuring Cups and Spoons: Accurate measurements ensure consistent results.
  • Chilled Serving Bowls: Keep your smoothie thick by serving in chilled bowls.

Serving Suggestions

Enhance your smoothie bowl experience with these serving ideas:

  • Pair with Whole Grains: Serve alongside whole grain toast or oatmeal for a balanced meal.
  • Add a Side of Protein: Include a hard-boiled egg or a small serving of nuts for added protein.
  • Garnish Creatively: Use edible flowers or fresh mint leaves for an aesthetic touch.

In conclusion, the Vanilla Berry Protein Smoothie Bowl is an ideal way to kickstart your day with flavor and nutrition. With its simple preparation and endless customization options, you can enjoy a delightful breakfast that supports your lifestyle. Remember to experiment and find your perfect blend, and most importantly, enjoy the process of creating delicious food in your own kitchen!

Vanilla Berry Protein Smoothie Bowl (Simple, Thick & Meal-Worthy) - A Creamy, Satisfying Breakfast

Prep Time 10 minutes
Total Time 10 minutes
Servings 2 servings
Calories 350
This creamy smoothie bowl combines berries, banana, and protein for a nutritious and satisfying breakfast. Perfect for a quick, thick, and delicious start to your day.

Ingredients

Fruits

  • 1 cup Frozen mixed berries
  • 1 small Frozen banana (in chunks)

Protein & Dairy

  • 1 scoop Vanilla protein powder (whey or plant-based)
  • 1/3 to 1/2 cup Greek yogurt (plain or vanilla)

Liquid

  • 1/4 to 1/2 cup Milk of choice (almond, oat, dairy, etc.)
  • 1 tablespoon Chia seeds
  • 1 tablespoon Nut butter (almond, peanut, or cashew)
  • 1/2 teaspoon Vanilla extract

Optional Sweetener

  • 1–2 teaspoons Maple syrup, honey, or stevia

Toppings

  • Sliced banana, fresh berries, granola, coconut flakes, cacao nibs, hemp seeds (for topping)

Instructions 

  • Add frozen berries and banana to your blender.
  • Add protein powder and Greek yogurt, then blend.
  • Add chia seeds, nut butter, vanilla extract, and liquid. Blend until thick and smooth.
  • Adjust sweetness with honey or syrup if needed. Serve immediately topped with your favorite toppings.

Notes

Use frozen fruit for a thicker, creamier texture and customize toppings for added flavor and nutrients.
Calories: 350kcal
Cost: $15
Course: Breakfast
Keyword: Berry, Protein, Smoothie

Start Your Day Right: The Joy of Avocado Toast with Egg

There’s something soothing about starting your day with a well-prepared meal that feels both nourishing and comforting. Enter the delightful combination of avocado toast with eggs—a breakfast choice that is not only delicious but also incredibly versatile. With creamy avocado spread over your favorite bread topped with perfectly cooked eggs, you create a satisfying dish that embodies simplicity and flavor. This guide will walk you through every step of making this scrumptious breakfast, along with tips, variations, and a wealth of information to help you enjoy cooking at your own pace.

Why You’ll Love This Recipe

  • Quick and Easy: This recipe takes less than 20 minutes from start to finish, making it perfect for busy mornings.
  • Nutritious Benefits: Packed with healthy fats from the avocado and protein from the eggs, it’s a balanced meal that fuels your day.
  • Customizable: With endless toppings and variations, you can tailor it to your taste and dietary preferences.
  • Visual Appeal: The vibrant green of the avocado against the golden egg creates a dish that is as beautiful as it is delicious.
  • Comforting and Satisfying: Enjoy the creamy texture of avocado combined with the warmth of eggs for a truly comforting meal.

Ingredients Breakdown

To create your perfect avocado toast with egg, gather the following ingredients:

  • Bread of choice: 1–2 slices of whole grain or sourdough are recommended for their flavor and texture.
  • Ripe avocado: A perfectly ripe avocado is key; it should yield slightly when pressed.
  • Eggs: Use 2 eggs per serving for a fulfilling breakfast.
  • Salt and pepper: Essential for seasoning, adjust to your taste.
  • Butter or olive oil: For frying or scrambling the eggs, providing rich flavor.
  • Optional: A splash of vinegar is great for poaching the eggs to enhance flavor and hold their shape.

Feel free to substitute ingredients; for instance, if you prefer a leaner option, egg whites can be used instead of whole eggs, or you can replace butter with olive oil for a healthier fat choice.

How to Create Your Avocado Toast with Egg

Follow these straightforward steps to make your delicious breakfast:

  • Toast the bread until golden and crisp.
  • Slice or mash the avocado and spread it onto the toast. Season generously with salt and pepper.
  • For fried eggs, heat butter or oil in a pan, crack in the eggs, and cook on low until the whites are set and yolk is runny.
  • If scrambling, whisk the eggs, pour into the pan, and cook gently, folding until soft and fluffy.
  • To boil the eggs, cook them to your desired doneness, cool in an ice bath, peel, and slice onto the toast.
  • For poached eggs, bring water with a splash of vinegar to a boil, swirl it, gently slide in the egg, and poach until the white is set and the yolk remains soft.
  • Place the prepared egg on top of the avocado toast and serve immediately for the best taste experience.

Pro Tips for Perfecting Your Avocado Toast

  • Choose the right avocado: Look for avocados that are slightly soft to the touch; they should not be overly mushy.
  • Season well: Don’t skip the salt and pepper; they elevate the flavor of the avocado significantly.
  • Experiment with toppings: Add sliced tomatoes, radishes, or microgreens for extra flavor and nutrition.
  • Keep it fresh: Serve immediately after preparing to enjoy the best texture and flavor.
  • Use a sharp knife: A sharp knife helps in slicing the avocado smoothly without mashing it.
  • Toast the bread properly: Make sure the bread is toasted enough to support the weight of the avocado and egg.
  • Mind the cooking times: Keep an eye on the eggs; overcooking can lead to rubbery textures.
  • Consider a squeeze of lemon: Adding a splash of lemon juice to your avocado not only enhances flavor but also helps prevent browning.

Common Mistakes and Troubleshooting

Even simple recipes can have their pitfalls. Here’s how to avoid common mistakes:

  • Overripe avocados: Ensure your avocado is ripe but not overly so, to avoid a mushy texture.
  • Burnt toast: Pay attention while toasting; check it regularly to prevent burning.
  • Eggs cooked too long: For perfect eggs, low heat is essential; take them off the heat when they still look slightly undercooked.
  • Dry avocado: If your avocado is dry, try mashing it with a bit of olive oil or lemon juice for creaminess.

Variations to Try

One of the joys of avocado toast is its flexibility. Here are some variations to keep things interesting:

  • Spicy Avocado Toast: Add red pepper flakes or sliced jalapeños for a kick.
  • Caprese Style: Top with fresh mozzarella, tomatoes, and basil for a refreshing twist.
  • Smoked Salmon: Add slices of smoked salmon for a luxurious touch, rich in omega-3s.
  • Sweet Potato Toast: Replace bread with thinly sliced roasted sweet potatoes for a gluten-free option.

Storage and Make-Ahead Instructions

If you want to prepare this dish in advance, consider these tips:

  • For the avocado: To prevent browning, store it in an airtight container with a squeeze of lemon juice.
  • Eggs: Cooked eggs can be stored in the fridge for up to 3 days. Reheat gently.
  • Toast: Bread can be toasted in advance but is best served fresh for texture.

Frequently Asked Questions

Here are some common questions about avocado toast with eggs:

  • How can I prevent the avocado from turning brown? A squeeze of lemon juice helps slow down oxidation.
  • Can I make this ahead of time? While the toast is best fresh, you can prepare the ingredients in advance.
  • Is avocado toast a healthy breakfast? Yes! It’s rich in healthy fats and provides essential nutrients.
  • Can I use any type of bread? Whole grain or sourdough is preferred, but feel free to use any bread you enjoy!
  • How do I get the perfect poached egg? Use fresh eggs, a splash of vinegar, and don’t rush the cooking process.
  • What can I add to my avocado toast? Toppings like feta, nuts, seeds, or various herbs can enhance flavor and texture.
  • How do I store leftovers? Store components separately and assemble fresh when ready to eat.
  • Is this recipe suitable for a vegan diet? Substitute eggs with tofu scramble or chickpea mash for a plant-based option.

Nutritional Tips and Dietary Adaptations

This meal can fit various dietary needs:

  • Gluten-Free: Use gluten-free bread or sweet potato slices.
  • Low-Carb: Opt for lettuce wraps instead of bread for a lighter option.
  • High-Protein: Add additional eggs or pair with Greek yogurt on the side.
  • Vegan: Replace eggs with avocado or a chickpea salad for protein and flavor.

Equipment Recommendations

To make your cooking experience smooth, consider having the following on hand:

  • Non-stick skillet: Ideal for frying or scrambling eggs without sticking.
  • Sharp knife and cutting board: Essential for slicing avocados and bread.
  • Toaster or toaster oven: To achieve the perfect toast.
  • Mixing bowl: Useful for preparing scrambled eggs or any toppings.

Serving Suggestions

To elevate your avocado toast experience, consider pairing it with:

  • A side salad: A light side salad can complement the meal and add freshness.
  • Fresh fruit: Seasonal fruits like berries or citrus add a sweet touch.
  • Coffee or herbal tea: A warm beverage enhances the breakfast experience.

In conclusion, avocado toast with egg is more than just a breakfast dish; it’s an opportunity to enjoy the simple pleasures of cooking. Whether you keep it classic or explore various toppings and preparations, this recipe embodies comfort and nourishment. I encourage you to experiment, find your favorite version, and savor every bite. Happy cooking!

Avocado Toast With Egg

Prep Time 5 minutes
Cook Time 10 minutes
Total Time 15 minutes
Servings 1 serving
Calories 350
A quick and nutritious breakfast featuring creamy avocado on crispy toast topped with a perfectly cooked egg.

Ingredients

Bread

  • 1 slice bread of choice (whole grain or sourdough recommended)

Avocado

  • 1 ripe avocado ripe avocado

Eggs

  • 2 eggs eggs

Salt and pepper

  • to taste Salt and pepper

Butter or olive oil

  • for frying or scrambling eggs Butter or olive oil

Vinegar (optional)

  • splash optional Splash of vinegar (for poaching eggs)

Instructions 

  • Toast the bread until golden and crisp.
  • Spread mashed or sliced avocado onto toast; season with salt and pepper.
  • Cook eggs: fry, scramble, or poach as preferred, until whites are set and yolk is soft.
  • Place cooked egg on avocado toast and serve immediately.

Notes

For extra flavor, add a sprinkle of chili flakes or herbs.
Calories: 350kcal
Cost: $8
Course: Breakfast
Cuisine: American
Keyword: Avocado, Egg, Toast

Discover the Joy of Spinach and Cheese Puff Pastry Bites

Delightful Spinach and Cheese Puff Pastry Bites are not just a snack; they are a celebration of flavor, texture, and comfort. Wrapped in flaky, golden-brown pastry, these bites are filled with a creamy blend of cheeses and fresh spinach, making them the perfect appetizer for any occasion. Whether you are hosting a gathering or simply enjoying a quiet evening at home, these bites are sure to impress.

In this comprehensive guide, we will explore everything you need to know about making these delectable pastries. From ingredient breakdowns to expert tips, we will ensure that you can whip them up with confidence and ease. Let’s embark on this culinary adventure together!

Why You’ll Love This Recipe

  • Effortless Preparation: With just a few simple ingredients and straightforward steps, you can create a delicious appetizer that looks and tastes gourmet.
  • Versatile Filling: The combination of spinach and cheese offers a wonderful balance of flavors; however, you can easily customize the filling to suit your preferences.
  • Perfect for Any Occasion: Whether it’s a cozy family dinner or a lively party, these puff pastry bites are a crowd-pleaser that will satisfy everyone.
  • Quick Cooking Time: Baking these bites only takes about 18-20 minutes, allowing you to serve up something delicious without spending hours in the kitchen.
  • Make-Ahead Friendly: These delightful pastry bites can be prepared in advance and stored in the fridge or freezer, making them a convenient option for busy days.

Ingredients for Spinach and Cheese Puff Pastry Bites

To create your Spinach and Cheese Puff Pastry Bites, you will need the following ingredients:

  • 1 sheet store-bought puff pastry, thawed
  • 1 cup fresh baby spinach, chopped
  • 4 oz cream cheese, softened
  • 1 cup shredded mozzarella cheese
  • 1 tsp garlic powder
  • Salt and pepper to taste

Ingredient Substitutions & Notes

  • Puff Pastry: If you prefer, you can make your own puff pastry, but store-bought is perfectly fine for convenience.
  • Fresh Spinach: Feel free to substitute with frozen spinach, but ensure it’s thoroughly drained and squeezed of excess water.
  • Cheese Varieties: Experiment with different cheese combinations such as feta, goat cheese, or cheddar for a unique twist.
  • Herbs and Spices: Add fresh herbs like dill or basil for an aromatic touch or a pinch of red pepper flakes for some heat.

How to Make Spinach and Cheese Puff Pastry Bites

Side profile of flaky puff pastry filled with spinach and melted cheese, showcasing a crispy texture.

Follow these easy steps to create your delicious Spinach and Cheese Puff Pastry Bites:

  1. Preheat your oven to 400°F (200°C).
  2. In a mixing bowl, combine the chopped spinach, softened cream cheese, shredded mozzarella, garlic powder, salt, and pepper. Stir well until you have a smooth filling.
  3. On a floured surface, roll out the thawed puff pastry and cut it into squares, approximately 4 inches in size.
  4. Place a tablespoon of the spinach-cheese mixture in the center of each square. Fold the pastry over diagonally or bring the corners together to create pockets.
  5. Arrange the filled pastries on a lined baking sheet. Bake for 18-20 minutes or until they are golden brown and puffed up.
  6. Serve warm and enjoy!

Pro Tips for Perfect Puff Pastry Bites

  • Keep Ingredients Cold: Ensure your puff pastry is kept cold until you’re ready to use it. This helps achieve that flaky texture when baked.
  • Don’t Overfill: Be careful not to overstuff the pastry; this can cause them to burst during baking.
  • Seal Well: Crimp the edges of the pastry firmly to prevent the filling from leaking out while baking.
  • Brush with Egg Wash: For a beautiful golden finish, brush the tops of the pastries with a beaten egg before baking.
  • Experiment with Shapes: Get creative with the shape of your pastries! Triangles, rectangles, or even circles can be fun.
  • Use a Baking Sheet Liner: Line your baking sheet with parchment paper to prevent sticking and make cleanup easier.
  • Serve with Dipping Sauces: Offer a variety of dips such as marinara, tzatziki, or a garlic aioli to elevate your appetizer experience.
  • Make in Batches: Double the recipe and freeze half for a quick snack later on. Simply bake from frozen, adding a few extra minutes to the cooking time.

Common Mistakes and Troubleshooting

Even the best chefs make mistakes! Here are some common issues you may encounter and how to resolve them:

  • Pastry Not Puffing Up: Ensure your oven is preheated and that the pastry was kept cold before baking. A hot oven is key for puffing.
  • Filling Leaking Out: Make sure to seal your pastries tightly. You can also use a fork to crimp the edges for added security.
  • Overcooked Pastries: Keep an eye on your pastries while they bake. Ovens can vary, so check them a few minutes before the suggested baking time.
  • Underseasoned Filling: Taste your filling before sealing it in the pastry. Adjust the seasoning as needed for the best flavor.

Variations on Spinach and Cheese Puff Pastry Bites

These delightful bites are versatile and can be customized in many ways. Here are some variations to try:

  • Mediterranean Twist: Add sun-dried tomatoes and olives for a Mediterranean flair.
  • Spicy Kick: Incorporate diced jalapeños or crushed red pepper flakes into the filling for a spicy version.
  • Herbed Cheese: Use a blend of herbed cream cheese and mozzarella for added flavor.
  • Meat Lovers: Mix in cooked crumbled sausage or bacon with the spinach and cheese for a heartier option.

Storage and Make-Ahead Instructions

You can easily prepare these Spinach and Cheese Puff Pastry Bites ahead of time. Here’s how:

  • Refrigerator Storage: Store uncooked, filled pastries in an airtight container in the fridge for up to 24 hours before baking.
  • Freezer Storage: Freeze unbaked pastries on a baking sheet until firm, then transfer them to a freezer bag. They can be stored for up to 3 months.
  • Baking from Frozen: Bake frozen pastries directly from the freezer, adding a few extra minutes to the baking time.

FAQs About Spinach and Cheese Puff Pastry Bites

  • Can I use frozen spinach? Yes, just ensure it’s well-drained before using it in the filling.
  • How do I know when they are done baking? They should be golden brown and puffed up. A light tap on the pastry should sound hollow.
  • Can I make these vegetarian? Yes, this recipe is already vegetarian-friendly!
  • How long can I store leftovers? Store leftovers in an airtight container in the fridge for up to 3 days.
  • Can I reheat them? Yes! Simply reheat in the oven at 350°F (175°C) until warmed through.
  • What other cheeses work well? Feta, goat cheese, or even cheddar are great alternatives!
  • Can I prepare these without puff pastry? You can use phyllo dough or biscuit dough as alternatives, but cooking times may vary.
  • What dips pair well with these bites? Marinara, garlic aioli, or tzatziki are excellent choices!

Nutritional Tips and Dietary Adaptations

To make these Spinach and Cheese Puff Pastry Bites even healthier, consider the following tips:

  • Whole Wheat Pastry: Use whole wheat puff pastry for a healthier option.
  • Dairy-Free Option: Substitute cream cheese and mozzarella with dairy-free alternatives.
  • Low-Sodium Options: Use low-sodium cheese and seasonings to reduce salt intake.

Equipment Recommendations

To make your cooking experience seamless, here’s a list of recommended kitchen tools:

  • Baking Sheet: A sturdy baking sheet lined with parchment paper ensures even baking.
  • Mixing Bowl: A large mixing bowl for combining the filling ingredients.
  • Rolling Pin: To roll out the puff pastry evenly.
  • Pastry Brush: For applying egg wash before baking for that golden finish.

Serving Suggestions

These Spinach and Cheese Puff Pastry Bites can be served in various delightful ways:

  • As Appetizers: Serve them warm with a selection of dipping sauces.
  • For Brunch: Pair them with fresh fruit and a light salad for a perfect brunch spread.
  • At Parties: Arrange them on a decorative platter for a visually appealing appetizer at gatherings.

In conclusion, making Spinach and Cheese Puff Pastry Bites is not only an enjoyable process but also a rewarding one. With their delightful flavors and versatility, these bites will surely become a favorite in your home cooking repertoire. Remember, cooking is about enjoying the journey, so take your time, experiment, and most importantly, have fun in the kitchen. Happy cooking!

Spinach and Cheese Puff Pastry Bites

Prep Time 10 minutes
Cook Time 20 minutes
Total Time 30 minutes
Servings 8 pieces
Calories 150
Delight in these savory puff pastry bites filled with spinach and cheese, perfect for appetizers or snacks.

Ingredients

Dough

  • 1 sheet store-bought puff pastry, thawed

Filling

  • 1 cup fresh baby spinach, chopped
  • 4 oz cream cheese, softened
  • 1 cup shredded mozzarella cheese
  • 1 tsp garlic powder
  • to taste Salt and pepper

Instructions 

  • Preheat oven to 400°F (200°C).
  • Mix spinach, cream cheese, mozzarella, garlic powder, salt, and pepper until smooth.
  • Cut puff pastry into 4-inch squares.
  • Place filling in centers, fold into pockets, and arrange on baking sheet.
  • Bake for 18-20 minutes until golden. Serve warm.

Notes

For a crispier crust, brush with egg wash before baking.
Calories: 150kcal
Cost: $15
Course: Appetizer
Cuisine: American
Keyword: Cheese, Puff Pastry, Spinach

Discover the Joy of Baking: Wholesome Banana Oatmeal Cookies

Welcome to a delightful baking experience where we transform simple ingredients into banana oatmeal cookies that are both comforting and nourishing. This recipe utilizes ripe bananas and quick oats, along with a hint of sweetness from chocolate chips, making it perfect for any day of the week. Whether you’re looking for a quick snack, a healthy dessert, or a way to use up those overripe bananas, these cookies are your best bet. Let’s dive into the details!

Why You’ll Love This Recipe

  • Quick and Easy: With just a few simple steps, you can have a batch of warm cookies ready in under 30 minutes.
  • Nutritious Ingredients: Featuring whole foods like oats and bananas, these cookies offer a healthier alternative to traditional cookies.
  • Customizable: Add your favorite mix-ins like nuts, dried fruits, or even a dash of cinnamon to make this recipe your own.
  • Kid-Friendly: This recipe is great for getting kids involved in the kitchen, making baking a fun family activity.
  • Perfect for Meal Prep: These cookies store well and can be made ahead of time for busy weeks.

Ingredients Breakdown

To make these delicious banana oatmeal cookies, gather the following ingredients:

  • 2 medium ripe bananas: About 1 cup when mashed. Overripe bananas work best as they bring natural sweetness.
  • ½ cup packed light brown sugar: This adds moisture and a richer flavor. You can substitute with coconut sugar for a healthier option.
  • 1 large egg: Lightly beaten, this acts as a binder for the ingredients.
  • 1 teaspoon vanilla extract: Enhances the overall flavor profile.
  • 2 ½ cups quick oats: These provide texture and heartiness to the cookies. For a gluten-free version, use certified gluten-free oats.
  • Pinch of sea salt: Balances the sweetness and enhances flavor.
  • ½ cup mini chocolate chips: Optional but highly recommended for that extra touch of indulgence.

How to Make Banana Oatmeal Cookies

Juicy banana oatmeal cookies with chocolate chips, displayed in a close-up shot.

Follow these steps for perfectly baked cookies:

  1. Preheat your oven to 350°F (175°C) and line two baking sheets with parchment paper.
  2. In a medium bowl, mash the ripe bananas until smooth. Then, add the brown sugar, egg, and vanilla extract. Whisk until well combined.
  3. Stir in the quick oats and sea salt, folding until the oats are evenly moistened. Gently fold in the chocolate chips.
  4. Using a medium spring-loaded cookie scoop, portion about 1.5 tablespoons of the cookie dough onto the prepared baking sheets, spacing them at least two inches apart. Flatten each mound slightly to about ½ inch thickness.
  5. Bake for 12-14 minutes or until the edges are lightly golden. The centers should remain slightly soft.
  6. Once baked, remove the cookies from the oven and let them cool on the baking sheet for 5 minutes before transferring to a wire rack to cool completely.

Pro Tips for Perfect Cookies

  • Choose the right bananas: Your best bet is to use very ripe bananas that are speckled black for maximum sweetness.
  • Don’t overmix: Gently fold the ingredients to maintain a tender texture in the cookies.
  • Adjust sweetness: Taste the batter before baking; you can always add a bit more sugar if desired.
  • Use an ice cream scoop: For uniform cookies, use an ice cream scoop for even baking.
  • Experiment with spices: A dash of cinnamon or nutmeg can elevate the flavor profile.
  • Chill the dough: If you have time, refrigerate the dough for 30 minutes to enhance the flavors.
  • Use parchment paper: This prevents sticking and helps cookies bake evenly.
  • Watch the baking time: Since ovens can vary, keep an eye on the cookies to avoid overbaking.

Common Mistakes and Troubleshooting

Here are some common pitfalls and how to avoid them:

  • Cookies are too dry: Make sure not to overbake. The cookies will continue to firm up as they cool.
  • Cookies spread too much: Ensure that your butter is not too soft and that you’re using the right amount of flour.
  • Flavor is bland: Adjust the amount of vanilla and consider adding spices for a more robust flavor.
  • Texture is too dense: This can happen if you pack the oats too tightly. Measure them lightly.

Delicious Variations

Mix things up with these fun variations:

  • Nutty Addition: Add ½ cup chopped walnuts or pecans for extra crunch.
  • Dried Fruits: Incorporate ½ cup of raisins or dried cranberries for a fruity twist.
  • Peanut Butter Swirl: Mix in ¼ cup of creamy peanut butter for a rich flavor.
  • Chocolate Lovers: Use dark chocolate chips or chunks for a more decadent treat.

Storage and Make-Ahead Instructions

These cookies are perfect for meal prep! Here’s how to store them:

  • Cooling: Allow cookies to cool completely before storing to prevent moisture build-up.
  • Airtight container: Store in an airtight container at room temperature for up to 3 days.
  • Refrigeration: For longer storage, keep in the fridge for up to a week.
  • Freezing: Freeze baked cookies in a single layer then transfer to a freezer bag for up to 3 months. Thaw at room temperature before enjoying.

Frequently Asked Questions

Here are some common questions about making banana oatmeal cookies:

  • Can I use frozen bananas? Yes, just thaw and drain excess moisture before mashing.
  • Are these cookies gluten-free? Yes, if you use gluten-free oats.
  • How do I make these cookies vegan? Substitute the egg with a flax egg (1 tablespoon flaxseed meal + 2.5 tablespoons water) and replace yogurt with a vegan alternative.
  • Can I add protein powder? Absolutely! Replace ¼ cup of oats with protein powder for an extra boost.
  • What can I do with leftover oats? Use them in smoothies, overnight oats, or as a topping for yogurt.
  • How can I tell when the cookies are done? Look for lightly golden edges and slightly soft centers.
  • Can I make the dough in advance? Yes, refrigerate the dough for up to 24 hours before baking.
  • Are these cookies suitable for kids? Yes, they are a healthy and fun snack for children!

Nutritional Tips and Dietary Adaptations

To make these cookies even healthier, consider the following tips:

  • Lower sugar: Reduce the brown sugar or substitute with a natural sweetener like honey or maple syrup.
  • Increase fiber: Add ground flaxseed or chia seeds for an extra fiber boost.
  • Nut-free option: Omit any nuts for a nut-free cookie, perfect for school lunches.
  • Healthy fats: Swap in coconut oil instead of butter for a dairy-free option.

Essential Equipment Recommendations

Here’s what you’ll need for this recipe:

  • Mixing bowls: A medium bowl for mixing the batter and a larger one for mashing the bananas.
  • Whisk: For combining wet ingredients smoothly.
  • Cookie scoop: Ensures uniform cookie sizes for even baking.
  • Baking sheets: Use heavy-duty sheets for best results.
  • Parchment paper: Prevents sticking and makes cleanup easier.

Serving Suggestions

Enjoy these cookies in various delightful ways:

  • With a glass of milk: A classic pairing that satisfies your sweet tooth.
  • As a breakfast treat: Crumble over yogurt with some fresh fruit for a nutritious start to your day.
  • After school snack: Perfect for kids returning from school, paired with a piece of fruit.
  • With coffee or tea: A sweet afternoon pick-me-up that complements your favorite hot beverage.

In conclusion, these banana oatmeal cookies are a wonderful addition to your baking repertoire. They are easy to make, healthy, and satisfyingly delicious. Embrace the joy of cooking with this simple recipe, and don’t forget to share your creations with loved ones!

Banana Oatmeal Cookie Recipe

Prep Time 10 minutes
Cook Time 15 minutes
Total Time 25 minutes
Servings 12 cookies
Calories 120
Enjoy these healthy, chewy banana oatmeal cookies with chocolate chips, perfect for a quick snack or dessert.

Ingredients

Bananas

  • 2 medium ripe bananas (about 1 cup mashed)

Brown Sugar

  • 0.5 cup light brown sugar

Egg

  • 1 large egg (lightly beaten)

Vanilla Extract

  • 1 teaspoon vanilla extract

Quick Oats

  • 2.5 cups quick oats

Sea Salt

  • Pinch sea salt

Mini Chocolate Chips

  • 0.5 cup mini chocolate chips

Instructions 

  • Preheat oven to 350°F (175°C) and line baking sheets with parchment.
  • Mash bananas, then mix in sugar, egg, and vanilla until combined.
  • Stir in oats, salt, then fold in chocolate chips.
  • Drop 1.5 tbsp dough onto sheets, flatten to ½ inch, and bake 12-14 mins.
  • Cool on sheets 5 mins, then transfer to wire rack to cool completely.

Notes

For softer cookies, slightly underbake and let cool on the baking sheet.
Calories: 120kcal
Cost: $5
Course: Dessert
Cuisine: American
Keyword: Banana, cookie, oatmeal

Discover the Joy of Homemade Snacks

If you’re on the lookout for a satisfying snack that packs a punch, look no further than crispy ranch chickpeas. This simple recipe transforms ordinary garbanzo beans into a crunchy delight, perfect for munching on while watching your favorite show or as a healthful addition to your salads. With a blend of savory spices and a hint of sweetness, these protein-packed snacks are not just delicious—they’re also incredibly easy to make! In this guide, we’ll cover everything from the ingredients to tips for achieving that perfect crunch.

Why You’ll Love This Recipe

Here are a few reasons why this recipe will quickly become a favorite:

  • Quick and Easy: With minimal prep time, you can whip up a batch of crispy chickpeas in under an hour.
  • Versatile Flavor Options: Easily customize the seasonings to suit your taste—whether you prefer a spicy kick or a more subdued flavor.
  • Healthy Snacking: These chickpeas are a great source of plant-based protein and fiber, making them a nutritious alternative to chips.
  • Perfect for Meal Prep: Make a big batch and enjoy them throughout the week as a snack or salad topper.
  • Kid-Friendly: These crunchy snacks are sure to be a hit with kids, making healthy eating fun!

Ingredient Breakdown

Let’s dive into the ingredients you will need to make your ranch crispy chickpeas:

  • 3 (15 oz) cans organic low sodium garbanzo beans: The star of the show! Ensure they are well-drained and rinsed.
  • 1-2 tbsp olive oil: This helps achieve that satisfying crunch. You can substitute with avocado oil if preferred.
  • 1 tbsp maple syrup: Adds a hint of sweetness that balances the spices.
  • ½ tsp cinnamon: For a warm, aromatic flavor.
  • 1 tsp garlic powder: Essential for that savory taste.
  • 1 tsp onion powder: Enhances the overall flavor profile.
  • ½ tsp dried dill: Adds a fresh, herby taste.
  • ½ tsp dried parsley: For an extra layer of flavor.
  • ½ tsp salt: To taste; adjust based on your preference.
  • ½ tsp chili powder: For a touch of heat.
  • ½ tsp ground cumin: Brings a warm, earthy flavor.
  • ½ tsp paprika: Adds color and a mild sweetness.
  • ½ tsp cayenne pepper: Optional, for those who enjoy a spicy kick.
  • ¼ tsp garlic powder & ¼ tsp salt: For additional flavor layering.

Step-by-Step Instructions

Juicy and crunchy roasted chickpeas displayed in a rustic setting.

Follow these simple steps to create your addictive ranch crispy chickpeas:

  1. Preheat the oven: Set your oven to 400°F (200°C) and line a large baking sheet with parchment paper for easy cleanup.
  2. Prepare the chickpeas: Drain and rinse the chickpeas thoroughly in a colander under cold running water. Remove any loose skins that come off during rinsing.
  3. Dry them well: Spread the chickpeas on a clean kitchen towel or paper towels and gently pat dry. The drier the chickpeas, the crispier they’ll get in the oven.
  4. Toss with oil: Transfer the dried chickpeas to a large bowl and drizzle with olive oil. Toss until all chickpeas are evenly coated.
  5. Season: Divide the chickpeas into three separate bowls if making different flavors. Add the corresponding seasonings to each bowl and toss until evenly coated.
  6. Spread on baking sheet: Arrange the seasoned chickpeas in a single layer on the prepared baking sheet, ensuring they are not overcrowded. Use multiple baking sheets if necessary.
  7. Bake: Bake for 25-30 minutes, stirring halfway through cooking time, until the chickpeas are golden brown and crispy. They should make a slight rattling sound when you shake the pan.
  8. Cool down: Remove from the oven and let cool completely on the baking sheet. The chickpeas will continue to crisp up as they cool. Store in an airtight container at room temperature for up to 3 days.

Pro Tips for Perfectly Crispy Chickpeas

To ensure that your ranch crispy chickpeas turn out perfectly every time, keep these tips in mind:

  • Dry thoroughly: Make sure the chickpeas are completely dry before you toss them with oil. This is crucial for achieving that satisfying crunch.
  • Oven temperature: Ensure your oven is preheated properly; a hot oven is essential for crispiness.
  • Use parchment paper: This helps prevent sticking and makes cleanup a breeze.
  • Batch bake: If you’re making a lot, bake in batches to avoid overcrowding on the baking sheet.
  • Check on them: Keep an eye on the chickpeas towards the end of baking to prevent burning.
  • Serve immediately: For the best texture, enjoy them fresh out of the oven!
  • Experiment with flavors: Don’t hesitate to try different seasonings to find your favorite combination.
  • Store wisely: Keep in an airtight container to maintain freshness but consume within a few days for the best crunch.

Common Mistakes and Troubleshooting

Here are a few common pitfalls and how to avoid them:

  • Chickpeas not crispy: This usually happens if they weren’t dried sufficiently. Make sure to remove as much moisture as possible.
  • Overseasoning: It’s easy to go overboard with spices. Start with small amounts and adjust to taste.
  • Burning: If your chickpeas are browning too quickly, lower the oven temperature slightly.
  • Sticking to the pan: Use parchment paper to prevent sticking and ensure even cooking.

Delicious Variations

Feel free to mix things up with these tasty variations:

  • Spicy Sriracha: Add a tablespoon of Sriracha sauce for a zesty twist.
  • Curry Flavored: Substitute the ranch seasoning with curry powder for an exotic flavor.
  • Italian Herb: Use Italian seasoning with garlic and onion powder for a Mediterranean flair.
  • Sweet & Spicy: Combine a bit of brown sugar with chili powder and cayenne for a sweet and spicy kick.

Storage and Make-Ahead Instructions

To keep your crispy ranch chickpeas fresh:

  • Cool completely: Make sure they are fully cooled before storing to prevent sogginess.
  • Airtight container: Store in an airtight container at room temperature for up to 3 days. For longer storage, consider freezing.
  • Freezing: While best enjoyed fresh, you can freeze them in an airtight bag for up to 2 months. Reheat in the oven to restore crunch.

Frequently Asked Questions

Here are some common questions about making crispy chickpeas:

  • Why aren’t my roasted chickpeas crispy? Make sure they are completely dry before roasting, and avoid overcrowding on the baking sheet.
  • Can I use dried chickpeas? Yes, but you’ll need to soak and cook them first before following the recipe.
  • What is the best oil for roasting? Olive oil works best, but avocado oil is also a great option.
  • How can I make them spicier? Add more cayenne pepper or try a spicy seasoning blend.
  • Can I make these ahead of time? Yes, they can be made in advance and stored properly for a few days.
  • What can I use them for? They make a great snack by themselves or can be added to salads, soups, or grain bowls.
  • Are they gluten-free? Yes, chickpeas are gluten-free, making this a suitable snack for those with gluten sensitivities.
  • Can I use canned chickpeas? Absolutely! Canned chickpeas are a convenient option and work perfectly for this recipe.

Nutritional Benefits and Dietary Adaptations

These ranch crispy chickpeas are not only delicious but also nutritious:

  • High in protein: Chickpeas are a great source of plant-based protein, making them a satisfying snack.
  • Rich in fiber: They promote digestive health and help keep you feeling full.
  • Low in fat: When roasted with minimal oil, they remain a low-fat snack option.

Recommended Equipment

To make this recipe, you will need:

  • Baking sheet: A large one for even roasting.
  • Parchment paper: This helps prevent sticking.
  • Colander: For rinsing the chickpeas.
  • Mixing bowls: To combine chickpeas and seasonings.

Serving Suggestions

Here are a few ideas on how to enjoy your crispy ranch chickpeas:

  • As a snack: Perfect for munching on during movie nights or at parties.
  • In salads: Add a crunchy topping to your favorite green salads or grain bowls.
  • Garnish for soups: Sprinkle them on top of soups for an added crunch.
  • With dips: Serve alongside hummus or tzatziki for a delightful combination.

Conclusion

Creating your own crispy ranch chickpeas is not only a fun kitchen project but also a wonderful way to enjoy nutritious snacking. With the right techniques, you can make these little gems crispy, flavorful, and utterly addictive. So gather your ingredients, follow the steps, and get ready to enjoy a snack that’s both delicious and good for you. Happy cooking!

Addictive Ranch Crispy Chickpeas: Homemade Savory Snack

Prep Time 10 minutes
Cook Time 30 minutes
Total Time 40 minutes
Servings 4 servings
Calories 220
Enjoy these crunchy, flavorful roasted chickpeas seasoned with a savory ranch-inspired blend, perfect for a healthy snack.

Ingredients

Canned Goods

  • 3 cans organic low sodium garbanzo beans
  • 1-2 tbsp olive oil
  • 1 tbsp maple syrup
  • ½ tsp cinnamon
  • 1 tsp garlic powder
  • 1 tsp onion powder
  • ½ tsp dried dill
  • ½ tsp dried parsley
  • ½ tsp salt
  • ½ tsp chili powder
  • ½ tsp ground cumin
  • ½ tsp paprika
  • ½ tsp cayenne pepper
  • ¼ tsp garlic powder
  • ¼ tsp salt

Instructions 

  • Preheat oven to 400°F (200°C) and line a baking sheet with parchment paper.
  • Drain, rinse, and dry chickpeas thoroughly.
  • Toss chickpeas with olive oil and maple syrup.
  • Divide into bowls and add seasonings, tossing to coat.
  • Spread on baking sheet and bake for 25-30 minutes, stirring halfway.
  • Cool completely and store in an airtight container.

Notes

Ensure chickpeas are thoroughly dried for maximum crispiness.
Calories: 220kcal
Cost: $10
Course: Snack
Cuisine: American
Keyword: Chickpeas

Start Your Day Right with Wholesome Oat Waffles

Welcome to a cozy morning filled with the delightful aroma of warm waffles! If you’re seeking a comforting, nourishing breakfast, you’ve come to the right place. These wholesome oat waffles are not only easy to make but also packed with goodness. They bring together the rich, nutty flavor of oats with just the right crunch, making them the perfect start to your day. Let’s dive into the details of this delightful recipe!

Why You’ll Love This Recipe

These waffles are sure to become a favorite in your home! Here’s why:

  • Healthier alternative: Made with rolled oats, these waffles are high in fiber and nutrients, making them a wholesome choice for breakfast.
  • Quick and easy: With just a few simple steps and minimal prep time, you can have delicious waffles ready in no time.
  • Customizable: You can easily adapt the recipe to suit your taste by adding fruits, nuts, or spices.
  • Freezer-friendly: Make a big batch and freeze them for quick breakfasts throughout the week.
  • Perfect for everyone: Whether you’re gluten-free or following a healthy diet, this recipe can be tailored to fit your needs!

Ingredients You’ll Need

Below are the ingredients for your oat waffles, along with some suggested substitutions to suit your pantry and preferences:

  • 2/3 cup rolled oats: For a gluten-free version, use certified gluten-free oats.
  • 1 tsp baking powder: This helps the waffles rise and become fluffy.
  • 1/4 tsp sea salt: Enhances the flavor of the waffles.
  • 1/8 tsp cinnamon: Adds a warm, comforting spice to your waffles.
  • 3/8 cup water: Adjust as necessary to reach your desired batter consistency.
  • 2 tbsp melted coconut oil: You can substitute with vegetable oil or melted butter.
  • 1 egg: If you need a vegan option, use a flax egg instead.
  • 1 tbsp maple syrup: Provides natural sweetness; feel free to use honey or agave syrup.
  • 1/2 tsp vanilla: Enhances the overall flavor of the waffles.

The Method: How to Make Wholesome Oat Waffles

Juicy oat waffles neatly stacked, showcasing their texture and color.

Making these delicious waffles is a breeze! Follow these simple steps:

  1. Place all of the ingredients in a blender and blend until smooth.
  2. Allow the batter to sit in the blender for 10 minutes while you preheat your waffle iron.
  3. Spoon 1/4-1/3 cup of batter onto the heated waffle iron and cook until lightly browned and crisp, approximately 2-5 minutes.
  4. Enjoy warm, topped with your favorite fruits, syrup, or yogurt!

Pro Tips for Perfect Waffles

Here are some expert insights to ensure your waffles turn out perfectly every time:

  • Preheat your waffle iron: This is key to achieving a crispy exterior and fluffy inside.
  • Don’t overcrowd the waffle iron: Allow enough space for the batter to expand while cooking.
  • Let the batter rest: Resting the batter helps the oats absorb moisture and improves texture.
  • Experiment with flavors: Feel free to add your favorite spices, such as nutmeg or ginger, for a unique twist.
  • Keep them warm: If making a large batch, keep cooked waffles warm in a low oven until ready to serve.
  • Use cooking spray or oil: Lightly grease the waffle iron before adding the batter to prevent sticking.
  • Try different toppings: From fresh fruit to nut butter or yogurt, the possibilities are endless!
  • Store leftovers properly: Allow waffles to cool completely before storing them in an airtight container or freezing.

Common Mistakes and Troubleshooting

If your waffles aren’t turning out as expected, check for these common pitfalls:

  • Waffles sticking to the iron: Ensure you’ve preheated your waffle iron and greased it well.
  • Gummy texture: This can occur if the batter is overmixed. Blend just until combined.
  • Flat waffles: Make sure your baking powder is fresh; old leavening agents can lead to dense waffles.

Delicious Variations to Try

Want to mix it up? Here are some variations to experiment with:

  • Banana Oat Waffles: Add mashed ripe bananas to the batter for natural sweetness and moisture.
  • Blueberry Oat Waffles: Fold in fresh or frozen blueberries for a burst of flavor.
  • Chocolate Chip Oat Waffles: Incorporate dark chocolate chips for a decadent touch.
  • Nutty Oat Waffles: Add chopped nuts or nut butter for extra protein and crunch.

Storage and Make-Ahead Instructions

Planning for busy mornings? Here’s how to store and prepare your waffles:

  • Refrigerate: Store cooked waffles in an airtight container in the fridge for up to 3 days.
  • Freeze: For longer storage, freeze waffles in a single layer, then transfer to a zip-top bag. They’ll keep for up to 3 months.
  • Reheat: Pop frozen waffles in the toaster or oven until heated through and crispy.

Frequently Asked Questions

Got questions? Here are answers to some common inquiries about oatmeal waffles:

  • Can I make these waffles gluten-free? Absolutely! Just use certified gluten-free oats.
  • How do I know when my waffles are done? They should be golden brown and crisp. If they’re sticking, they may need a bit more time.
  • Can I use quick oats instead of rolled oats? Yes, but the texture may vary. Rolled oats give a heartier bite.
  • What can I serve with these waffles? Try them with yogurt, fresh fruit, syrup, or a sprinkle of nuts.
  • Is it possible to make the batter ahead of time? Yes! Store the batter in the fridge for up to 24 hours before cooking.
  • Can I substitute the egg? Yes, a flax egg or unsweetened applesauce can work as an egg substitute.
  • How do I keep waffles warm? Place them on a baking sheet in a low oven (around 200°F) until ready to serve.
  • Can I double the recipe? Of course! Just ensure you have enough space in your waffle iron for the batter.

Nutritional Tips and Dietary Adaptations

For a more balanced meal, consider the following:

  • Add protein: Top your waffles with Greek yogurt or nut butter for an added protein boost.
  • Increase fiber: Include chia seeds or ground flaxseed in the batter.
  • Lower sugar options: Use ripe bananas or applesauce to reduce the amount of added sweeteners.

Essential Equipment Recommendations

To make your waffle-making experience smooth and enjoyable, here are some essential tools:

  • Waffle Iron: A reliable non-stick waffle iron ensures easy release and crisp results.
  • Blender: A high-speed blender makes quick work of mixing the batter to a smooth consistency.
  • Spatula: A silicone spatula is great for handling the batter with ease.

Serving Suggestions

Once your waffles are ready, it’s time to enjoy them! Here are some delightful serving ideas:

  • Top with fresh fruit: Strawberries, blueberries, or sliced bananas add color and flavor.
  • Drizzle with syrup: Maple syrup, honey, or agave syrup make a sweet touch.
  • Sprinkle with nuts: Chopped walnuts or almonds add a satisfying crunch.
  • Serve with yogurt: A dollop of Greek yogurt adds creaminess and protein.

Conclusion: Your New Favorite Breakfast Awaits!

There you have it—a comprehensive guide to making delicious and wholesome oat waffles! With their simplicity and versatility, these waffles are sure to become a beloved recipe in your home. Remember, cooking should be enjoyable, so take your time and savor the process. I hope you find joy in making and sharing these delightful waffles. Thank you for choosing this recipe; I’m glad you’re here, and I’m excited for you to enjoy every bite!

Oat Waffles

Prep Time 10 minutes
Cook Time 5 minutes
Total Time 15 minutes
Servings 2 servings
Calories 180
Enjoy these healthy and delicious oat waffles, perfect for a quick breakfast or brunch.

Ingredients

Dry ingredients

  • 2/3 cup rolled oats
  • 1 tsp baking powder
  • 1/4 tsp sea salt
  • 1/8 tsp cinnamon

Wet ingredients

  • 3/8 cup water
  • 2 tbsp melted coconut oil
  • 1 egg egg
  • 1 tbsp maple syrup
  • 1/2 tsp vanilla

Instructions 

  • Blend all ingredients until smooth, then let sit for 10 minutes.
  • Preheat waffle iron.
  • Spoon batter onto waffle iron and cook until golden (2-5 minutes).
  • Serve and enjoy!

Notes

For extra flavor, add fresh berries or nuts.
Calories: 180kcal
Cost: $8
Course: Breakfast
Cuisine: American
Keyword: Oats

Discover the Comfort of Italian Baked Eggs

Welcome to a delightful culinary journey with Italian baked eggs, a comforting dish that warms both the heart and the home. This recipe, often referred to as eggs in purgatory, combines the rich flavors of tomatoes, aromatic garlic, and fresh basil with perfectly baked eggs. Whether it’s for breakfast, brunch, or a cozy dinner, this dish is not only simple to make but also incredibly satisfying. Let’s dive into the details of this wonderful recipe and explore why you’ll love making it at home.

Why You’ll Love This Recipe

  • Comforting flavors: The combination of rich tomato sauce and eggs creates a warm, homely taste that’s hard to resist.
  • Quick and easy: With just a few ingredients and straightforward steps, you can whip up this dish in under 30 minutes.
  • Customizable: Feel free to add your favorite vegetables, cheeses, or spices for a personal touch.
  • Perfect for sharing: This dish is best served straight from the pan, making it a lovely communal meal.
  • Healthy and nourishing: Packed with protein and vitamins from the eggs and tomatoes, this recipe is both nutritious and filling.

Ingredients for Italian Baked Eggs

To prepare this delicious Italian baked eggs recipe, you’ll need the following ingredients:

  • 2 Tablespoon extra virgin olive oil: Adds richness and flavor to the dish.
  • 3-4 cloves fresh garlic (minced, approximately 1 Tablespoon): Brings aromatic goodness to the sauce.
  • Pinch crushed red pepper flakes: For a subtle kick of heat.
  • 28 ounces canned whole peeled tomatoes (San Marzano certified, if possible): The star of the sauce; choose high-quality tomatoes for the best flavor.
  • 10-12 large fresh basil leaves (plus extra for garnish, if desired): Adds freshness and a hint of sweetness.
  • 1 teaspoon kosher salt (divided use): Enhances the overall flavor.
  • ½ teaspoon black pepper (divided use): Provides a mild spice.
  • 6 large eggs: The main protein source that makes this dish satisfying.
  • Parmesan cheese (freshly grated for serving): Optional, but adds a lovely finishing touch.

Step-by-Step Instructions to Make Italian Baked Eggs

Juicy Italian Baked Eggs in a rich tomato sauce, garnished with fresh basil.

Now that we have our ingredients ready, let’s walk through the simple steps to create this delightful dish.

  1. Preheat the oven: Preheat your oven to 400˚F (200˚C) and heat a 10″ cast iron skillet over medium heat on the stovetop.
  2. Add olive oil: Pour in the extra virgin olive oil, swirling it around to coat the bottom of the skillet.
  3. Sauté garlic: Add the minced garlic and crushed red pepper flakes, sautéing for about 1 minute until the garlic is fragrant and lightly browned.
  4. Prepare tomatoes: Carefully add the whole peeled tomatoes, breaking them up into smaller pieces with a spoon.
  5. Add basil and season: Tear the fresh basil leaves and add them to the sauce, along with ½ teaspoon of kosher salt and ¼ teaspoon of black pepper. Stir to combine.
  6. Simmer the sauce: Reduce the heat to medium-low and let the sauce simmer for about 5 minutes, continuing to break up the tomatoes until they are well incorporated.
  7. Crack the eggs: Make small wells in the sauce and gently break the eggs into the wells, leaving space around each egg. Sprinkle with the remaining salt and pepper.
  8. Bake the dish: Place the skillet in the preheated oven and bake for 7-9 minutes, or until the whites are set and the yolks are cooked to your desired doneness.
  9. Serve immediately: Remove the skillet from the oven and serve right away, topped with freshly grated parmesan cheese and extra basil if desired.

Pro Tips for Perfect Italian Baked Eggs

  • Choose quality ingredients: Using high-quality canned tomatoes, like San Marzano, elevates the flavor of the sauce.
  • Fresh herbs are key: Fresh basil truly enhances the dish; dried herbs won’t provide the same vibrant taste.
  • Watch the eggs closely: Baking time can vary; keep an eye on the eggs to achieve your preferred doneness.
  • Customize your toppings: Consider adding crumbled feta or goat cheese for a unique twist.
  • Experiment with spices: Feel free to add herbs like oregano or thyme for added depth.
  • Use a deeper skillet: A deeper skillet allows for more sauce and prevents overflow during baking.
  • Serve with crusty bread: Pair your baked eggs with crusty bread for dipping and scooping up the delicious sauce.
  • Make it ahead: Prepare the sauce in advance and store it. When you’re ready, just crack the eggs and bake!

Common Mistakes and Troubleshooting

Even though this dish is straightforward, here are some common pitfalls to avoid:

  • Overcooking the eggs: Keep an eye on the eggs in the oven; overcooked yolks can become rubbery.
  • Using too much salt: Adjust the salt to your taste, especially if your canned tomatoes are already salted.
  • Skipping the garlic: Garlic adds essential flavor; don’t omit it!

Delicious Variations to Try

If you’re feeling adventurous, here are some variations to elevate your Italian baked eggs:

  • Italian Sausage and Peppers: Sauté sliced sausage with bell peppers and onions before adding the tomatoes for a heartier dish.
  • Spinach and Feta: Stir in fresh spinach and sprinkle crumbled feta cheese for a Mediterranean twist.
  • Mushroom Medley: Add sautéed mushrooms for an earthy flavor that pairs beautifully with the sauce.
  • Spicy Chorizo: Incorporate spicy chorizo for a kick and a smoky flavor.

Storage and Make-Ahead Instructions

This dish is best enjoyed fresh, but you can make it ahead and store it:

  • Refrigeration: Store leftovers in an airtight container in the fridge for up to 3 days.
  • Freezing: While the egg texture may change, you can freeze the sauce for up to 2 months. Just reheat and add fresh eggs when ready to serve.
  • Make-ahead sauce: Prepare the sauce in advance, refrigerate, and heat up before adding the eggs.

Frequently Asked Questions

Here are some common questions about Italian baked eggs:

  • Can I use fresh tomatoes instead of canned? Yes, you can use fresh tomatoes; just ensure they are ripe and juicy.
  • What can I substitute for eggs? For a vegan version, consider using tofu or chickpea flour for a similar texture.
  • Is this dish gluten-free? Yes, the ingredients are naturally gluten-free, but always check labels.
  • Can I prepare this dish in advance? Yes, you can prepare the sauce ahead of time and bake it with eggs when ready.
  • What sides go well with this dish? Serve with a fresh salad or crusty bread to soak up the sauce.
  • How do I adjust the spice level? Add more or fewer red pepper flakes according to your heat preference.
  • Can I use a different type of cheese? Absolutely! Mozzarella or goat cheese are excellent alternatives.
  • Is it possible to double the recipe? Yes, simply use a larger skillet or bake in batches!

Nutrition Tips and Dietary Adaptations

This recipe can be adapted to fit various dietary needs:

  • Low-carb option: Serve it with a side of sautéed vegetables instead of bread.
  • Vegetarian-friendly: Already vegetarian, but you can add more veggies for extra nutrition.
  • High-protein boost: Include some cooked quinoa or beans for added protein.

Recommended Equipment

For this recipe, you will need a few essential kitchen tools:

  • 10-inch cast iron skillet: Ideal for even cooking and serving.
  • Wooden spoon: Perfect for stirring the sauce without scratching your skillet.
  • Measuring cups and spoons: Ensure accuracy in your recipe.

Serving Suggestions

To enjoy your Italian baked eggs to the fullest, consider these serving ideas:

  • Pair with crusty bread: Ideal for dipping into the rich sauce.
  • Fresh salad: A light salad with lemon vinaigrette complements the dish beautifully.
  • Herb garnish: Finish with fresh basil or parsley for a pop of color and flavor.

Conclusion

Italian baked eggs are more than just a meal; they’re a comforting experience that brings warmth to your table. With their rich flavors and satisfying nature, this dish is perfect for any occasion. Remember, cooking is about enjoying the process and sharing moments with loved ones. So gather your ingredients, follow these steps, and indulge in the joy of making this simple yet delightful recipe. Happy cooking!

Easy Italian Baked Eggs (Eggs in Purgatory)

Prep Time 10 minutes
Cook Time 15 minutes
Total Time 25 minutes
Servings 4 servings
Calories 250
A flavorful and simple Italian-inspired baked eggs dish cooked in a spicy tomato sauce, perfect for a quick breakfast or brunch.

Ingredients

Oil

  • 2 tablespoons extra virgin olive oil

Garlic

  • 3-4 cloves fresh garlic (minced) (approximately 1 tablespoon)

Red pepper flakes

  • pinch crushed red pepper flakes

Tomatoes

  • 28 ounces canned whole peeled tomatoes (San Marzano preferred)

Basil

  • 10-12 leaves fresh basil leaves (plus extra for garnish)
  • 1 teaspoon kosher salt (divided use)
  • ½ teaspoon black pepper (divided use)
  • 6 large eggs

Parmesan cheese

  • to taste freshly grated Parmesan cheese (for serving)

Instructions 

  • Preheat oven to 400˚F. Heat a cast iron skillet over medium heat and add olive oil.
  • Add minced garlic and red pepper flakes; sauté for 1 minute until fragrant.
  • Add tomatoes and break them up; stir in basil, salt, and pepper. Simmer for 5 minutes.
  • Create space for eggs, crack them into the sauce, season, and transfer skillet to oven. Bake for 7-9 minutes until whites are set.
  • Remove from oven, garnish with Parmesan and basil, and serve immediately.

Notes

Use high-quality canned tomatoes for best flavor.
Calories: 250kcal
Cost: $15
Course: Breakfast, Brunch
Cuisine: Italian
Keyword: baked, Eggs, Tomato

Discover the Joy of Spinach Ricotta Bites

Welcome to a delightful culinary journey where we explore how to create scrumptious Spinach Ricotta Bites. This recipe is not only easy to follow but also perfect for gatherings or cozy nights in. Combining creamy ricotta, flavorful spinach, and a hint of cheese, these bites are destined to become a favorite in your kitchen. Whether you’re looking for a quick snack or a crowd-pleasing appetizer, this recipe delivers on both flavor and simplicity.

Why You’ll Love This Recipe

Let’s dive into the reasons why these spinach ricotta bites are a must-try:

  • Quick and Easy: These bites come together in just a few simple steps, making them perfect for busy weeknights or spontaneous gatherings.
  • Nutritious: Packed with spinach and ricotta, they are rich in vitamins, protein, and calcium, offering a wholesome snack option.
  • Versatile: You can easily customize the ingredients based on your dietary preferences or what you have on hand.
  • Great for Meal Prep: Make a batch ahead of time and store them for easy snacking throughout the week.
  • Crowd-Pleaser: Their bite-sized nature makes them ideal for parties, potlucks, or family gatherings.

Ingredients for Spinach Ricotta Bites

Here’s what you’ll need to make these delightful bites:

  • 2 tablespoons butter
  • 1 small yellow onion, chopped
  • 1 clove garlic, minced
  • 2 large eggs, beaten
  • 1 cup ricotta cheese (low or full-fat ricotta will work)
  • 1/2 cup mozzarella cheese, shredded
  • 1/2 cup parmesan cheese, grated
  • 10-ounce package frozen chopped spinach, defrosted and drained well (squeeze out as much liquid as possible)
  • 1/4 teaspoon kosher salt

**Substitutions & Variations**: You can easily swap or add ingredients to suit your taste:

  • Cheese Variations: Substitute mozzarella or parmesan with feta or goat cheese for a different flavor profile.
  • Herbal Touch: Add fresh herbs like basil or dill for an aromatic twist.
  • Spicy Kick: Mix in some red pepper flakes or jalapeños for a hint of heat.
  • Veggie Boost: Include finely chopped bell peppers or mushrooms for added nutrients and texture.

How to Make Spinach Ricotta Bites: Easy Baking Guide

A side view of delicious Spinach Ricotta Bites showcasing their crispy exterior.

Follow these simple steps to create your spinach ricotta bites:

  1. Preheat the Oven: Preheat your oven to 375°F (190°C). Coat a mini muffin tin with grease or use paper liners for easy removal.
  2. Prepare the Onion and Garlic: Melt the butter in a small skillet over medium heat. Add chopped onion and cook for about 5 minutes, until soft and translucent. Stir in minced garlic and cook for another minute. Remove from heat and let cool slightly.
  3. Combine the Ingredients: In a large mixing bowl, combine beaten eggs, ricotta cheese, shredded mozzarella, grated parmesan, and drained spinach. Add the sautéed onion and garlic mixture, seasoning with kosher salt. Mix until well combined.
  4. Fill the Muffin Tin: Spoon the mixture into the prepared muffin tin, filling each cup to the top.
  5. Bake: Bake in the preheated oven for 20-25 minutes, until the tops are golden brown and the bites are set.
  6. Cool and Serve: Allow the bites to cool in the tin for a few minutes before transferring them to a wire rack to cool completely. Serve warm or at room temperature.

Pro Tips for Perfect Spinach Ricotta Bites

Enhance your cooking experience with these expert insights:

  • Drain Well: Ensure your spinach is thoroughly drained to prevent soggy bites.
  • Egg Temperature: Use eggs at room temperature for better emulsification.
  • Cheese Mix: Experiment with different cheese blends for unique flavors.
  • Don’t Overmix: Mix just until combined to keep the texture light and airy.
  • Check Doneness: The bites are ready when they are golden brown on top and firm to the touch.
  • Cooling Time: Let them cool slightly in the tin to help them set before transferring.
  • Perfect for Freezing: These bites freeze well. Just reheat in the oven for a quick snack.
  • Serving Ideas: Pair with a side of marinara or a yogurt dip for extra flavor.

Common Mistakes and Troubleshooting

Here’s how to avoid common pitfalls:

  • Too Watery: If your bites are too wet, check that the spinach is well-drained and that you haven’t added too many wet ingredients.
  • Burnt Tops: If the tops brown too quickly, cover with foil during the last few minutes of baking.
  • Underbaked Bites: If they don’t seem set after the recommended baking time, give them a few extra minutes.

Storage and Make-Ahead Instructions

To keep your spinach ricotta bites fresh:

  • Refrigerate: Store in an airtight container in the fridge for up to 4 days.
  • Freeze: Freeze in a single layer, then transfer to a freezer bag. They can be stored for up to 3 months.
  • Reheat: To reheat, place them in a preheated oven at 350°F (175°C) for 10-15 minutes until warmed through.

Frequently Asked Questions (FAQs)

Here are answers to some common questions:

  • Can I use fresh spinach instead of frozen? Yes, just blanch and chop fresh spinach before using.
  • Can I make these in a regular-sized muffin tin? Absolutely! Just adjust the baking time, as they will need longer to cook.
  • What should I serve with these Spinach Ricotta Bites? They pair wonderfully with marinara sauce, a fresh salad, or as part of a larger appetizer spread.
  • Are these good for meal prep? Yes, they are perfect for meal prep and can be made in advance for quick snacks.
  • Can I substitute the cheeses? Yes, feel free to use your favorite cheeses or whatever you have on hand.
  • How long do leftovers last? Store leftovers in the fridge for up to 4 days.
  • Can I add meat to these bites? Yes! Cooked bacon or sausage can be added for extra flavor.
  • What’s the best way to reheat them? Reheat in the oven for the best texture, or microwave if you’re short on time.

Nutritional Benefits of Spinach Ricotta Bites

These little bites not only satisfy your taste buds but also offer nutritional perks:

  • Protein-Rich: With ricotta and eggs, these bites provide a good source of protein, essential for muscle repair and growth.
  • Vitamins and Minerals: Spinach is loaded with vitamins A, C, and K, along with iron and calcium.
  • Low in Carbs: A great option for those following low-carb diets, making them a guilt-free snack.

Equipment Recommendations

For best results, consider these kitchen tools:

  • Mini Muffin Tin: Essential for perfectly sized bites.
  • Mixing Bowls: Having various sizes helps when combining ingredients.
  • Silicone Spatula: Great for mixing and scraping down the sides of bowls.
  • Skillet: A non-stick skillet works best for sautéing onions and garlic without sticking.

Serving Suggestions

These bites can be enjoyed in various ways:

  • As an Appetizer: Serve warm with a side of marinara for dipping.
  • In a Salad: Crumble over a fresh salad for added flavor and texture.
  • As a Snack: Enjoy them cold or reheated for a quick, nutritious snack.
  • At a Picnic: Pack them for a delightful addition to your picnic basket.

With their delightful flavor and ease of preparation, these spinach ricotta bites are sure to become a go-to recipe in your kitchen. Whether you’re hosting a gathering or simply enjoying a quiet evening at home, these bites offer a taste of comfort and joy in every bite. Happy cooking!

Spinach Ricotta Bites: The Perfect Easy Appetizer for Every Occasion

Prep Time 10 minutes
Cook Time 20 minutes
Total Time 30 minutes
Servings 12 pieces
Calories 150
These savory spinach ricotta bites are quick to make and perfect for any gathering. They combine cheesy goodness with healthy spinach in a delightful mini muffin form.

Ingredients

Dairy

  • 2 tablespoons butter
  • 1 small yellow onion, chopped
  • 1 clove garlic, minced
  • 2 large eggs, beaten
  • 1 cup ricotta cheese ((low or full-fat))
  • 1/2 cup mozzarella cheese, shredded
  • 1/2 cup parmesan cheese, grated
  • 10 ounces frozen chopped spinach, defrosted and drained (squeeze out excess liquid)
  • 1/4 teaspoon kosher salt

Instructions 

  • Preheat oven to 375°F (190°C) and prepare a mini muffin tin.
  • Sauté onion in butter until soft, then add garlic and cool.
  • Mix eggs, ricotta, cheeses, spinach, onion, garlic, and salt in a bowl.
  • Fill muffin cups with the mixture and bake for 20-25 minutes until golden.
  • Cool briefly, then serve warm or at room temperature.

Notes

For extra flavor, sprinkle with additional Parmesan before baking.
Calories: 150kcal
Cost: $15
Course: Appetizer
Keyword: Cheese, Ricotta, Spinach