Author

Noah

Browsing

Transform Your Dinner Routine with Smashed Turkey Burgers

Welcome to a culinary adventure that will elevate your weeknight dinners! Today, we’re diving into the world of smashed turkey burgers, a delicious and satisfying meal that’s easy to prepare. Made with simple ingredients, these burgers are not just tasty; they also offer a healthier alternative to traditional beef burgers. With a beautiful blend of flavors and textures, you’ll find that cooking can be both enjoyable and fulfilling. Let’s explore this delightful recipe and discover why you’ll love making turkey burgers at home.

Why You’ll Love This Recipe

Here are five compelling reasons to embrace this smashed turkey burger recipe:

  • Healthier Choice: Ground turkey is lower in fat and calories compared to beef, making it a great option for lighter meals.
  • Quick and Easy: With minimal prep time and straightforward steps, this recipe is perfect for busy weeknights.
  • Customizable: You can easily adjust toppings and seasonings to suit your family’s tastes.
  • Juicy and Flavorful: The technique of smashing the patties ensures a crispy edge while keeping the inside tender and juicy.
  • Fun to Make: Involving family members in the cooking process can make for a fun and engaging dinner experience.

Ingredients Breakdown

Let’s take a closer look at what you’ll need to create these amazing burgers:

  • Ground Turkey: Lean and packed with protein, choose a mix that has a bit of fat for juiciness.
  • Butter: Adds richness and a wonderful flavor; feel free to substitute with olive oil for a healthier option.
  • Cheese: A slice of your favorite cheese (like cheddar or mozzarella) for melting on top.
  • Lettuce: Crisp romaine or iceberg for a refreshing crunch.
  • Sliced Onion: Red onion or sweet onion works beautifully for added flavor.
  • Pickles: For tanginess and crunch, use dill pickles or your favorite variety.
  • Secret Sauce: A mix of mayonnaise, ketchup, and a dash of mustard for a zingy kick.

Pro Tips for Perfect Turkey Burgers
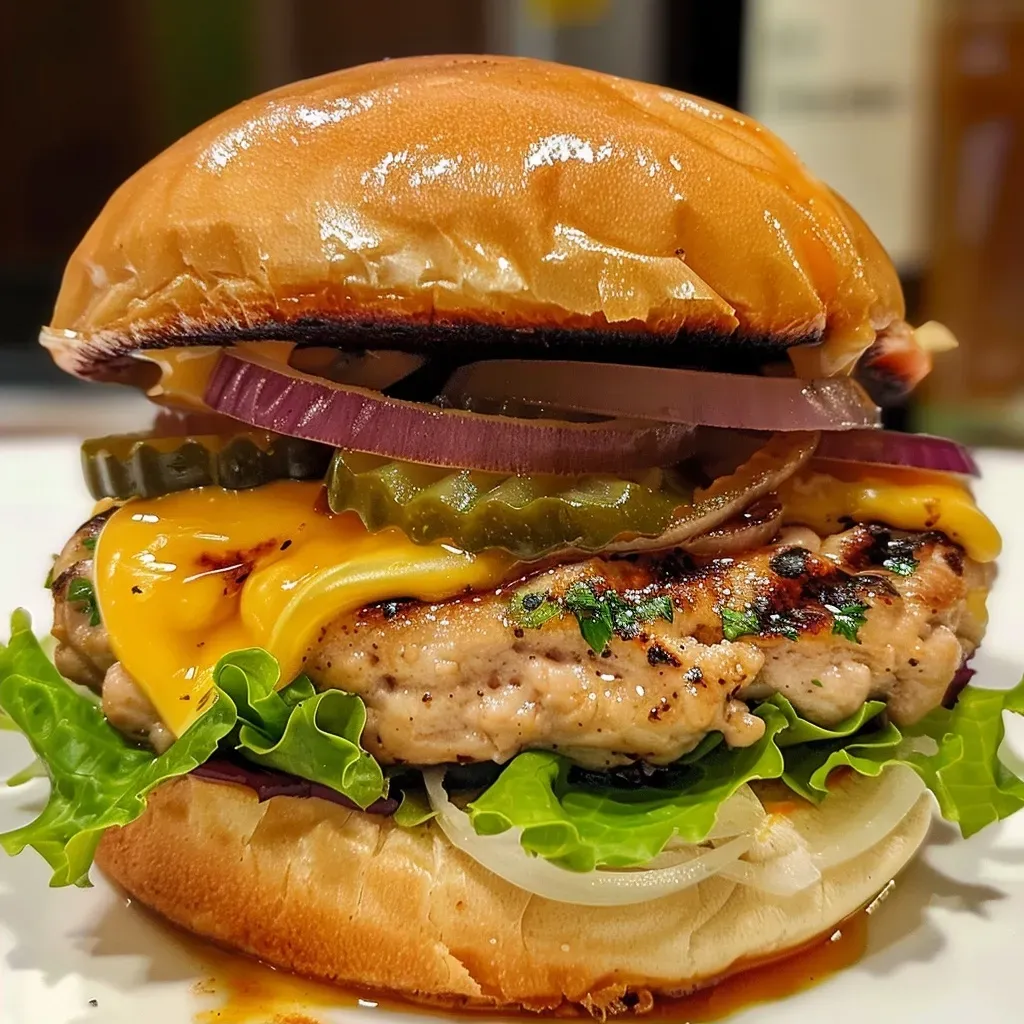
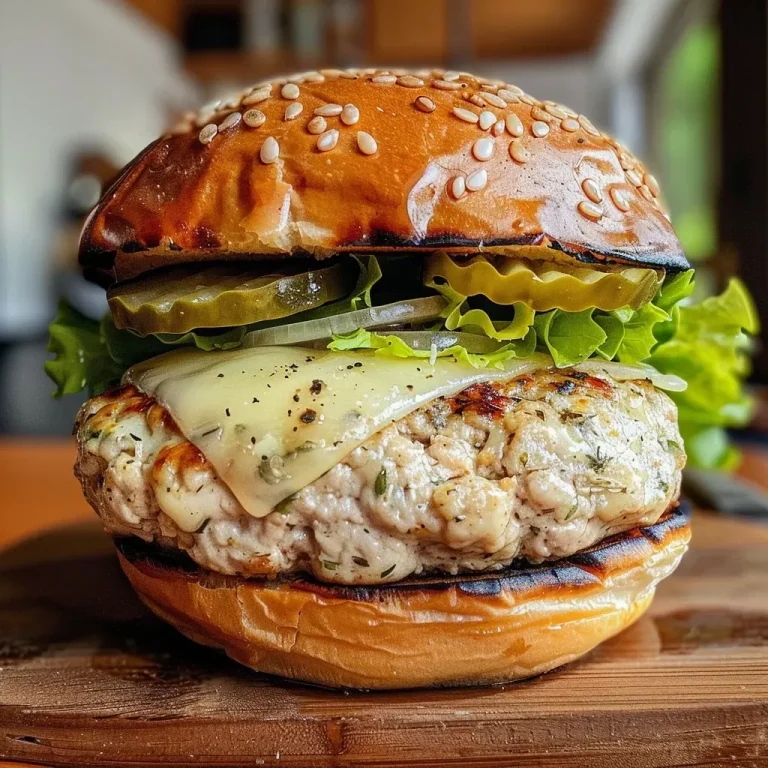
A detailed view of a delicious turkey burger featuring lettuce, pickles, and onions.

Follow these expert insights to ensure your smashed turkey burgers turn out perfectly every time:

  • Don’t Overmix: Mix the turkey with butter just until combined; overworking the meat can lead to tough burgers.
  • Chill the Patties: Let them rest in the fridge for about 30 minutes before cooking to help them hold their shape.
  • Preheat Your Grill: A hot grill is essential for achieving that perfect sear and crispy edges.
  • Smash and Cook Quickly: Smash the patties with a spatula immediately after placing them on the grill to lock in juices.
  • Cheese Melting: Place cheese on the patty during the last minute of cooking and cover to help it melt beautifully.
  • Experiment with Toppings: Try avocado, jalapeños, or a fried egg for unique flavor combinations.
  • Season Generously: Don’t skimp on salt and pepper; they enhance the natural flavors of the turkey.
  • Rest the Burgers: Let the cooked burgers rest for a few minutes before assembling to keep them juicy.

Common Mistakes and Troubleshooting

Even the best chefs run into issues sometimes. Here’s how to avoid common pitfalls:

  • Dry Burgers: Ensure you use a ground turkey blend with some fat content (around 85% lean).
  • Burnt Patties: Keep an eye on your cooking time; turkey cooks quickly, and overcooking can dry them out.
  • Loose Patties: If your burgers fall apart, consider adding a binding agent like breadcrumbs or an egg.
  • Flavorless Burgers: Always season your turkey generously; don’t forget the salt and pepper.

Delicious Variations

Want to switch things up? Here are four tasty variations on the classic smashed turkey burger:

  • Chipotle Turkey Burger: Add chipotle sauce and smoked paprika for a spicy kick.
  • Greek-Inspired Burger: Mix feta cheese, olives, and oregano into the ground turkey.
  • Italian Turkey Burger: Incorporate Italian herbs and serve with marinara sauce and mozzarella cheese.
  • BBQ Turkey Burger: Brush with your favorite BBQ sauce during the last few minutes of cooking for a smoky flavor.

Storage and Make-Ahead Instructions

If you want to prepare ahead of time, here’s how to do it:

  • Make-Ahead Patties: Shape the patties and store them in the fridge for up to 24 hours or freeze for up to 3 months.
  • Cooked Burger Storage: Store leftover cooked burgers in an airtight container in the fridge for up to 3 days.
  • Reheating: Reheat in the oven at 350°F (175°C) until warmed through to maintain moisture.

Frequently Asked Questions

Here are answers to some common questions about smashed turkey burgers:

  • Can I use ground turkey breast? Yes, but keep in mind that it may be drier than a blend with thigh meat.
  • What should I serve with turkey burgers? Consider sweet potato fries, a fresh salad, or roasted vegetables for a balanced meal.
  • Can I make these gluten-free? Absolutely! Use gluten-free breadcrumbs or omit them altogether.
  • How do I know when the burgers are done? Use a meat thermometer; turkey should reach an internal temperature of 165°F (74°C).
  • Can I grill these burgers? Yes, grilling is a fantastic way to add flavor; just ensure your grill is preheated.
  • How do I prevent my turkey burgers from falling apart? Chill the patties before cooking and avoid over-mixing the meat.
  • Can I add vegetables to the patties? Yes, finely chopped vegetables like bell peppers or mushrooms can add moisture and flavor.
  • What’s the best way to top my turkey burger? Get creative! Lettuce, tomato, avocado, and gourmet sauces can elevate your burger experience.

Nutritional Tips and Dietary Adaptations

Here’s how to make your turkey burgers even healthier:

  • Lean Protein: Ground turkey is high in protein and lower in calories compared to beef, making it an excellent choice.
  • Load Up on Veggies: Add vegetables to your burger mix or serve with a side salad to boost fiber intake.
  • Whole Grain Buns: Opt for whole-grain or lettuce wraps to increase nutritional value.
  • Dairy-Free Options: Substitute cheese with avocado or nutritional yeast for a creamy texture without dairy.

Equipment Recommendations

To make your cooking experience smoother, here’s what you’ll need:

  • Large Mixing Bowl: For combining your ingredients easily.
  • Griddle or Grill: Essential for that perfect sear and flavor.
  • Spatula: A sturdy spatula for smashing and flipping your burgers.
  • Meat Thermometer: To ensure your turkey burgers are cooked to a safe temperature.

Serving Suggestions

When it comes to serving your delicious smashed turkey burgers, consider these ideas:

  • Classic Style: Serve on a toasted bun with lettuce, tomato, and your favorite condiments.
  • Open-Faced: Serve on a bed of greens for a lighter option.
  • On a Platter: Create a burger bar with various toppings and sauces for a fun, interactive meal.
  • Sliders: Make mini versions for parties or gatherings, perfect for sharing.

In conclusion, smashed turkey burgers are a fantastic way to enjoy a family-friendly meal that’s both satisfying and nutritious. With endless possibilities for customization, you can make each burger unique and flavorful. So grab your ingredients, gather your loved ones, and enjoy the simple pleasure of cooking together. Remember, great food doesn’t need to be complicated—just thoughtful and made with care. Happy cooking!
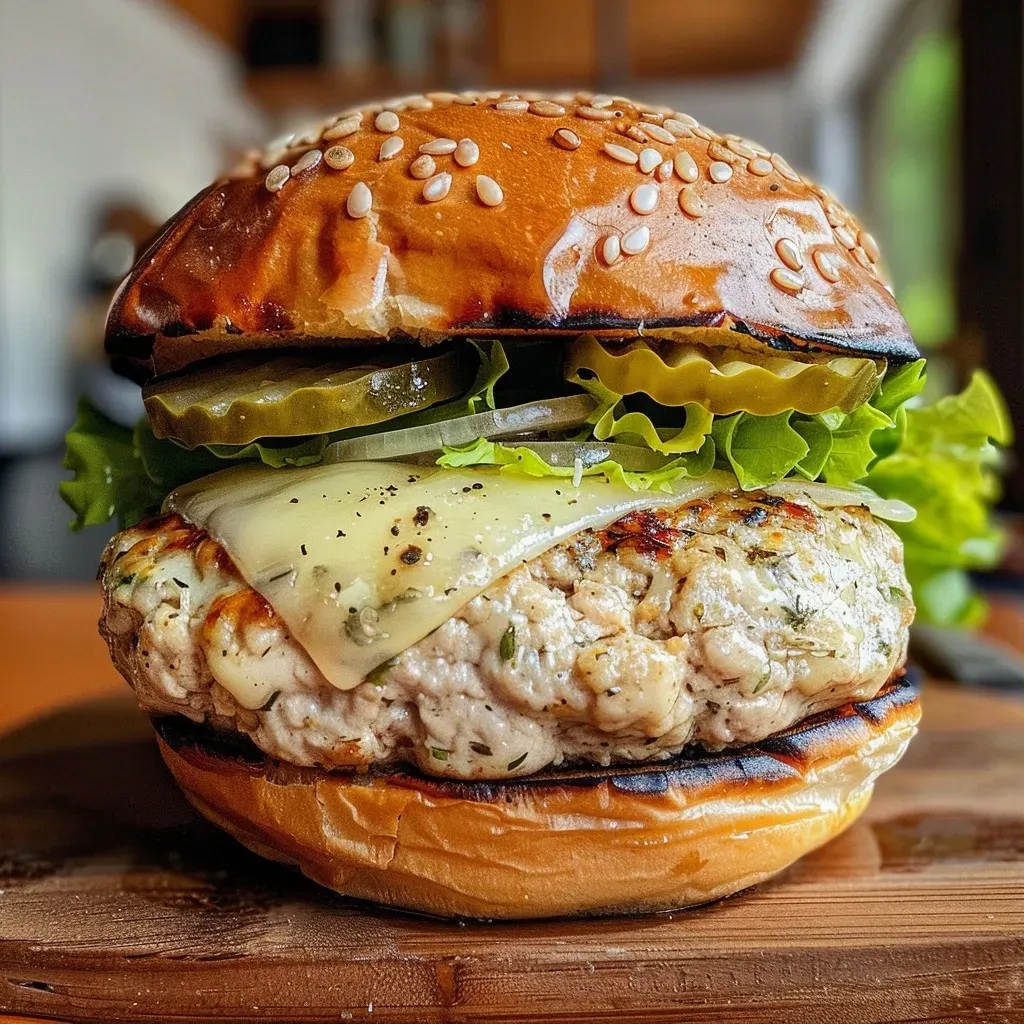
Smashed Turkey Burger

Prep Time 10 minutes
Cook Time 10 minutes
Total Time 20 minutes
Servings 4 pieces
Calories 450
A juicy and flavorful smashed turkey burger topped with cheese and fresh toppings, perfect for a quick and satisfying meal.

Ingredients

Main ingredients

  • 1 pound ground turkey
  • 2 tablespoons butter
  • 4 slices cheese
  • 1 cup lettuce
  • 0.5 cup sliced onion
  • 0.25 cup pickles
  • 0.25 cup secret sauce

Instructions 

  • Mix ground turkey with butter.
  • Form into patties and smash on the grill.
  • Cook until juicy and golden.
  • Top with cheese, lettuce, onion, pickles, and secret sauce.
Notes

Use a hot grill for best results and serve immediately.
Calories: 450kcal
Cost: $12
Course: Main Course
Cuisine: American
Keyword: Turkey

Discover the Comfort of a Brown Butter Upside-Down Pear Cake

As the leaves begin to turn and the air takes on a crispness that signals the arrival of fall, there’s no better time to indulge in the warm, comforting flavors of a Brown Butter Upside-Down Pear Cake. This delightful dessert is not just about taste; it’s a celebration of simple ingredients transformed into something extraordinary. Imagine the sweet aroma of ripe pears mingling with the rich, nutty scent of brown butter as it fills your kitchen, inviting everyone to gather around the table. Whether you’re hosting a cozy gathering or simply treating yourself to a slice of joy, this cake is perfect for any occasion.

In this article, we’ll dive deep into the nuances of creating the perfect Upside-Down Pear Cake with Brown Butter, exploring everything from ingredient choices to expert tips that guarantee success. So, roll up your sleeves, and let’s embark on this culinary adventure together!

Why You’ll Love This Recipe

  • Flavor Harmony: The combination of sweet pears, rich brown butter, and warm spices creates a flavor profile that is both comforting and sophisticated.
  • Easy to Make: With straightforward steps and minimal equipment required, this cake is perfect for both novice and seasoned bakers.
  • Versatile Serving Options: Enjoy it warm with a scoop of vanilla ice cream, or serve it with a dusting of powdered sugar for a simple yet elegant dessert.
  • Make-Ahead Friendly: This cake can be made in advance and stored, making it an ideal choice for busy weeks.
  • Beautiful Presentation: The stunning upside-down presentation, with caramelized pears as the star, makes it a show-stopping dessert.

Ingredient Breakdown and Substitutions

Every great cake starts with quality ingredients. Here’s what you’ll need to create this delicious Brown Butter Upside-Down Pear Cake:

  • Unsalted Butter: Essential for a rich flavor. If you’re out of unsalted butter, you can use salted butter but reduce the added salt in the recipe.
  • Brown Sugar: Adds depth to the flavor and helps create a beautiful caramel layer. You can substitute with coconut sugar for a different flavor profile.
  • Kosher Salt: Enhances all the flavors. If you use table salt, reduce the amount as it is more potent.
  • Pears: Ripe pears (like Bartlett or Anjou) are best for this recipe. If you don’t have pears, apples can also work well.
  • White Sugar: For sweetness, you can substitute with honey or maple syrup, but be aware it may alter the texture slightly.
  • Eggs: They provide structure. For a vegan option, flax eggs can be used as a substitute.
  • Vanilla Extract: Adds warmth; feel free to use almond extract for a twist.
  • Buttermilk: For moisture and a slight tang. You can make your own buttermilk by adding a tablespoon of vinegar or lemon juice to regular milk and letting it sit for 5 minutes.
  • All-Purpose Flour: Essential for structure. Gluten-free flour blends can also work, but ensure it contains xanthan gum for structure.
  • Baking Soda and Baking Powder: These are key leavening agents for a light cake. Ensure they are fresh for best results.
  • Ground Cinnamon and Ginger: For warmth and spice; you can adjust these to taste or use other warming spices like nutmeg.

Pro Tips for Perfecting Your Upside-Down Cake

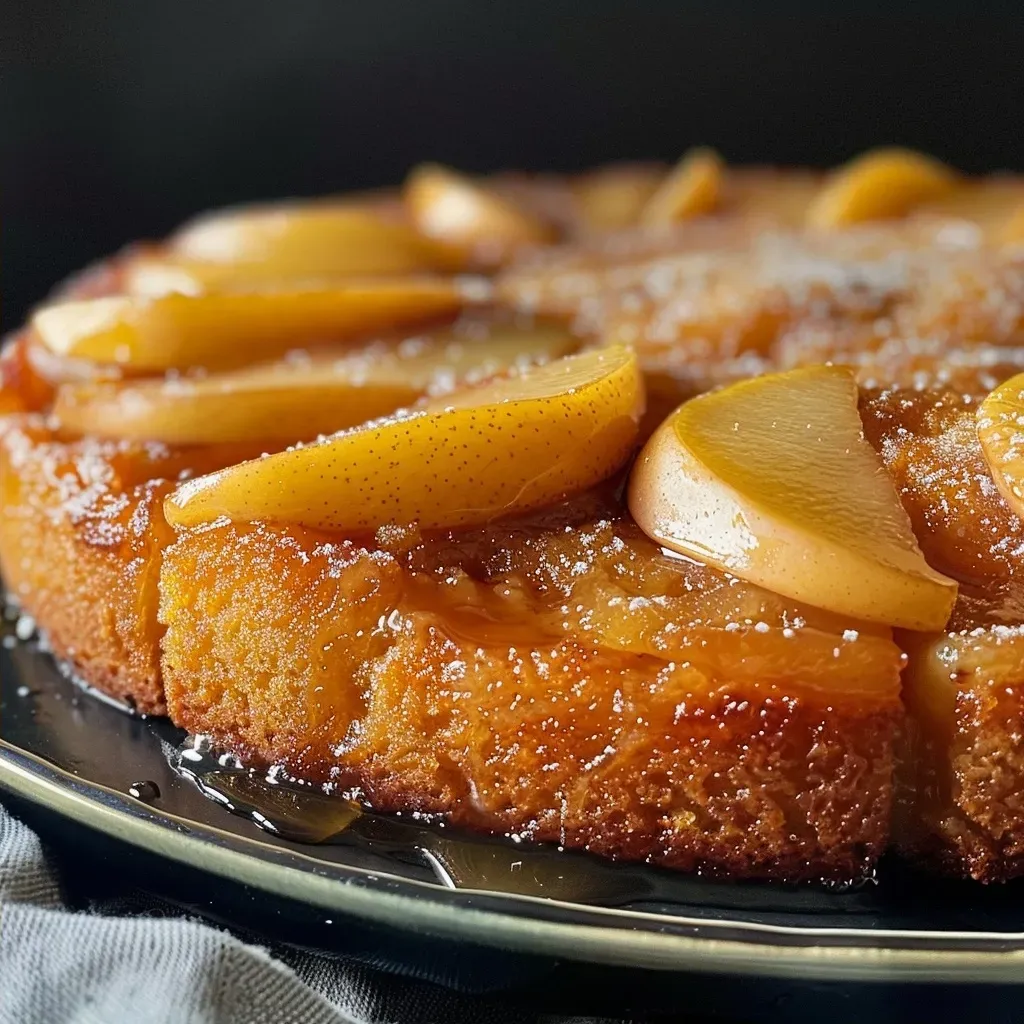
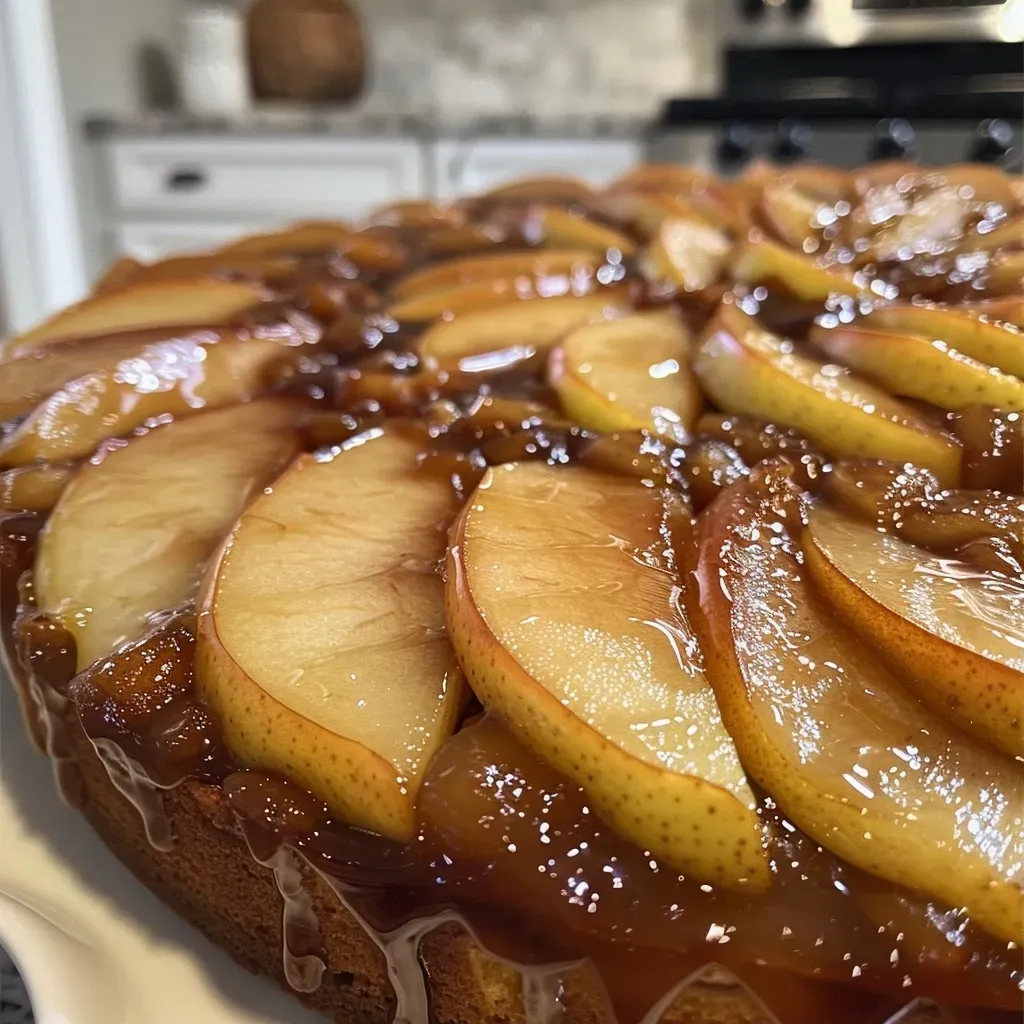
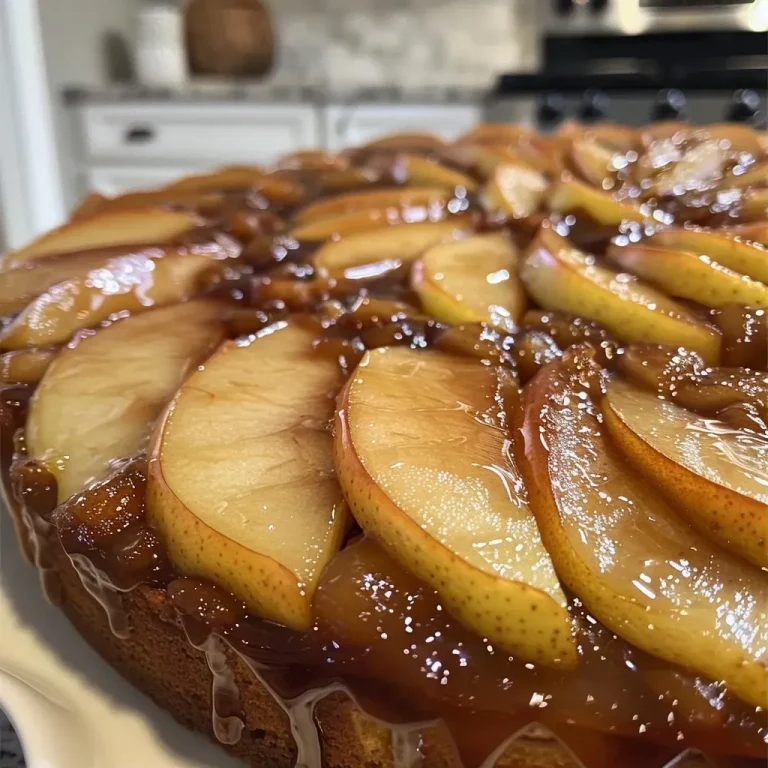
Juicy upside-down pear cake showcasing layered pear slices with a golden brown crust.
  • Brown Your Butter Correctly: Swirl the butter on medium-high heat until it turns a deep golden brown and has a nutty aroma. Watch carefully to prevent burning.
  • Prepare the Pan Well: Butter and flour your cake pan thoroughly to prevent sticking; consider lining the bottom with parchment paper for extra assurance.
  • Layer the Pears Beautifully: Arrange pears evenly for an attractive presentation; the way they are laid out will be the first thing people see when the cake is flipped.
  • Control Your Oven Temperature: Use an oven thermometer to ensure accuracy; baking at the right temperature is critical for the cake’s rise.
  • Check for Doneness: Use a toothpick or skewer in the center of the cake; it should come out clean or with a few moist crumbs.
  • Let it Cool Before Flipping: Allow the cake to sit in the pan for a few minutes before inverting to prevent it from breaking apart.
  • Experiment with Flavors: Don’t hesitate to add nuts or chocolate chips to the batter for a delightful twist.
  • Keep It Moist: Store the cake in an airtight container to maintain moisture, or warm individual slices in the microwave before serving.

Common Mistakes and Troubleshooting

Even the best bakers encounter hiccups now and then. Here are some common issues and how to avoid them:

  • Cake Sticking to the Pan: Ensure you butter and flour the pan well; using parchment paper can help.
  • Overmixing the Batter: Mix just until combined to avoid a dense cake. It’s better to mix in batches rather than all at once.
  • Pears Overcooking: Keep an eye on the pears while cooking; they should be just softened, not mushy.
  • Uneven Baking: Rotate the cake halfway through baking to ensure even heat distribution.

Delicious Variations to Try

Feeling adventurous? Here are some variations you might enjoy:

  • Nutty Addition: Add chopped walnuts or pecans to the batter for a delightful crunch.
  • Spiced Pear Cake: Enhance the flavor with cardamom or allspice for a different spice profile.
  • Chocolate Drizzle: Drizzle melted chocolate over the cooled cake for added decadence.
  • Citrus Zest: Add lemon or orange zest to the batter for a refreshing twist.

Storage and Make-Ahead Instructions

This cake is perfect for making ahead of time. Here’s how to store it for freshness:

  • At Room Temperature: Store covered at room temperature for up to 3 days.
  • Refrigeration: If you want to keep it longer, refrigerate for up to a week.
  • Freezing: Wrap slices tightly in plastic wrap and store in an airtight container for up to 3 months. Thaw in the refrigerator overnight before serving.

Frequently Asked Questions

  • Can I use other fruits? Yes, apples or peaches can be excellent substitutes for pears.
  • Is this cake gluten-free? You can substitute all-purpose flour with a gluten-free blend.
  • How can I make it vegan? Use flax eggs instead of regular eggs and dairy-free butter and milk.
  • What’s the best way to serve this cake? It’s delightful warm with ice cream or at room temperature with tea.
  • Can I make this cake in advance? Absolutely! It stores well and can be made a day ahead.
  • What’s the best way to store leftovers? Keep in an airtight container at room temperature for short-term storage or refrigerate for longer.
  • Why is my cake dense? Overmixing the batter can lead to a dense texture, so mix just until combined.
  • Can I add nuts? Yes, chopped nuts add a great texture and flavor to this cake.

Nutrition Tips and Dietary Adaptations

This cake can be adjusted for various dietary needs:

  • Lower Sugar Option: Reduce the amount of sugar or substitute with natural sweeteners like stevia.
  • Dairy-Free Adaptation: Use plant-based butter and non-dairy milk.
  • Whole Grain Option: Substitute half of the all-purpose flour with whole wheat flour for added nutrition.

Essential Equipment You’ll Need

  • 8 or 9-inch Round Cake Pan: Ensure it’s well-greased and floured.
  • Stand Mixer or Hand Mixer: For beating the butter and sugar until light and fluffy.
  • Saute Pan: To brown the butter and cook the pears.
  • Whisk: For mixing dry ingredients.
  • Spatula: For folding ingredients and spreading batter.

Serving Suggestions

This Upside-Down Pear Cake is versatile and pairs beautifully with:

  • Vanilla Ice Cream: A scoop of creamy vanilla complements the warm spices perfectly.
  • Whipped Cream: Lightly sweetened whipped cream adds a lovely texture.
  • Fresh Berries: A handful of fresh berries adds a pop of color and freshness.
  • Tea or Coffee: Perfect with a warm cup for an afternoon treat.

In conclusion, the Brown Butter Upside-Down Pear Cake is more than just a dessert; it’s an experience filled with warmth and joy. With its rich flavors and delightful texture, it’s sure to become a cherished recipe in your home. So gather your ingredients, invite loved ones, and enjoy the simple pleasure of baking and sharing this comforting cake. Happy baking!

Upside-Down Pear Cake with Brown Butter

Prep Time 20 minutes
Cook Time 30 minutes
Total Time 50 minutes
Servings 8 slices
Calories 350
A deliciously moist cake featuring caramelized pears and rich brown butter, perfect for a cozy dessert or special occasion.

Ingredients

Dough and Batter

  • 1/2 cup unsalted butter, softened
  • 3 tbsp unsalted butter, softened
  • 1/4 cup packed brown sugar
  • 1/2 tsp kosher salt (plus pinch)
  • 2 pears halved, cored and sliced into 1/8-inch pieces
  • 1/2 cup white sugar
  • 2 large eggs
  • 1/2 tsp vanilla extract
  • 3 tbsp buttermilk
  • 1 1/2 cups all-purpose flour
  • 1/2 tsp baking soda
  • 1 tsp baking powder
  • 1/2 tsp ground cinnamon
  • 1/4 tsp ground ginger

Instructions 

  • Preheat oven to 350°F. Prepare the cake pan with butter, parchment, and flour.
  • Cook 7 tbsp of butter until browned, then melt brown sugar in the butter. Toss pears in the sauce and set aside.
  • Mix flour, baking soda, baking powder, salt, cinnamon, and ginger. Beat butter and sugar until fluffy, then add eggs and vanilla. Alternate adding flour mixture and buttermilk, then pour batter over pears in the pan.
  • Bake for 25-30 minutes, then invert the cake onto a plate and remove the pan. Serve warm or at room temperature.

Notes

Ensure the butter is browned properly for a nutty flavor.
Calories: 350kcal
Cost: $15
Course: Dessert
Cuisine: American
Keyword: pear

Discover the Joy of Baking: Nourishing Pumpkin Muffins with Oat Flour

As the leaves turn and the air gets crisp, there’s nothing quite like the warmth of freshly baked pumpkin muffins to evoke the cozy essence of autumn. These Healthy Oat Flour Pumpkin Muffins are not only delicious but also made with wholesome ingredients that will fill your home with delightful aromas. The blend of oat flour and pumpkin puree creates a nurturing, satisfying treat that’s perfect for breakfast or a snack. Let’s dive into this easy recipe that celebrates the joy of cooking and the beauty of seasonal ingredients!

Why You’ll Love This Recipe

  • Wholesome Ingredients: Made with oat flour, these muffins are gluten-free and full of nutrients, making them a guilt-free indulgence.
  • Time-Saving: With a prep time of just 10 minutes and bake time of 18-22 minutes, you can enjoy homemade muffins in no time!
  • Customizable: Add your favorite mix-ins, like nuts or dried fruit, to personalize your muffins.
  • Perfect for Meal Prep: These muffins freeze well, making them a convenient option for busy mornings.
  • Deliciously Moist: The combination of pumpkin puree and avocado oil ensures that these muffins are moist and tender, with a delightful texture.

Ingredient Breakdown and Substitutions

Here’s what you’ll need to create these scrumptious muffins:

  • 1 1/2 cups oat flour: A gluten-free alternative that provides a nutty flavor and a tender crumb. If you don’t have oat flour, you can make your own by blending rolled oats until fine.
  • 1 tsp baking powder: Helps the muffins rise and become fluffy.
  • 1/2 tsp baking soda: Works in conjunction with baking powder for the perfect lift.
  • 1/4 tsp salt: Enhances the flavors of the other ingredients.
  • 1 1/2 tsp pumpkin pie spice: A warm blend of spices that captures the essence of fall. You can substitute with cinnamon, nutmeg, and ginger if needed.
  • 2 large eggs: Binds the ingredients together and adds moisture.
  • 1/2 cup pure maple syrup: A natural sweetener that complements the flavor of pumpkin beautifully. Honey or agave syrup can also be used.
  • 1/2 cup avocado oil: Adds healthy fats and moisture. Melted coconut oil or butter can be used as a substitute.
  • 1/4 cup milk of choice: Any milk will work, including nut milk, dairy, or oat milk.
  • 1 cup pure pumpkin puree: The star ingredient that keeps the muffins moist. Make sure to use pure pumpkin puree, not pumpkin pie filling.
  • 2 tsp vanilla extract: Adds a lovely depth of flavor.
  • 1/2 cup mini chocolate chips: These add a delightful sweetness and are optional. Feel free to use dark chocolate or leave them out for a healthier option.

Step-by-Step Instructions to Make Pumpkin Muffins

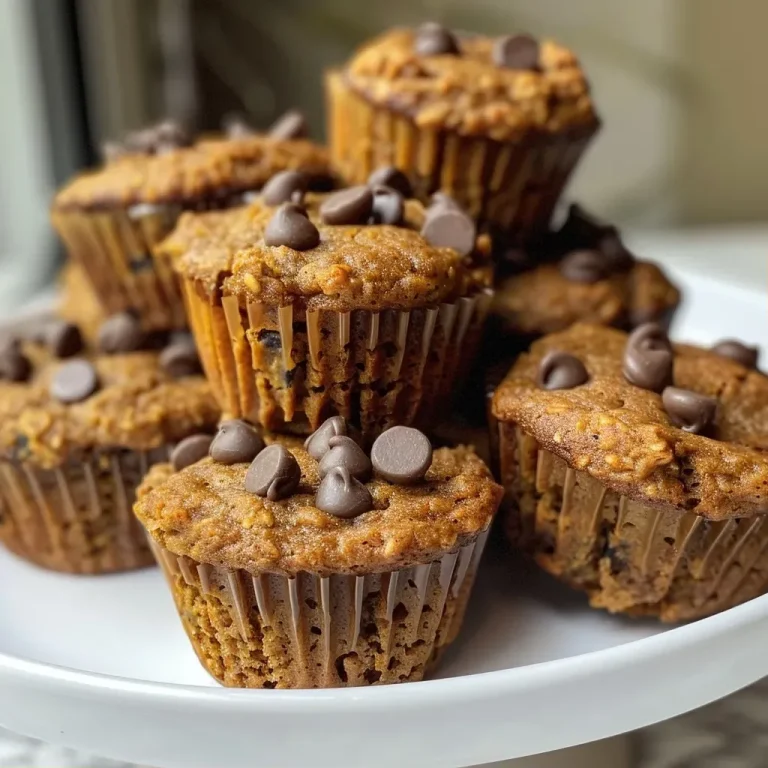
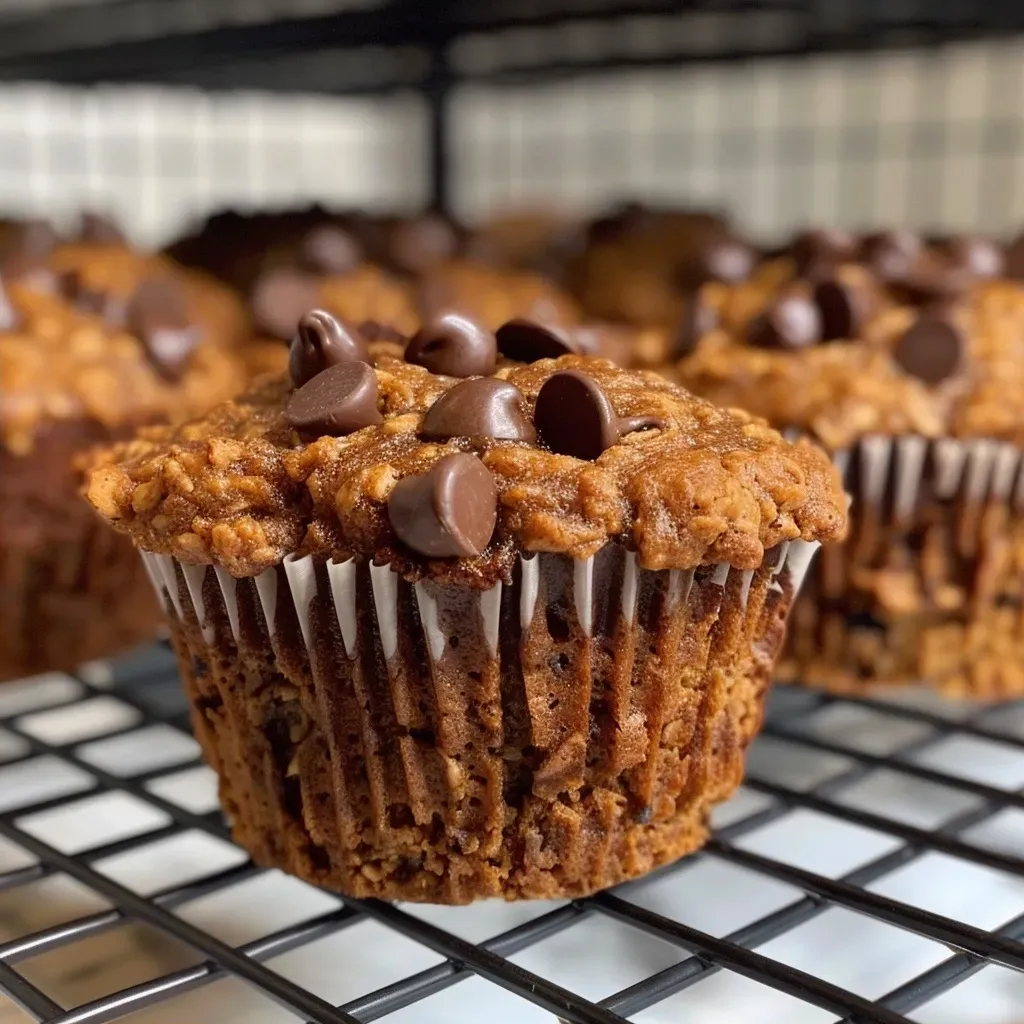
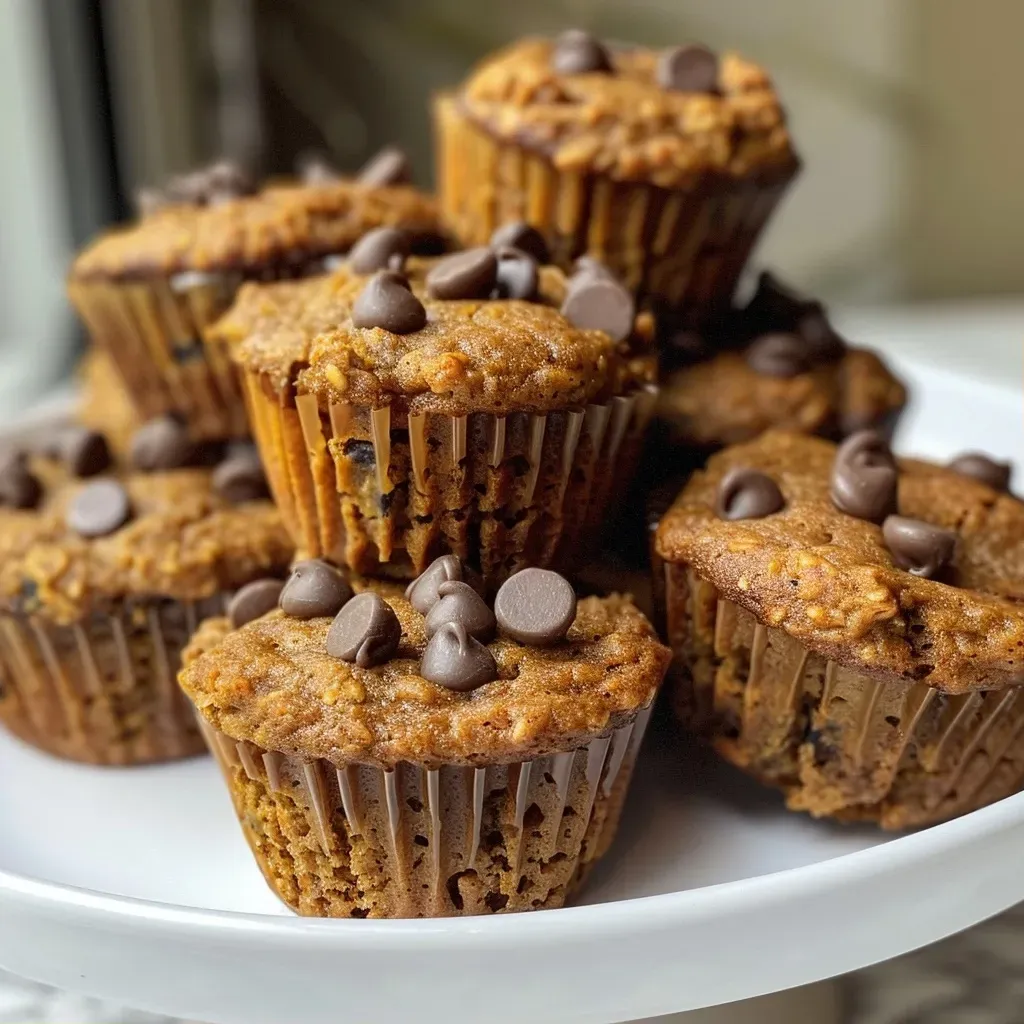
Side view of a fluffy pumpkin muffin made with oat flour and topped with chocolate chips.

Follow these simple steps to create your Healthy Oat Flour Pumpkin Muffins:

  1. Preheat the oven to 350°F (180°C) and line a muffin pan with paper liners.
  2. Mix Dry Ingredients: In a medium bowl, whisk together the oat flour, baking powder, baking soda, salt, and pumpkin pie spice.
  3. Combine Wet Ingredients: In a large bowl, whisk together the eggs, maple syrup, avocado oil, milk, pumpkin puree, and vanilla extract until smooth.
  4. Combine Wet and Dry: Pour the dry ingredients into the wet ingredients and use a spatula to gently fold everything together until just combined. Be careful not to overmix.
  5. Add Chocolate Chips: Stir in the chocolate chips, ensuring an even distribution.
  6. Fill Muffin Cups: Divide the batter evenly between the muffin cups, filling each about 3/4 full. Sprinkle a few extra chocolate chips on top if desired.
  7. Bake for 18–22 minutes, or until a toothpick inserted in the center comes out clean.
  8. Cool: Let the muffins cool in the pan for 5–10 minutes, then transfer to a wire rack to cool completely before serving.

Pro Tips for Perfect Muffins

  • Don’t Overmix: Mixing too much can lead to dense muffins. Gently fold the ingredients until just combined.
  • Let the Batter Rest: Allowing the batter to rest for 10-15 minutes can result in a fluffier texture.
  • Use Room Temperature Ingredients: Ingredients at room temperature will mix better and create a smoother batter.
  • Experiment with Sweetness: Adjust the amount of maple syrup based on your preference for sweetness.
  • Check for Doneness: Ovens vary, so check your muffins a couple of minutes before the recommended time.
  • Store Wisely: Store leftovers in an airtight container at room temperature for 2-3 days, or freeze for longer storage.
  • Mind the Toppings: If you’re adding toppings like nuts or chocolate chips, sprinkle them on just before baking for added texture.
  • Flavor Variations: Feel free to add orange zest or nuts for an extra layer of flavor and crunch.

Common Mistakes and Troubleshooting

Here are some common pitfalls to avoid:

  • Incorrect Measurements: Always measure your ingredients accurately. Use a kitchen scale for the best results.
  • Overbaking: Keep an eye on your muffins to prevent them from drying out. They should be moist but fully cooked.
  • Using the Wrong Flour: Make sure you’re using pure oat flour; any other type of flour may not yield the same results.
  • Not Preheating the Oven: Always preheat your oven to ensure even baking.

Delicious Variations to Try

The beauty of these muffins lies in their versatility. Here are a few variations to consider:

  • Chocolate Chip Pumpkin Muffins: Add more chocolate chips for a sweeter treat.
  • Pumpkin Spice Muffins: Add extra pumpkin pie spice for a more intense flavor.
  • Nuts and Seeds: Incorporate walnuts or pumpkin seeds for added texture and nutrition.
  • Maple Pecan Muffins: Substitute some of the chocolate chips with chopped pecans for a nutty flavor.

How to Store and Make-Ahead Instructions

To keep your muffins fresh and delicious, follow these storage tips:

  • Room Temperature: Store in an airtight container for up to 3 days at room temperature.
  • Refrigerator: For longer storage, keep them in the fridge for up to a week.
  • Freezing: Freeze muffins in a single layer on a baking sheet, then transfer to an airtight container for up to 3 months. Thaw at room temperature or reheat in the oven.

Frequently Asked Questions (FAQs)

  • Can I make these muffins vegan?: Yes! Substitute eggs with flax eggs and use a plant-based milk alternative.
  • What can I use instead of pumpkin puree?: You can use applesauce or mashed bananas, but the flavor will differ.
  • Are these muffins gluten-free?: Yes, as long as you use certified gluten-free oat flour.
  • How can I make these muffins less sweet?: Reduce the amount of maple syrup or omit the chocolate chips.
  • Can I add protein powder?: Absolutely! Just replace a portion of the oat flour with protein powder for an extra boost.
  • How long do these muffins last?: They can last up to a week in the fridge or three months in the freezer.
  • What can I use instead of chocolate chips?: Dried fruit, nuts, or even a sprinkle of cinnamon can be great alternatives.
  • Can I double the recipe?: Yes! Just ensure you have a large enough mixing bowl and muffin pan.

Nutritional Tips and Dietary Adaptations

This recipe is already quite nutritious, but here are a few tips to enhance its health benefits:

  • Add Flaxseed or Chia Seeds: Incorporate ground flaxseed or chia seeds for added omega-3 fatty acids and fiber.
  • Reduce Sugar: Consider using stevia or monk fruit sweetener as a low-calorie alternative.
  • Use Whole Ingredients: Opt for whole foods and organic ingredients whenever possible for the best nutrition.

Equipment Recommendations

For this recipe, you’ll need:

  • Muffin Pan: A standard 12-cup muffin pan is ideal for this recipe.
  • Mixing Bowls: Use large and medium bowls for mixing wet and dry ingredients separately.
  • Whisk: A good quality whisk will help to combine ingredients smoothly.
  • Spatula: A rubber spatula is perfect for folding the batter without overmixing.

Serving Suggestions

These muffins pair beautifully with:

  • Fresh Fruit: Serve with sliced apples or pears for a balanced breakfast.
  • Yogurt: A dollop of Greek yogurt adds creaminess and extra protein.
  • Tea or Coffee: Enjoy with a warm cup of tea or coffee for the perfect start to your day.

Conclusion

Baking these Nourishing Pumpkin Muffins with Oat Flour is more than just a recipe; it’s a delightful way to embrace the flavors of the season while nourishing your body. With simple ingredients and easy steps, you can create a treat that everyone will love. So, gather your ingredients, take a moment to enjoy the process, and treat yourself to the cozy goodness of homemade pumpkin muffins. Happy baking!

Healthy Oat Flour Pumpkin Muffins

Prep Time 10 minutes
Cook Time 20 minutes
Total Time 30 minutes
Servings 12 muffins
Calories 150
These wholesome pumpkin muffins are made with oat flour and sweetened with pure maple syrup, perfect for a nutritious snack or breakfast.

Ingredients

Dry ingredients

  • 1 1/2 cups oat flour
  • 1 tsp baking powder
  • 1/2 tsp baking soda
  • 1/4 tsp salt
  • 1 1/2 tsp pumpkin pie spice

Wet ingredients

  • 2 large eggs
  • 1/2 cup pure maple syrup
  • 1/2 cup avocado oil (or melted and cooled butter)
  • 1/4 cup milk of choice
  • 1 cup pure pumpkin purée
  • 2 tsp vanilla extract
  • 1/2 cup mini chocolate chips (plus more for topping)

Instructions 

  • Preheat oven to 350°F (180°C) and line a muffin tin.
  • Mix dry ingredients in a bowl.
  • Whisk wet ingredients in a separate bowl.
  • Combine wet and dry, fold in chocolate chips, then divide batter into muffin cups.
  • Bake for 18–22 minutes, cool, then serve.

Notes

For extra flavor, sprinkle additional chocolate chips on top before baking.
Calories: 150kcal
Cost: $10
Course: Breakfast, Snack
Cuisine: American
Keyword: Healthy, Oat Flour, pumpkin

As the leaves change and the air turns crisp, there’s nothing quite like the comfort of a warm, creamy dip to brighten your day. This pumpkin queso is not just a delightful twist on a classic; it’s a celebration of autumn’s flavors, blending smooth pumpkin puree with savory spices and creamy non-dairy options. Perfect for cozy gatherings or as a simple, nourishing snack, this recipe is both easy to make and a joy to share.

In this guide, we’ll explore the delightful world of pumpkin queso, from its ingredients to expert tips, making sure you have everything you need to whip up this comforting dish with confidence.

Why You’ll Love This Recipe

  • Quick and Easy: With just a handful of ingredients and minimal prep time, you can have this delicious dip ready in under 30 minutes.
  • Comforting and Cozy: The warm, creamy texture of the queso is perfect for chilly fall evenings, making it a go-to comfort food.
  • Wholesome Ingredients: Packed with nutritional benefits from pumpkin and fortified with non-dairy options, it’s a guilt-free indulgence.
  • Versatile Dish: Serve it as an appetizer with tortilla chips, drizzle it over tacos, or use it as a filling for enchiladas.
  • Customizable: This recipe is incredibly flexible, allowing you to play with flavors and ingredients to suit your taste.

Ingredient Breakdown

Understanding the ingredients in your pumpkin queso is essential for achieving the best flavor and texture. Here’s what you’ll need:

  • Non-Dairy Milk (2 cups): Choose a creamy option like almond or oat milk for a rich texture. You can also use dairy milk if you prefer.
  • Tapioca Flour (1/4 cup): This is crucial for achieving that gooey queso consistency. Arrowroot flour can be used as a substitute.
  • Nutritional Yeast (1 tablespoon): Adds a cheesy flavor without the dairy. It’s packed with nutrients and enhances the creaminess of the dip.
  • Pumpkin Puree (1 cup): Be sure to use 100% pumpkin puree (not pumpkin pie filling) for the best flavor and health benefits.
  • Vegan Chorizo (1 Field Roast Mexican-style sausage): This adds a spicy kick and depth of flavor. Feel free to use any plant-based sausage or omit for a milder version.
  • Pepitas (1/8 cup, for topping): These pumpkin seeds add a delightful crunch and are a great source of healthy fats.
  • Salt (1 teaspoon, or to taste): Enhances all the flavors; adjust based on your dietary needs.

How to Make Pumpkin Queso

Let’s dive into the steps to create this delightful pumpkin queso:

  1. In a small pan, crumble the vegan chorizo and cook it according to package directions until browned and fragrant.
  2. In a pot, whisk together 1 cup of non-dairy milk, tapioca flour, and salt. Whisk for about 30 seconds until smooth and well combined.
  3. Place the pot on the stove over medium-high heat and cook for 5 to 10 minutes, stirring continuously until thickened and bubbling.
  4. Meanwhile, warm the other cup of non-dairy milk in the microwave or on the stove until just hot (like a hot shower, not boiling).
  5. Pour the warm milk into the thickened mixture along with the pumpkin puree and half of the cooked vegan chorizo. Mix until smooth and fully integrated.
  6. If the mixture isn’t blending well, return it to the stove for an additional 2 to 3 minutes over medium-low heat, stirring continuously.
  7. Taste the queso and adjust the salt or add any extra spices to your liking.
  8. Transfer to a serving bowl, top with the remaining vegan chorizo and pepitas, and enjoy!

Pro Tips for the Best Pumpkin Queso

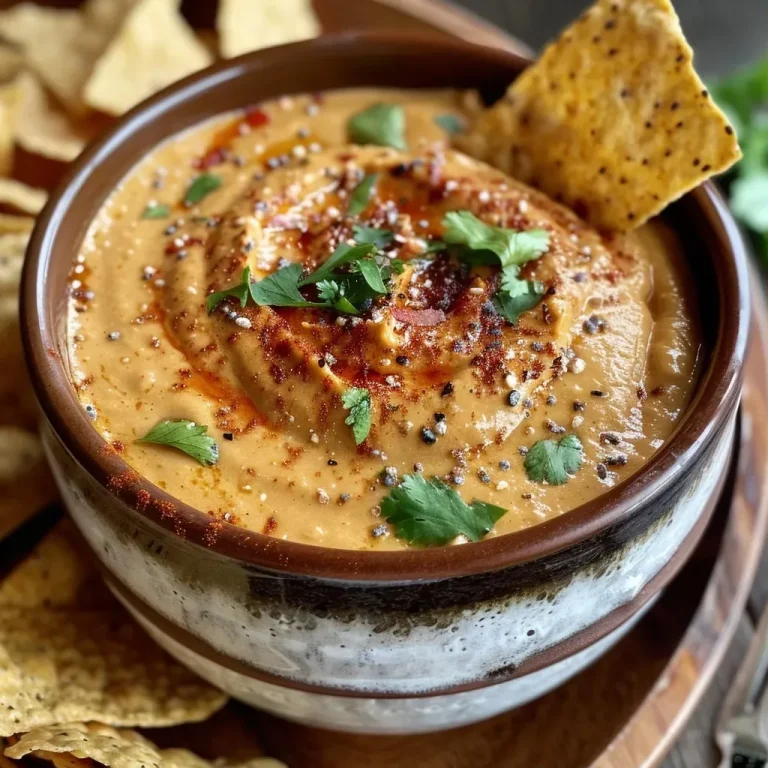
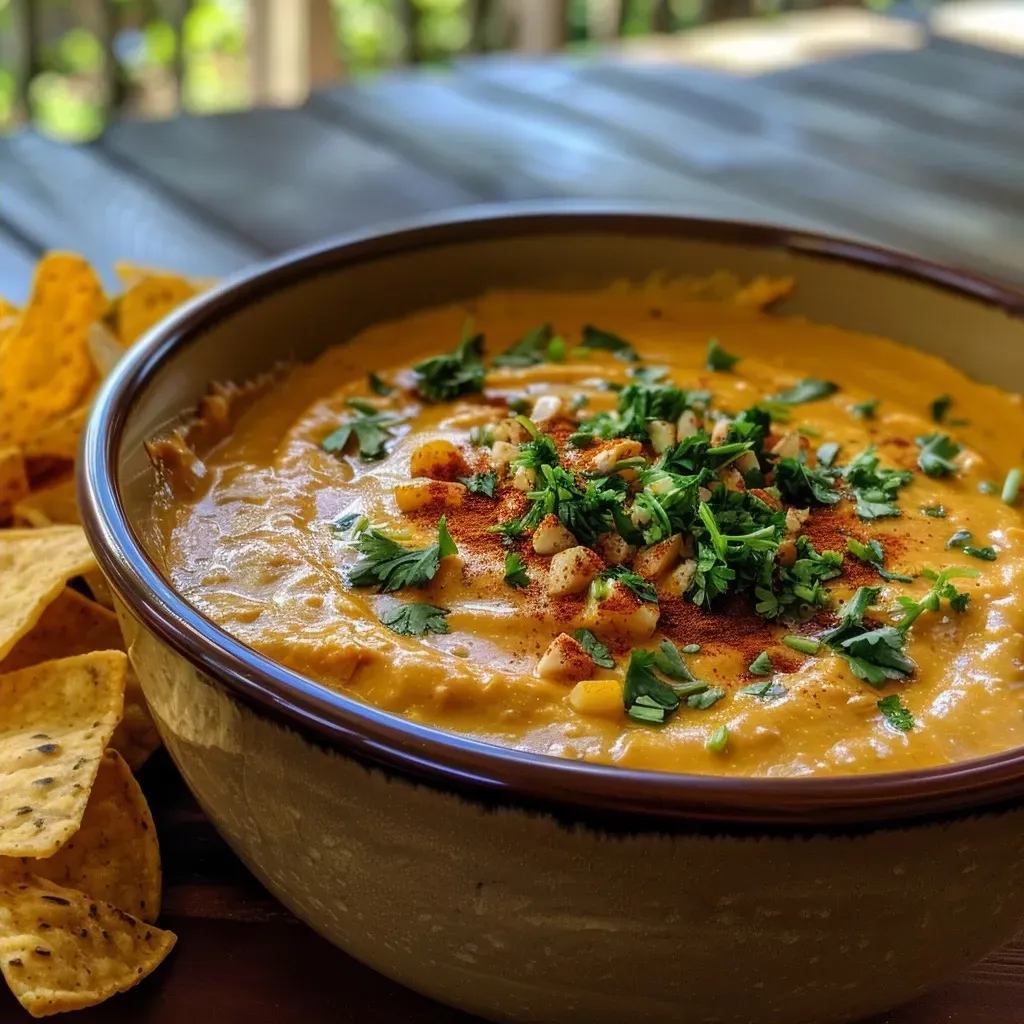
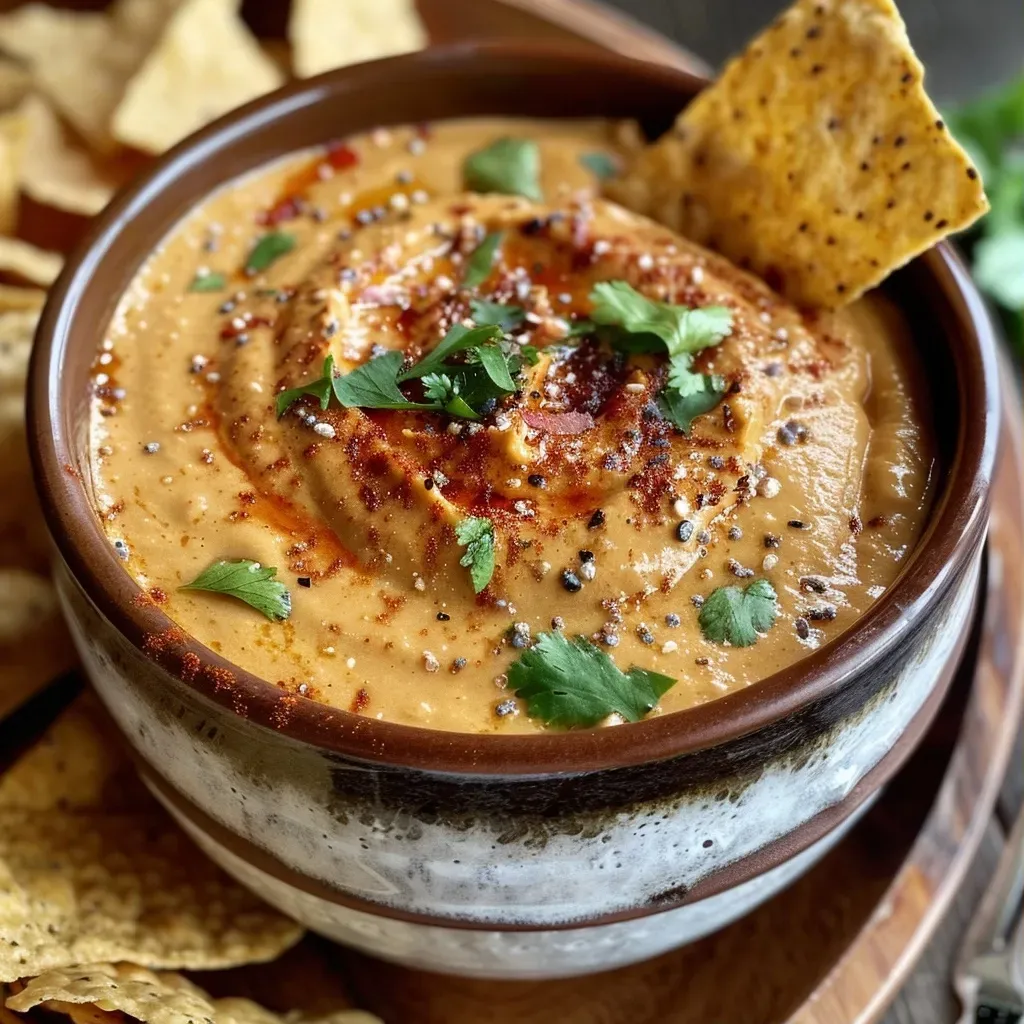
Side angle of a bowl filled with vibrant orange pumpkin queso, showcasing its creamy texture.
  • Choose the Right Milk: For a creamier texture, opt for a barista blend non-dairy milk, designed for frothing.
  • Don’t Rush the Cooking: Allow the sauce to thicken properly for that perfect queso consistency.
  • Adjust the Spice Level: If you prefer a spicier kick, add a pinch of cayenne or diced jalapeños to the mix.
  • Add Fresh Herbs: A sprinkle of chopped cilantro or chives on top can elevate the flavors and add a fresh touch.
  • Experiment with Cheese Alternatives: If you’re not vegan, feel free to substitute with cream cheese for a creamier texture.
  • Make it Smoky: A dash of smoked paprika can enhance the depth of flavor if you love a smoky taste.
  • Use Fresh Ingredients: Fresh garlic and onion can elevate the flavor; sauté them before adding the other ingredients.
  • Check for Consistency: If the queso thickens too much, stir in a bit more warm non-dairy milk to reach your desired texture.

Common Mistakes and Troubleshooting

Even the best recipes can have hiccups! Here are some common mistakes to avoid:

  • Using Pumpkin Pie Filling: Make sure you’re using pure pumpkin puree, as pie filling contains added sugars and spices.
  • Not Whisking Enough: Thoroughly whisking the tapioca flour is crucial; lumps can lead to an uneven texture.
  • Overcooking: Keep an eye on the heat; cooking too long can cause the queso to become gummy.
  • Skipping the Chorizo: If you want a flavor-packed dip, don’t skip the chorizo—it adds essential depth!

Variations to Try

Get creative with your pumpkin queso! Here are some variations to consider:

  • Spicy Pumpkin Queso: Add diced jalapeños or a few dashes of hot sauce to kick up the heat.
  • Cheesy Pumpkin Queso: Incorporate shredded vegan cheese or cream cheese for an ultra-creamy texture.
  • Chili Pumpkin Queso: Mix in black beans and corn for added heartiness and flavor.
  • Herbed Pumpkin Queso: Stir in fresh herbs like oregano or thyme for a fragrant twist.

Storage and Make-Ahead Instructions

This pumpkin queso can be made ahead of time and stored for later enjoyment:

  • Refrigeration: Store in an airtight container in the fridge for up to 4 days. Reheat gently on the stove with a splash of non-dairy milk.
  • Freezing: You can freeze the queso for up to 3 months. Thaw in the fridge overnight before reheating.
  • Make-Ahead: Prepare the queso base and store in the fridge; add toppings just before serving to keep them fresh.

Comprehensive FAQ

  • Can I use regular cheese instead of vegan options? Yes, feel free to substitute with regular cream cheese or shredded cheese for a non-vegan version.
  • Is this recipe gluten-free? Yes, as long as you use gluten-free non-dairy milk and check your tapioca flour for gluten-free certification.
  • How can I make it spicier? Add more vegan chorizo, jalapeños, or a splash of your favorite hot sauce to the mix.
  • Can I use pumpkin puree from a can? Absolutely! Just ensure it’s 100% pumpkin and not a pre-spiced mixture.
  • What can I serve with pumpkin queso? Tortilla chips, vegetable sticks, or even drizzled on tacos or nachos!
  • How long does it take to make? This recipe can be prepared in about 30 minutes, making it perfect for quick gatherings.
  • Can I add other vegetables? Yes! Feel free to mix in sautéed spinach, corn, or bell peppers for added nutrition.
  • Is it suitable for meal prep? Definitely! This queso keeps well and can be easily reheated for meals throughout the week.

Nutritional Tips and Dietary Adaptations

To make this recipe fit various dietary needs:

  • For a lower-calorie option: Use unsweetened almond milk and reduce the amount of oil or fat used.
  • To boost protein: Incorporate cooked lentils or beans for added nutrition without compromising flavor.
  • For a nut-free version: Opt for oat or rice milk instead of nut-based milks.

Equipment Recommendations

Here’s what you’ll need to make this delicious pumpkin queso:

  • Medium-Sized Pot: Ideal for cooking the queso smoothly.
  • Whisk: Essential for blending ingredients without lumps.
  • Small Pan: For cooking the vegan chorizo.

Serving Suggestions

To enjoy your pumpkin queso to the fullest:

  • With Tortilla Chips: The classic pairing that never disappoints.
  • Over Tacos: Drizzle it over your favorite tacos for a creamy twist.
  • As a Dip for Vegetables: Serve with fresh veggies for a healthier snacking option.

Embrace the beauty of fall flavors with this warm and creamy pumpkin queso. Whether you’re hosting friends or enjoying a quiet night in, this recipe is sure to bring comfort and joy to your table. Remember, cooking is about enjoying the process, so take your time and savor every moment in the kitchen. Happy cooking!

Pumpkin Queso (Nut Free)

Prep Time 10 minutes
Cook Time 15 minutes
Total Time 25 minutes
Servings 4 servings
Calories 250
A creamy, nut-free pumpkin queso perfect for dipping or topping your favorite dishes. Made with non-dairy milk and vegan chorizo for a flavorful, comforting treat.

Ingredients

Dairy-Free Milk

  • 2 cups non-dairy milk (divided)
  • 0.25 cup tapioca flour
  • 1 tablespoon nutritional yeast
  • 1 cup pumpkin purée
  • 1 field roast mexican-style sausage Field Roast Mexican-style sausage (*see note)
  • 0.125 cup pepitas (for topping)
  • 1 teaspoon salt ((or to taste))

Instructions 

  • Cook the vegan chorizo according to package directions.
  • Whisk 1 cup non-dairy milk, tapioca flour, and salt in a pot until smooth.
  • Cook over medium-high heat for 5-10 minutes until thickened, whisking continuously.
  • Warm the remaining non-dairy milk and combine with pumpkin purée, cooked chorizo, and seasonings. Mix until smooth.
  • Optional: Return to stove for 2-3 minutes if needed to achieve smooth consistency. Top with pepitas and remaining chorizo. Serve warm.

Notes

Adjust salt and seasonings to taste. For a smoother texture, blend ingredients before serving.
Calories: 250kcal
Cost: $15
Course: Appetizer
Cuisine: American
Keyword: Dairy-Free, pumpkin, Vegan

Discover the Joy of Cooking with Squash Blossoms

Welcome to a delightful culinary journey where we explore the beauty and flavor of squash blossoms! These delicate, edible flowers not only elevate your meals but also provide a unique opportunity to connect with seasonal ingredients. In this article, we will dive into a comforting recipe for Spiced Chickpea Stuffed Squash Blossoms, packed with nourishing ingredients and aromatic spices. Whether you are a seasoned chef or a curious home cook, this dish is perfect for any occasion.

Squash blossoms are the vibrant flowers that bloom from summer squash plants, and they are a fleeting delicacy available during warm months. Their mild flavor and tender texture create a wonderful canvas for a variety of fillings, making them an exciting ingredient to work with. Let’s embark on this delicious adventure together!

Why You’ll Love This Recipe

This recipe for stuffed squash blossoms is not just about taste; it’s a celebration of simplicity and nourishment. Here are five reasons why you’ll fall in love with it:

  • Nourishing Ingredients: Packed with protein from chickpeas and enriched with fiber, this dish is both filling and wholesome.
  • Flavorful Spices: The blend of cumin, coriander, and cayenne pepper adds a warm, aromatic depth to the filling, making each bite satisfying.
  • Visual Appeal: The vibrant yellow of the stuffed blossoms, complemented by the rich red of the pomegranate drizzle, creates a stunning presentation.
  • Easy to Prepare: With simple steps and accessible ingredients, this recipe is approachable for cooks of all skill levels.
  • Versatile Dish: Perfect as an appetizer, a main course, or a unique side dish, these blossoms can fit into any meal plan.

Ingredients You’ll Need

To create this delightful dish, gather the following ingredients:

  • 12 fresh and clean squash blossoms: Choose blossoms that are vibrant and free of blemishes.
  • 2 cups cooked or canned chickpeas: A great source of protein and texture.
  • 1/2 cup cooked amaranth: This adds a nutty flavor and extra nutrition.
  • 1 tsp cumin powder: For a warm, earthy flavor.
  • 1 tsp coriander powder: Enhances the dish with a citrusy note.
  • 1/2 tsp turmeric powder: Adds color and anti-inflammatory benefits.
  • 1/2 tsp cayenne pepper: For a touch of heat.
  • 1 tsp lime zest and 1 Tbsp lime juice: Brightens the flavors.
  • Sea salt to taste: Essential for enhancing flavor.
  • 2 Tbsp pomegranate molasses: Adds a sweet and tangy drizzle.
  • 2 garlic cloves, minced: For aromatic depth.
  • 1/4 cup roasted peanuts, crushed: Adds crunch and nuttiness.
  • Extra virgin olive oil for frying: Gives a crispy finish.

Feel free to make substitutions based on your preferences or dietary needs. For example, quinoa can be used instead of amaranth, or you can try different nuts for the garnish.

Step-by-Step Instructions

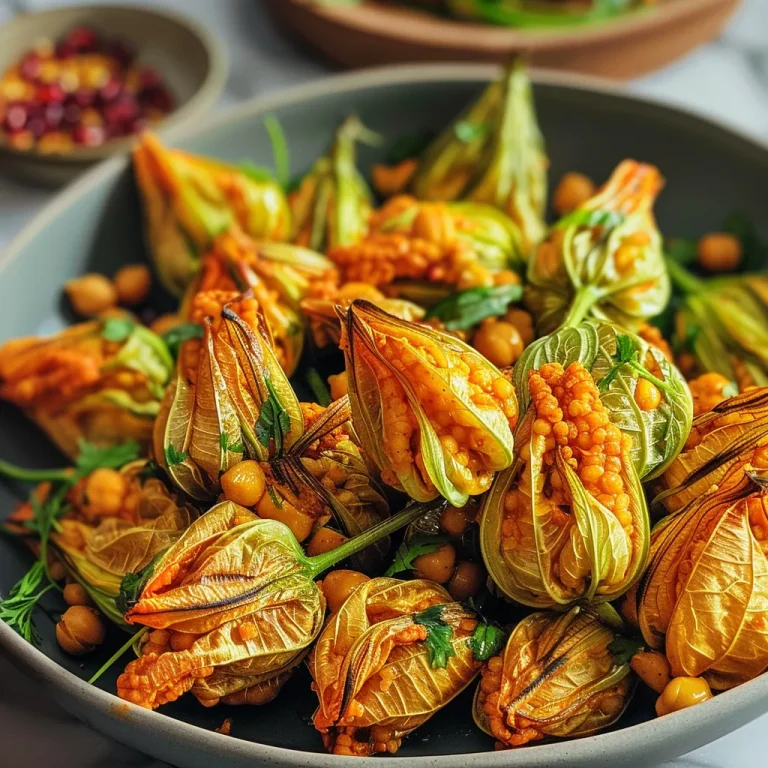
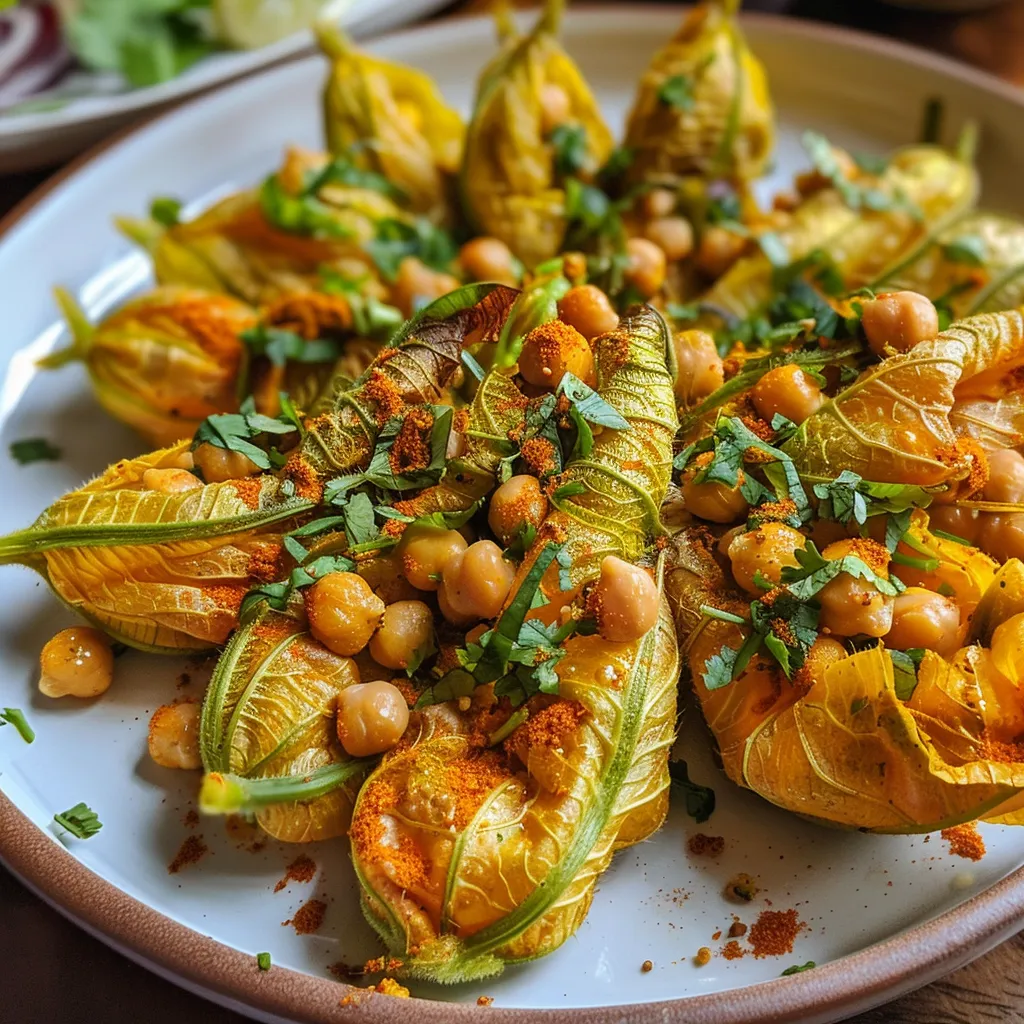
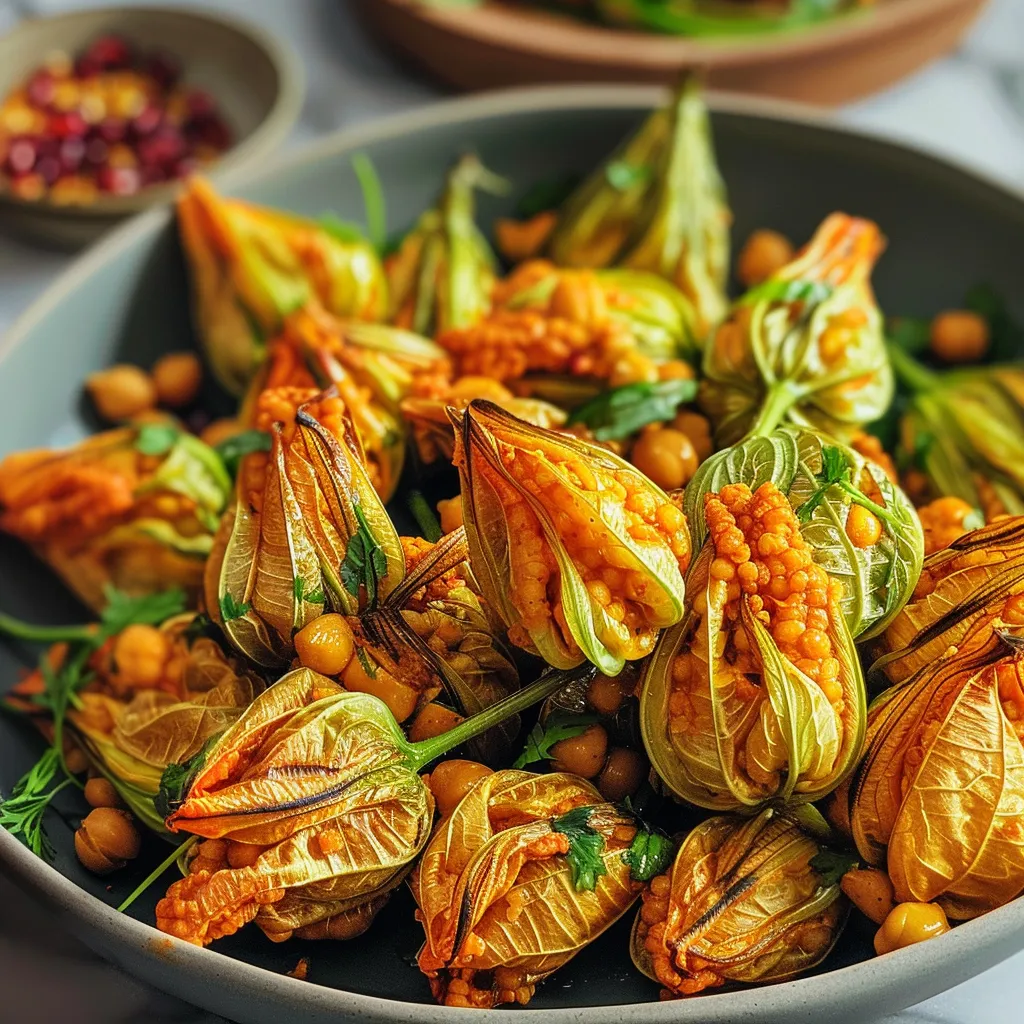
A vibrant photo featuring freshly prepared squash blossoms filled with chickpea mixture.

Now that you have your ingredients ready, let’s walk through the preparation of this delicious dish:

  • Prepare the Blossoms: Lightly steam the squash blossoms until soft but still intact. This makes them easier to stuff. Set them aside to cool.
  • Make the Filling: In a mixing bowl, combine the cooked chickpeas, amaranth, and all the spices (cumin, coriander, turmeric, cayenne), lime zest, lime juice, and salt. Mix until well combined.
  • Stuff the Blossoms: Carefully fill each blossom with the chickpea mixture, twisting the ends to seal them closed.
  • Fry the Blossoms: In a skillet, heat the extra virgin olive oil over medium heat. Fry the stuffed blossoms until they are crispy and golden. Drain on paper towels.
  • Prepare the Drizzle: In a small saucepan, simmer the pomegranate molasses with minced garlic until it thickens to a chutney consistency.
  • Plate and Garnish: Arrange the fried blossoms on a plate, drizzle with the pomegranate sauce, and sprinkle with the crushed roasted peanuts and fresh microgreens.

Pro Tips for Perfect Stuffed Blossoms

To ensure your dish turns out perfectly, keep these expert tips in mind:

  • Choose Fresh Blossoms: Always select fresh squash blossoms that are vibrant and have no signs of wilting.
  • Don’t Overstuff: Fill the blossoms lightly to avoid tearing them during frying.
  • Temperature Matters: Ensure your oil is hot enough for frying; this will help achieve a crispy texture.
  • Experiment with Fillings: Try adding different herbs or spices to the chickpea mixture for a unique flavor.
  • Serve Immediately: These blossoms are best enjoyed fresh and hot from the pan.
  • Pair with a Salad: A light salad can balance the richness of the fried blossoms.
  • Garnish Creatively: Use edible flowers or microgreens to enhance the visual appeal.
  • Make-Ahead Option: Prepare the filling a day ahead and stuff the blossoms just before frying.

Common Mistakes and Troubleshooting

If you encounter any issues while preparing your stuffed blossoms, here are some common mistakes and how to avoid them:

  • Blossoms Tearing: Handle them gently to avoid tearing. If they do tear, try to patch them up with extra filling.
  • Filling Too Dry: If your filling seems dry, add a splash of olive oil or more lime juice to moisten it.
  • Not Enough Flavor: Taste your filling before stuffing and adjust the seasoning as needed.
  • Oil Temperature Issues: If the oil is too hot, the outside will burn while the inside remains uncooked; if too cool, they will absorb too much oil. Aim for medium heat.

Variations to Try

Here are some fun variations to customize your stuffed squash blossoms:

  • Cheese Lovers: Add ricotta or feta cheese to the chickpea filling for added creaminess.
  • Herb-Infused: Incorporate fresh herbs like basil or parsley into the filling for a burst of freshness.
  • Mexican Twist: Use black beans and spices like cumin and smoked paprika for a southwestern flair.
  • Spicy Option: Add chopped jalapeños or a dash of hot sauce to the filling for heat.

Storage and Make-Ahead Instructions

You can prepare parts of this dish in advance for convenience:

  • Filling Storage: Store the chickpea filling in an airtight container in the refrigerator for up to 3 days.
  • Blossom Preparation: Stuffed blossoms can be made a few hours ahead and kept in the fridge before frying.
  • Leftovers: Fried blossoms can be stored in the refrigerator for up to 2 days, though they are best enjoyed fresh.
  • Reheating: To reheat, place in a hot oven for a few minutes to regain crispiness.

Frequently Asked Questions

Here are some common questions about stuffed squash blossoms:

  • Can I use other types of squash blossoms? Yes! Other edible blossoms can work, but be mindful of their flavor profiles.
  • Are squash blossoms gluten-free? Yes, this recipe is naturally gluten-free.
  • How do I know when the blossoms are fresh? Look for bright colors and no wilting or browning.
  • Can I bake the stuffed blossoms instead of frying? Yes, baking them in a preheated oven at 375°F (190°C) can be a healthier option.
  • What can I serve with stuffed squash blossoms? They pair well with a light salad, yogurt dip, or a refreshing beverage.
  • Can I freeze the stuffed blossoms? It’s best to fry them fresh, but you can freeze the filling.
  • What should I do if I can’t find squash blossoms? You can substitute zucchini or other summer squash as a filling ingredient.
  • Are there any dietary adaptations for this recipe? This recipe is vegan, and you can make it nut-free by omitting peanuts.

Nutritional Tips and Dietary Adaptations

This recipe is not only delicious but also offers several health benefits:

  • High in Protein: Chickpeas are a great source of plant-based protein.
  • Rich in Fiber: Helps with digestion and keeps you feeling full longer.
  • Vitamins and Minerals: Squash blossoms are rich in vitamin A and C, supporting overall health.
  • Heart-Healthy Fats: Olive oil provides monounsaturated fats that are beneficial for heart health.
  • Customizable for Dietary Needs: Easily adapt the recipe to fit vegan, gluten-free, or nut-free diets.

Equipment Recommendations

To successfully prepare this dish, you will need:

  • Steamer Basket: For steaming squash blossoms.
  • Mixing Bowl: To combine filling ingredients.
  • Skillet: For frying the stuffed blossoms.
  • Spatula: To handle the delicate blossoms without tearing.

Serving Suggestions

Enhance your dining experience by pairing your stuffed squash blossoms with:

  • Light Salad: A simple arugula salad with lemon vinaigrette.
  • Yogurt Dip: A tangy yogurt sauce with herbs for dipping.
  • Wine Pairing: A crisp white wine such as Sauvignon Blanc complements the flavors beautifully.

Final Thoughts

Cooking is a journey of exploration, and making Spiced Chickpea Stuffed Squash Blossoms is a wonderful way to embrace seasonal ingredients and create something truly special. Remember, the joy of cooking lies not only in the final dish but in the process itself. Take your time, experiment, and most importantly, enjoy the flavors you create. Happy cooking!

Spiced Chickpea Stuffed Squash Blossoms

Prep Time 15 minutes
Cook Time 20 minutes
Total Time 35 minutes
Servings 4 servings
Calories 250
A vibrant and flavorful dish featuring delicate squash blossoms filled with spiced chickpeas, topped with pomegranate chutney and garnished with microgreens.

Ingredients

Squash Blossoms

  • 2 cups cooked or canned chickpeas
  • 0.5 cup cooked amaranth
  • 1 tsp cumin powder
  • 1 tsp coriander powder
  • 0.5 tsp turmeric powder
  • 0.5 tsp cayenne pepper
  • 1 tsp lime zest
  • 1 Tbsp lime juice
  • to taste sea salt
  • 2 Tbsp pomegranate molasses
  • 2 cloves garlic minced
  • 0.25 cup roasted peanuts crushed

Garnish

  • for garnish fresh microgreens
  • for frying extra virgin olive oil

Instructions 

  • Steam the squash blossoms until soft, then cool.
  • Mix chickpeas, amaranth, spices, lime zest, lime juice, and salt to make filling.
  • Fill each blossom with the chickpea mixture and seal.
  • Pan-fry the stuffed blossoms in olive oil until crispy and golden, then drain.
  • Simmer pomegranate molasses with minced garlic until thickened.
  • Arrange fried blossoms on the chutney, garnish with crushed peanuts and microgreens.

Notes

Ensure to handle the squash blossoms gently to prevent tearing.
Calories: 250kcal
Cost: $15
Course: Appetizer
Cuisine: Mediterranean
Keyword: Chickpeas

Apple turnovers are a cherished dessert that brings warmth and nostalgia to any kitchen. With their flaky pastry and sweet apple filling, they are the perfect treat for cozy evenings at home or special gatherings. In this comprehensive guide, we’ll explore everything you need to know to create the perfect apple turnovers, from selecting the right ingredients to mastering the baking process. Let’s dive in and discover why this delightful recipe deserves a spot in your culinary repertoire.

Why You’ll Love This Recipe

  • Simple Ingredients: This recipe uses everyday ingredients, making it accessible for home cooks at any skill level.
  • Quick Preparation: With a preparation time of just 25 minutes, you can whip up these treats in no time.
  • Versatile Flavor: The apple filling can be customized with spices and add-ins to suit your taste preferences.
  • Perfect for Any Occasion: Whether it’s a cozy family dessert or a contribution to a potluck, these turnovers are sure to impress.
  • Freezable Option: Make a batch ahead of time and freeze them for a quick treat whenever the craving strikes.

Ingredient Breakdown

To create delightful apple turnovers, you will need the following ingredients:

  • 2 large apples (Granny Smith or Honeycrisp, peeled and diced): These varieties offer the perfect balance of sweetness and tartness.
  • 1/4 cup sugar (adjust based on apple sweetness): Sweeten to taste; some apples may require less sugar.
  • 1 teaspoon cinnamon: Adds warmth and complements the apples beautifully.
  • 1 tablespoon lemon juice: Brightens the flavors and prevents the apples from browning.
  • 1 tablespoon cornstarch (optional): Helps thicken the filling and prevent it from becoming soggy.
  • 1 package (17.3 oz) frozen puff pastry, thawed (2 sheets): The star of the show, providing that flaky texture.
  • 1 egg, beaten: For the egg wash, giving the pastries a golden finish.
  • Powdered sugar (for dusting, optional): A sweet finishing touch for presentation.

How to Make Apple Turnovers

Let’s walk through the steps to create your own apple turnovers:

Step 1: Prepare the Apple Filling

In a medium bowl, combine the diced apples, sugar, cinnamon, lemon juice, and cornstarch (if using). Mix until the apples are well coated. Set aside to allow the flavors to meld while you prepare the pastry.

Step 2: Preheat Your Oven

Preheat your oven to 400°F (200°C). A hot oven is key to achieving that perfect puffiness in the pastry.

Step 3: Roll Out the Puff Pastry

On a lightly floured surface, roll out the thawed puff pastry sheets. Cut each sheet into 4 squares, resulting in a total of 8 squares for your turnovers.

Step 4: Fill the Turnovers

Place about 2 tablespoons of the apple filling in the center of each pastry square. Be careful not to overfill, as this can cause them to leak during baking.

Step 5: Seal the Turnovers

Fold each square diagonally to form a triangle. Press the edges together firmly to seal, then crimp with a fork for a decorative touch.

Step 6: Apply the Egg Wash

Brush the tops of the turnovers with the beaten egg. This will give them a beautiful golden color as they bake.

Step 7: Bake the Turnovers

Place the turnovers on a baking sheet lined with parchment paper. Bake for 20-25 minutes, or until golden brown and puffed up.

Step 8: Cool and Serve

Allow the turnovers to cool for a few minutes on a wire rack. Dust with powdered sugar if desired before serving.

Pro Tips for Perfect Apple Turnovers

Side view of a freshly baked apple turnover, showcasing juicy apple filling.
  • Use Cold Puff Pastry: Ensure your puff pastry remains cold until ready to use to achieve maximum flakiness.
  • Don’t Overfill: Avoid overfilling to prevent leakage; 2 tablespoons per turnover is ideal.
  • Crimping Technique: Crimp the edges well to ensure a tight seal. This helps keep the filling inside.
  • Experiment with Spices: Add nutmeg or allspice for a unique flavor twist in the filling.
  • Check for Doneness: Look for a deep golden color on the pastry; this indicates it’s perfectly baked.
  • Serve Warm: These turnovers are best enjoyed warm right out of the oven.
  • Make Ahead: Prep the filling and pastry in advance, then assemble and bake when ready to serve.
  • Cooling Time: Allow turnovers to cool completely on a wire rack to maintain their crispness.

Common Mistakes and Troubleshooting

Even seasoned bakers can run into issues. Here are some common mistakes and how to avoid them:

  • Soggy Pastry: This can happen if there’s too much filling or if the filling isn’t prepped properly (i.e., too much moisture). Use cornstarch for thickening if needed.
  • Pastry Not Puffing: Ensure your oven is at the correct temperature and that the pastry is kept cold before baking.
  • Burnt Edges: If you notice the edges browning too quickly, cover them with aluminum foil to protect them.

Variations on Apple Turnovers

Feel free to change things up with these delicious variations:

  • Caramel Apple Turnovers: Drizzle caramel sauce over the apple filling for an indulgent twist.
  • Cinnamon Roll Turnovers: Add a swirl of cinnamon sugar to the filling for a cinnamon roll flavor.
  • Berry Apple Turnovers: Mix in some fresh or frozen berries with the apples for added color and flavor.
  • Nutty Apple Turnovers: Stir in some chopped nuts like pecans or walnuts for crunch.

Storage and Make-Ahead Instructions

To store your apple turnovers:

  • Room Temperature: Store cooled turnovers in an airtight container at room temperature for up to 2 days.
  • Refrigeration: For longer storage, keep them in the fridge for up to a week. Reheat in the oven to restore crispness.
  • Freezing: Freeze unbaked turnovers on a baking sheet until solid, then transfer to a freezer bag for up to 3 months. Bake from frozen, adding a few extra minutes to the baking time.

Frequently Asked Questions

Here are some common questions about making apple turnovers:

  • Can I use fresh apples instead of frozen? Yes, fresh apples are ideal for this recipe.
  • Can I make turnovers with other fruits? Absolutely! Blueberries, peaches, and cherries all work well.
  • What if my puff pastry tears? Simply patch it with a small piece of pastry and crimp the edges to seal.
  • How can I make the turnovers healthier? Use less sugar or substitute with honey and opt for whole wheat pastry.
  • Can I skip the egg wash? Yes, but the egg wash gives a nice golden finish. You can use milk as an alternative.
  • What’s the best way to serve apple turnovers? Serve warm with a scoop of vanilla ice cream or a dollop of whipped cream.
  • Can I make the filling ahead of time? Yes, you can prepare the filling a day in advance and store it in the fridge.
  • What’s the ideal baking temperature for turnovers? 400°F (200°C) is ideal for a golden, flaky pastry.

Nutritional Insights and Dietary Adaptations

This apple turnover recipe can fit various dietary needs:

  • Gluten-Free: Use gluten-free puff pastry available in stores.
  • Vegan: Substitute the egg wash with a plant-based alternative like almond milk.
  • Low-Sugar: Reduce the sugar in the filling or use sugar alternatives like stevia or monk fruit.

Equipment Recommendations

To make your cooking experience smoother, consider these tools:

  • Rolling Pin: For rolling out the puff pastry evenly.
  • Sharp Knife or Pizza Cutter: For cutting the pastry into squares.
  • Baking Sheet: A sturdy baking sheet lined with parchment paper helps prevent sticking.
  • Mixing Bowls: Have a couple of medium bowls on hand for mixing the filling and egg wash.

Serving Suggestions

For a delightful presentation, consider serving your apple turnovers with:

  • Vanilla Ice Cream: A scoop on the side complements the warm apple filling beautifully.
  • Whipped Cream: For a light and airy topping to balance the sweetness.
  • Caramel Sauce: Drizzle over the top for an indulgent treat.
  • Fresh Mint: A sprig of mint adds a splash of color and freshness.

Apple turnovers are more than just a dessert; they are a heartfelt expression of comfort and joy in the kitchen. By following this detailed guide, you’re equipped with the knowledge to create these delightful pastries that will surely impress. Enjoy the process, savor the moments, and share your creations with loved ones. Happy baking!

Apple Turnovers

Prep Time 15 minutes
Cook Time 20 minutes
Total Time 35 minutes
Servings 8 pieces
Calories 250
Delight in these flaky puff pastry turnovers filled with sweet and spiced apple filling, perfect for a quick dessert or snack.

Ingredients

Filling

  • 2 large apples (Granny Smith or Honeycrisp), peeled and diced
  • 1/4 cup sugar (adjust based on apple sweetness)
  • 1 teaspoon cinnamon
  • 1 tablespoon lemon juice
  • 1 tablespoon cornstarch (optional, for thickening)

Pastry

  • 1 package (17.3 oz) oz frozen puff pastry, thawed (2 sheets)
  • 1 egg beaten (for egg wash)
  • to taste optional Powdered sugar (for dusting)

Instructions 

  • Mix apples, sugar, cinnamon, lemon juice, and cornstarch until well coated. Set aside.
  • Preheat oven to 400°F (200°C). Roll out pastry and cut into 4 squares each.
  • Place 2 tbsp filling in center of each square, fold into triangles, seal edges, and crimp with a fork.
  • Brush turnovers with beaten egg. Bake on parchment-lined sheet for 20-25 minutes until golden.
  • Cool slightly, then dust with powdered sugar if desired before serving.

Notes

Ensure not to overfill the turnovers to prevent spilling during baking.
Calories: 250kcal
Cost: $10
Course: Dessert
Cuisine: American
Keyword: apple

Experience the Warmth of Autumn with Harvest Bliss Snack Bars

As the leaves turn and the air becomes crisp, there’s something truly comforting about embracing the flavors of the season. Enter the Fall Harvest Snack Bars—a delicious blend of wholesome ingredients that celebrate the best of autumn. Packed with the goodness of dried apples, cranberries, and a touch of pumpkin spice, these snack bars are perfect for cozy afternoons or as a quick on-the-go treat. Let’s dive into the details of crafting these delightful bars that not only warm your heart but also nourish your body.

Why You’ll Love This Recipe

When it comes to snack bars, there are countless options out there, but here’s why these Fall Harvest Snack Bars stand out:

  • Wholesome Ingredients: Made with almond meal, toasted oats, and dried fruits, these bars provide a nutritious energy boost.
  • Simple Preparation: With straightforward steps, you can whip up a batch in no time, making this recipe ideal for busy schedules.
  • Customizable: Feel free to adapt the recipe to your taste preferences. Swap out fruits or nuts based on what you have at home.
  • Perfect for Any Occasion: Whether it’s a snack for your kids, a quick breakfast, or an afternoon pick-me-up, these bars fit the bill.
  • Make-Ahead Friendly: Prepare them in advance and store them for a week of easy snacking!

Ingredient Breakdown

Let’s take a closer look at the ingredients that make these snack bars so special, along with some substitution suggestions:

  • Almond Meal: This gives the bars a nutty flavor and a nice texture. If you’re allergic, feel free to use oat flour or sunflower seed meal.
  • Dried Oats: Toasting the oats enhances their flavor. If you prefer gluten-free options, certified gluten-free oats work perfectly!
  • Pumpkin Pie Spice: A blend of cinnamon, nutmeg, and ginger adds warmth. If you don’t have it on hand, a mix of cinnamon and nutmeg can also work well.
  • Dried Cranberries: These add a sweet-tart flavor. Consider using raisins or dried cherries as alternatives.
  • Dried Apples: Chopped into small pieces, they provide natural sweetness. Any dried fruit can be substituted—just ensure they’re unsweetened for a healthier option.
  • Pumpkin Puree: Adds moisture and a subtle flavor. You can replace it with applesauce for a different taste.
  • Honey: Acts as a natural sweetener and binder. Maple syrup or agave nectar can be used for a vegan option.
  • Vanilla Extract: A splash enhances the overall flavor. Feel free to skip it if you’re in a pinch, but it does add a lovely aroma!

Step-by-Step Instructions

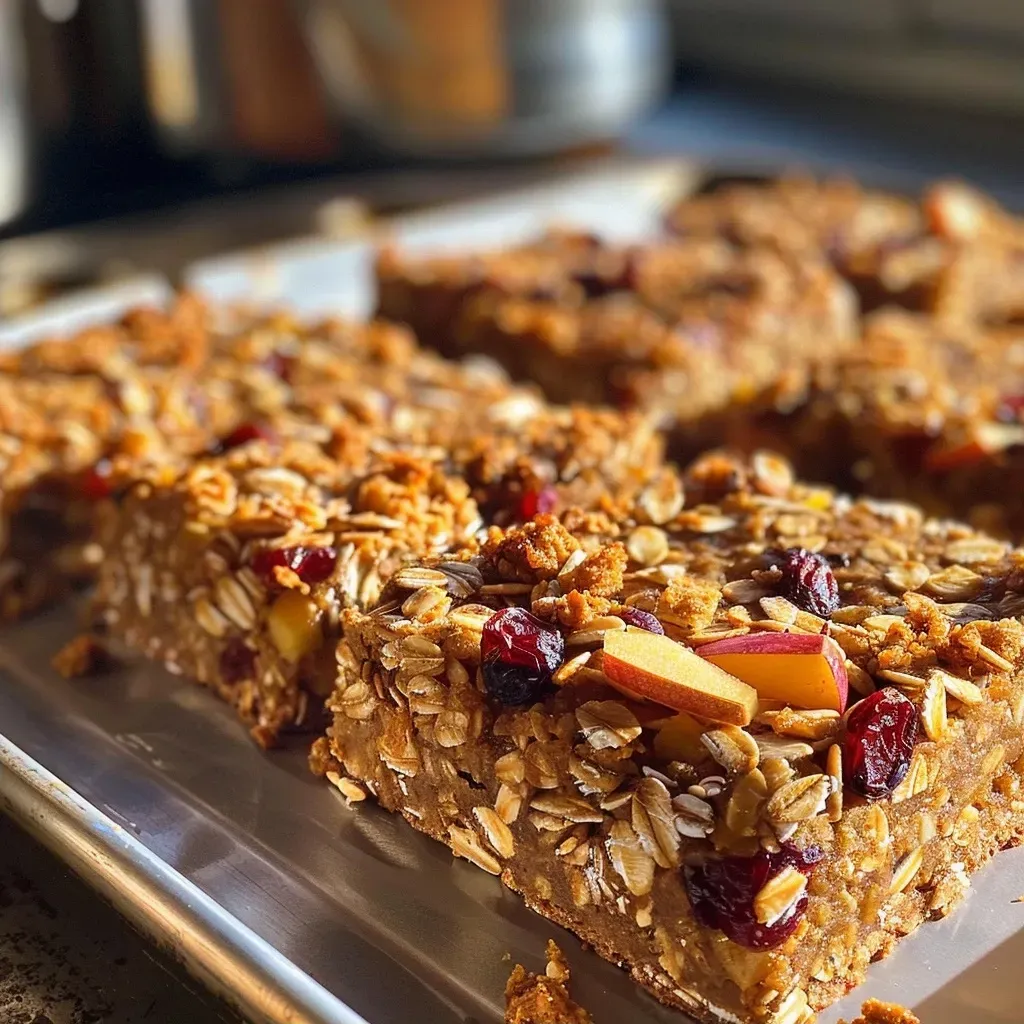
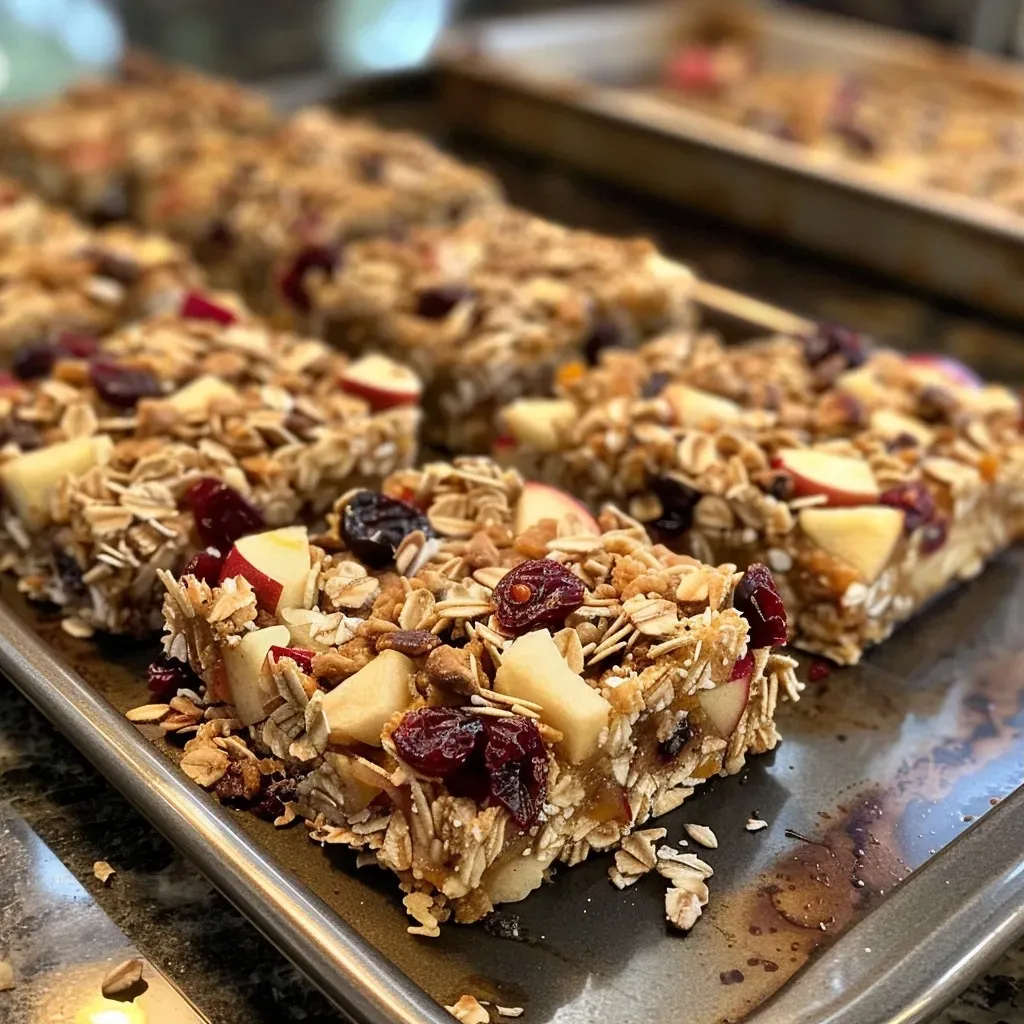
Delicious Fall Harvest Snack Bar showing oat and almond textures alongside dried fruit pieces.

Now that we have our ingredients ready, let’s follow these simple steps to create our Fall Harvest Snack Bars:

  1. Preheat your oven to 300°F (150°C) and prepare an 8-inch baking dish by lining it with parchment paper, leaving some overhang for easy removal later. Spread ⅛ cup of almond meal evenly over the bottom.
  2. In a food processor, grind the dried oats until fine. Transfer to a large mixing bowl and combine with the remaining ¾ cup almond meal, pumpkin pie spice, dried cranberries, and dried apples. Stir to blend.
  3. In a separate bowl, whisk together pumpkin puree, honey, and vanilla extract. Pour this mixture over the dry ingredients and mix until you have a cohesive dough.
  4. Transfer the mixture into the prepared baking dish. Using slightly wet hands, firmly pack the mixture into the dish, creating a smooth surface.
  5. Bake in the preheated oven for 30 minutes. Once done, remove from the oven and allow to cool in the pan on a wire rack for 1 hour.
  6. Utilize the parchment sling to lift the cooled mixture out of the pan. Cut into 8 bars and enjoy your homemade snack!

Pro Tips for Perfect Bars

To ensure your Fall Harvest Snack Bars turn out perfectly every time, keep these expert tips in mind:

  • Don’t Overmix: When combining the wet and dry ingredients, mix just until combined to maintain a good texture.
  • Pack Firmly: Packing the mixture firmly into the baking dish helps the bars hold together once baked.
  • Cool Completely: Allowing the bars to cool fully before cutting ensures clean edges and easier handling.
  • Use Quality Ingredients: Fresh and high-quality ingredients yield the best flavor and texture.
  • Experiment with Flavors: Don’t hesitate to try different spices, nuts, or seeds to create your unique twist.
  • Store Properly: Keep the bars in an airtight container at room temperature for up to a week for optimal freshness.
  • Chill for Easier Slicing: If the bars seem too soft, refrigerate them for a bit before slicing.
  • Try Different Shapes: While bars are classic, you can also press the mixture into a round pan for cookie-like snacks!

Common Mistakes and Troubleshooting

If you encounter issues while making these snack bars, here are some common mistakes and how to avoid them:

  • Bars Crumbling: If your bars fall apart, they may need more binding. Add a bit more honey or pumpkin puree to the mixture.
  • Too Dry: If the bars seem dry, they may have baked too long. Keep an eye on them as they bake and adjust the time as needed.
  • Uneven Cooking: Ensure your oven is preheated and consider rotating the baking dish halfway through to promote even baking.
  • Flavor Lacking: If the bars taste bland, try adding more spices or a pinch of salt to enhance the overall flavor.

Variations to Try

While the original recipe is delightful as is, here are some fun variations to elevate your Harvest Snack Bars:

  • Nutty Delight: Add chopped nuts like walnuts or pecans for added crunch and healthy fats.
  • Chocolate Drizzle: Top the bars with melted dark chocolate for a decadent touch.
  • Spiced Pear: Substitute dried pears for apples for a unique flavor twist.
  • Maple Pecan: Replace honey with maple syrup and add chopped pecans for a rich, autumnal flavor.

Storage and Make-Ahead Instructions

These Fall Harvest Snack Bars are perfect for meal prep! Here’s how to store them:

  • Room Temperature: Store in an airtight container for up to a week.
  • Refrigeration: For longer freshness, keep them in the fridge, where they can last up to two weeks.
  • Freezing: Wrap individual bars tightly in plastic wrap and place them in a freezer bag for up to 3 months. Thaw in the fridge or at room temperature before enjoying.

Comprehensive FAQ

Have questions about these delightful snack bars? Here are some answers to common queries:

  • Can I make these bars vegan? Yes! Simply swap honey for maple syrup.
  • What can I use instead of almond meal? Oat flour or sunflower seed meal can be great alternatives.
  • Can I add protein powder? Absolutely! Mix in a scoop of your favorite protein powder for an added boost.
  • How do I know when the bars are done baking? They should be golden brown on the edges and firm to the touch.
  • Can I use fresh fruit instead of dried? Dried fruit is recommended for this recipe as it adds sweetness and texture without excess moisture.
  • What’s the best way to cut the bars? Use a sharp knife and cut while the bars are still slightly warm for clean edges.
  • Can I double the recipe? Yes! Just ensure to use a larger baking dish and adjust the baking time as needed.
  • What should I serve with these bars? They pair wonderfully with a warm cup of tea or coffee, or even a dollop of yogurt for breakfast.

Nutritional Tips and Dietary Adaptations

These snack bars are not only delicious but also healthy! Here are some nutritional tips:

  • High Fiber: The oats and dried fruits provide a good source of dietary fiber, promoting digestive health.
  • Natural Sweetness: Using honey and dried fruits reduces the reliance on refined sugars.
  • Healthy Fats: Almond meal adds healthy fats, which can help keep you satiated.
  • Protein Boost: Add seeds or nut butter to increase the protein content, making them even more filling.

Equipment Recommendations

To make your baking experience smooth, here are some essential tools:

  • Food Processor: Ideal for grinding oats and mixing ingredients quickly.
  • 8-inch Baking Dish: A standard size for this recipe; make sure it’s lined for easy removal.
  • Parchment Paper: Essential for easy cleanup and preventing sticking.
  • Mixing Bowls: A set of varying sizes for mixing ingredients comfortably.

Serving Suggestions

Enjoy your Fall Harvest Snack Bars in various ways:

  • As a Breakfast Option: Pair with yogurt and fresh fruit for a wholesome breakfast.
  • On-the-Go Snack: Perfect for busy mornings or as a quick afternoon treat.
  • With Tea or Coffee: A lovely companion for your favorite hot beverage.
  • Pack for Lunch: Great addition to lunchboxes for kids and adults alike.

In closing, these Fall Harvest Snack Bars are not just a recipe; they’re a celebration of the season. As you enjoy each bite, remember that cooking is about taking time for yourself and finding joy in the process. So gather your ingredients, embrace the flavors of autumn, and let each bar remind you of the warmth and comfort that comes from home-cooked goodness. Happy baking!

Fall Harvest Snack Bars

Prep Time 15 minutes
Cook Time 30 minutes
Total Time 45 minutes
Servings 8 bars
Calories 250
Enjoy these wholesome fall-inspired snack bars packed with dried fruits, oats, and warm spices, perfect for a quick treat or on-the-go snack.

Ingredients

Dry ingredients

  • 0.75 cup almond meal (plus ⅛ cup for sprinkling)
  • 0.125 cup almond meal (for sprinkling)
  • 1 cup dried oats (toasted)
  • 1.5 teaspoon pumpkin pie spice
  • 0.5 cup dried cranberries
  • 0.5 cup dried apples (chopped into ½-inch pieces)
  • 2 tablespoons pumpkin puree
  • 0.33 cup honey
  • 1 teaspoon vanilla extract

Instructions 

  • Preheat oven to 300°F (150°C). Line an 8-inch baking dish with parchment paper and sprinkle ⅛ cup almond meal evenly over it.
  • Grind oats until fine, then mix with remaining almond meal, spices, cranberries, and apples.
  • Whisk pumpkin puree, honey, and vanilla, then combine with oat mixture to form dough.
  • Press mixture into the prepared dish, smoothing the surface.
  • Bake for 30 minutes, then cool for 1 hour before cutting into 8 bars.

Notes

Store in an airtight container for up to 3 days for best freshness.
Calories: 250kcal
Cost: $15
Course: Snack
Cuisine: American
Keyword: bars, fall, Healthy

Indulge in the Comfort of Pumpkin Spice Sweet Potato Fries

As the crispness of autumn fills the air, there’s nothing quite like cozying up with a warm, flavorful dish that celebrates the season. That’s where these Pumpkin Spice Sweet Potato Fries come into play. Not only do they bring a delightful twist to a classic comfort food, but they also offer a wonderful balance of sweet and spicy flavors, perfect for any gathering or a quiet evening at home. In this article, we’ll dive deep into why you’ll love this recipe, the ingredients you’ll need, and some expert tips to ensure your fries turn out perfectly every time.

Why You’ll Love This Recipe

This recipe isn’t just about fries; it’s about creating a heartwarming experience in your kitchen. Here are five reasons why you’ll adore these Pumpkin Spice Sweet Potato Fries:

  • Healthier alternative: Sweet potatoes are packed with vitamins A and C, making these fries a nutritious option compared to traditional potato fries.
  • Simple ingredients: With just a handful of pantry staples, you can whip up this dish without any fuss.
  • Versatile flavors: The pumpkin pie spice blend adds a unique twist that complements the natural sweetness of the sweet potatoes.
  • Perfect for any occasion: Whether it’s a fall gathering, a game day snack, or a cozy dinner, these fries are always a hit.
  • Easy to customize: You can easily adjust the spices to suit your taste, making this recipe adaptable for everyone.

Ingredients Breakdown

Let’s gather what you’ll need to create these delicious fries. Here’s a detailed breakdown of the ingredients along with some substitution options for flexibility:

  • 4 large sweet potatoes: These are the star of the dish! If you can’t find sweet potatoes, try using butternut squash for a similar flavor.
  • 1/4 cup vegetable oil: Use olive oil for a richer taste or avocado oil for a higher smoke point.
  • 1 tablespoon pumpkin pie spice: You can make your own by mixing cinnamon, nutmeg, and ginger if you prefer.
  • 1/4 teaspoon cayenne pepper: For a bit of heat, but feel free to adjust or omit based on your spice preference.
  • 1/2 teaspoon smoked paprika: This adds a lovely depth of flavor and smokiness.
  • 1/2 teaspoon salt: Enhances all other flavors; you can use sea salt for a gourmet touch.

How to Make Pumpkin Spice Sweet Potato Fries

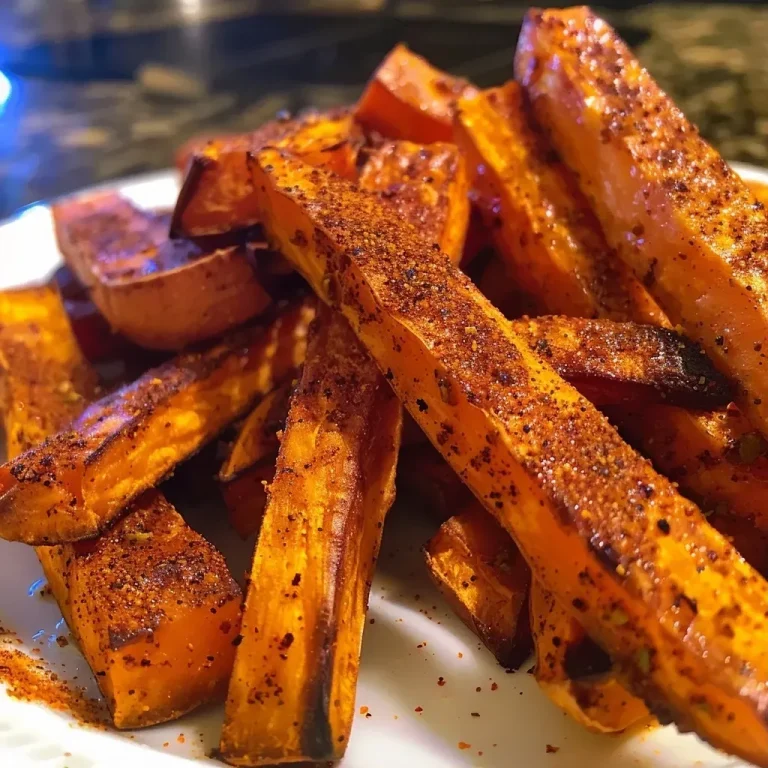
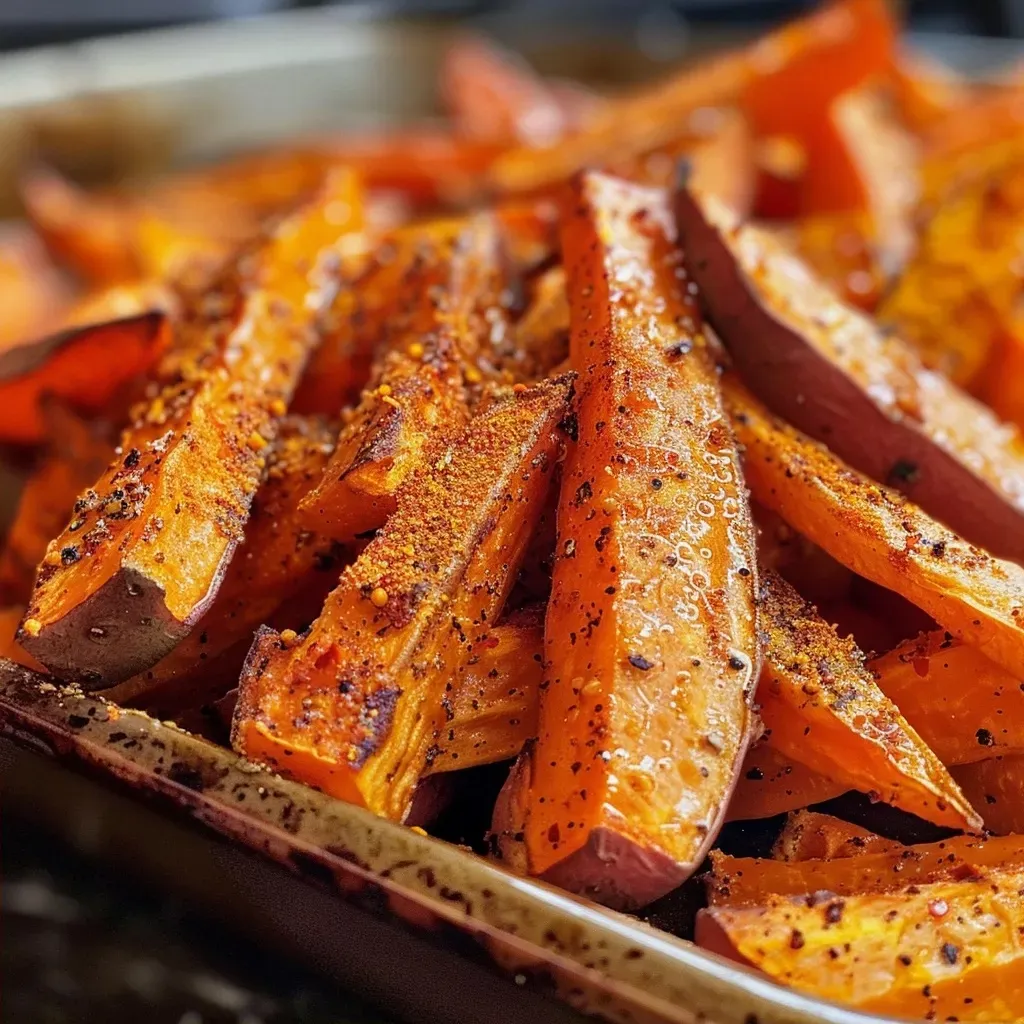
Side view of crispy sweet potato fries coated in pumpkin spice seasoning.

Creating these fries is a straightforward process that anyone can master. Follow these steps for crispy, flavorful results:

  1. Preheat your oven to 400°F (200°C).
  2. Cover a lipped cookie sheet with aluminum foil to make cleanup easier.
  3. Wash and thoroughly dry the sweet potatoes, cutting out any funky parts. You can choose to peel them or leave the skins on for extra crispiness.
  4. Chop the sweet potatoes into long, rustic fries and set aside on a paper towel to absorb excess moisture.
  5. In a bowl, mix all the spices until well blended.
  6. Pour the sweet potato fries into a gallon Ziploc bag, add the oil, and zip it shut. Shake until the sweet potatoes are coated.
  7. Open the bag and add the dry spice mixture, zip it shut, and shake again to ensure even coating.
  8. Spread the fries out in a single layer on the baking sheet.
  9. Bake for about 30 minutes, or until the outside is crispy and the inside is smooth and soft. Taste to check doneness.
  10. For extra crispiness, turn the oven up to 425°F (220°C) for the last 10 minutes.
  11. Once done, sprinkle with a bit of salt, serve, and enjoy your delicious creation!

Pro Tips for Perfect Fries

To ensure your Pumpkin Spice Sweet Potato Fries turn out perfectly every time, keep these expert insights in mind:

  • Cut evenly: Ensure your fries are cut to a uniform size for even cooking.
  • Soak before baking: Soaking the sweet potatoes in water for 30 minutes helps remove excess starch, leading to crispier fries.
  • Don’t overcrowd: Allow space between fries on the baking sheet to promote even crisping.
  • Flip halfway through: Turning the fries halfway through baking guarantees they cook evenly on all sides.
  • Experiment with spices: Feel free to try different spice blends like chili powder or Italian seasoning for a unique flavor profile.
  • Use parchment paper: For even easier cleanup and to prevent sticking, consider using parchment paper instead of foil.
  • Serve immediately: For the best texture, serve the fries right after baking.
  • Pair with dips: Consider serving with a yogurt dip or spicy aioli for a gourmet touch.

Common Mistakes and Troubleshooting

Even the best home chefs can face challenges. Here are some common mistakes and troubleshooting tips:

  • Fries are soggy: Ensure sweet potatoes are dried thoroughly before adding oil and spices.
  • Uneven cooking: Make sure to cut fries into equal sizes and avoid overcrowding on the baking sheet.
  • Burnt edges: Keep an eye on the fries during the last few minutes of baking, as they can burn quickly at higher temperatures.
  • Flavorless fries: Adjust the spice levels to your taste; don’t be afraid to add a bit more salt or spice if needed.

Variations to Explore

Feeling adventurous? Here are some fun variations to try with your Pumpkin Spice Sweet Potato Fries:

  • Maple-glazed fries: Drizzle with maple syrup before baking for a sweet, caramelized finish.
  • Parmesan and herb fries: Toss with grated Parmesan and fresh herbs like rosemary or thyme before baking.
  • Curry-spiced fries: Swap pumpkin spice for curry powder for an exotic twist.
  • Sweet and spicy: Add a touch of brown sugar along with cayenne for a sweet heat.

Storage and Make-Ahead Instructions

If you want to prepare these sweet potato fries ahead of time, here’s how:

  • Make-ahead: You can cut the sweet potatoes and store them in water in the refrigerator for up to 24 hours before cooking.
  • Storage: Store leftover fries in an airtight container in the fridge for up to 3 days. Reheat in the oven to restore crispiness.
  • Freezing: Freeze uncooked, seasoned fries on a baking sheet. Once frozen, transfer to a zip-top bag and store for up to 3 months. Bake directly from frozen, adding a few extra minutes to the cooking time.

Frequently Asked Questions

Here are some common questions about making Pumpkin Spice Sweet Potato Fries:

  • Can I use regular potatoes instead of sweet potatoes? Yes, you can! Just be aware that the flavor will differ.
  • What if I don’t have pumpkin pie spice? You can easily make your own blend with cinnamon, nutmeg, and ginger.
  • How do I get my fries crispy? Ensure they’re dried well, cut evenly, and spread out on the baking sheet.
  • Can I air fry these fries? Absolutely! Preheat your air fryer and cook at 375°F for about 15-20 minutes, shaking halfway through.
  • Are these fries gluten-free? Yes, all ingredients are gluten-free!
  • Can I add other veggies? Feel free to mix in carrots or parsnips for a colorful twist.
  • How can I make these fries spicy? Increase the cayenne pepper or add some chili powder for an extra kick.
  • What should I serve with these fries? They pair wonderfully with burgers, grilled chicken, or as a snack on their own!

Nutrition Tips and Dietary Adaptations

For those mindful of their dietary choices, here are some tips:

  • Vegan: This recipe is already vegan-friendly!
  • Low-carb: Consider using zucchini fries instead of sweet potatoes.
  • Low-fat: Reduce the oil or try baking them without any oil, though the texture may vary.

Equipment Recommendations

To make the most of this recipe, consider using the following tools:

  • Sharp knife: A good knife will help you cut the sweet potatoes evenly.
  • Baking sheet: A sturdy, lipped baking sheet will keep your fries contained and make for easier cleanup.
  • Large Ziploc bag: Perfect for shaking the fries with oil and spices to ensure even coating.
  • Mixing bowl: A large bowl for mixing your spices and coating the fries.

Delight in Your Creation

Cooking is an art, and these Pumpkin Spice Sweet Potato Fries are a canvas for your creativity. Invite friends over, gather around the dinner table, or simply enjoy a cozy evening at home with a plate of these delectable fries. Remember, the joy of cooking lies in the process, so take your time, savor the flavors, and enjoy every moment in the kitchen. Happy cooking!

Pumpkin Spice Sweet Potato Fries

Prep Time 10 minutes
Cook Time 30 minutes
Total Time 40 minutes
Servings 4 servings
Calories 180
Enjoy crispy, flavorful sweet potato fries seasoned with pumpkin spice and a hint of cayenne pepper, baked to perfection.

Ingredients

Sweet Potatoes

  • 4 large sweet potatoes (washed and dried)
  • 0.25 Cup vegetable oil
  • 1 Tablespoon pumpkin pie spice
  • 0.25 teaspoon cayenne pepper
  • 0.5 teaspoon smoked paprika
  • 0.5 teaspoon salt

Instructions 

  • Preheat oven to 400°F (200°C). Line a baking sheet with foil.
  • Cut sweet potatoes into fries, dry thoroughly, and place in a bag with oil. Shake to coat.
  • Add spice mixture to the bag, shake again to coat evenly.
  • Spread fries on the baking sheet and bake for 30 minutes. For extra crispiness, increase oven to 425°F for last 10 minutes.
  • Remove from oven, sprinkle with salt, and serve hot.

Notes

For extra crispiness, turn the oven up to 425°F for the last 10 minutes.
Calories: 180kcal
Cost: $10
Course: Side Dish
Cuisine: American
Keyword: Pumpkin Spice, sweet potato

Unlock the Joy of Homemade Cinnamon Popcorn

When it comes to snacks, few things can match the delightful experience of homemade cinnamon popcorn. This vegan and gluten-free treat combines the warmth of cinnamon with the satisfying crunch of freshly popped corn. Whether you’re hosting movie night or simply craving a comforting snack, this recipe is sure to please. In this guide, we’ll explore everything you need to know about creating this irresistible treat in your own kitchen. Let’s dive in!

Why You’ll Love This Recipe

This cinnamon popcorn recipe isn’t just tasty; it offers several benefits that make it a standout option for any snack lover:

  • Quick and Easy: With just four ingredients, you can whip up this delicious snack in no time. Perfect for those busy weekdays!
  • Customizable Flavors: Feel free to experiment with spices and toppings, allowing you to create your own unique blend.
  • Healthy Snack Option: Made with wholesome ingredients, this popcorn is a guilt-free treat that satisfies your sweet tooth.
  • Family-Friendly: Kids love popcorn, and this recipe is a fantastic way to introduce them to healthier snacking.
  • Perfect for Any Occasion: Whether it’s a cozy night in or a festive gathering, this cinnamon popcorn fits right in!

Ingredient Breakdown

To make your healthy cinnamon popcorn, you’ll need the following ingredients:

  • 1 cup popcorn kernels: Choose high-quality kernels for the best popping results.
  • 4 tbsp vegan butter: You can substitute with coconut oil or any plant-based butter.
  • 1 1/2 tbsp cinnamon: Adjust the amount based on your taste preference.
  • 1 tsp salt: Enhances the overall flavor. Feel free to use a salt substitute if needed.

Pro Tips for Perfect Popcorn

Side view of a bowl filled with vegan cinnamon popcorn, highlighting its crunchy texture and spiced appearance.

Here are some expert insights to elevate your popcorn game:

  • Use Fresh Kernels: Ensure your popcorn kernels are fresh for maximum popping success.
  • Popcorn Maker vs. Stovetop: Both methods can yield great results. A popcorn maker is convenient, but stovetop popping allows for more control.
  • Monitor Temperature: If using the stovetop, keep the heat at medium to avoid burning the kernels.
  • Flavor Variations: Experiment with different spices like nutmeg or vanilla for a twist on traditional flavors.
  • Storage Tips: Store any leftovers in an airtight container to maintain freshness.
  • Listen for the Pops: When popping, listen closely—once the pops slow down, it’s time to remove the pot from heat.
  • Mix Thoroughly: Make sure the cinnamon and salt are evenly distributed for the best flavor.
  • Serve Warm: This popcorn is best enjoyed fresh out of the pot, while it’s still warm and crispy.

Common Mistakes and Troubleshooting

Even the best chefs can make mistakes! Here are some common pitfalls and how to avoid them:

  • Burnt Popcorn: If your popcorn burns, check the heat level and reduce it next time.
  • Unpopped Kernels: If many kernels remain unpopped, your oil may not have been hot enough.
  • Uneven Flavoring: To ensure even coverage, mix the melted butter and cinnamon thoroughly before drizzling.
  • Stale Popcorn: Store leftovers in a cool, dry place to avoid staleness.

Variations to Try

Here are some fun variations to keep things interesting:

  • Maple Cinnamon Popcorn: Add 2 tablespoons of maple syrup to your melted butter for a sweet twist.
  • Chocolate Drizzle: Drizzle melted dark chocolate over the popcorn for a decadent treat.
  • Spicy Cinnamon Popcorn: Mix in a pinch of cayenne pepper or chili powder for a kick.
  • Herb-Infused Popcorn: Experiment with dried herbs like rosemary or thyme for a savory version.

Storage and Make-Ahead Instructions

Want to prepare in advance? Here’s how to store your delicious popcorn:

  • Make-Ahead: Prepare the popcorn and let it cool completely before storing.
  • Storage: Keep in an airtight container to maintain freshness, and consume within a week.
  • Re-crisping: If it loses its crunch, pop it in a warm oven for a few minutes to re-crisp.

Comprehensive FAQ

Here are some frequently asked questions to guide you:

  • Can I use regular butter instead of vegan butter? Yes, but this will no longer be a vegan recipe!
  • What type of popcorn kernels should I use? Look for organic or non-GMO kernels for the best flavor.
  • How can I make this popcorn sweeter? Increase the amount of cinnamon or add sugar to the melted butter.
  • Is this popcorn gluten-free? Absolutely! This recipe is naturally gluten-free.
  • What’s the best way to pop popcorn? Both stovetop and air poppers yield great results; choose the one you prefer!
  • Can I add other toppings? Yes! Get creative with toppings like nutritional yeast, cheese powder, or sprinkles.
  • How long does popcorn stay fresh? Store in an airtight container; it should stay fresh for up to a week.
  • Can I make this recipe without oil? Yes, but the flavor and texture may vary. Try using a popcorn air popper instead.

Nutritional Tips and Dietary Adaptations

This healthy cinnamon popcorn can be adjusted to fit various dietary needs:

  • Lower-Calorie Option: Reduce the amount of vegan butter to cut calories.
  • Nut-Free Option: This recipe is already nut-free, but always check your ingredients!
  • Diabetic-Friendly: Use a sugar substitute if you’re watching your sugar intake.

Equipment Recommendations

Here’s what you’ll need to create your perfect batch of popcorn:

  • Popcorn Maker: A dedicated popcorn maker ensures even popping.
  • Heavy-Bottomed Pot: For stovetop popping, a heavy pot helps distribute heat evenly.
  • Measuring Spoons: Accurate measurements ensure the perfect flavor balance.
  • Mixing Bowl: A large bowl is essential for tossing the popcorn with flavorings.

Serving Suggestions

How you serve your popcorn can enhance the enjoyment:

  • Movie Night: Serve in individual bowls for a cozy viewing experience.
  • Party Snack: Create a popcorn bar with various toppings for guests to customize.
  • Gift Idea: Package in a decorative jar for a thoughtful homemade gift.

In conclusion, this wholesome cinnamon popcorn is a wonderful way to indulge in a sweet snack while keeping it healthy. With its simple ingredients and customizable options, you can easily make it your own. So gather your ingredients and get ready to enjoy a delightful treat that brings warmth and joy to every occasion. Happy popping!

Healthy Cinnamon Popcorn (Vegan & Gluten Free)

Prep Time 5 minutes
Cook Time 10 minutes
Total Time 15 minutes
Servings 4 cups
Calories 250
A light and flavorful snack perfect for a healthy treat, combining crunchy popcorn with warm cinnamon and vegan butter.

Ingredients

popcorn

  • 1 cup popcorn kernels

vegan butter

  • 4 tbsp vegan butter

spices

  • 1 1/2 tbsp cinnamon
  • 1 tsp salt

Instructions 

  • Pop the popcorn kernels until fully popped and set aside.
  • Melt the vegan butter in a small saucepan over low heat.
  • Mix cinnamon and salt into the melted butter.
  • Pour the cinnamon mixture over the popcorn and toss to coat evenly.
  • Spread the coated popcorn on a baking sheet and let it cool for 5 minutes before serving.

Notes

For extra flavor, sprinkle a little more cinnamon on top before serving.
Calories: 250kcal
Cost: $5
Course: Snack
Cuisine: vegan
Keyword: Popcorn

Welcome to the Delightful World of Grape Focaccia

There’s something truly magical about the aroma of freshly baked bread wafting through your kitchen. Today, we’ll embark on a delightful culinary journey, creating a Grape Focaccia that not only fills your home with warmth but also your heart with joy. This recipe marries the savory goodness of focaccia with the sweet succulence of grapes, resulting in a dish that is perfect for sharing or enjoying as a comforting solo treat. Let’s dive into the delightful details of this recipe and discover why it should be your next baking adventure!

Why You’ll Love This Recipe

This Tuscan Grape Focaccia is more than just a loaf of bread; it’s an experience. Here are five reasons to fall in love with it:

  • Unique Flavor Combination: The contrast of sweet grapes and the savory, slightly salty focaccia creates a delightful taste sensation.
  • Easy to Make: With simple ingredients and straightforward instructions, this recipe is perfect for bakers of all skill levels.
  • Perfect for Any Occasion: Whether it’s a family gathering, a picnic, or a cozy night in, this focaccia fits right in.
  • Versatile Serving Options: Serve it warm as a snack, or pair it with cheese and charcuterie for an elegant appetizer.
  • Healthier Indulgence: Made with wholesome ingredients, this focaccia can be a delightful addition to a balanced diet.

Diving Into the Ingredients

Before we start, let’s take a closer look at the ingredients needed for our Grape Focaccia and explore some possible substitutions to fit your pantry.

  • 500 g (1 lb 2 oz) plain (all-purpose) flour: This is the base of our focaccia. If you prefer, you can use whole wheat flour for a nuttier flavor.
  • 20 g (3/4 oz) fresh yeast or 7 g (1/4 oz/2 1/2 level teaspoons) active dry yeast: Fresh yeast provides a lovely rise. If using dry yeast, activate it in warm water first.
  • 400 ml (13 1/2 fl oz) lukewarm water: This helps to activate the yeast. Ensure it’s not too hot to avoid killing the yeast.
  • 75 ml (2 1/2 fl oz) extra-virgin olive oil: A key player in our focaccia, providing flavor and moisture. You can substitute it with another oil, but olive oil is recommended for its taste.
  • 600 g (1 lb 5 oz) concord grapes: For the sweetest results, opt for fresh, ripe grapes. You can use other varieties as well, such as black or red grapes.
  • 80 g (2 3/4 oz) caster (superfine) sugar: This enhances the sweetness of the grapes. You can reduce the amount or replace it with honey if desired.
  • 1 teaspoon aniseed (optional): Adds a hint of spice. Feel free to omit it if you prefer a simpler flavor.
  • Icing (confectioners’) sugar (optional): For a sweet dusting before serving. This is entirely optional!

Step-by-Step Instructions

Side view of freshly baked grape focaccia, highlighting the textured crust and fruity toppings.

Now that we have our ingredients ready, let’s get started with the preparation of our Grape Focaccia.

  1. Sift the flour into a large bowl and create a well in the center.
  2. Dissolve the yeast in about 125 ml (1/2 cup) of lukewarm water.
  3. Add the yeast mixture to the center of the flour and mix with your hand or a wooden spoon.
  4. Gradually add the remaining water, working the dough well after each addition to allow the flour to absorb all the water.
  5. Add 1 tablespoon of extra-virgin olive oil to the dough and combine.
  6. Cover the bowl of dough with plastic wrap and set it in a warm place to rise until it doubles in size, about 1 hour. Alternatively, let it rise in the fridge overnight for a slower fermentation.
  7. While the dough is rising, separate the grapes from the stems, rinse, and pat dry.
  8. Preheat the oven to 190°C (375°F).
  9. Grease a 20 cm (8 in) x 30 cm (12 in) baking tin or a round pizza tray with olive oil.
  10. With well-oiled hands, divide the dough into two halves, one slightly larger than the other. Spread the larger half onto the greased pan, ensuring it’s no more than 1.5 cm (1/2 in) thick.
  11. Place about two-thirds of the grapes onto the first dough layer, sprinkle over half of the sugar, followed by about 30 ml (1 fl oz) of olive oil and 1/2 teaspoon of aniseed.
  12. Stretch out the remaining dough to cover the grapes, rolling up the edges to seal.
  13. Gently push down on the surface of the dough to create dimples, then cover with the remaining grapes and sprinkle with the remaining sugar, olive oil, and aniseed.
  14. Bake for about 30 minutes or until golden and crunchy, with the grapes oozing.
  15. Allow to cool completely before cutting into squares. Dust with icing sugar before serving if desired.

Pro Tips for Perfect Grape Focaccia

To ensure your focaccia turns out perfectly every time, here are some expert insights:

  • Let it Rise Properly: A good rise is crucial for light, airy focaccia. Don’t rush this step!
  • Use Quality Ingredients: The better the ingredients, the better the flavor. Opt for high-quality olive oil and fresh grapes.
  • Don’t Overwork the Dough: Mix just until combined to avoid developing too much gluten, which can lead to a dense texture.
  • Experiment with Toppings: Feel free to add herbs or other fruits to the top for unique variations.
  • Check the Oven Temperature: An accurate oven temperature is essential. Consider using an oven thermometer for best results.
  • Cool Before Slicing: Let the focaccia cool completely for easier slicing and to maintain its structure.
  • Store Properly: Keep leftovers in an airtight container at room temperature for up to 3 days.
  • Enjoy Warm: Focaccia is best enjoyed warm, so consider reheating slices in the oven before serving.

Common Mistakes and Troubleshooting

Even the best bakers make mistakes! Here are some common pitfalls to avoid:

  • Too Much Flour: Adding too much flour can lead to a dry focaccia. Measure carefully and add flour gradually as needed.
  • Not Enough Yeast: Ensure your yeast is fresh and active to achieve proper leavening.
  • Skipping the Rise: Don’t skip the rising time; it’s essential for the dough’s texture.
  • Overbaking: Keep an eye on your focaccia as it bakes. Overbaking can lead to a hard crust.
  • Using Cold Ingredients: Ensure your ingredients, especially water, are at the right temperature to activate the yeast.

Delicious Variations

Want to switch things up? Here are some delightful variations on the classic recipe:

  • Herbed Focaccia: Add fresh herbs like rosemary or thyme to the dough for an aromatic twist.
  • Citrus Zest: Incorporate lemon or orange zest into the dough for a bright, zesty flavor.
  • Cheese Lover’s Delight: Sprinkle feta or goat cheese on top along with the grapes for a savory touch.
  • Nutty Addition: Add toasted nuts like walnuts or almonds for extra crunch and flavor.

Storage and Make-Ahead Instructions

Want to prep ahead? Here’s how to store and make this focaccia in advance:

  • Room Temperature: Store cooled focaccia in an airtight container at room temperature for up to 3 days.
  • Freezing: Freeze slices in a single layer, then transfer them to a zip-top bag for up to 3 months. Reheat in the oven when ready to enjoy.
  • Make-Ahead Dough: Prepare the dough and let it rise overnight in the fridge. Shape and bake the next day for fresh focaccia!

Frequently Asked Questions

Here are some common questions about making Grape Focaccia:

  • Can I use different types of grapes? Yes! While concord grapes are traditional, you can use any sweet variety.
  • What if my dough doesn’t rise? Ensure your yeast is fresh and that the environment is warm enough for rising.
  • Can I add other fruits? Absolutely! Try adding figs or sliced peaches for a different flavor profile.
  • Is this recipe vegan? Yes, it’s naturally vegan! Just ensure your sugar is vegan-friendly.
  • How can I make this gluten-free? Substitute the all-purpose flour with a gluten-free flour blend.
  • What’s the best way to serve focaccia? Serve warm with olive oil for dipping, or pair it with cheese and charcuterie.
  • How long does it keep? It’s best enjoyed fresh, but can be stored for up to 3 days at room temperature.
  • Can I use bread flour instead? Yes, bread flour will yield a chewier texture, which is also delicious!

Nutritional Tips and Dietary Adaptations

Making healthy choices while enjoying this delicious focaccia is easy:

  • Whole Wheat Flour: Using whole wheat flour increases fiber content and adds a nutty flavor.
  • Reduce Sugar: Feel free to cut down on the sugar if you prefer a less sweet focaccia.
  • Add Seeds: Incorporating seeds like sunflower or pumpkin seeds can add healthy fats and nutrients.
  • Serve with Nut Butter: For a protein boost, pair your focaccia with almond or peanut butter.

Essential Equipment for Baking Grape Focaccia

Here’s what you’ll need to make this recipe:

  • Large Mixing Bowl: For mixing and rising the dough.
  • Measuring Cups and Spoons: Accurate measurements are key to success.
  • Baking Tin or Pizza Tray: A good quality baking tin helps with even cooking.
  • Plastic Wrap: For covering the dough while it rises, preventing it from drying out.
  • Oven Mitts: Essential for safely removing the hot focaccia from the oven.

Serving Suggestions

To elevate your focaccia experience, consider these serving ideas:

  • Cheese Pairing: Serve with a selection of cheeses like brie, goat cheese, or aged cheddar.
  • Charcuterie Board: Include meats like prosciutto and salami alongside the focaccia.
  • Olive Oil Dip: Drizzle high-quality olive oil mixed with balsamic vinegar for dipping.
  • Salad Companion: Pair with a fresh salad for a complete meal.

In conclusion, baking your own Grape Focaccia is a rewarding experience that brings joy and comfort to your kitchen. With its unique flavor profile and delightful texture, it’s sure to become a favorite in your home. So roll up your sleeves, gather your ingredients, and let’s make some delicious memories together in the kitchen. Happy baking!

Grape Focaccia

Prep Time 30 minutes
Cook Time 30 minutes
Total Time 1 hour
Servings 8 slices
Calories 350
A delicious Italian-style focaccia topped with sweet grapes and aromatic aniseed, perfect for sharing.

Ingredients

Dough

  • 500 g plain (all-purpose) flour
  • 20 g fresh yeast
  • 400 ml lukewarm water
  • 75 ml extra-virgin olive oil

Grapes

  • 600 g concord grapes (or other black grapes)
  • 80 g caster (superfine) sugar
  • 1 teaspoon aniseed (optional)

Optional toppings

  • icing (confectioners’) sugar (for dusting)

Instructions 

  • Mix flour and yeast, then add water gradually, kneading until smooth. Add olive oil and let rise until doubled, about 1 hour.
  • Preheat oven to 190°C (375°F). Grease a baking tray and divide dough into two parts, spreading the larger piece to cover the tray.
  • Spread two-thirds of grapes over the dough, sprinkle with half the sugar, drizzle with olive oil, and sprinkle half the aniseed. Cover with the second dough layer and seal edges.
  • Press down gently to create dimples, then top with remaining grapes, sugar, aniseed, and olive oil. Bake for 30 minutes until golden and grapes are cooked.
  • Cool completely, then cut into squares. Dust with icing sugar if desired and serve.

Notes

Use well-oiled hands to handle the dough for easier shaping.
Calories: 350kcal
Cost: $12
Course: Appetizer, Snack
Cuisine: Italian
Keyword: Focaccia, Grapes