
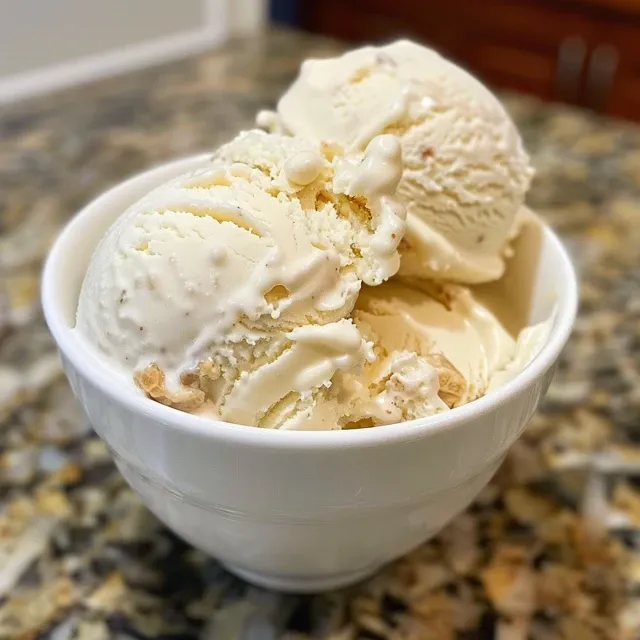
Discover the Joy of Making No-Churn Vanilla Protein Ice Cream
If you’re looking to indulge in a creamy, delicious dessert without the guilt, you’ve come to the right place! This simple No-Churn Vanilla Protein Ice Cream recipe is your new favorite healthy homemade ice cream. It combines the smooth texture of Greek yogurt with the sweetness of vanilla protein powder, making it a delightful frozen treat that fits perfectly into a balanced lifestyle. Let’s dive in and explore how you can create this indulgent yet guilt-free dessert right in your own kitchen!
Why You’ll Love This Recipe
This recipe is not just about satisfying your sweet tooth; it offers numerous benefits that make it a standout choice among homemade desserts:
- Healthy indulgence: With protein-packed Greek yogurt and protein powder, you can enjoy a dessert that supports your fitness goals.
- Zero churn required: No ice cream maker? No problem! This recipe is designed for the freezer, making it accessible for everyone.
- Customizable flavors: Feel free to get creative! This base recipe can be adapted with various flavors and mix-ins.
- Quick and easy preparation: Whip up this ice cream in just a few minutes, and let the freezer do the rest.
- Perfect for meal prep: Make a batch ahead of time, so you always have a healthy dessert on hand when cravings strike.
Gathering Your Ingredients
Before we get started, let’s gather the essential ingredients for your No-Churn Vanilla Protein Ice Cream. Each ingredient plays a crucial role in achieving that creamy, dreamy texture!
- 1 cup plain Greek yogurt: Choose 2% or full-fat for the best texture. This will be the base of your ice cream.
- 1/2 cup milk: Dairy or unsweetened almond milk works well to create a smooth consistency.
- 1 scoop vanilla protein powder: A whey or casein blend is recommended for optimal creaminess.
- 1 tablespoon sweetener: Use erythritol, monk fruit, or your preferred zero-calorie option to keep it guilt-free.
- 1 teaspoon vanilla extract: For an extra burst of flavor that complements the protein powder.
- Pinch of salt: Enhances the flavors and balances the sweetness.
Step-by-Step Instructions
Now that you have your ingredients ready, let’s walk through the simple steps to make this ice cream:
- Combine ingredients: In a medium bowl, combine the Greek yogurt, milk, protein powder, sweetener, vanilla extract, and salt.
- Mix until smooth: Use a whisk or an electric mixer to beat the mixture until it is completely smooth and no lumps of protein powder remain. This step is crucial for achieving a creamy texture.
- Transfer to a container: Pour the mixture into a freezer-safe container, like a loaf pan or a small plastic tub. Cover it tightly with a lid or plastic wrap.
- Freeze: Place the container in the freezer for at least 6 hours, or until firm. The longer it freezes, the more solid it will become.
- Serve: For the best texture, remove the container from the freezer 10 to 15 minutes before serving to allow it to soften slightly. Scoop and enjoy your healthy homemade ice cream!
Pro Tips for Perfect Ice Cream
To ensure your No-Churn Vanilla Protein Ice Cream turns out perfectly every time, consider these expert insights:
- Use full-fat Greek yogurt: This provides the creaminess you’re looking for. Non-fat yogurt may yield a grainy texture.
- Adjust sweetness to taste: Since different sweeteners vary in sweetness, taste the mixture before freezing and adjust as needed.
- Let it soften before scooping: If the ice cream is too hard, it may be difficult to scoop. Softening helps achieve that perfect creamy scoop.
- Experiment with flavors: Add cocoa powder for a chocolate version, or blend in fruit for added nutrition and flavor.
- Keep it covered: To avoid freezer burn, make sure your container is sealed tightly.
- Don’t skip the salt: A pinch of salt enhances the overall flavor and balances the sweetness.
- Test different protein powders: Different brands can yield different textures and flavors. Find the one you love best!
- Incorporate mix-ins: Consider adding chocolate chips, nuts, or fruit pieces for extra texture and flavor.
Common Mistakes and Troubleshooting
Even the best home chefs can face challenges. Here are some common mistakes and how to troubleshoot them:
- Grainy texture: This can happen if the protein powder isn’t mixed well. Make sure to blend until completely smooth.
- Too hard to scoop: If your ice cream freezes too solid, allow it to sit at room temperature for a few minutes before scooping.
- Flavor not strong enough: If the flavor is too mild, consider adding more vanilla extract or sweetener to enhance it.
- Ice crystals forming: This may occur if the ice cream isn’t mixed well before freezing. Ensure a smooth consistency before transferring to the freezer.
Flavor Variations
While this No-Churn Vanilla Protein Ice Cream is delicious on its own, you can easily switch things up with these flavorful variations:
- Chocolate Protein Ice Cream: Replace the vanilla protein powder with chocolate protein powder and add 2 tablespoons of cocoa powder.
- Berry Swirl Ice Cream: Fold in 1 cup of blended mixed berries before freezing for a fruity delight.
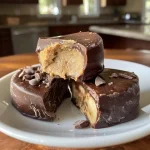
- Peanut Butter Chocolate Chip Ice Cream: Add 1/4 cup of natural peanut butter and mix in 1/2 cup of dark chocolate chips.
- Coffee Ice Cream: Incorporate 1 tablespoon of instant coffee or espresso powder for a delightful caffeine kick.
Storage and Make-Ahead Instructions
If you want to make your ice cream ahead of time, follow these storage tips:
- Store in an airtight container: This prevents freezer burn and helps maintain freshness.
- Keep in the freezer: Your ice cream can be stored for up to 2 months, but it’s best enjoyed within the first few weeks for optimal flavor and texture.
- Thaw before serving: If stored for a while, you may need to let it sit at room temperature for a few minutes to soften before scooping.
Frequently Asked Questions About Making Protein Ice Cream
Here are answers to some common questions you may have while making your own No-Churn Vanilla Protein Ice Cream:
- Can I use different flavors of protein powder? Yes! Feel free to experiment with various flavors to find your favorite combination.
- Is this protein ice cream recipe suitable for meal prepping? Absolutely! Make a large batch, and you’ll have delicious, healthy desserts ready to go!
- What if I want to use my Ninja Creami for this protein ice cream base? You can absolutely use a Ninja Creami! Just follow the machine’s instructions for creating a creamy texture.
- How can I make this recipe vegan? Use a plant-based yogurt and protein powder, along with a non-dairy milk option.
- Can I add mix-ins to the ice cream? Yes! Add-ins like nuts, chocolate chips, or fruit can be folded into the mixture before freezing.
- How do I know when my ice cream is ready? It should be firm to the touch but still scoopable after freezing for at least 6 hours.
- What’s the best way to serve this ice cream? Serve it in bowls or cones, and consider topping it with fresh fruit or a drizzle of chocolate sauce.
- Can I make this ice cream without protein powder? While protein powder enhances the recipe, you can omit it, but the texture and nutritional content may vary.
Nutritional Tips and Dietary Adaptations
This No-Churn Vanilla Protein Ice Cream can be adapted to fit various dietary needs:
- Low-carb option: Use low-carb sweeteners like erythritol or monk fruit to keep sugar content minimal.
- Gluten-free: All ingredients are gluten-free, making this recipe a safe choice for those with gluten sensitivities.
- Dairy-free: Substitute Greek yogurt and milk with dairy-free alternatives for a completely dairy-free dessert.
- High-protein: With the inclusion of Greek yogurt and protein powder, this dessert is great for those looking to increase their protein intake.
Equipment Recommendations
Having the right tools can make the process smoother. Here’s what you’ll need:
- Mixing bowl: A medium-sized bowl for combining your ingredients.
- Electric mixer or whisk: To ensure your mixture is completely smooth.
- Freezer-safe container: A loaf pan or airtight plastic tub works well for freezing.
- Scoop: For serving your delicious ice cream.
Serving Suggestions
Make your homemade ice cream even more delightful with these serving ideas:
- Top with fresh fruits: Berries, bananas, or peaches add a refreshing touch.
- Add a drizzle of syrup: Chocolate or caramel sauce can elevate the flavor profile.
- Serve with nuts: Chopped almonds or walnuts add a satisfying crunch.
- Make a sundae: Layer with your favorite toppings for a fun ice cream sundae experience.
With this comprehensive guide, you now have everything you need to create a delicious and satisfying No-Churn Vanilla Protein Ice Cream. Enjoy the process, and don’t hesitate to experiment with flavors and toppings to make it your own. Happy cooking!
Simple No-Churn Vanilla Protein Ice Cream Guilt-Free Treat
Ingredients
Dairy & Protein
- 1 cup plain Greek yogurt (full-fat preferred)
- 0.5 cup milk (dairy or unsweetened almond milk)
- 1 scoop vanilla protein powder (whey or casein blend recommended)
- 1 tablespoon sweetener (erythritol, monk fruit, or preferred zero-calorie option)
- 1 teaspoon vanilla extract
- Pinch salt
Instructions
- Combine Greek yogurt, milk, protein powder, sweetener, vanilla extract, and salt in a medium bowl.
- Whisk until smooth and no lumps remain.
- Pour mixture into a freezer-safe container and cover tightly.
- Freeze for at least 6 hours until firm.
- Remove from freezer 10-15 minutes before serving to soften.
- Scoop and enjoy your healthy ice cream!