
![['Close-up view of golden-brown sausage mummies wrapped in pastry, with eyes made of mustard.', 'Side profile of sausage mummies, showcasing flaky pastry and distinct facial features.', 'Juicy sausages encased in dough, presented on a rustic wooden surface for Halloween.', 'Halloween-themed sausage mummies with a crispy exterior and playful expression.']](https://tastykuche.com/wp-content/uploads/2026/07/sausage-mummies_1_U1.webp "Spooky Sausage Mummies: A Fun Halloween Treat for Everyone")
Embrace the Spook: A Fun Guide to Making Sausage Mummies This Halloween
As Halloween approaches, there’s a delightful anticipation in the air—a chance to gather with friends and family, share stories, and indulge in festive treats. One of the most adored Halloween snacks is the sausage mummies, a fun and easy-to-make dish that will surely bring a smile to everyone’s face. This recipe combines comforting flavors with a playful presentation, making it perfect for both children and adults alike. Let’s dive into the world of Halloween food with this comprehensive guide on crafting these charming mummies that are sure to spook and delight!
Why You’ll Love This Recipe
- Quick and Easy: With just a few simple ingredients and minimal prep time, you can whip up these mummies in under 30 minutes.
- Kid-Friendly: Kids will love helping out in the kitchen, wrapping the sausages, and decorating them with spooky eyes.
- Customizable: You can use any type of sausage, dough, or toppings, allowing for a variety of flavors and presentations.
- Perfect for Parties: These sausage mummies make for an eye-catching appetizer that is sure to be a hit at any Halloween gathering.
- Fun for All Ages: Whether you’re hosting a kids’ party or a gathering of adults, these tasty treats will appeal to everyone.
Ingredients: What You’ll Need
Before we start the fun, let’s gather our ingredients. Here’s what you’ll need to create your Halloween sausage mummies:
- 500 g of flour: This forms the base of your dough. You can substitute with whole wheat or gluten-free flour if desired.
- 10 g of salt: Enhances the flavor of the dough.
- 20 g of sugar: Adds a hint of sweetness to balance the savory flavors.
- 1 egg: This will help bind the dough together.
- 150 g of butter: For a rich and flaky crust. You can also use margarine for a dairy-free version.
- 150 ml of water at room temperature: To hydrate the dough.
- Sausages of your choice: Whether you prefer pork, chicken, or veggie, choose what you love!
- Beaten egg (for brushing): This will give your mummies a lovely golden color when baked.
Step-by-Step Guide: Making Your Sausage Mummies
Ready to get cooking? Follow these easy steps to create your spooky treats:

★ Recommended Kitchen Tool
Meal Prep Container Set
Make this recipe even easier with a quality Meal Prep Container Set — a must-have kitchen staple!
- Step 1: Prepare the Dough: In a large mixing bowl, combine the flour, salt, sugar, egg, and water. Mix until everything is well combined. Add the butter and knead the dough for about 5 minutes until it’s smooth and elastic. If it’s sticky, sprinkle a little more flour. Let the dough rest for 30 minutes.
- Step 2: Roll Out the Dough: After resting, dust your work surface with flour and roll the dough into a rectangle about 5mm thick. Cut the dough into strips approximately 2 cm wide.
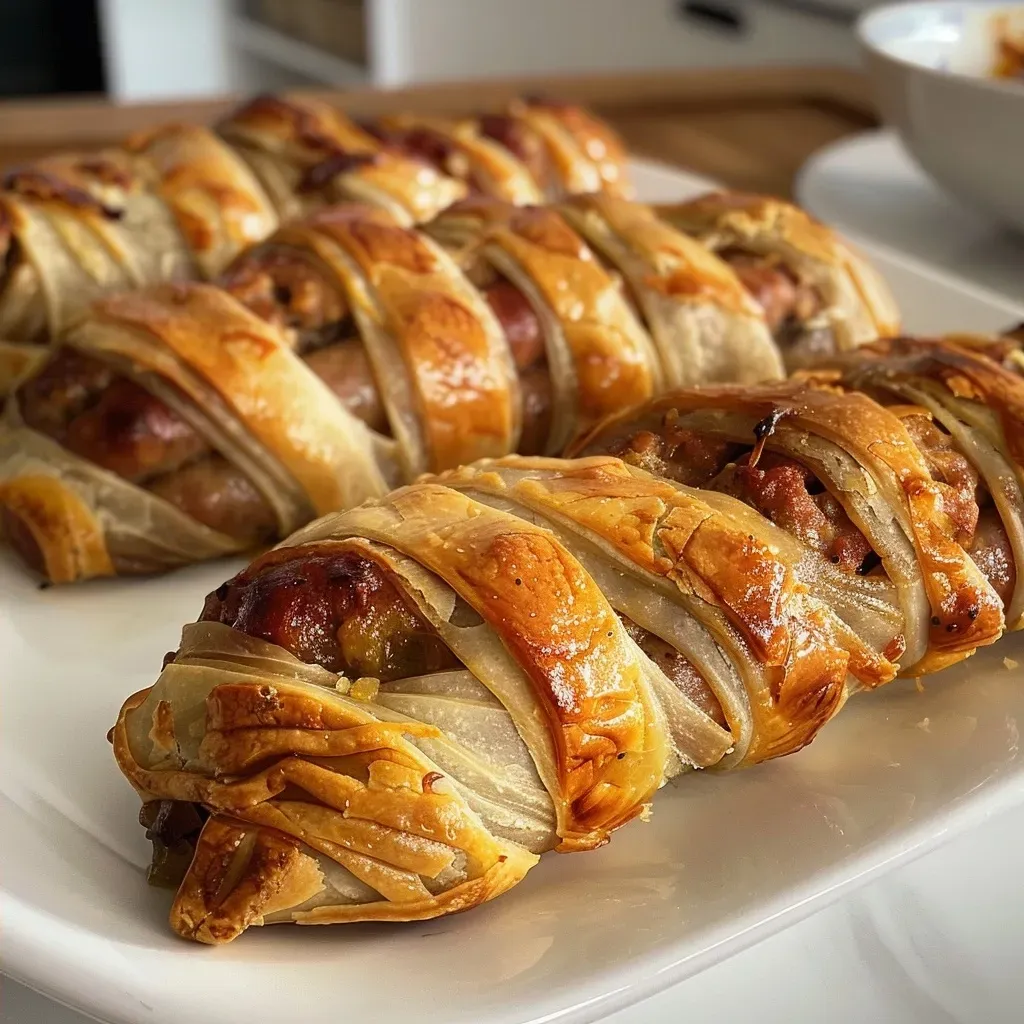
- Step 3: Wrap the Sausages: Take each sausage and wrap a strip of dough around it, leaving a small gap near the top for the eyes. The more haphazard the wrapping, the better—this gives it that authentic mummy fingers look!
- Step 4: Bake to Perfection: Place your wrapped sausages on a baking sheet lined with parchment paper. Brush each one with the beaten egg for a golden finish. Bake at 374°F (190°C) for about 15 minutes or until golden brown.
- Step 5: Add the Spooky Touches: Once cooled slightly, decorate your mummies using small pieces of cheese, cloves, or edible googly eyes for a fun and spooky effect.
Pro Tips for Perfect Sausage Mummies
To ensure your sausage mummies are the best they can be, consider these expert tips:
- Use Cold Ingredients: Keeping your butter and water cold can help achieve a flakier dough.
- Don’t Overwork the Dough: Knead just until combined to avoid tough mummies.
- Experiment with Flavors: Try adding herbs or spices to the dough for an extra punch of flavor.
- Perfect Texture: Bake until golden brown for a crispy crust while keeping the inside tender.
- Fun Variations: Use different toppings for eyes, like olives or sliced peppers, to create a variety of mummy faces.
- Serving Suggestions: Pair with a selection of dips like ketchup (for “blood”) or mustard to enhance the experience.
- Make Ahead: Prepare and wrap the mummies in advance, then simply bake them when ready to serve.
- Storage: Store leftovers in an airtight container in the fridge for up to 3 days.
Common Mistakes and Troubleshooting
Even the best chefs encounter hiccups in the kitchen. Here’s how to avoid common mistakes:
- Dough Too Sticky: If your dough is too sticky, add a little more flour until it reaches the right consistency.
- Underbaked Mummies: If they’re not golden brown after 15 minutes, give them a few extra minutes in the oven.
- Eyes Falling Off: If cheese or other toppings don’t stick well, try using a little dab of mustard or ketchup as glue.
Fun Variations to Try
Want to switch things up? Here are some creative variations you can try:
- Veggie Mummies: Use vegetarian sausages for a plant-based option that everyone can enjoy.
- Sweet Mummies: Instead of sausages, use chocolate-covered bananas wrapped in dough for a sweet treat.
- Herbed Dough: Incorporate dried herbs like oregano or thyme into the dough for a savory twist.
- Cheese-Stuffed Mummies: Before wrapping, stuff the sausages with cheese for an even more indulgent snack.
Storage and Make-Ahead Instructions
If you want to prepare ahead of time, here’s how to store your creations:
- Refrigerate: Store wrapped mummies in the fridge for up to 2 days before baking.
- Freeze: You can freeze unbaked mummies. Just make sure to wrap them tightly in plastic wrap and store them in a freezer-safe bag. Bake from frozen, adding an extra 5 minutes to the baking time.
Frequently Asked Questions
Here are some common questions about making sausage mummies:
- Can I use different types of sausages? Yes! Feel free to experiment with pork, chicken, turkey, or veggie sausages.
- Is this recipe suitable for freezing? Absolutely! Unbaked mummies freeze well and can be baked straight from the freezer.
- What can I use for the eyes? You can use cheese, cloves, peppercorns, or edible googly eyes for fun decorations.
- How do I prevent the dough from sticking? Use flour on your work surface and on your hands while working with the dough.
- Can I make the dough ahead of time? Yes, you can make the dough a day in advance and keep it refrigerated until you’re ready to use it.
- What’s the best way to reheat leftovers? You can reheat them in the oven at 350°F (175°C) for about 10 minutes to restore their crispiness.
- How do I make a gluten-free version? Substitute the flour with a gluten-free blend that is suitable for baking.
- What dipping sauces pair well? Ketchup, mustard, and barbecue sauce are all great choices for dipping!
Nutritional Tips and Dietary Adaptations
For those mindful of their health, here are a few tips:
- Use Whole Wheat Flour: This will increase the fiber content of your dough.
- Opt for Leaner Sausages: Choose turkey or chicken sausages for a lower-fat option.
- Skip the Sugar: You can reduce or omit the sugar for a healthier dough without compromising flavor.
Recommended Equipment
To make your cooking process smoother, here’s a simple list of kitchen tools you’ll need:
- Mixing Bowl: A large bowl for combining ingredients.
- Rolling Pin: Essential for rolling out your dough evenly.
- Baking Sheet: Make sure to line it with parchment paper for easy cleanup.
- Pastry Brush: For brushing egg wash onto your mummies.
Serving Suggestions
Once your mummies are ready, consider these creative serving ideas:
- Platter Display: Arrange them on a festive platter with Halloween-themed decorations.
- Pair with Drinks: Serve alongside spooky cocktails or mocktails for a full Halloween experience.
- Interactive Dipping Station: Set up a variety of dips for guests to choose from, making it interactive and fun.
In conclusion, making sausage mummies is an enjoyable and creative activity that brings joy to your Halloween festivities. With this detailed guide, you can create delicious mummies that are not only delightful to eat but also a joy to make. So gather your ingredients, invite some friends or family, and have fun in the kitchen this Halloween. Remember, cooking is all about the experience and finding joy in every step. Happy cooking!
Sausage Mummies (Halloweenies)
Ingredients
Dough
- 500 g flour
- 10 g salt
- 20 g sugar
- 1 egg egg
- 150 g butter
- 150 ml water at room temperature
- Sausages of your choice sausages (Use your preferred type)
- Beaten egg beaten egg (For brushing before baking)
Instructions
-
Mix flour, salt, sugar, egg, and water until combined. Knead in butter for 5 minutes, then rest for 30 minutes.
-
Roll dough into a 5mm thick rectangle and cut into 2cm wide strips.
-
Wrap each sausage with a dough strip, leaving space for eyes. Place on a baking sheet and brush with beaten egg.
-
Bake at 190°C (374°F) for 15 minutes until golden and cooked through.
-
Cool slightly, then add eyes using cheese, cloves, or googly eyes for a spooky effect.

![['Close-up view of golden brown High-Protein Bagel Bites arranged on a wooden board.', 'Side view of freshly baked High-Protein Bagel Bites with a creamy texture visible.', 'Juicy High-Protein Bagel Bites topped with Everything But The Bagel seasoning on a plate.', 'Appetizing High-Protein Bagel Bites showcasing a soft interior and crispy exterior.']](https://tastykuche.com/wp-content/uploads/2026/07/u6426281249_Prompt_to_retry_close_up_photo_side_view_from_red_ab003e51-3d97-45a1-addb-4da59808fc1b_0-150x150.webp)
![['Close-up of a colorful dish featuring sautéed cabbage and ground beef with diced tomatoes.', 'Juicy ground beef mixed with chopped cabbage and spices in a vibrant dish.', 'Side view of a hearty meal showcasing cabbage combined with seasoned ground beef.', 'Delicious plate of ground beef and cabbage, garnished and ready to eat.']](https://tastykuche.com/wp-content/uploads/2026/07/cabbage-and-ground-beef_1_U1-150x150.webp)