

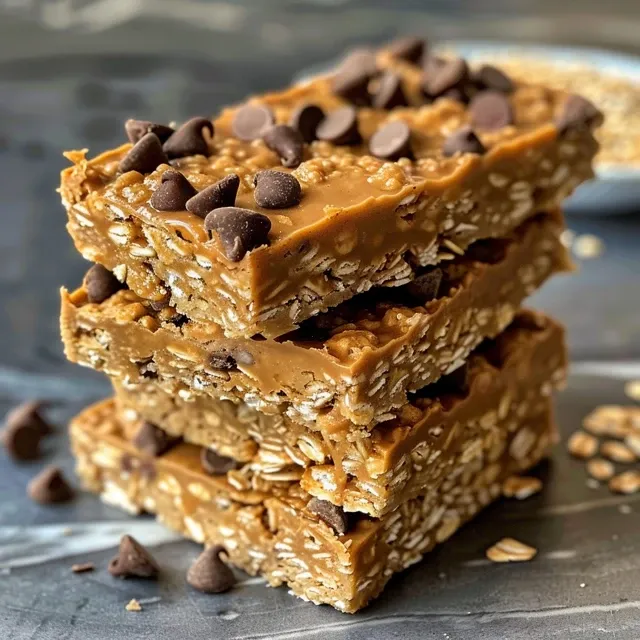
Unleashing the Joy of No Bake Chocolate Oat Bars
Welcome to your new favorite treat: No Bake Chocolate Oat Bars. These bars are not only easy to make, but they also offer a delightful blend of flavors that will satisfy your sweet tooth without the need for an oven. Perfect for a quick snack or dessert, these bars combine the wholesome goodness of oats with rich chocolate and creamy peanut butter. Let’s dive into the world of no bake chocolate oat bars and discover why they deserve a spot in your kitchen.
Why You’ll Love This Recipe
Here are just a few reasons why this no bake chocolate oat bars recipe will become a staple in your home:
- Quick and Easy: With minimal preparation time, you can whip these up in just a few minutes. All you need to do is mix, press, and chill!
- Healthy Ingredients: Made with rolled oats, peanut butter, and honey, these bars are packed with nutrients, making them a guilt-free indulgence.
- Customizable: You can easily swap ingredients based on your preferences or pantry supplies, making it a flexible recipe.
- No Baking Required: Perfect for hot summer days, there’s no need to turn on the oven, keeping your kitchen cool.
- Great for Meal Prep: These bars keep well in the fridge or freezer, making them an excellent option for meal planning.
Ingredient Breakdown
Let’s take a closer look at the ingredients you’ll need for these delectable no bake chocolate oat bars:
- 3 cups rolled oats: Ensure you use rolled oats for the best texture. Quick oats can be used, but they may result in a softer bar.
- 1 1/2 cups chocolate chips: Semi-sweet or dark chocolate chips add a rich flavor. You can also use dairy-free options for a vegan treat.
- 1 cup peanut butter: Creamy peanut butter works best to bind the ingredients together. You can substitute almond butter or sunflower seed butter for nut-free options.
- 1/2 cup maple syrup: Acts as a natural sweetener and helps hold the bars together. Honey can be used as an alternative if you prefer.
- 1/4 cup coconut oil: This can be substituted with butter if desired, but coconut oil gives a lovely flavor and texture.
Pro Tips for Perfect Bars
To ensure your no bake chocolate oat bars turn out perfectly every time, consider these expert insights:
- Chill Time: Allow your bars to chill for at least 2-3 hours to set properly. Overnight is even better for a firmer texture.
- Press Firmly: When spreading the mixture into your pan, press down firmly to compact the ingredients. This helps with structure and prevents crumbling.
- Add-ins: Feel free to incorporate extras like nuts, dried fruit, or seeds for added texture and nutrition.
- Storage: Keep your bars in an airtight container in the fridge for up to a week or freeze for longer storage.
- Even Slicing: Use a sharp knife to cut the bars after they’ve set. Warming the knife slightly can help make cleaner cuts.
- Room Temperature: If you want to enjoy these bars at room temperature, let them sit out for a few minutes before serving.
- Sweetness Level: Adjust the amount of maple syrup based on your sweetness preference. Feel free to taste the mixture before setting!
- Experiment: Don’t hesitate to try different nut butters or sweeteners to find your favorite combination.
Common Mistakes and Troubleshooting
Even the best recipes can have hiccups! Here’s how to troubleshoot common issues:
- Bars Crumbling: If your bars are crumbly, they may need more binding agents like peanut butter or syrup. Ensure you press the mixture down firmly.
- Too Sweet: If the bars are overly sweet for your taste, reduce the amount of chocolate chips or syrup next time.
- Not Setting: If the bars aren’t firm enough, extend the chilling time. Sometimes they just need a bit more time in the fridge!
- Flavor Balance: If the chocolate flavor is overwhelming, add a pinch of salt to balance the sweetness.
Variations and Substitutions
Feel free to get creative! Here are some tasty variations you can try:
- Nut-Free Version: Replace peanut butter with sunflower seed butter for a nut-free treat.
- Vegan Delight: Use vegan chocolate chips and maple syrup for a completely plant-based option.
- Protein Boost: Add a scoop of protein powder to the mixture for a post-workout snack.
- Chocolate Mint: Incorporate peppermint extract for a refreshing twist on the classic flavor.
Storage and Make-Ahead Instructions
Storing your no bake chocolate oat bars correctly is key to keeping them fresh:
- Refrigeration: Store in an airtight container in the fridge for up to a week.
- Freezing: For longer storage, wrap the bars individually in plastic wrap and place them in a freezer-safe bag. They can last up to 3 months in the freezer.
- Defrosting: To enjoy, simply remove from the freezer and let sit at room temperature for a few minutes or microwave for a few seconds.
Frequently Asked Questions
Here are some common questions answered to help you on your no bake journey:
- Can I use quick oats? Yes, but rolled oats are recommended for better texture.
- How long do these bars last? They can last up to a week in the fridge or three months in the freezer.
- Can I substitute the peanut butter? Absolutely! Almond butter or sunflower seed butter work well.
- What if I don’t have maple syrup? Honey or agave syrup can be used as alternatives.
- Can I add protein powder? Yes, a scoop of protein powder can be added for a nutritional boost.
- Are these bars gluten-free? They are gluten-free if you use certified gluten-free oats.
- Do I need to bake these bars? No, these bars are made without any baking required.
- Can I add other mix-ins? Yes, feel free to add nuts, dried fruits, or seeds for added flavor and texture.
Nutritional Tips and Dietary Adaptations
These bars can easily fit into various dietary needs:
- Vegan: Use vegan chocolate chips and maple syrup.
- Gluten-Free: Ensure to use certified gluten-free oats.
- High-Protein: Incorporate protein powder and use nut butters that are high in protein.
- Low-Sugar: Reduce the amount of chocolate chips or use sugar-free alternatives.
Equipment Recommendations
To make your cooking experience smoother, here are a few recommended tools:
- Mixing Bowl: A large mixing bowl for combining ingredients.
- Spatula: A silicone spatula is perfect for mixing and spreading the mixture into the pan.
- 9×9-inch Pan: A square pan works best for setting your bars.
- Sharp Knife: For cutting your bars evenly after they’ve set.
Serving Suggestions
These bars are incredibly versatile when it comes to serving:
- Snack Time: Enjoy them as a quick snack between meals.
- Post-Workout: A great recovery snack packed with energy.
- Lunchbox Treat: Perfect addition to kids’ lunchboxes for a sweet surprise.
- Party Platter: Cut into smaller pieces for a delightful treat at gatherings.
Final Thoughts
Indulging in these no bake chocolate oat bars is not just a treat; it’s a celebration of simple, wholesome ingredients. With their ease of preparation and delightful taste, you’ll find yourself making these often. Enjoy the process, and remember, cooking is about savoring each moment. So take your time, experiment, and most importantly, enjoy every bite of these delicious bars!
No Bake Chocolate Oat Bars
Ingredients
Dry ingredients
- 3 cups rolled oats
- 1.5 cups chocolate chips
Wet ingredients
- 1 cup peanut butter
- 0.5 cup maple syrup
- 0.25 cup coconut oil (can substitute for butter)
Instructions
- Mix oats, chocolate chips, peanut butter, maple syrup, and coconut oil until well combined.
- Press the mixture into a lined baking dish evenly.
- Refrigerate for at least 2 hours until firm.
- Cut into bars and serve.